Author Archives: Rhea

It is difficult to find the exact furniture that matches your taste as well as the house. Headboards are one of them. Creating one on your own will not only help save a lot but also give it a personal touch to your decor. In addition, it will give you the cozy comfort that you have always desired. We have rounded up some easy and amazing DIY Ideas to make mirror headboards at home.
A mirrored headboard is both functional and ornamental in nature giving a major facelift to your bedroom design. You can easily create your own mirror headboard by using mirror tiles, plywood, mirror adhesives and some simple tools. You can add elements like making a mirror headboard with storage or with lights as per your discretion.
-
DIY Mirror Headboard Ideas
This unique mirror headboard is beautiful and elegant and there are no worries about using matching colors to the bed. With numerous ways to shape it, you can save a lot as well. It will definitely add a shine to the room.
-
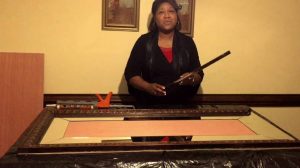
Unique Headboard Made from Vintage Dressing Mirror
Update our room by cleaning simple discarded stuff like a dressing mirror. Use it to make a rustic or modern headboard. Color the frame and attach it safely to the board for an eye-catching headboard for the room which will add a creative touch to your interiors.
-
Mirror Headboard
-
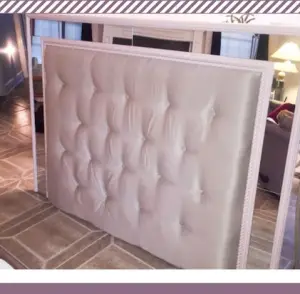
Mirrored Tufted Headboard DIY Tutorial
Create a large mirror and foam headboard covered with soft fabric for less than haft the price that you will spend at the market. Follow the above link for a beautiful, self upholstery tufted headboard which not only looks classy but also has a perfect combination of comfort. It as durable too as the base is wood and has a mirror on the borders giving it a glam look.
-
Mirror Door Headboard Plans
You can recycle one furniture to create another by adding mirrors as a decorative piece. This tutorial is made from a mirror door and is quick and easy to make one. Arrange the mirror pieces as you like it and add details by painting the vacant spaces.
-
DIY: Mirror Tufted Hanging Headboard
These decorative pieces add a personal touch without drilling a hole in your pocket. The above crafty ideas will not take surfeit time and will be a talk among your friends the next time you have friends visiting your place.
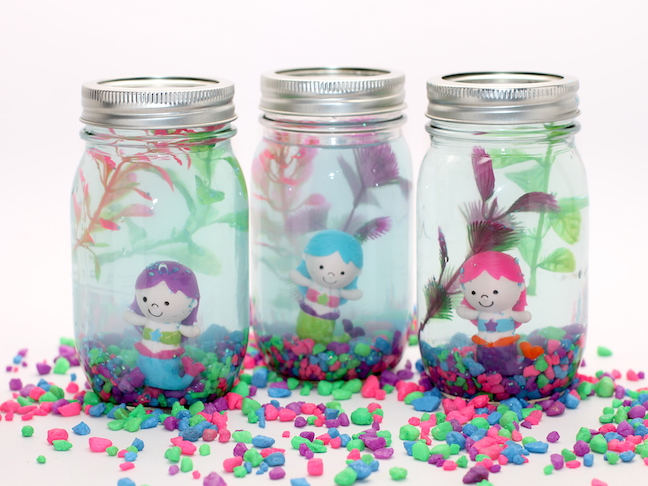
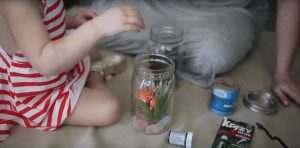
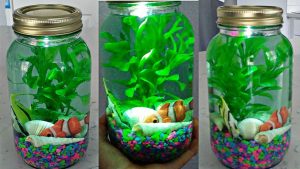
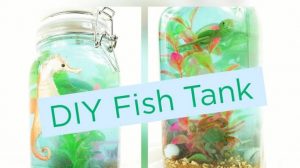
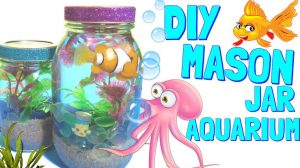
Aquariums add an interesting addition to your interiors in-home or office. But maintaining real fishes can be an expensive and time-consuming affair. If you have kids who ask for a new pet repeatedly, then a fun alternative is to set up a fake aquarium. Mason jar aquariums will give you the look you want without the work or the responsibility of keeping live creatures healthy. This DIY project is a fun craft for kids, who can use their creativity to make small realistic fish tanks with mason jars.
Also See: How to Make Your Own Fish Tank Coffee Table
Supplies needed for the project;
- Mason Jars with metal lids, Plastic Mason Jars for young kids.
- Food Color, Glitters, Glycerine
- Toy Fishes, Plastic plants
- Aquarium gravel/stones
- Water
How to Make Mason Jar Toy Fish Tank at Home
*Note: This mason jar aquarium is not suitable for live fish or animals. It’s for pretend play only.
-
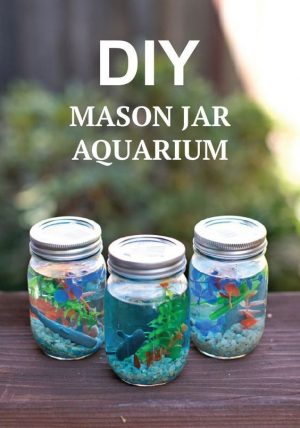
Mason Jar Aquarium DIY
Make these cute real looking aquariums by adding small pebble rocks, plastic plants, toy animals to a mason jar of blue water. You need some simple supplies like a mason jar (whatever size you like), toy fish, blue food color for the water, and other embellishments like glitters, stones, etc. Kids will love to make this mini aquarium and keep them on their bedside. They will love taking care of their fish without the fuss!
-
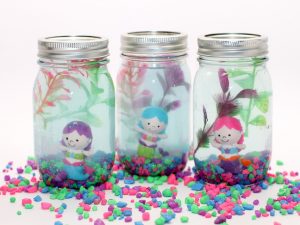
Faux Mason Jar Aquarium for Kids
This colorful little mason jar aquarium is a budget-friendly and cute addition to your kid’s bookshelf. It’s easy to make a craft with no maintenance being the plus point. This linked tutorial has some used mermaid figurines, faux animal, etc. added to the jar, you can add any faux fishes, animals as per your discretion. These handmade jars will make perfect party favors for kids theme birthday parties.
-
How to Make Aquarium from Mason Jar
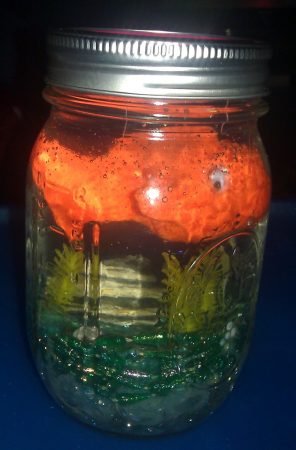
A little food coloring, shells, gravel, and sea creatures and corals is everything you need to make your own aquarium in a mason jar.
-
Homemade Mason Jar Fish Tank Craft
-
Fake Mason Jar Sea Aquarium/ Fish Tank
Kids will love making this magnificent mason jar sea aquarium on their own. This tutorial has added sea-shells, stones. a tiny starfish, some sea animals, and some plants to give it the perfect underwater effect. You can pain the lid of the jar and customize it with names when used as giveaways or party favors.
-
DIY Mason Jar Aquarium Lampshade for Kids
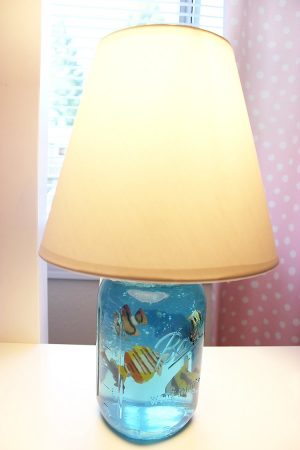
With just a few basic supplies you can create a real looking, DIY fish aquarium lamp. Create a beautiful marine terrarium bottled in a mason jar and decorate it with plants and aquatic fishes. Once the jar is ready, placing the lamp adapter to it is easy, as explained in the directions of the linked tutorial. The fun part is the fishes jiggle, and are moving every time you move the lamp giving it a real effect.
-
DIY Lego Mason Jar Aquarium
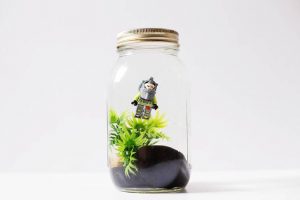
A unique cool Lego-themed mason jar aquariums to add some decoration to a room. You need a lego mini-figure for this project. Even without the fishes, this will excite your kids when making one.
-
Light Up Mini Aquarium Mason Jar Tutorials
Make this cute faux aquarium where u don’t have to worry about the fishes dying. This craft is easy to make and there is no maintenance required. You can customize them with “treasures” such as gems, seashells, small pebbles, glitter and gold coins!
-
DIY Aquarium – Artificial Fsh Tank (Youtube Tutorial)
Make this fun craft project! It’s easy and fast so the kids can also have a go at this! It makes such a nice child’s room decor or a desktop ornament. Add some sand at the bottom and your favorite sea creatures and get crafting!
-
How to Make Under the Sea Snow Globe Aquariums
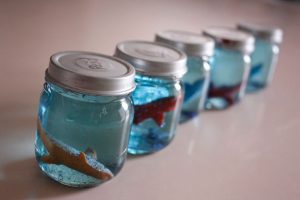
If you are planning an “Under the Sea” themed party for your kids then this is the perfect mason jar craft for you. All you need is empty baby jars prepped for the project with few small sea creatures. They will make great party favors at the most reasonable prices.
-
How to make an Aquarium In A Jar
This cool aquairum really livens up the room. A good idea for someone’s office desk, window seal or a kids room
-
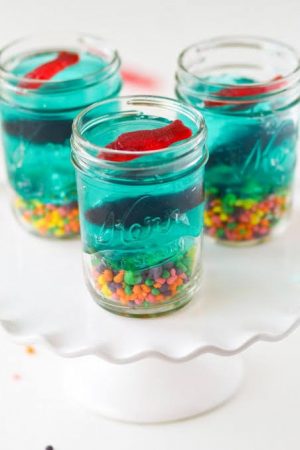
Mini Jello Aquariums for Kids (DeSsert)
This easy dessert recipe is inspired by Disney Pixar’s Finding Dory. Make this yummy mini jello aquarium, as inspired by Dory and her under the sea friends! These desserts are yummy, super easy (and super fun) to make.
Even without a real fish, these aquariums and mini fish tanks are cool to look at and are good decoration for your room. I hope you have fun making yours, do share your creations with us.
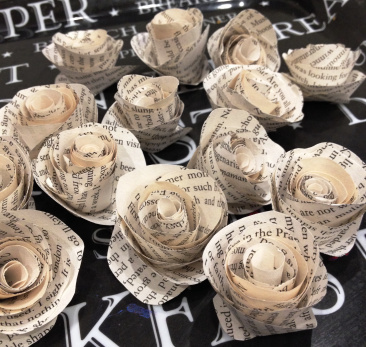
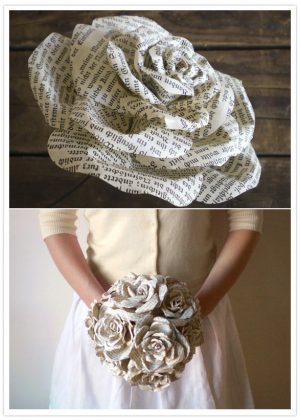
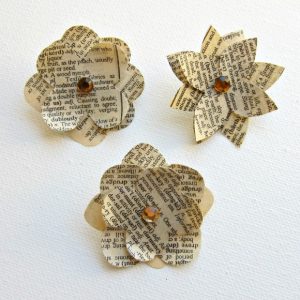
Having a short shelf life newspaper might seem useful only for one day. Newspapers can be easily reused and made into hats, baskets, and flowers too. Let’s see some creative DIYs to make flowers our of newspaper, finally, a use for the “junk mail” newspapers and magazines that come through the door. They may not smell like the original ones but you can attach them to our headbands, barrettes, make costumes or make large flowers as centerpieces. Click on the following linked tutorials to open a whole new world of pulchritudinous flowers.
How to Make Newspaper Flowers – DIY Tutorials
-
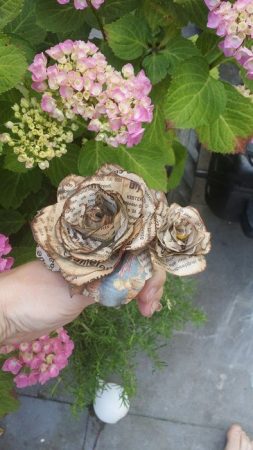
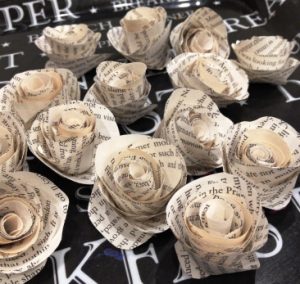
How to Make Newspaper Roses Flowers
Handmade paper flowers fashioned from newspaper are a frugal alternative to store-bought bows, ribbons to adorn your gifts. With the simple use of supplies like a newspaper, tape, and scissors you can make these beautiful roses. Create the base and with it cut the different petals and stick them together. Embellish and color them by using a coffee pad or tea bag to give it a vintage look.
-
Rolled Newspaper Flowers DIY
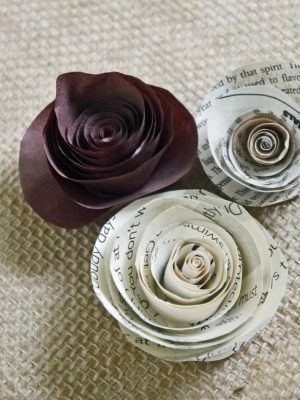
This link provides an easy way to make interesting patterns for roses. Just cut spirals and roll it up to the stick. You can use different colors to give it a nice touch to create an artificial garden or keep it as it is to give a rustic touch to the look.
-
Beautiful Newspaper Flower Instructions
You can recycle not only newspapers but any kind or paper waste to create flowers. This extra element will create a perfect bouquet of artificial flowers for your work desk.
-
Make Newspaper Roses at Home
This detailed newspaper rose tutorial is easy to follow and gives an almost real look. Use green papers to add leaves to finish the set.
-
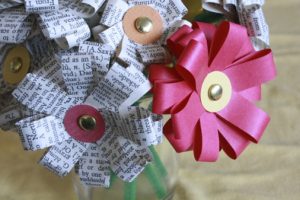
Newspaper Flower Bouquet Tutorials
This tutorial is relatively different from the above. Use strips of different sizes to create loops and bind then together with brads. Create a layered flower with different hues.
-
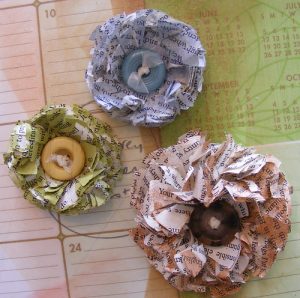
Gorgeous Flowers Made with Recycled Newspaper
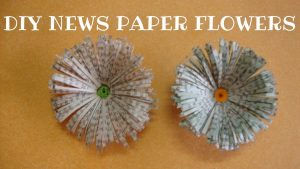
Make these insanely easy flowers by cutting the newspapers and crushing them. Use a variety of papers to create different hues of flowers and maybe use them as a decorative piece for your wall or cupboard or you can stick them on wrapped presents in lieu of a bow. Adding colorful buttons will make it look prettier and add a charm to your piece.
-
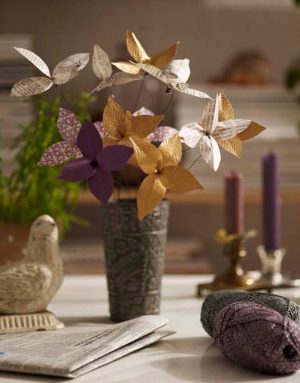
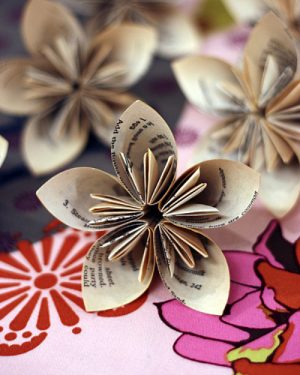
Unique Kusudama Newspaper Flowers Tutorial
The beautiful art of Kusudama from Japan helps create these different and intriguing flowers. Add some long sticks and put it in a vase for a perfect item to decorate the room with.
-
Easy Handmade Newspaper Daisies (Youtube Tutorial)
It’s amazing how with one newspaper you can make a variety of flowers. Just by using a 30 cm long newspaper strip you can make these little daisies and use paint to make it more colorful. Use them as a decorative ornament for a book cover.
-
Adorable Newspaper and Tissue Flowers Tutorial
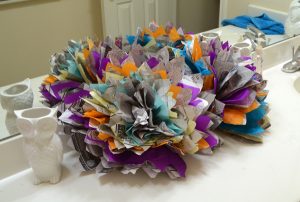
Recycling never hurts. You can mix newspapers, crepe papers or colorful tissue papers and make these large fluffy flowers as a side table showpiece. Add a
-
Easy Flowers Made from Newspapers
Flowers are incomplete without colors. Splash, stroke or spray paint the flowers for a more vibrant look and creative outcome. Arrange and paste them to a board for your craft corner or frame it and hang it for the visitors to admire.
-
Newspaper Flower with Pushpins
Let your craft stand out. Use different shapes and sizes of newspaper cuttings to make interesting patterns of flowers.
-
Instructions to Make Newspaper Flower
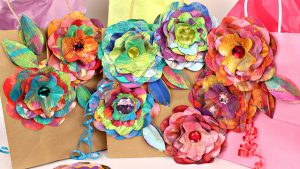
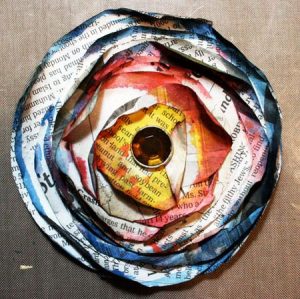
The ombre effect of the colored edges of the petals and with the beautiful gem added in the center give it a stunning look.
-
How to Make Rolled Newspaper Roses Decor
-
Elegant Wedding Bouquet from Newspapers
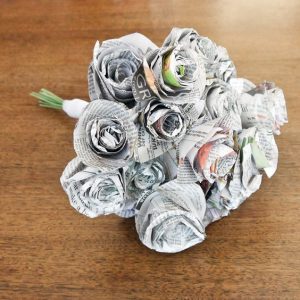
-
How to Make a Newspaper Flower Wreath
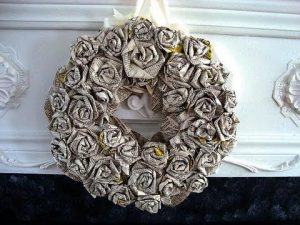
Twist and turn the newspaper strips to make small and large roses to be arranged together on cardboard to make this simple yet elegant flower wreath and use them on special occasions.
These simple ideas not only help recycle but also brings out the creative side. The flowers can be used in a variety of ways to decorate the house, parties, or workspace. I hope the above ideas have interested you to grab the waste and make something beautiful out of it.
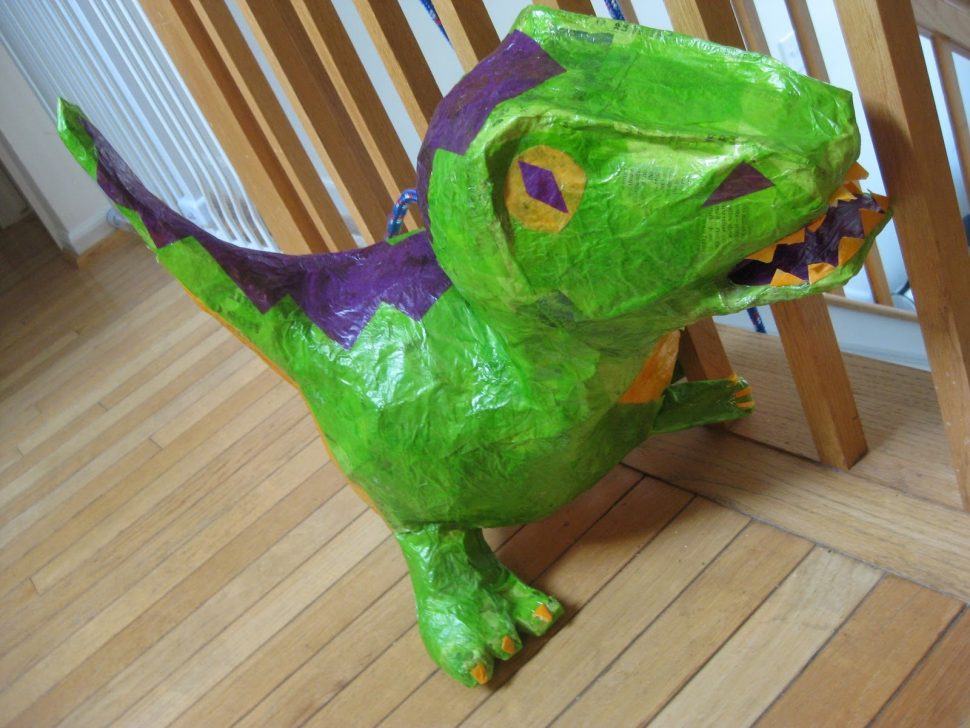
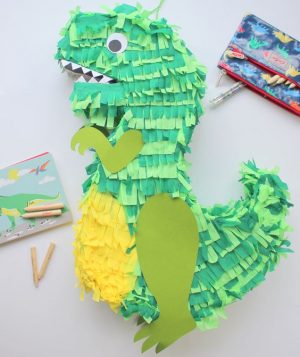
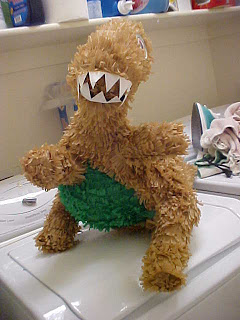
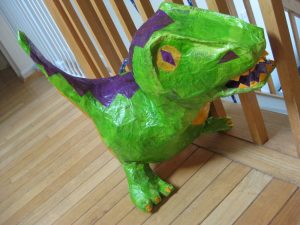
Pinatas contain chunks of surprises loved by the young and the old equally. These contain small toys and sweet treats that shower down on the person who bursts them. They can be made into any shape and any size, so today we go for dinosaurs pinatas and their eggs. Kids will be roaring with excitement seeing an extinct T-Rex Dinosaur Pinata full of goodies. These vessels of happiness are fun to make and even more fun to burst.
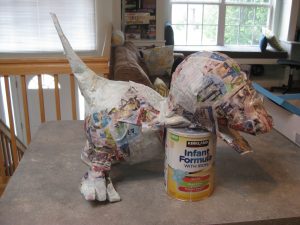
Paper mache is the most common technique to use pinatas with some simple supplies like a balloon, paper, and paper mache paste. So go Jurassic with following linked tutorials which are your guide to making amazing dino pinatas with step by step instructions.
How to Make Dinosaur Piñata at Home
-
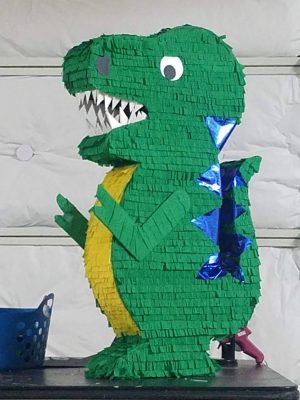
DIY Cardboard Derek Dinosaur Piñata
With the simple use of cardboard, colorful crepe paper, green paint, scissors, few more art supplies, and creativity you can create this majestic dinosaur pinata. Follow the step by step instructions to make this for the next birthday party and see kids go ga-ga over these friendly dinos.
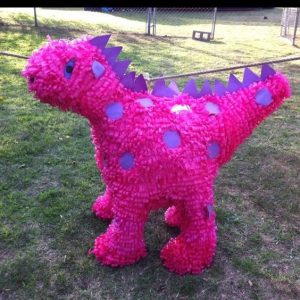
If it’s your girl’s party, then you can easily opt for a pink and purple colored dino pinata. Just change the colors of the crepe papers.
-
How to Make a Cute Baby Dinosaur Pinata
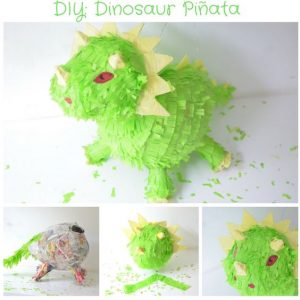
Now that we have created an adult version of the pinata let’s dwell into making a baby version of it which may be useful for a small party or just because it looks cute. This tutorial requires the use of balloons, hence doubles the fun. Make a paste of flour and water, commonly known as paper mache glue, to stick the newspaper cuttings on the balloon to give it a strong frame. Once dried cover the frame with the crepe paper and decorate it with horns and eyes.
-
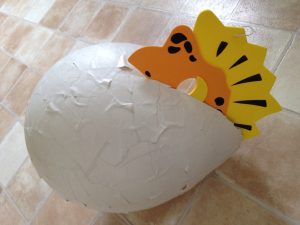
Dinosaur Egg Pinata Tutorial
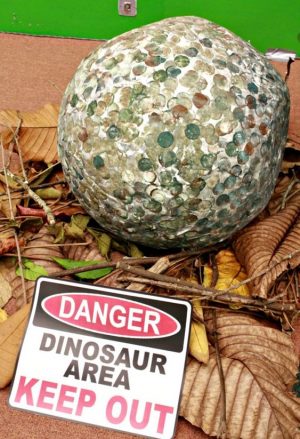
Now, let’s go deeper into the past and create a dinosaur egg pinata. This easy to make egg pinata will hold a lot of surprises for your child and their friends. Use a large balloon, paper mache glue, and some newspaper strips to cover the entire body. Tie it with a thread and enjoy while trying to hit it, blindfolded. You can also place this with some dried leaves and twigs in Halloween to give it a traditional touch.
-
How to Make a Unique Dinosaur Egg Pinata
-
How to Make a Big Dinosaur Pull String Pinata
Why go for double expenditure when you can create the same thing at half the price at home and be creative as per the liking of your children! Flow with this instructional link for an easy homemade string pinata.
-
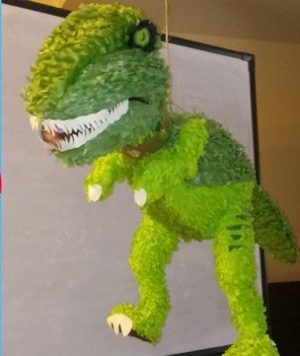
Instructions to Make a Large Dinosaur Pinata
This tutorial for a massive dinosaur pinata is perfect for your kid’s huge theme party. The angry green eyes and the pointy jaws will provide an authentic feel.
-
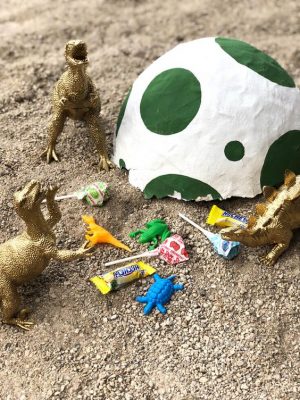
Make Your Own: Prehistoric Dino Egg Pinata
Inflate a balloon big enough for a dinosaur egg and cover it with a newspaper using a paper mache paste. Color it and attach a strong rope or string to hold the wight. Suspend it to a height and there you have your very own paper mache pinata ready to be smashed.
-
Homemade Paper Mache Dinosaur Piñata
-
DIY Number Dinosaur Pinata for Theme Birthday Party
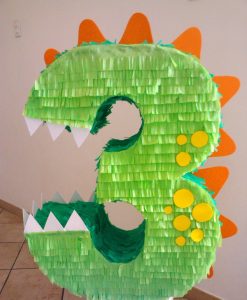
This last piece is something different. This number-themed dinosaur piñata is an absolute delight for your little’s one’s special day. You can easily customize this with stickers, beads, glitters, to make it more attractive. Chose your number 1, 2,3 and follow the instructions to make your number and decorate your party city. Trace and cut the number from the cardboard that your child is about to turn and decorate it with details like teeth and spikes like that of Tuojiangosaurus.
-
Easy Dinosaur Pinata with Balloons Instructions
You can choose to create mini dinosaur pinatas for kids to burst them individually. This will be time-taking but each kid will be delighted to burst their very own T-rex. For fillers use small exciting toys, candies, chocolates to thrill the kids. You can make the neck long to give it a different appeal.
-
Crafty Dinosaur Egg Pinata Tutorials for Kids
Use some bright splash of colors to give it a unique twist like blue, green, red and more.
DIY-ing these dinosaur pinatas not only saves money but might help your child to develop a hobby for art and craft. It also helps in recycling the boxes that you might think of as waste. Follow any of the above links to create one for your child’s next birthday party.
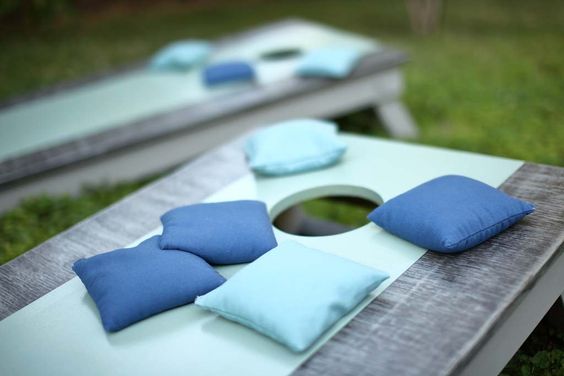
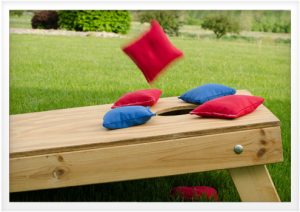
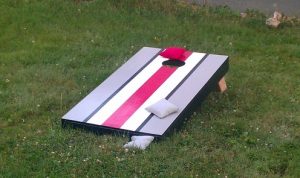
Cornhole board games are popular and the perfect outdoor sport to spend a lazy summer afternoon. You can make your own cornhole bags at home with some easy tutorials to guide you well. Prepare this game for the summer and enjoy in your lawn throwing these soft pillow-like bags on a board with a hole to be aimed at.
Here we have put together ways to kick start your summer with these DIY cornhole bags. These bags are easy to make and lasts long when made with the right material. Choose one or more if you like and have fun designing them.
Supplies Needed for the Project;
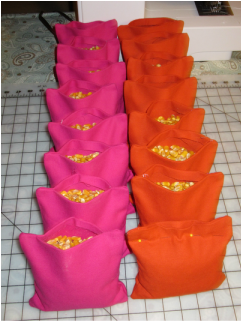
Cornhole is also known as bags, tailgate, doghouse, Baggo, sack toss, or bean bag depending on the region you stay in. A set of cornhole game has a total of 8 bags per set, 4 each of 2 different colors. Bags are approximately 6” x 6” squares in dimension. The bags are easy to make at home and are cheap too. It’s very cost-effective when compared to the commercial ones available in stores. You need some simple supplies to start making them.
- Scissors, Ruler, Masking Tape, Glue
- Sewing Machine/Needle
- A strong and durable thread (mostly polyester)
- Fabric – Usually Duck Cloth
- Cornhole Bag Fill – Corns (traditionally used), synthetic corn, resin pellets.
- Funnel – Makes it easy to fill the bags with the corn.
- Weighing Scale – To accurately weigh your bean bag fill.
How to Make Cornhole Bags at Home
-
How to Sew Cornhole Bag
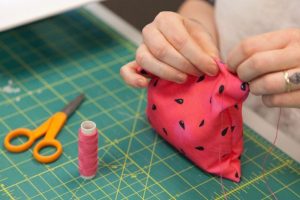
You can use Cotton Duck material for the cloth, use corn for the stuffing and double stitch the cloth along the inner sides as mentioned in the tutorial for a lightweight but strong bean bag. Use contrasting colors as they complement each other more than anything else.
-
DIY Cornhole Bags
A common material used to make this filling bag is Duck Fabric. Use heavyweight thread for a durable bag that would bear the flings towards the hole in the board. Vibrant hues will make the game more interesting.
-
Cornhole Bean Bag Tutorial
Make the lawn game more exciting by using a printed cloth or theme prints of your favorite team. Just make sure to use a tough one so that the fillings of corn/beans or similar filling do not fall off. Make a set set of these bags for a fun game.
-
Instructions to Make Cornhole Bag
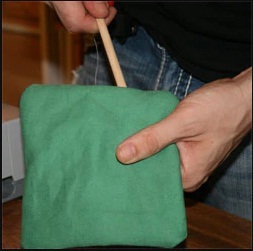
Follow this elaborate instruction to effortlessly make an entire set for the game. To be double sure of not tearing the cloth, stitch and glue the seams after filling each bag.
-
How to Make Regulation Cornhole Bags (Official Cornhole Bags)
For accurate measurements use scales and remember to stitch only 3 sides before filling the bags. Use a funnel for easy filling of the bag from the third non- stitched side. Follow this step by step tutorial to make a long-lasting bag of cornholes.
-
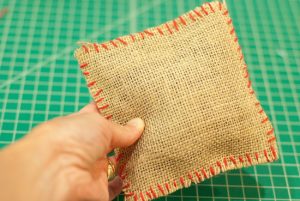
Homemade Burlap Cornhole Game Bag
Using burlap will make durable and light bags. For a better version, carve the base with more than one holes, each representing different points.
-
Make Your Own: Cornhole Bag
A pleasant weather calls for a good outdoor game and this cornhole game is perfect. You can easily customize the pattern of the bags and the base and create your own rules. There is no turning back for hours after you start this competitive yet light-hearted game.
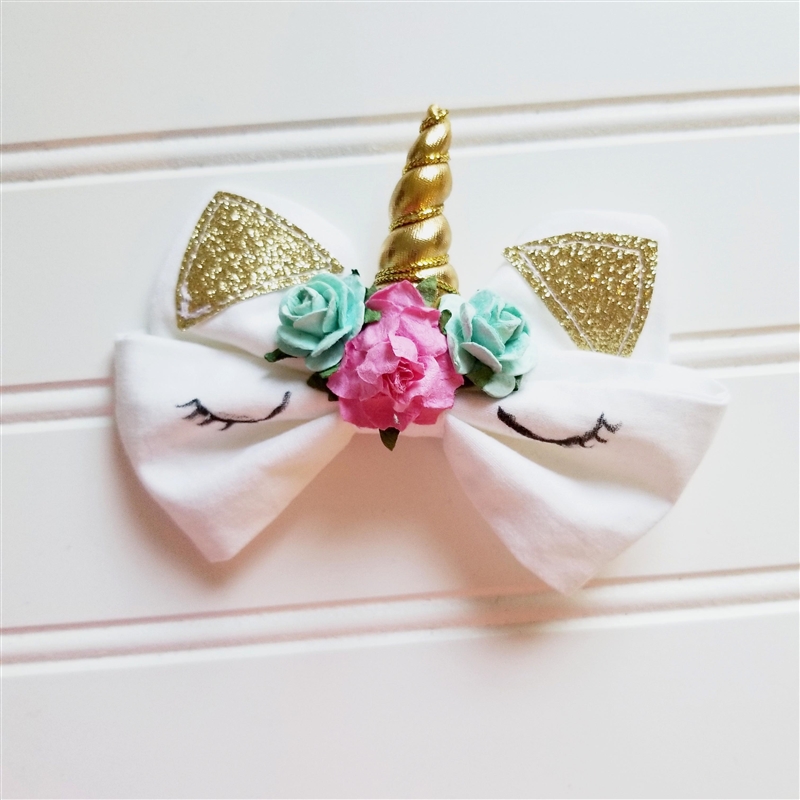
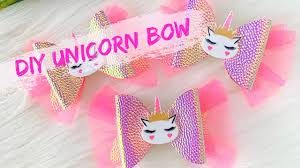
Unicorn bows are a huge hit when it comes to hair accessories for girls or adding them to a craft or decorate your gifts. Girls can easily sport a cool look at theme parties, birthdays and other special occasions with handmade bows. You can make hair bows, hair clips and hair ties with the Unicorn theme, with or without their trademark horn. Get creative with your imagination and make vibrant bows and use them in various ways.
The linked tutorials are easy to make and can be customized according to your child’s wish and can be worn by children of all ages. Their simple look is what also makes them an accessory that can be worn regularly. Scroll, click on the linked tutorials to get the detailed instructions. #UnicornBow
DIY’s to Make Amazing Unicorn Bows at Home
-
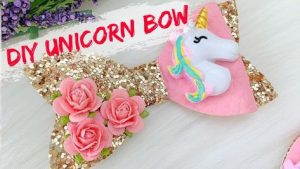
How to Make Unicorn Bow with Glitter Fabric
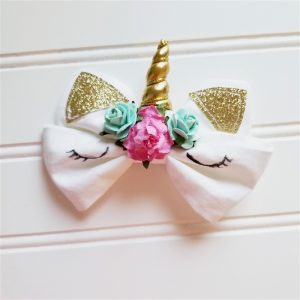
This simple yet beautiful bow of glitter fabric can be made into a rubber band or a hair clip. With the help of a few crafty materials as simple as glue, flowers and a plastic unicorn you can create a beautiful accessory for your girl which will blend perfectly dress.
-
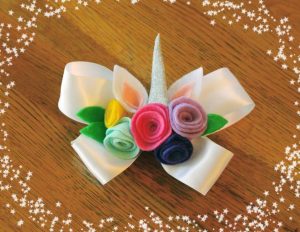
DIY Magical Unicorn Hair Bow
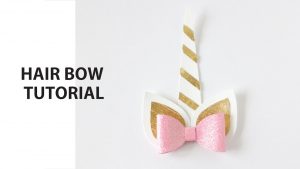
This kind of 3-D Unicorn bow can be made with ease with the use of a white ribbon, felt fabric of different colors, foam sheets for the ears and horn that will be required to roll for a 3-D look, alligator hair clips and a few other necessary items. The end result is a rainbow-like clip to be worn with any outfit.
-
Pink Unicorn Bow With Tulle Tutorial
This step by step tutorial of making a tulle fabric bow is fun and beautiful at the end. Tulle is a type of net fabric and looks really pretty on fashion accessories. You can also use mesh or burlap instead of tulle to give it a more rustic and traditional appeal. This easy tutorial is best for a last-minute touch-up for a birthday present.
-
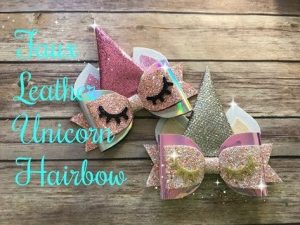
Instructions to Make Faux Leather Unicorn Bow
The faux leather glitter Unicorn bow is just elegant and will surely make your kids excited. From the base till the horn everything is glitter and pretty. There is no need to stick to the color wheel and you can mix and match the colors according to your preference.
-
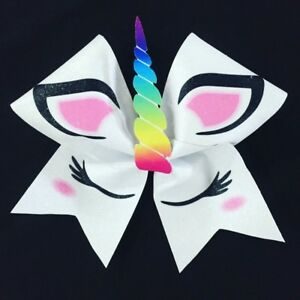
How to Make a Unicorn Horn Cheer Bow
Use a simple white ribbon, some flowers and a glitter paper for the horn. You can sew the ribbon or stick it as per your choice. This guide of making a unicorn cheer bow making is not at all time consuming and really fun.
-
Make Your Own: Unicorn Hair Bow DIY
-
DIY Unicorn Bow Project (Youtube Tutorial)
Unicorn loving crafters will love this super sweet unicorn bow project. The golden horn and the colorful flowers give it an ornamental and girly element.
-
Free Unicorn Bow Template
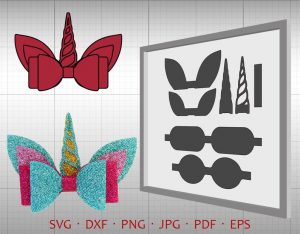
Download the basic template or design. Use them as a stencil on the fabric or paper of your choice and color, cut them and paste them together like shown in this tutorial for the final look.
I hope this project gives you some new inspiration for making handmade bows that can be used as Christmas decorations, accessories, and more. Share your ideas with us in the comment section below.
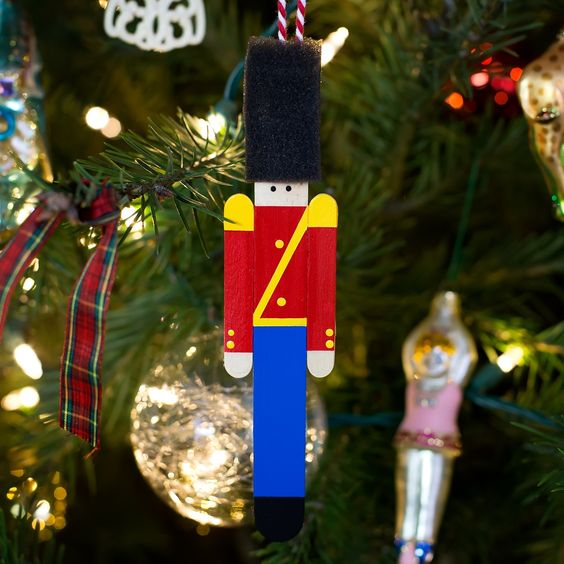
Its winters and popsicle sticks are one of the best craft items you can explore with. You can create beautiful Christmas ornaments of varied shapes and colors. The rustic look of the wood gives it a traditional touch. You can easily customize these ornaments with glitters, buttons, ribbons, stamps, and colors you might already have on hand.
Related: How to Make Cut Out Snowflakes
Your kids will love making these cute and easy popsicles stick Christmas crafts. They would make great handmade gifts for friends and family this holiday season! Scroll through the ideas below and be sure to click on the links if you want the individual popsicle stick ornament tutorials with step-by-step instructions.
Also Read: Popsicle Stick Snowflake Tutorials
-
Christmas Ornaments Made with Popsicle Sticks
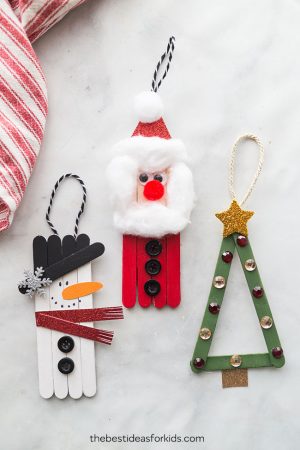
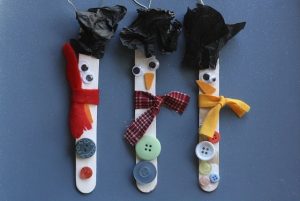
The quirky snowman is the highlight of this tutorial. You can even make Santa, and the Christmas tree, which are bright and dazzling. The designs here are very creative and yet easy to make. Kids will love making these crafts for Christmas.
-
Popsicle Stick Star Ornaments for Christmas
Start by painting the craft sticks, once dry stick them together in star-shaped. When the glue is dry, add the crafty jewels, or other embellishments to decorate your star ornament. This is an easy one for toddlers and preschoolers.
-
Gingerbread Man Ornaments out of Popsicle Sticks
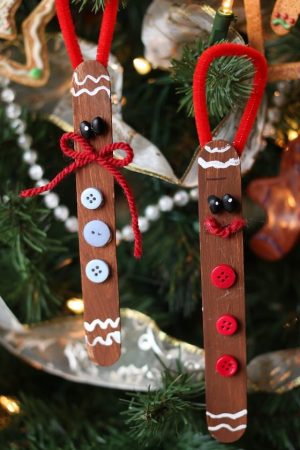
This is a fun craft for preschoolers and kids. You need simple supplies for this craft which include popsicle sticks, quirky buttons, bright thread, and paint. They’ll look adorable hanging on your Christmas tree. This tutorial is easy and is a great one as a last-minute Christmas craft idea.
-
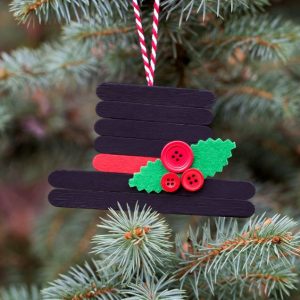
DIY Cool Popsicle Stick Snowman Hat Ornament
-
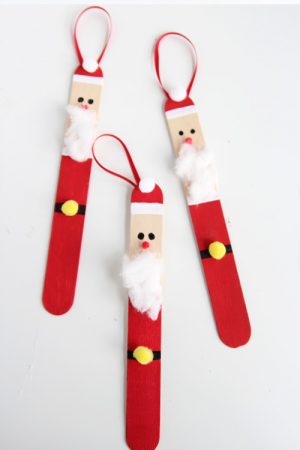
Instructions for Popsicle Stick Santa
-
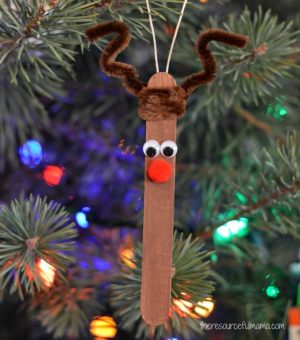
DIY Reindeer Christmas Ornament with Popsicle Sticks
-
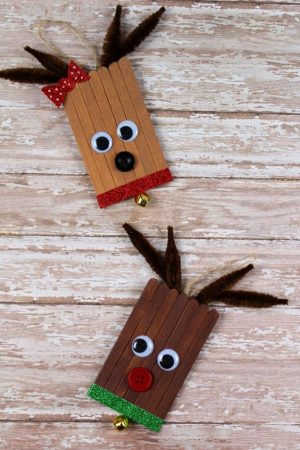
Cool Popsicle Stick Rudolph Ornament Ideas
-
DIY Popsicle Stick Christmas Snowman Tutorial
-
Popsicle Stick Sled Tutorial
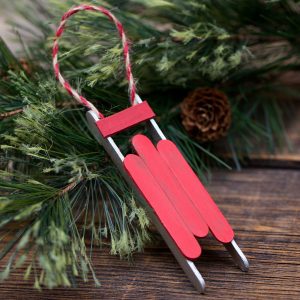
Kids can make this fun holiday craft in school or at home. You need 6 wooden popsicle sticks and stick three of them together as shown in the linked tutorial. These cute little rustic sleighs can be made in different colors and can be used as miniature gifts for grandparents from their loved kiddos.
-
Popsicle Stick Picture Frame Ornament
-
Christmas Ornaments Made from Craft Sticks
-
DIY Santa Sleigh from Popsicle Sticks
-
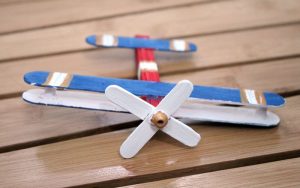
Airplane Ornament Made Out of Popsicle Sticks
-
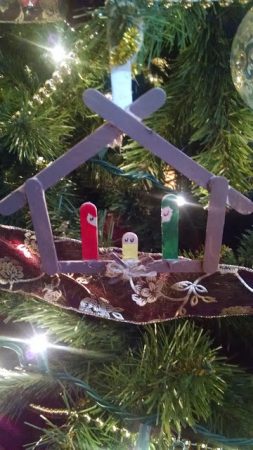
Popsicle Stick Nativity Craft Ideas
-
How to Make a Popsicle Stick Toy Soldier Ornament
-
Homemade Popsicle Ornaments
-
Manger Ornament with Popsicle Sticks
-
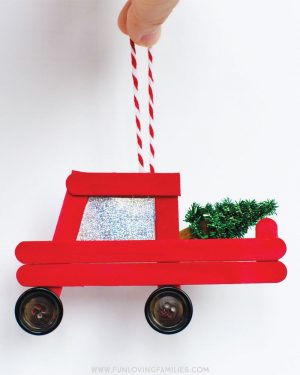
Red Christmas Truck Ornament
-
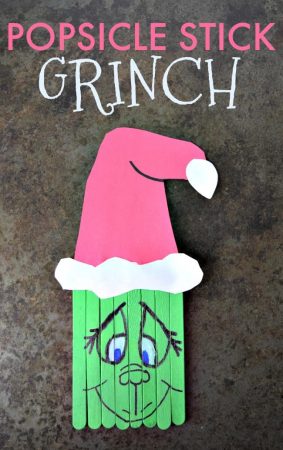
Green Popsicle Stick Grinch Christmas Ornament
-
Making Popsicle Stick Angel Ornament
-
X-Mas Popsicle Ornaments
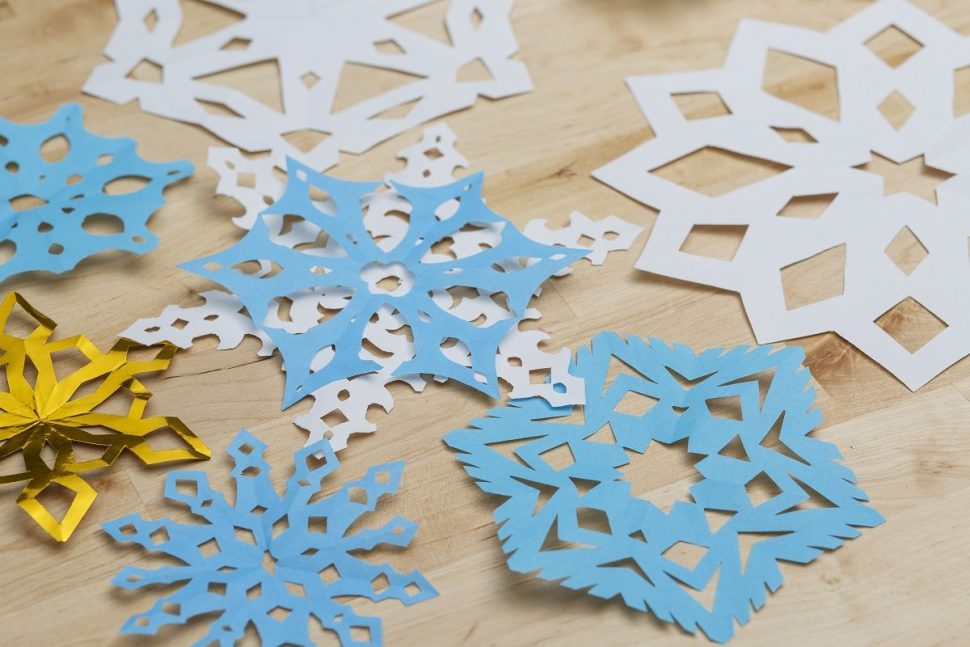
Winters are one of the most awaited times of the year. With the onset of holidays and the festive season, everyone is excited to make pretty crafts and DIY to decorate their home, Christmas trees, and more. Making snowflakes is a tradition that everyone enjoys be it, kids or adults.
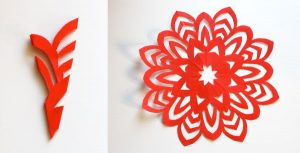
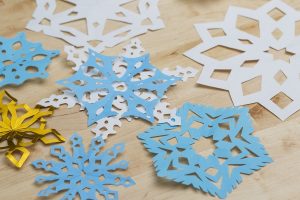
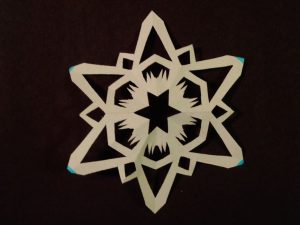
You can make snowflakes from popsicle sticks, coffee filter paper, beads, and numerous such creative things. If you are wondering how to beautifully cut a snowflake out of paper, then we’ve got you covered. We have collected some of the most pretty paper cut out snowflake patterns, designs, template and tutorials with step-by-step instructions to guide you well.
Read: Coffee Filter Snowflakes Patterns
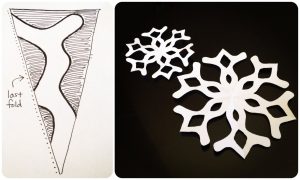
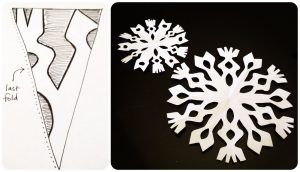
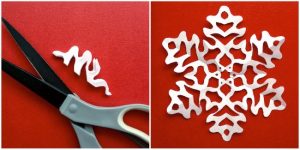
Instructions to Make an Easy Cut-Out Snowflake Pattern
- Fold bottom left corner up to the right side of the paper edge.
- Fold bottom right corner up to the left side.
- Fold in half down the middle.
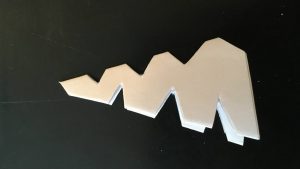
- Now, cut off the bottom tip, where all of the folded paper is. You can do a rounded edge, or straight cut, or angled cut. Each will make a different snowflake shape ex: diamonds, star, lace, hearts, snowmen, and forest snowflakes.
- Cut the bottom tip-off.
- Now make whatever decorative cuts you’d like. Experiment with all the ideas you can think of!
- Unfold the snowflake and flatten the creases!
- Ready to Decorate!
You’ll find classic paper snowflake designs, 3-D snowflakes, mini, large, that require some assembly, and even snowflake templates that feature your favorite characters from movies like Star Wars and Frozen.
-
Easy Paper Cut Out Snowflake (5 Pointer Snowflake Pattern)
Cutting out snowflakes is a winter tradition. This is a 5 pointer snowflake design and you can ask your little ones to make them. Pick up some colorful papers (computer paper or coffee filters) and draw the design as illustrated in the linked tutorial. The apply the folding techniques and then cut the snowflake along the design.
-
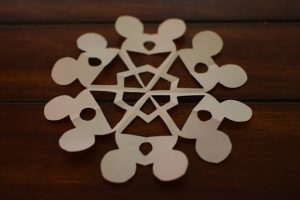
Disney Paper Cut-Out Snowflake Pattern
Kids love all Disney characters and this tutorial features a cute Mickey Mouse shaped snowflake design. The steps are easy to follow and you can easily involve your kids to make this one.
-
Perfect Paper Cut Out 6 Pointer Snowflake DIY
Keep your kids busy with this fun winter craft. For this craft use a thin paper, because thinner paper, is easy to cut out and add details and elements to it. You can pick pretty papers often used for origami—look for silver, gold, and holiday-hued papers to up the magic.
-
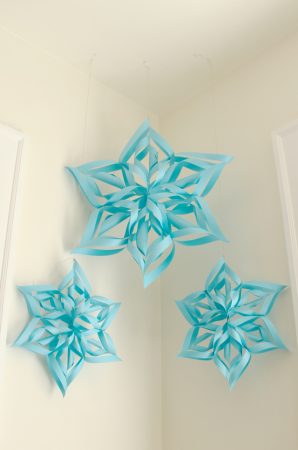
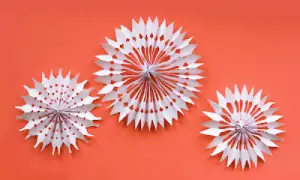
How to Make a 3D Paper Cut-Out Snowflake
You can make these incredible 3-dimensional snowflakes. You can choose to make them of various sizes and decorate your Christmas tree or hang them to the ceiling. This design is super easy to follow and you can recycle your unused papers for the crafts. Add some glitter or embellishments to decorate it further.
-
How to Cut Out a Folded Paper Snowflake
Cutting wonderful paper snowflakes can be easy with these designs. It’s fun and there is no limit to your creativity with designs.
-
6 Sided Paper Snowflake Patterns
People usually make different dimensions of snowflakes, 8 pointer snowflakes being the most common. But a real snowflakes in nature form with six points so here it is shown how to make homemade 6 pointed snowflakes yourself.
-
DIY Paper Snowflakes
-
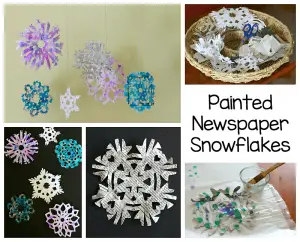
Cutting Snowflakes Out of a Newspaper
Take some newspapers for this project and paint it with watercolors and starch. Once painted and some glitter to some to really make them stand out! Hang them on your lights, ceiling and appreciate your kid’s handmade winter craft.
-
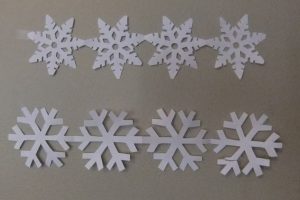
How to Make Paper Chain Snowflakes
-
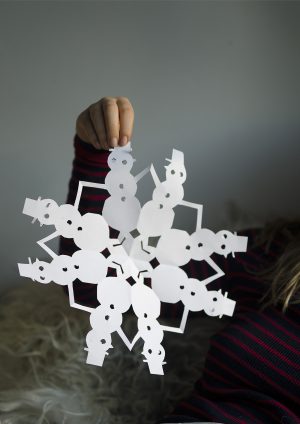
Snowman Snowflake Template for Christmas
-
How to Cut out a Heart-Shaped Snowflake
-
Beautiful Paper Snowflake Tutorial
Turn your home into a Christmas wonderland with these beautifully cut paper snowflakes. Try and make the folds as neat as possible for the end product to be clean and unique.
-
Round Paper Snowflake Ornaments Instructions
-
Star Wars Snowflake Patterns for Kids
Choose from one of the collections to view and download the free printable templates to make them yourself.
-
Beautiful Frozen Snowflake Designs and Template
Who’s your favorite Frozen character? Anna, Elsa, Hans, Olaf, Sven, or Marshmallow? We’ve covered all these patterns for you in this linked tutorial. You can download the free PDF pattern for any of these characters.
-
How to Fold and Cut Kirigami Snowflakes
There are both illustrative pictures and written directions that walk you through each step of creating one of these amazing snowflakes.
-
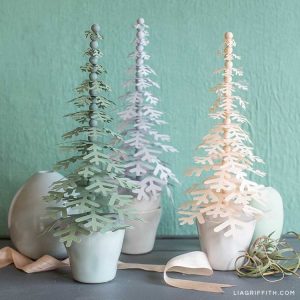
Pretty Snowflake Christmas Tree Tutorial
This unique Christmas tree is from Lia Griffith is made from cut snowflakes patterns of different sizes.
-
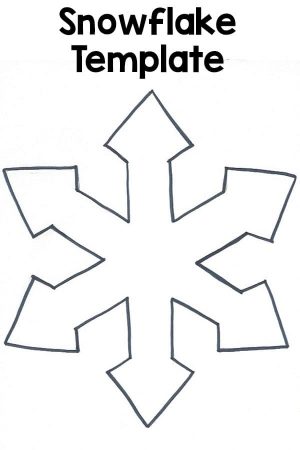
Free 6- Sided Paper Snowflake Cut-Out Template
-
Some More Designs to Make the Perfect Snowflakes
Snowflake Cutting Tip for Crafters!
If you’re constructing one of the more complex patterns which involve lots of cuts, try using tissue paper instead of standard copy paper. This will allow you to fold the paper easily and cut it neatly.
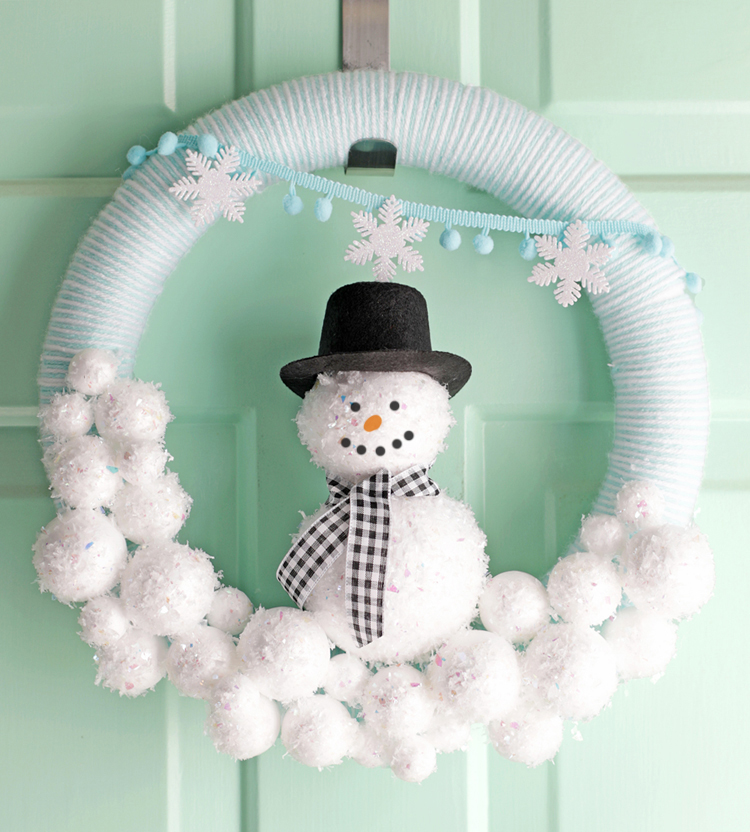
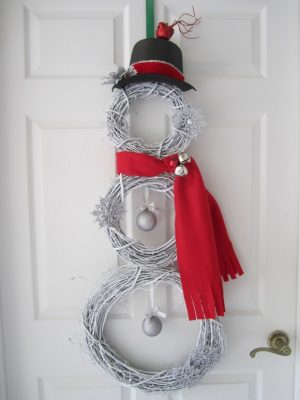
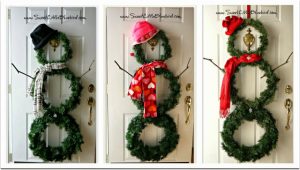
With the onset of winter, a snowman wreath on your front door will be the perfect decoration to welcome your guests home. There are numerous readymade snowman wreaths available in the market which are quite a pinch on your pockets. So if you are wondering how to make a snowman wreath at home which is affordable, then we’ve got you covered with some amazing tutorials and DIY Ideas.
Also Read: How to Make a Perfect Bow for Your Christmas Wreath
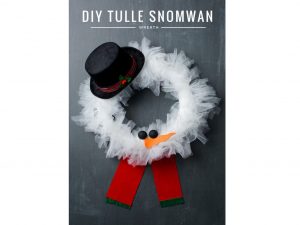
We have listed some of the easiest and creative snowman wreath DIYs, tutorials, which explain with step-by-step instructions to make the craft easily. In the tutorials there are different materials/fabric which are used to make the artificial snowman wreath, like; burlap, mesh, felt, paper, foam, cardboard, grapevine wreaths and more.
-
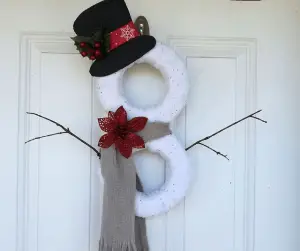
Easy Snowman Wreath Directions
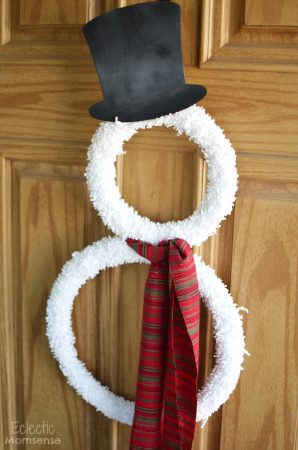
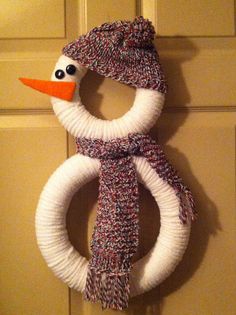
This snowman is constructed using two foam wreaths, some ribbons and a hat to complete the look. The project requires simple supplies that are put together creatively. This is an easy one and you can make it in a couple of hours. Place this on your front door, this winter to welcome your friends and family.
-
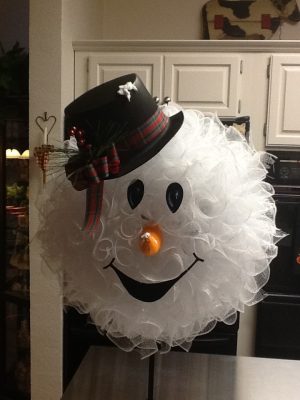
Cute Snowman Made out of Mesh
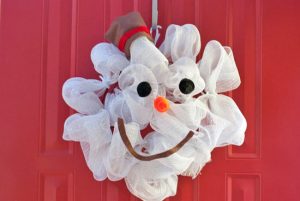
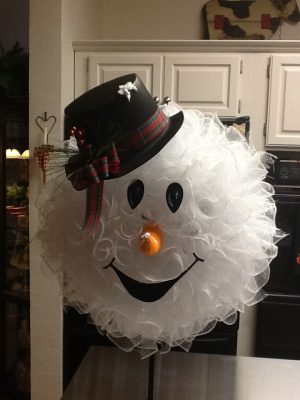
In this linked tutorial, they start with painting the eyes first. This is followed by making a stuffed carrot-shaped nose out of felt. Once done gather the deco mesh to give it the required shape and tie it with a pipe cleaner. This is easier than it seems, and quick too. So check out the linked tutorial for complete instructions to guide you well.
-
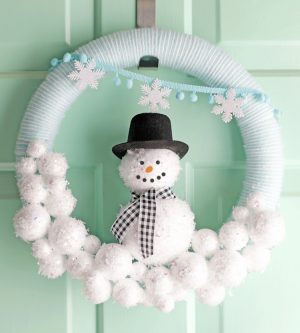
Homemade Snowman Wreath Instructions
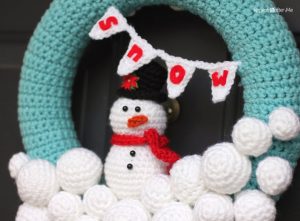
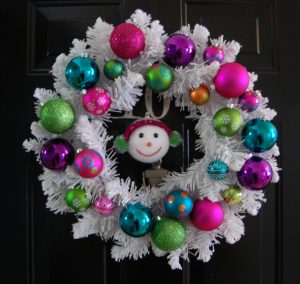
This DIY snowball winter wreath is so cute and can be put on the door at Christmas and continue till Feb. This project is done with a lot of creative elements which makes it an absolute stunner. This amazing winter wreath covered in cozy yarn and glittery snowballs. The small snowman in the center steals the show.
-
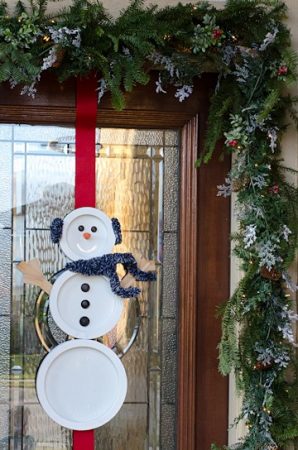
DIY Mirror Snowman Door Hanging Wreath
For this project, you need three mirror frames of 3 different sizes available at the dollar store. Once glued together as directed in the linked tutorial you can decorate it in various interesting ways to add a cozy touch to your front door this holiday!
-
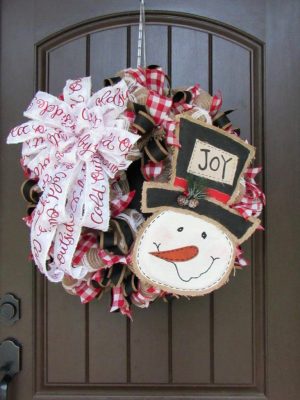
Burlap Snowman Wreaths for Christmas
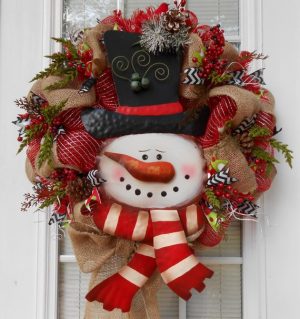
This is a wreath with a traditional touch made with ribbons, burlap, and mesh. Use lot of colored ribbons to make cute bows and add to the wreath. The wreath is made using the pouf technique explained in detail in the linked DIY.
-
DIY Snowman Wreath Design for Door
Make your own snoman for your front door this winters! Enjoy this awesome addition to your outdoor decor and give your house entrance a cute faceift.
-
White Snowman Wreath for Door
-
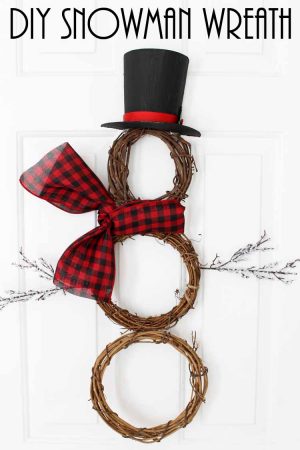
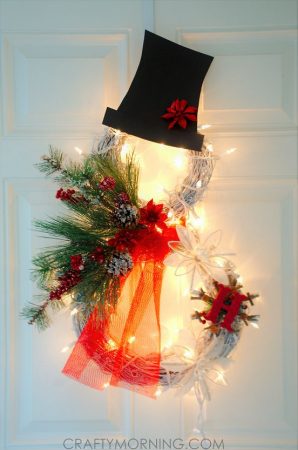
Snowman Christmas Wreath with Lights
To really show off your crafting skills, intertwine your stick wreaths into the shape of a snowman, add some flowery ribbons, a top hat, and embellish, embellish, embellish!
-
Easy Snowman Wreath for Christmas
-
Rustic Snowman Wreath Made from Burlap
When it comes to the wreath, burlap is another demanded material that can be used on a regular basis. Burlap can be easily molded into different shapes of your choice and used as a wreath. The snowman-shaped burlap wreath is simply pretty.
-
Snowman Pom Pom Wreath Ideas
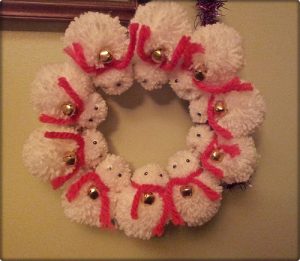
There’s something about a wreath hanging on the front door that welcomes the festive vibes. This adorable wreath will look great when decorated outdoors.
-
DIY Tulle Snowman Wreath Pattern
-
Easy Snowman Wreath Made from Yarn
Candy Sleigh Craft Ideas – Here
-
Snowman Wreaths Made Using Frame and Yarn
-
Funny Deco Mesh Snowman Wreath for Kids
If you’ve got children then this fun craft will be perfect for your winter holiday. They will love this cute and friendly face will surely make them smile. You can also add a hat and some ornaments or other traditional holiday embellishments of your choice.
-
Snowman Wreath made from Clothespin (Video Tutorial)
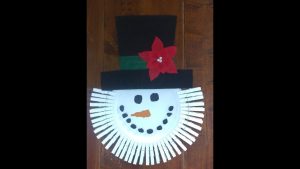
The snowman hat in this design is made using foam and then is painted black. This is a super cute and easy tutorial where you can turn simple platter to a lovely wreath using clothespin and other easily available supplies.
-
Christmas Wreath Snowman Crochet Pattern
-
Decorated Snowman Wreaths with Ornaments
-
Snowman Wreath Ideas from Deco Mesh
-
Christmas Snowman Wreath with Scarf
-
Snowman Wreath Door Hanger
We hope these wonderful winter wreath ideas beautify your day and you welcome your guests with a creative and adorable snowman wreath on your front door. Do share your creations in the comment sections below!
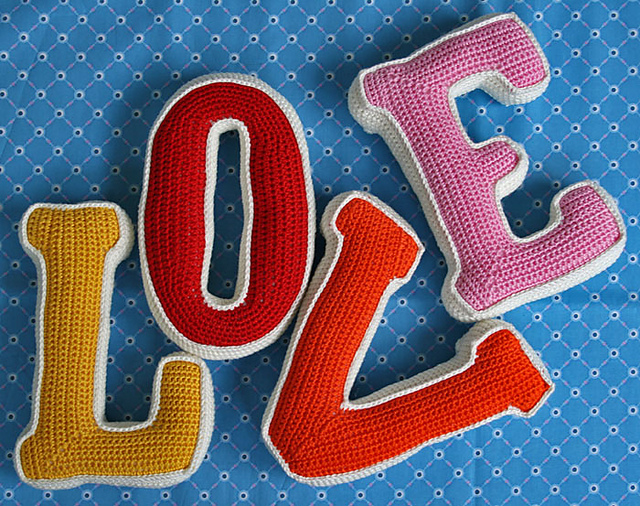
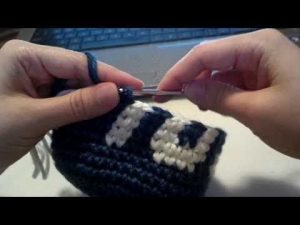
Crocheting letters and alphabets is a creative way to use leftover yarns and make interesting patterns. You can use these letters as an applique to decorate your bags, monogram a blankets, baby nursery decor, pillow covers, bookmarks, and other items. The linked tutorials have different patterns (including both block letters and cursive) with detailed instructions to guide you to make the designs.
So time to grab your wool, hook and start stitching your patterns now.
How to Crochet Crochet Letters & Alphabets Patterns
1. Crochet Upper Case Alphabet Pattern
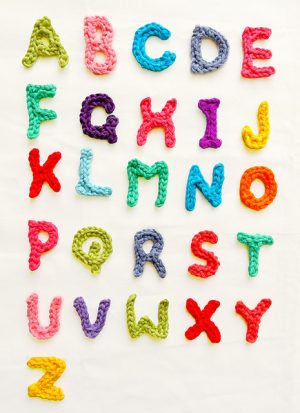
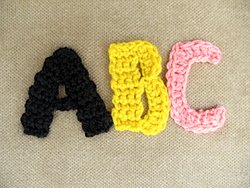
Use assorted colors of worsted yarn to make these cute letters in block. You can make words and names from these crocheted letters and embellish your clothes, bags, home decor and more. This linked tutorial is from Handy Kitty’s Ravelry Store where you will get the free patterns and written tutorials for each alphabet.
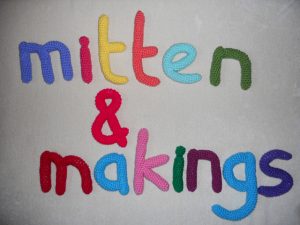
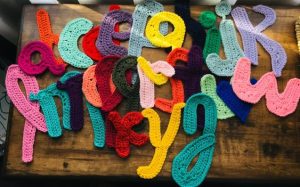
2. Crochet Cursive Letters Instructions
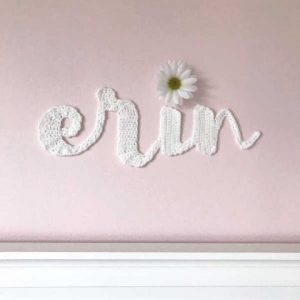
You can personalize these crocheted letters on gifts and blankets and give it a special touch. This amazing pattern is used to write a name and decor a room. Kids will love their rooms decorated with their names crocheted and hanging on the walls.
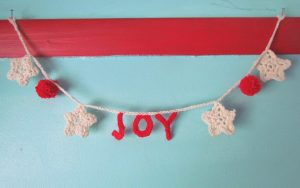
3. How to Crochet Words for a Christmas Garland
This is a great Christmas project for the holidays where you can involve your kids as well. You can make interesting patterns and make messages based on the vacation theme and use them as banners and garlands.
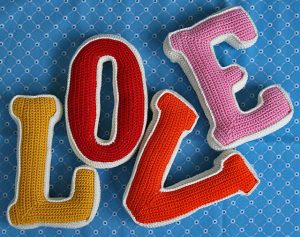
4. 3D Crochet Letter Pattern
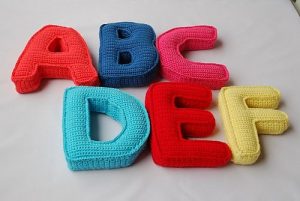
Three-dimensional alphabets are very eye-catching for kids and these letters can be used to educate kids about the alphabet. These letters are quite thick and big, and thus this project consumes a lot of worsted yarn. Make it colorful, quirky and fun for kids. You can embellish the letters with googly eyes, ribbons, buttons and more.
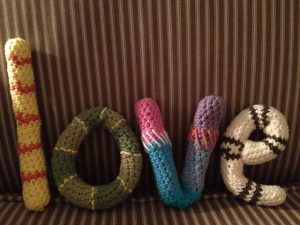
5. Amigurumi Style Crochet Letters
These letters are a little bold and puffy and require more of worsted yarn and time to make these elaborate alphabets. Beginner crocheters can find it a little difficult to start with but with practice, you will surely enjoy creating this for your kids.
6. Easy Crochet Letters Pattern (Youtube Tutorial)
7. Crochet Stuffed Letters Pillow Pattern
8. A-Z Crochet Alphabet Patterns Free
9. Monogram Crochet Letters Pattern
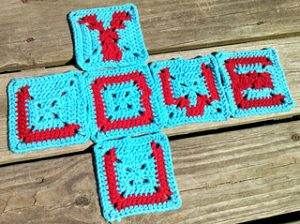
10. Crochet Letters into Granny Square Tutorial
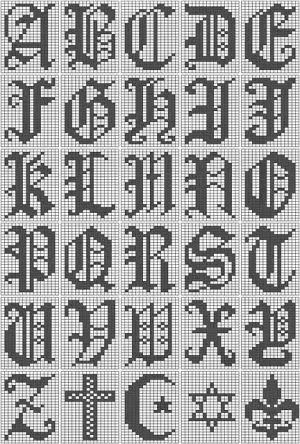
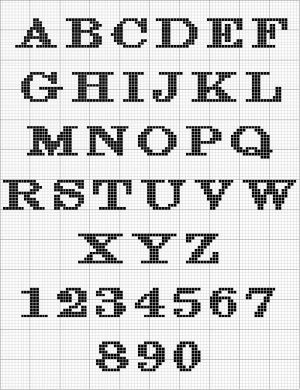
Each of the 26 letters will come with its own visual graph to make color changes easy. No confusing written out patterns for each letter.
Use your letters in scarves, throws, blankets, pillows and so much more. With the ease of a classic granny square, you can fill the need of many designs that require letters. Personalize baby blankets, show your team spirit, give gifts of love with words of inspiration; there’s no limit to what you can create!
Download Free PDF Crochet Letters Here.
11. How to Crochet a Name on Hat
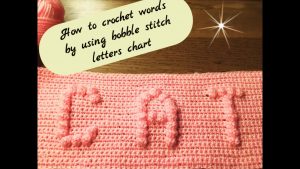
12. Crochet Words using Bobble Stitch Patterns
13. Baby’s ABC’S Afghan Crochet Pattern
14. Filet Crochet Letter Scripts
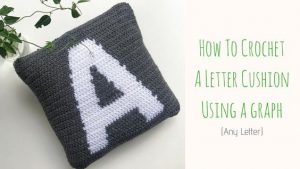
15. How to Make a Letter Cushion from Graph
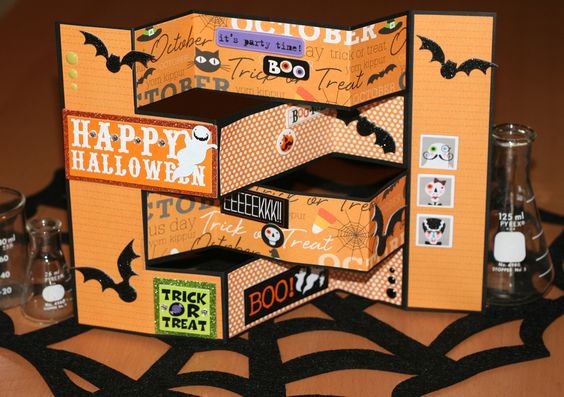
Halloween is around the corner and making a handmade Halloween Card is quite a popular tradition in the U.S and other countries as well. So no need to brainstorm ideas for this holiday, as we’ve got your back. We have compiled some of the most spooky and creative card ideas for Halloween.
-
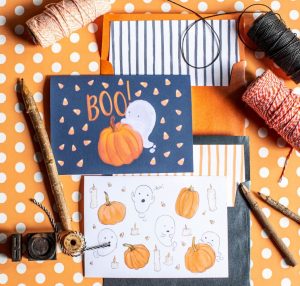
Halloween Greeting Card DIY
These cute ghosties and pumpkins are great to greet your friends and family “Happy Halloween”. Use colors like orange and blue to match your theme and make sure you add your creative touch to them with witty Halloween captions and sayings. These designs are freely printable and are a great idea for both kids and adults.
-
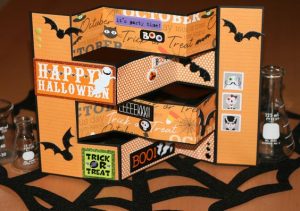
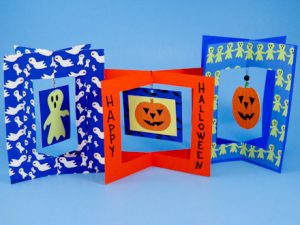
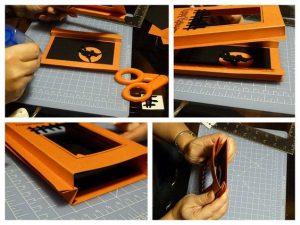
DIY Accordion Halloween Invitation Card
This holiday try to make these interesting card ideas to prepare invitation and greetings cards for Halloween. This cut-out card is not as difficult as it seems. You can add as many spooky elements you wish to make it more exciting.
-
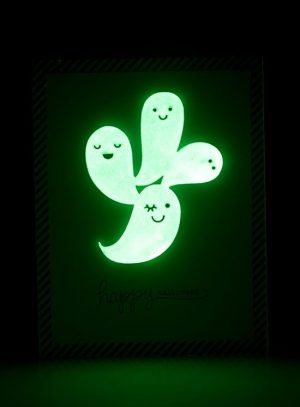
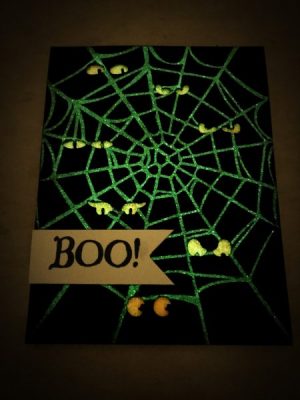
How to Make a Glow-in-the-Dark Card for Halloween
Making these ghostly glow-in-the-dark cards can be exciting and fun to make. You need some simple greeting card supplies along with glow-in-the-dark embossing powder to make your project. The linked tutorial explains you in details how to make this fun craft, which kids will surely love to create.
-
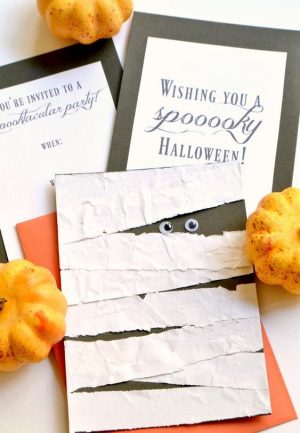
Spooky Mummy Halloween Card Ideas
Try to wish your friends in unique and interesting ways. With the simple card supplies, you need some googly eyes to create the mummy effect. You can make a bunch of the cards and use them to make Halloween party invites. The tutorial is quite easy and has step-by-step instructions to guide kids and adults and a free template for the design.
-
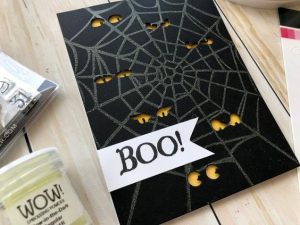
Spider Web Halloween Card Ideas
I love the cut-out effect on the front giving the perfect spooky eye effect. Using the glow in the dark embossing powder you will get the glowing effect on the web pattern. I’m sure kids will love to make this creative card for friends and family.
-
Handmade Card Ideas for Halloween
-
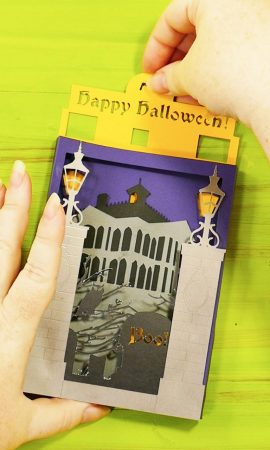
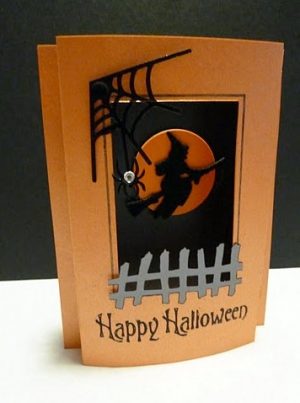
Haunted House Halloween Card
Here is a cute shadow box card. Perfect to wish someone a Happy Halloween.
-
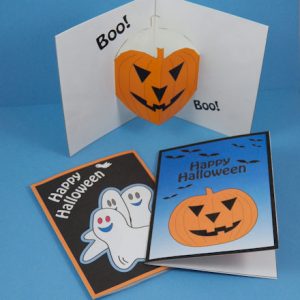
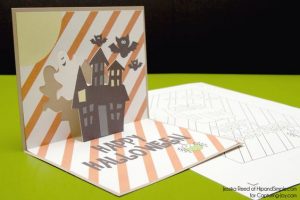
DIY Halloween Pop Up Card for Kids
These are simple pop-up pumpkin card invitations with a sense of humor. Great for your Halloween party!
-
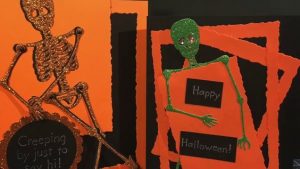
Skeleton Halloween Card Making
Let this dancing skeleton read your message for Halloween. The glittery skeleton will surely turn some heads.
-
How to Make a 3D Halloween Greeting Card
-
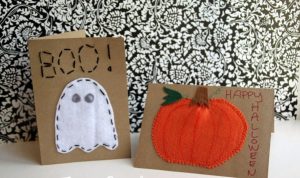
Hand Sewn Happy Halloween Card Ideas
-
Spooktacular Halloween Card Tutorial
Check out this flying witch card, where the blogger has used 3D tricks to give it a wow effect. You can add sparkles to add some bling to the card!
-
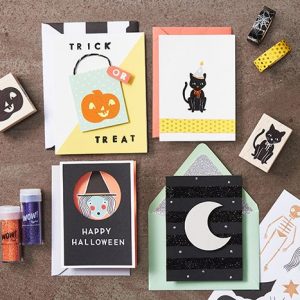
Trick or Treat Card Ideas for Halloween
Show off your creative side by making these simple cards with stamps, washi tapes, glitters and more for family and friends. Use these interesting ideas and jazz up your card with colorful stamped cut-outs.
-
Free Printable Halloween Cards
Download the free printable pdf version of this design for your pop-up card.
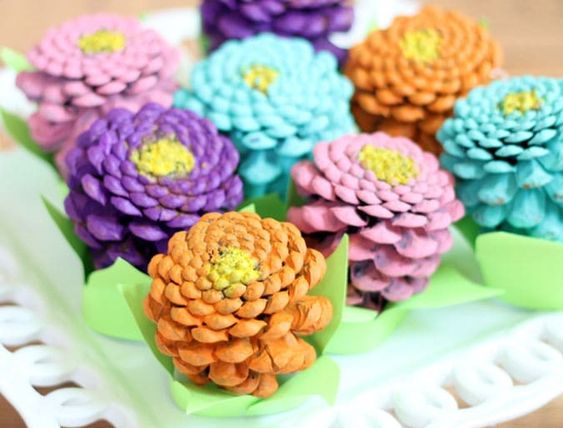
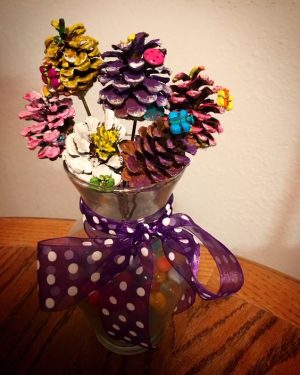
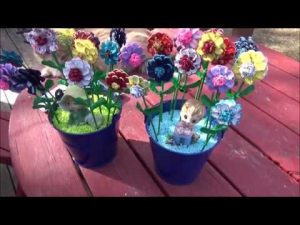
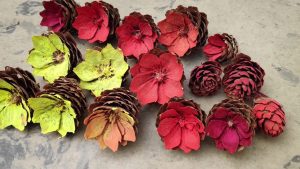
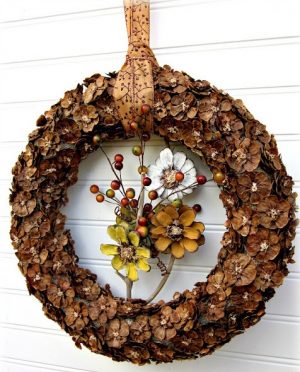
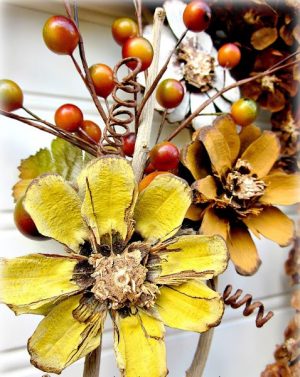
Pine cones crafts is a wonderful way to make ornaments, centerpieces, and wreaths, especially during the holiday season. They are easily available and make unique and inexpensive crafts and are amazing for creating Christmas tree toppers and garlands too. This Fall you can make your own handmade flowers with pine cones and use them as decorations, arrange them as a bouquet or even use them on wreaths. Painting them with different colors and adorning them with glitters, ribbons will add to the faux flower charm.
We have rounded up some DIYs which will help you in making pine cone flowers with step-by-step instructions. The project needs very basic supplies like pine cones, paints, glitters and a cutter to cut the base of the pinecone depending on your design.
20 Tutorials to Make Pine Cone Flowers at Home
-
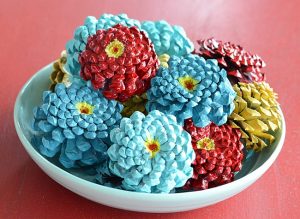
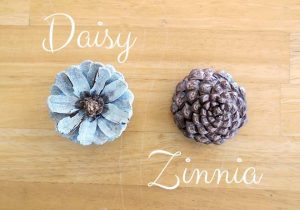
DIY Pine Cone Zinnias
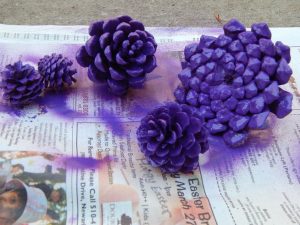
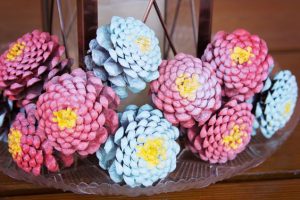
These beautiful flowers are quite simple to make and paint. The only exception being cutting the base of the pine cones. Pine cones are made of wood and cutting them can be a task at times. You will need a mini saw to shape them. The linked tutorial explains perfectly how to master the art. Turn your Pine Cones Upside Down and they turn into Zinnias. Once cut, just lay the Zinnias and spray paint them with colors of your choice.
-
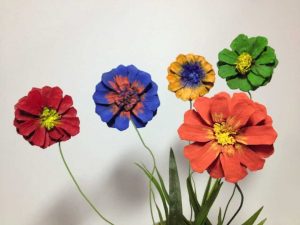
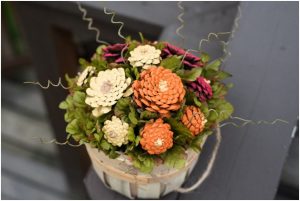
Handcrafted Pine Cone Flowers with Stems
To get the look of real flowers you can add fake stems made of cardboard to the pinecones and arrange them in a vase.
-
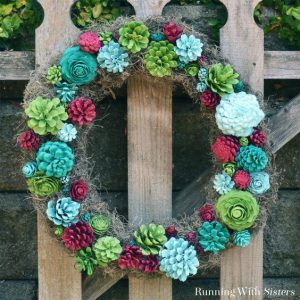
Pine Cone Wreath Tutorials
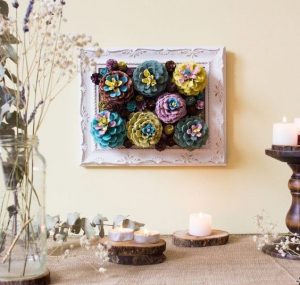
This Autumn try making this rustic faux succulent wreath with pine cones. You will need to gather some 50-60 pine cones for the project and cut them in different sizes. Then color them like succulents of your choice and place them creatively. This homemade wreath will surely make some heads turn and will gather all compliments.
-
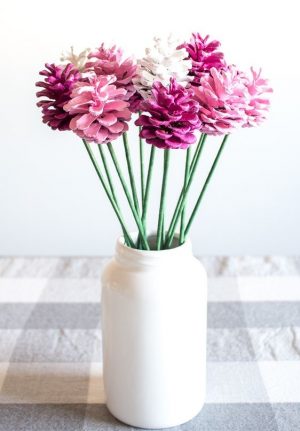
How to Make Pine Cone Roses with Stem
Arrange these pink and white roses in a mason jar and use it as handmade centerpieces in a wedding or any special occasion. In this project, they have used wooden skewers to make the stem of the flower. Alternatively, in the linked tutorial they have also shown how to use this bouquet in the Halloween theme and paint the flowers orange and black.
-
Floral Pine Cone Arrangement
-
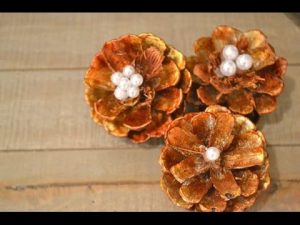
How to Make Simple Pine Cone Flowers for Decor
Adding pearls or beads at the center of the pine cones will give them an embellished look. These faux flowers can be used to decorate gifts, hampers and more.
-
How to Make Flower Refrigerator Magnets from Pine Cones
Give a handmade twist to the pine cone flowers by adding a magnet to them and use them as refrigerator magnets. You can make daisies, zinnias, lilies, and roses from the pine cones and color them red, orange and white to add a colorful element on your door.
-
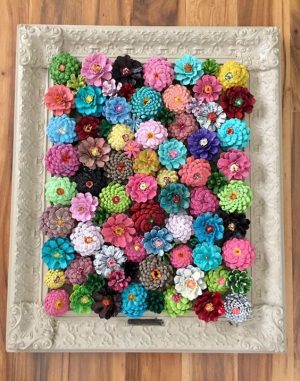
Pine Cone Floral Wall Art Instructions
-
Pine Cone Flower Crafts for Halloween Decorations
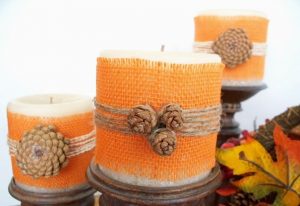
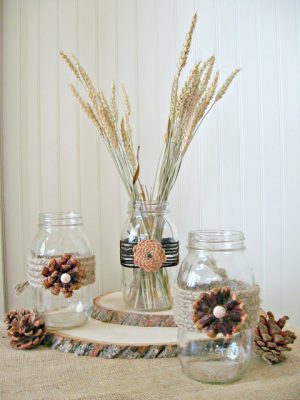
Add a rustic flair to your candles and decorate them with burlap, twine, and small pine cone flowers. They look amazing when the candles are lighted in the dark.
-
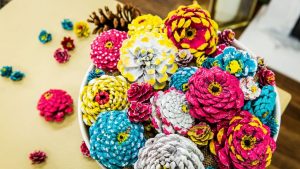
Directions to Make Colorful Pine Cone Flowers
Lay these colored flowers in a bowl and arrange them beautifully as a decorative centerpiece. You can color these flowers red and put green leaves in a bowl if its Christmas.
-
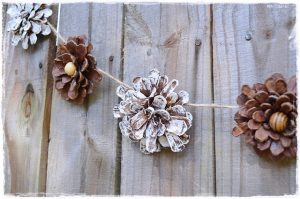
Directions to Make Flower Garland Made from Pine Cone
-
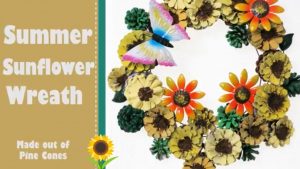
Summer Sunflower Wreath from Pine Cone
-
Make Pine Cone Flower Bouquet Arrangement
-
Purple Painted Pine Cone Flowers
-
How to Make Beautiful Pine Cone Zinnia Flowers
-
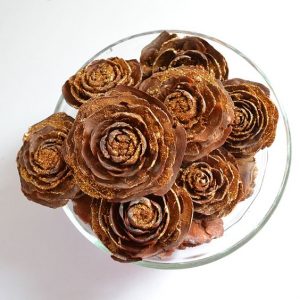
DIY Scented Cedar Pine Cone Roses
-
Mini Pine Cone Flower Potted Plant
This is a lovely craft idea for kids who would love to decorate the base of the planters with colorful supplies.
-
Easy DIY Flowers from Pine Cone for Autumn
-
How to Make Beautiful Pine Cone Wreath
-
Framed Flower Decor Made from Pine Cones
-
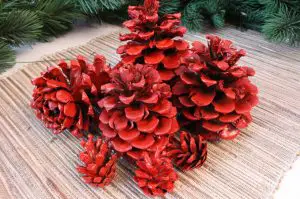
DIY Red Pine Cone Flower Ideas for Christmas
Mix some white, red, and green painted flowers and lay them in a bowl as a centerpiece during the Christmas for stunning decor.
-
DIY Pine Cone Flower Embellished Mason Jars
-
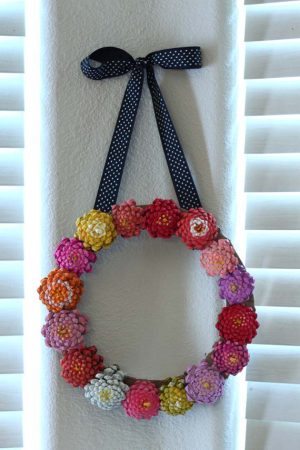
How to Make Colorful Flower Wreath with Pine Cones
For more pine cone wreath ideas click here.
These crafty ideas will surely keep you close to nature and add a rustic charm to your decor. Try making other crafts with pine cones like wreaths, Christmas trees, owls and more.
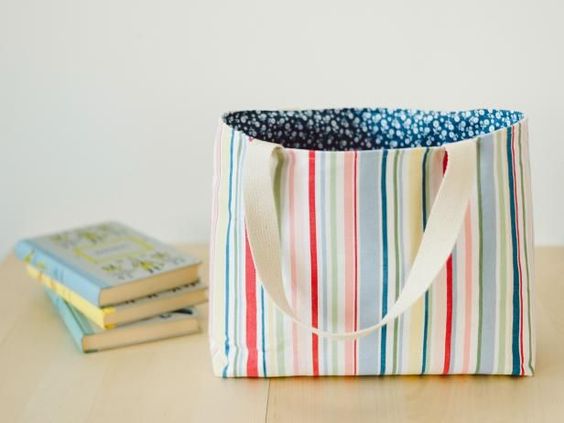
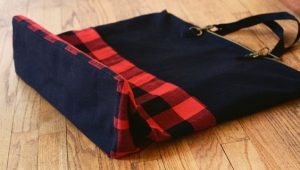
Tote bags are always handy to have around for beach trips, library sessions, or grocery shopping. Tote bags often have a flat bottom with squared corners. These bags have an extra piece of fabric on the bottom. A tote bag with a gusset or flat base can fit more items and makes it easier to access to those items. You can use different materials like cotton fabric, canvas or jute to make these useful bags depending on your purpose. Let’s browse through some of the tutorials which show how to make the perfect bags.
You May Also Like: DIY Tote Bag Designs n Patterns
-
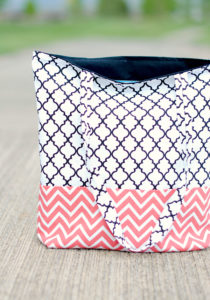
DIY Tote Bag with Flat Bottom
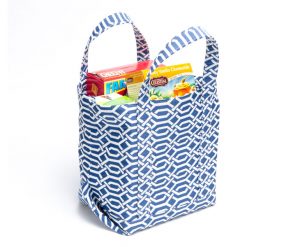
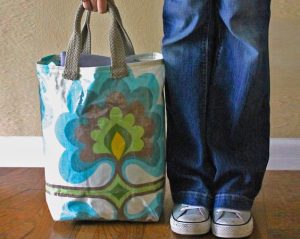
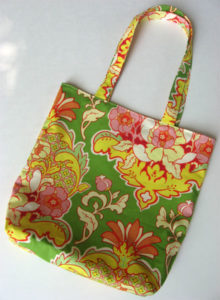
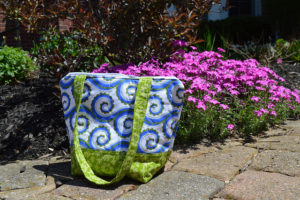
Pick up some quirky printed fabric and make a funky shopping bag. A wide base with squared corners gives you ample space to store your stuff.
-
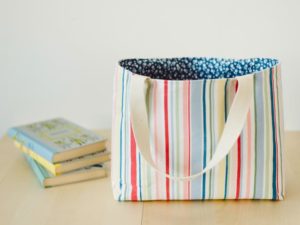
How to Sew a Flat Bottom Lined Tote Bag
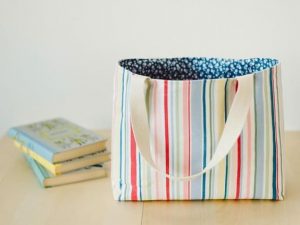
You can use printed fabrics for this design. If you like sewing, then you can get creative and make it a reversible tote, with different prints on the inner side and outside. These custom handbags are great to carry for grocery and other places. I loved the lined fabric used in this tutorial.
-
Making a Boxed Bottom Tote Bag
-
How to Make a Square Bottom Leather Tote Bag
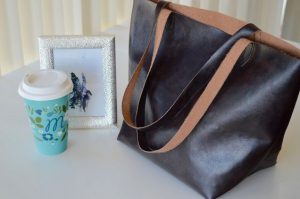
If you don’t want to shell money on expensive leather tote bags available in the markets, then this DIY is a total steal. All you need is some leather fabric to sew this stylish tote bag. The flat bottom makes it easy to store and carry your stuff.
-
How to Make a 70’s Tote Bag with Squared Bottom
-
Flat Bottom Tote Bag Pattern
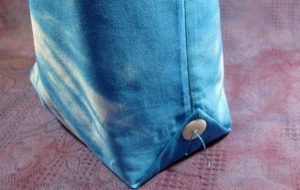
This tutorial explains you exactly how to get the perfectly flat bottom for your bag to make it convenient to store stuff and carry to a beach, store or more.
-
Reversible Line Tote Bag with Wide Bottom
-
Handmade Canvas Bag with Flat Bottom
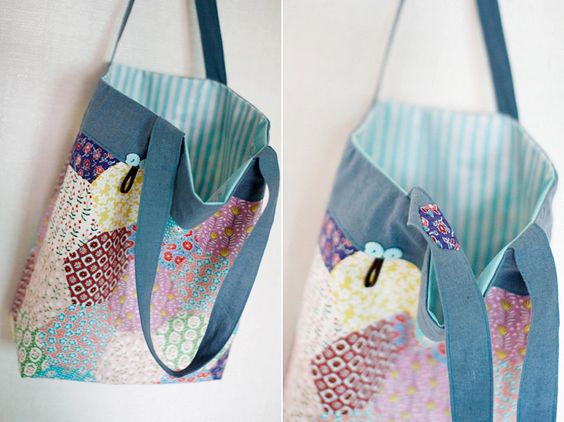
Do you love totes and just cannot find the perfect one for yourself which you can afford? Then what are you waiting for, go on and make one for yourself? You will just need some colorful threads, maybe your old clothes or you can even crochet one. It may seem difficult to you now but with this collection of tutorials listed below, you would be able to make cute DIY tote bags at home. So don’t fuss the next time you go out and you feel you don’t have a decent bag, just make one for yourself.
25 DIYs- How to Make Tote Bags with Step-by-Step Instructions
1. DIY Canvas Tote Bag: How to Make
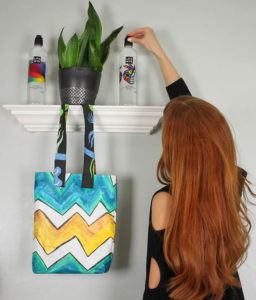
Just pick up some acrylic paint and canvas and paint your heart out be it geometric shapes or even a scenery. All you have to do is paint on two canvases and then sew them together in the shape of a bag and here it is, your new tote bag is ready. The best thing about it is you can make it according to the color of your outfit. So don’t depend on the shops and do it yourself.
2. DIY Large T-Shirt Tote Bag
Are you worried about the fact that you don’t know sewing? Don’t worry this tutorial is just perfect for you. No sewing doesn’t mean plain and mainstream. Just look at it, it’s so beautiful and flowery. You just need a white t-shirt or even a black one would work. Painting on a black t-shirt would result in a dark floral tote which is just perfect.
3. DIY Tote Bag To Backpack Pattern (Black n White)
If you have an old tote which is of no use to you o you have grown pretty bored with it then why not transform it into something new? Follow this amazing tutorial to turn your old tote bag into a new backpack.
4. DIY Reversible Tote Bag Tutorial
This reversible tote bag is certainly something out of the box. It may seem tricky but every detail has been shown in a step-by-step manner in this tutorial. You just need some piece of cloth and a little bit of your time to complete this.
5. DIY Leather Tote Bag Pattern
Making DIY tote bags doesn’t mean they have to be of paper or fabric. They can be of leather too. Follow this simple tutorial and with a piece of leather and a bit of sewing, you will get a good tote bag for your groceries.
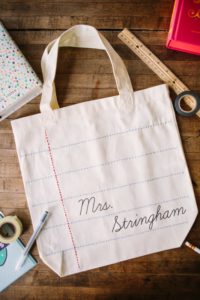
6. How to Make White Personalized Tote Bags
Gift your teacher or any friend this tote bag and surprise them with your creativity. Instead of a name, you can also put any appropriate quotation.
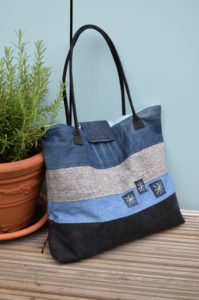
7. DIY Denim Tote Bag Tutorial
This denim tote bag doesn’t even look like it has been handmade. Get yourself a chic look with this tote. Take out that old denim you don’t wear anymore and sew the appropriately cut pieces into a tote. A denim tote is much durable than the others.
8. Fabric Tote Bag Design Tutorial
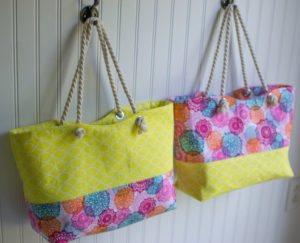
This fabric tote bag can be perfectly used as a beach bag. It’s colorful fabric, though you can use fabric of your choice, brings about a glowing and bubbly effect.
9.DIY No Sew Tote Bag Ideas
You just need to be handy with your scissors and you have your new tote bag ready. You just need o cut some fringes and tie them up so no problem if you don’t know sewing.
10. DIY Tie-Dye Tote Bags Instructions Step-by-Step
The tribal pattern that is done on this tote is no doubt amazing but you can do your patterns too. Don’t panic by the thought of dyeing something, trust me it’s a lot easier than anyone can ever imagine. You just need the right dye and a good pattern to highlight the overall appearance.
11. Pattern For Tote Bag With Flat Bottom (Medium Size)
This striped flat bottom tote bag is a perfect one to make when stripes are in trend. Women! make your own statement by this unique tote bag.
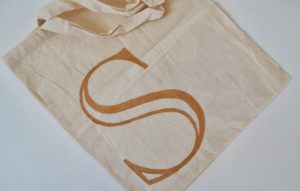
12. DIY Monogram Tote Bag: How to Make
You don’t even need to buy that tote bag as is shown in the tutorial. You can make yourself one by stitching two canvas clothes together as you have learned in the first tutorial mentioned in this list and then paint the monogram on it.
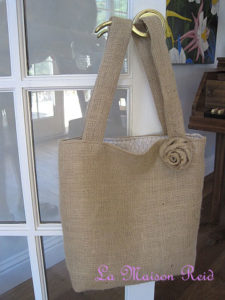
13. How to Make Burlap Tote Bags
Burlap tote bags are very much fashionable and trendy like the fabric ones. In fact, they give an additional rusty look which the fabric ones cannot give. Burlap tote bags have grown immensely popular not only because of their durability but also their impeccable appearance.
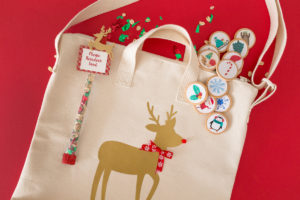
14. Amazing DIY Christmas Tote Bags Tutorial
This is no doubt one of the best Christmas gift ideas you can think of for a friend or a family member. After all, Christmas is the time we spread love and show gratitude towards others. What can be a better gift than this beautiful tote bag made by you?
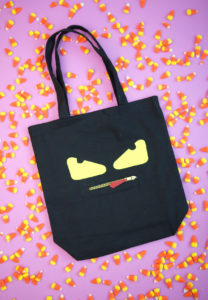
15. DIY Halloween Tote Bag
Gross looking candies and all other sorts of decorations are the most common gifts on Halloween. Gift your friend the wackiest gift she can ever think of – a tote bag designed especially for Halloween which will match her spooky outfit for the day.
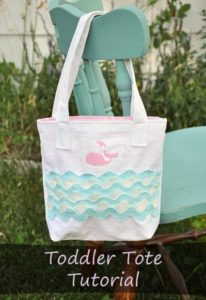
16. Free DIY Mini Tote Bags Design
Gift your little ones something unique and long-lasting. A gift does not always need to be expensive. It just needs to be made with love. This mini tote bag is the perfect one for that fashionable little lady in your house.
17. DIY Recycled Tote Bags (T-Shirt)
Recycle your old t-shirt or that tank top you don’t wear anymore and transform it into a cool tote bag. Do it yourself and don’t depend on the retail stores to rule over your choices. Make your own fashion.
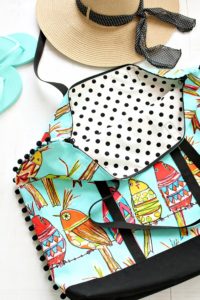
18. Colorful Beach Tote Bags DIY Design
On your next trip to the beach, whether you are wearing monochromatic beachwear or colorful florals, take this bright and beautiful tote bag with you and flaunt it well. So don’t waste time and be vacation ready!
19. Make DIY Tote Bag With Lining
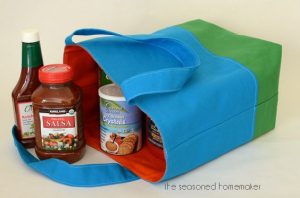
If you want a bag which will be able to hold heavy weights then you definitely need to sew a lining. The lining makes a bag strong. This bag would thus be perfect for your grocery store. This tutorial is extremely easy and the outcome is outstanding. The explanation is very vivid and you would not find any problem stitching your fabric into a beautiful tote.
20. Beautiful DIY Tote Bags
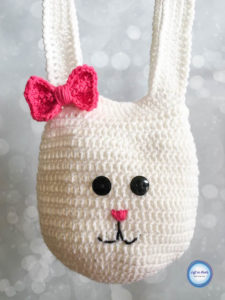
This cute bunny bag will leave everyone in awe once you finish the project. This will be the perfect weekend bag or the one which you can carry when you are going for a vacation. The materials are cheap and the overall cost of making this tote bag is quite affordable. The finished size of the tote is approximately 20” by 12” if you follow exactly what is given in the tutorial.
21. DIY Tote Bag With Zipper For Girls
Tote bags with a zipper are much safer than the open ones. The small things you carry like your makeup essentials or your sunglasses or even your headphones will never get the chance to slip out of your bag. With time the fashion trends change but tote bags are never out of fashion.
22. DIY Tote Bag With Duct Tape Project
This project will take only an hour. It does not even require sewing. Duct tape is used to make a wide range of things. This easy to make tote bag is not only beautiful but also the perfect one when you have to make a gift for someone within a 24-hour span.
23. Easy Tote Bag With Rope Handles
These DIY tote bags with rope handles are very pretty and sturdy. You don’t have to worry about the straps being torn away from the main body of the bag. These rope handles will never come off.
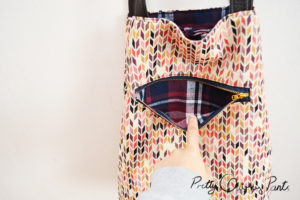
24. DIY Tote Bag Pattern With Pockets
Do you sometimes feel the need of an extra pocket in your tote bag? It is certainly very difficult sometimes to keep all the things in a single compartment especially the smaller things which tend to camouflage among other things in times of need. This tote bag with an extra pocket which is again guarded by a zipper is perfect to carry your small essential things or even your money which certainly needs to be kept separate from all other things.
25. Small Tote Bags DIY Tutorial
This small and easy tote bag is super cute. Buying expensive clothing and branded bags is not what makes you trendy but how you carry yourself and employ the simple things in life to achieve a look that leaves an impact on others and makes them follow your trends. This tote bag will definitely be one of the trendsetters.
Here, I bring to you 25 amazing and easy patterns to make your own tote bags tutorials which will guide you on how to make these cute DIY tote bags at home.
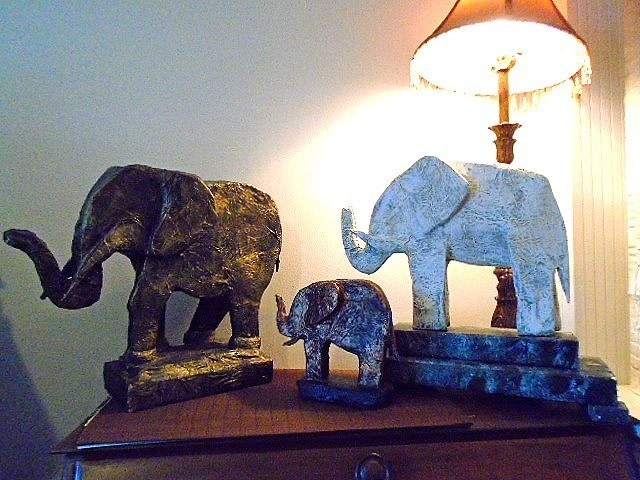
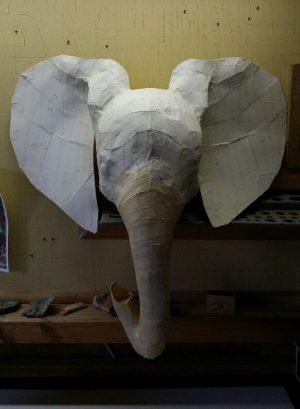
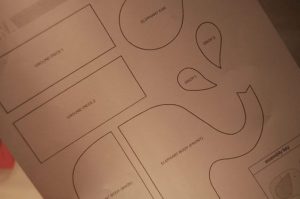
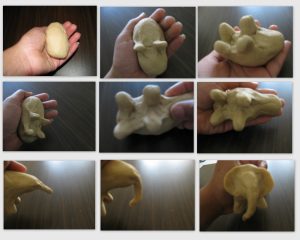
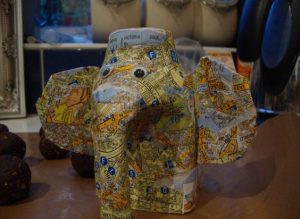
Paper mache is the popular art with the mache mix made from shreds of paper or paper pulp mixed with glue. This mixture could be molded into several shapes when it’s wet. Once they dry and become hard they are suitable for painting and decorating them. Paper Mache Elephants are quite a buzz these days. You can create numerous designs in it. This is a great way to make paper mache traditional toys, masks, pinatas, wall hangings, sculptures and more. We have listed all possible designs for the paper mache elephant. Let’s explore how to create your fav pattern.
How to Make Paper Mache Elephant with Step-by-Sep Instructions
-
Paper Mache Elephant DIY
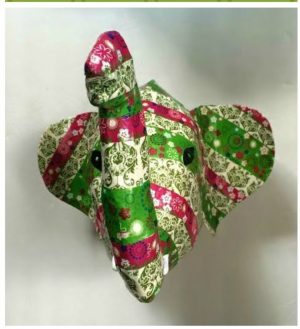
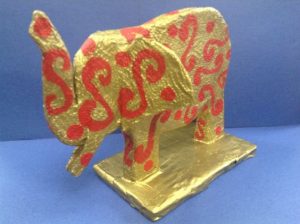
This sculpted elephant is made from using paper mache paste and cardboard. Once dry, paint it with traditional colors making it an elegant masterpiece. This is easy to construct and you can use it to decorate your side table. You can even use printed wrapping papers and cover the top layer with it to give it a unique look.
-
DIY Paper Mache Elephant Head
-
How to Make an Elephant out of Paper Mache
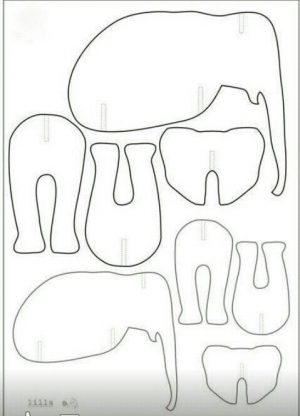
This standing sculpture of the elephant is an easy to make paper mache craft. All you need is some cardboard cut-outs, glue and paper strips to make the animal figure. Once dry, paint and decorate it.
-
How to Make a Paper Mache Elephant with Balloon
-
DIY Paper Mache Elephant Mask
-
Large Papier Mâché Elephant Tutorial
-
Instructions to Make Papier Mâché Elephant Head
-
How to Make a Paper Mache Baby Elephant
-
Very Easy Paper Mache Circus Elephant (Small)
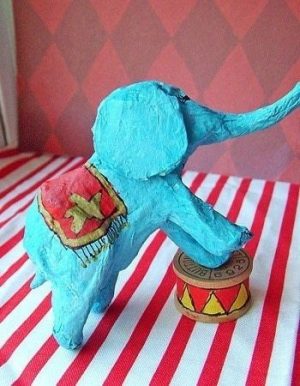
This design works well if you want to work on miniature-sized paper mache animals. I loved the cute elephant which was super easy to make, just follow the instructions to make one of your own.
-
DIY Papier Mache Sculpture
-
How to Make Pache Mache Elephant Piñata
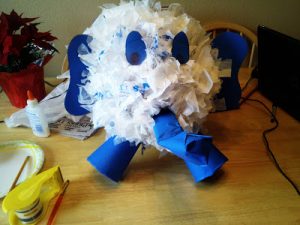
Elmer the elephant is a colorful character. His heady optimism and unbridled sense of humor keep the entire community in a cheery mood. So try to decorate yor piñata with colorful confetti papers and let the kids enjoy the theme on birthdays and parties.
-
Unique Kashmir Paper Mache Elephant Idea
This traditional Indian design was initially made in Kashmir. The intricate designs showcase the artistic zeal of the Mughal Empire.
-
How To Make A Paper Mache Elephant using Chicken Wire
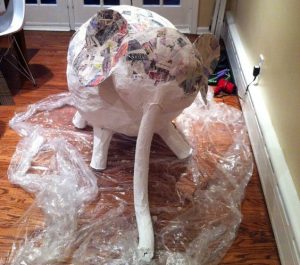
If you are keen to make a life-size elephant sculpture, then making the base frame with chicken wire is a sturdy and affordable option. It takes less time to create the animal figure and is easy too. Chicken wire is easy to mold into any shape and the material is light and solid too.
-
Paper Mache Clay Elephant Craft with Kids
-
Making Your Own 3D Elephant from Paper Mache
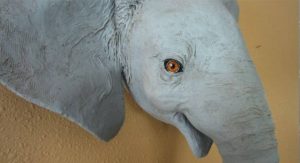
Once you are finished with your paper mache animal heads, we love the idea of using them as nursery decor or accents for a kid’s bedroom. You can hang them in your living room for some crafty inspiration for your next project.
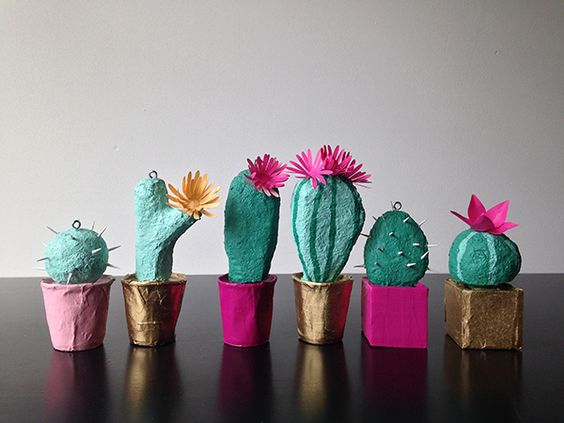
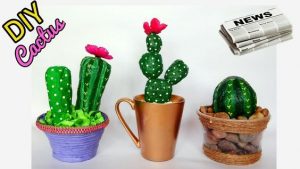
Paper Mache(Papier-Mâché) is a fun project for both kids and adults. If you are fond of succulents and can’t maintain real ones, so we have some adorable paper mache cactus (cacti) tutorials for you. Spruce up home with these green funky cactus plants which are easier to maintain. We have rounded up some of the best DIYs and paper mache recipe for this desert plant, which kids will have fun decorating.
Things Required for the Project
- Newspaper
- Modge-Podge
- Cardboard or Styrofoam
- Paints
- Toothpick
-
Easy Paper Mache Cactus DIY
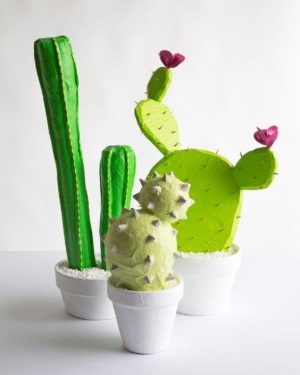
You can make a set of mini and large cacti plants from paper mache. Since cactus is quite popular these days and can be seen everywhere, try making one on your own. Add some extra spark to your prickly plants with toothpicks and colored pots and use them as beautiful centerpieces.
-
Paper Mache Potted Cacti Tutorial
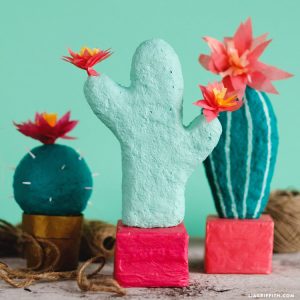
Add some beautiful cactus decor to your living room with these cute DIYs. You can make different shapes of the plant and adorn them with crepe paper flowers. These potted plants give a funky burst of colors to add to any space. Once the figures are hard, you can paint them and put embellishments of your choice. The tutorial has a free PDF template for the shape of the cactus plant.
-
How to Make a Large Paper Mache Cactus
Decorate your outdoor space and gardens with these giant cactus made from paper mache. This project takes some time as it is a giant cactus, but the outcome looks beautiful when placed outside your house. You need a large stick or a broomstick to make it as the base and then cover it with newspaper paste and finally paint them in different hues of green.
-
Colorful Paper Mache Cactus Plant Ideas
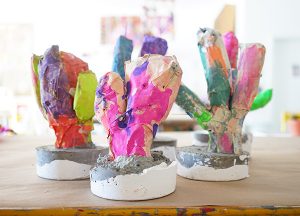
Your kids will love to do this paper mache project. It’s quite unique because of the use of unconventional colors for the cactus plants. They have used the concrete mixture to make the figures and place them in your rooms.
Paper Mache Letters DIY – Read Here
-
Paper Mache Flowering Cactus Instructions
With recycled newspaper and a little paper mache paste, you can easily transform your old waste into a lovely flowering Cactus that never needs watering.
-
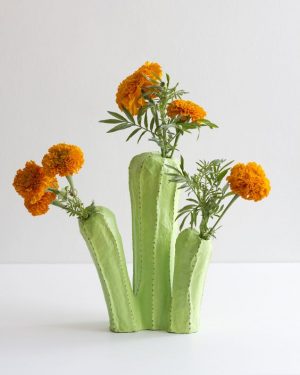
Make Your Own Paper Mâché Cactus Vase
-
How to Make Newspaper Cactus
These faux paper mache cactus designs are made from using old newspapers and paper mache paste which makes a beautiful home decor.
-
Giant Paper Mache Cacti Plant Tutorial
Showcase your handmade cactus plant on Christmas or a themed party and see your creation get compliments.

