Paper cootie catchers are an interesting holiday treat for kids that won’t clutter your home and can be completed in just a few minutes.
Get this tutorial with folding techniques here on Brendid.Com blog.
DIY Crafts is a great choice to evade the boredom of everyday chores and make creative projects. 5 minutes crafts can be with kids too. It makes them creative as they are always on the lookout to recycle old waste materials into something useful.
We at Ideas4DIY explore interesting ways to recycle cardboard, bottle caps, pipe cleaners, burlap, paper mache, newspapers, ribbons, duct tape, paper plates, toilet paper rolls, etc. for making unique craft items. Get inspired to make amazing handmade crafts for Thanksgiving, Christmas, Halloween and many more occasions. The tutorials and DO-it-Yourself ideas have step-by-step instructions to guide you well. Most of the DIY’s are easy and fun to make with not much skills needed.
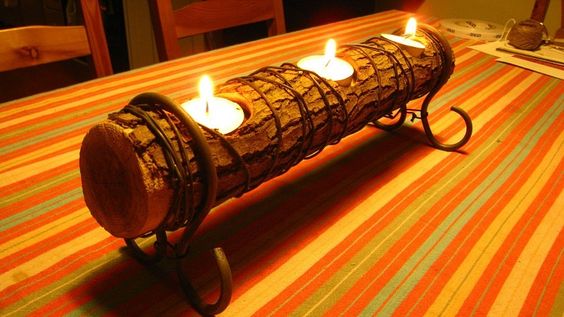
Reclaimed wood logs make stunning candle holders giving the decor a rustic and natural touch. Add some pretty tealight candles and add an aesthetic touch to your interiors. Enhance the ambiance of your house and make the best log candle holders at no extra cost. Upcycling wooden logs into vertical or horizontal candle holders are a great idea for this holiday season!
Here’s a quick DIY project that requires no welding or special woodworking skills. This elegant centerpiece candle can be made from any piece of chopped wood. You can add scented candles for a romantic ambiance
These pillar log candle holders are made from upcycled pine tree branch. You can make them of different sizes and use it as a beautiful centerpiece in Autumn or Christmas. The tea light candles when lit up change the ambiance of the house!
This winter holiday make this easy peasy DIY project and lighten up your room. This project is a quick and inexpensive one, great for beginners! You can put this on your side tables and enhance your room decor at no cost!
The candle holder decked with beautiful candlesticks illuminates the room aesthetically. Add Pinecones, grapes, holly, and candles to give a personal touch to it if you want to gift it to someone.
Turn wooden log slices into unique table centerpieces! Follow the simple instructions and place scented tealights for an amazing decor!
You May Also Like: “How to Make Twig Candle Holders”
This tutorial for rustic log candlesticks costs virtually nothing to make and takes about 1 hour for nine pretty candlesticks. You can pick wood piles from trees that were cut down and chose the best looking ones to decorate your dining table this festive season!
Collect some tree stumps and recycle them to tree log candle holders for this Fall. You can paint them white for the elegant look in winters.
You May Also Like ~ “How to Make Seashell Candle Holders”
Get ready for Memorial Day and 4th of July with these adorable American Flag Log Candles. You can paint another design if you want, but I found this very cool.
These DIY rustic wood candle holders are perfect for your Christmas decor. Get creative and add some greens and red candles to give it an Xmas touch. A set of these handmade candles make great gifts to friends and family!
You May also Like ~ “How to Make Wine Candles”
Make this craft using tree stumps or small logs and embellish them with flowers, ribbons, and ferns. You can use them as beautiful wedding decorations and centerpieces! Also, they make great gifts! Please translate the tutorial if you are a thumbs up for this idea!
You May also Like ~ “DIY Mason Jar Candle Holders”
Enjoy a warm and cozy dinner on your dining table with these tea light candles on the driftwood. It gives a rustic touch to the decor!
Martha Stewart and craftsman Tom Tambella make wood candle holders with tea light votive candles and small tree logs. Catch the tutorial with easy to follow instructions and make your own log candles!
The ambiance of the room gets misty and warm when the pillar log candles are lit up.
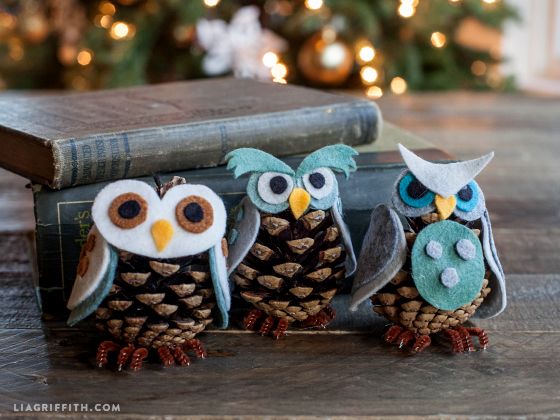
We all love pinecone crafts. Let’s explore the different ways of making pine cone owl and owl babies on your own. You can use the wonderful owl ornaments to decorate your Christmas Trees or as showpieces. They make great gifts for friends and family and are affordable too. Channelise your creative skills and recycle ordinary pine cones into amazing owls! You may need pine cones, felt, googly eyes, some paint, and cotton to make this craft!
Whooo’s got, crafty kids?
If you have large pinecones in your backyard, then time to make some beautiful ornaments for the festive season. To make this beautiful owls all you need is some pine cones, colored feathers, and googly eyes.
These adorable owl ornaments are made from pinecone and felt! They make amazing showpieces and is an easy and rustic craft idea for autumn!
Making pine cone owls is a fun autumn craft for kids. You can combine this craft with a nature hike to find the pine cones, acorn cups, and leaves used in the activity. You paint the eyes made of acorn tops and attach candy corns for the nose and talons.
Try turning pinecones into owls! Not only will you and the little ones have a “hoot,” it’s also a great way to explore nature and create fine motor skills.
Crafting with natural materials is fun. Bring a bit of the outdoors inside with these darling Pinecone Owls. A fun crating idea for kids too.
This is one of the favorite designs to make own ornaments from pine cones and felt. You need to cut out the head, eyes, and wings and stick them to the pine cones.
Follow the simple instructions to make these quirky owls from pinecone.
This cute little pinecone owl captures the whimsy excitement of the holiday season!
There are three types of owl designs which can be printed and cut out to stick on the pine cones. Make your owl ornaments in no time with kids!
We hope you liked the designs and templates and you will surely go in your garden to hunt for the fallen pine cones. Turn them into unique owl ornaments and decor pieces this fall!
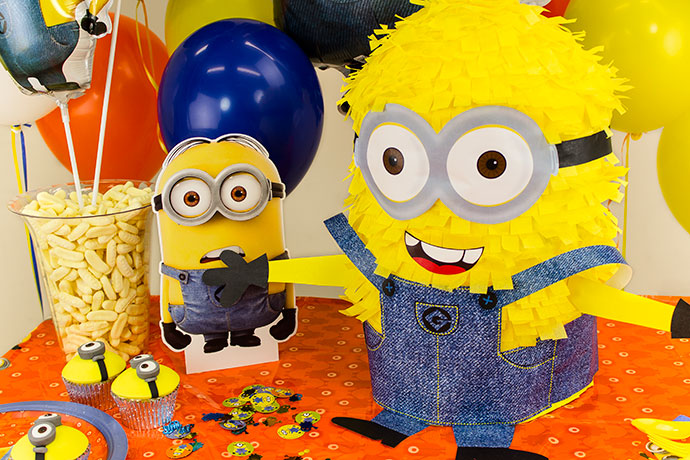
Kids love pinatas! They love to break a box character which overflows with candies, goodies, and amazing stuff to make them excited. Minions, the tiny yellow creatures, appearing in the Despicable Me franchise is a rage among many particularly the little ones. Let’s make a Minion Pinata to make all kiddos get nuts over their fav cartoon character. We have a compilation of different DIYs, and tutorials to make Minion Pinatas. You can use the paper mache technique or even make creative piñatas using boxes, cardboard or tin cans.
This huge minion piñata gracing your garden would be a fabulous outdoor party idea. You need some balloons for making the paper mache character. Adding the blue and yellow fringed papers may take some time, but the finished pinata is quite eye-catching and will surely make the kids excited at the birthday party.
Make a big Minion Pinata to decorate your tables and fill it with goodies, candies and fun stuff for kids to enjoy. The linked tutorial shows you how to make your very own minion piñata out of paper maché. Follow the few easy steps and once finished we can guarantee that it’ll be a hit at your party!
You can play with colors and use pink instead of purple for a more girlie themed party. Embellish them with caps, bows or other interesting add-ons to give the piñata for an attractive look.
You can fill this pinata with small toys, sweets, and goodies and get super happy kids!
Short of time to make something special for the birthday party? Yes, try making these easy pinatas from cardboards and minion prints. You can make several pinatas for each kid as return gifts and party favors. The kids will love goodies in their favorite cartoon character.
In this youtube video, they have used yellow paper, you can use purple crepe paper and cut fringes in the similar way as shown to get your evil pinata.
You can make creative Minions Stuart, Kevin, and Bob and hang them outdoors to decorate your garden.
Make interesting designs for your Minion Pinatas using cardboard boxes. Just add a string at the top to hang it or place it on the table.
An interesting party decor for all minion fans. You can also add other Disney pinatas and make it a cartoon corner for kids to enjoy. After you have paper mache and added the crepe papers, all you need to do is add the printed cut-out of minion googles and wohooo you pinata is all ready! A set of big and small minion pinatas will give an amazing look.
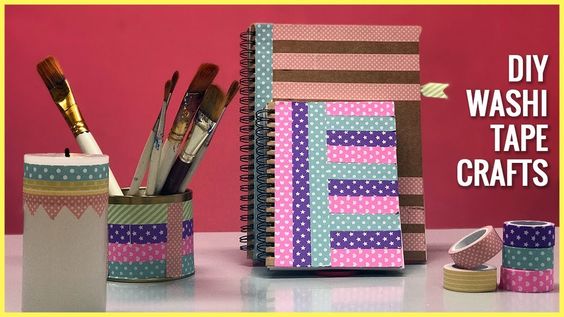
For beginners who are wondering what is a washi tape? Washi tape is a decorative Japanese tape that crafters are completely OBSESSED with. It comes with an array of designs to choose from—there are washi tape designs for almost all themes, be it holidays, and special occasions, birthdays etc.
You can stick it to anything to personalize and turn simple into extraordinary. There are just so many creative uses for washi tape and we have compiled more than 120 DIY projects and craft ideas for you.
Make these fancy coasters which look great on an end table, and would also be fabulous on a desk. You can use brighter masking tape prints too to brighten up your decor.
Add quirky prints to your phone covers and get a new look for your cell every day!
You can make wonderful gift boxes, party favors and more with these cardboard and deco tape. Add a bow or flower to it to complete the look.
They make fantastic, easy and inexpensive gifts. You can be innovative and use the washi tapes of different designs in numerous ways!
Making handcrafted birthday cards for Birthday is a cool idea with washi tape, ribbons, candles and more. You can explore amazing crafting techniques for DIY cards.
If you love to create personalized handmade cards for your friends and family, then these tutorials will be fun for you for Christmas.
Creating cards will be fun with kids and creative too. Use different color combinations of washi tapes for the Easter Eggs, bunnies and more. You can embellish your cards further with glitter, ribbons, buttons etc to make it eye-catching.
Cards can be as simple or as intricate as you like, it’s easy to make a pretty card using washi tapes and most importantly it will be a unique and personal card for your Mum.
If you don’t want to make a card you can make banners or cute postcards for the wedding day. Adorable thank you cards or invitation cards which are handmade hold a special touch. Try making one today!
Washi tape (masking tape) comes in a ton of colors and patterns. We did this for a Halloween party, but keep these tips and tricks in mind for birthday parties and other events.
These little Halloween treat bags are perfect for cookies or candy, and make a sweet presentation for gift giving.
This Fall if you are looking for a quick and easy to make pumpkin decoration with no carving, try the printed washi tapes to decorate them. With the endless patterns and colors of Washi tape there are a million combinations possible.
Making cute handmade bracelets with red washi tape for your loved one is a great idea to explore.
Learn how to make cute matchbox valentine gift with duck tape. They are creative Valentine’s Day craft idea and can be accessorized in numerous ways!
Decorate your house all red this Valentine’s to celebrate love. All you need is some votive jars or mason jars and embellish them with washi tape and beads. Place a tea light in it and enjoy a romantic ambiance.
Making your Christmas tree decorations not only adds a personalized touch but it’s easy on the pocket too!
Easy to complete, this Washi Tape Clothespin Card Holder Wreath Décor Idea is a great way of sprucing up your space for the holiday season.
Enjoy your affordable yet beautiful washi tape ornaments to embellish your Christmas trees. Use red and white, polka dots, green, striped and a host of other tape prints to make them.

Felt ball rug, also called mats or mini-carpets are the special type of rugs in which felt balls of same (or different) sizes and colors are stitched together to prepare a warm and cozy rug. Felt rugs add a colorful and quirky touch to any room, and their cushy and soft texture makes them a treat to walk or sit on.
You need some simple supplies to make your own felt ball rugs. Felt balls of required sizes and colors (ranging from 5 mm to 50 mm), strong thread and needle (easy stuff, isn’t it?). You can make your own woolen felt balls or buy them online.
Try making this wonderful round shaped rug pattern using homemade felt balls. You can make the felt balls as shown in the tutorial or get them from the market and sew them together. Sewing them won’t take much time.
You can use shades of pink felt balls if or blue depending on what color you prefer for your babies’ nursery.
The given link of tutorial would assist you in choosing a suitable color scheme for your rug which will match your decor.
Using different colored felt balls is a great idea to make a floor rug/carpet which matches the color of your decor. You can place this in the corner of the room. The shape makes it different from the regular round rugs!
The tutorial uses colorful pom-pom balls to make this simple rug. You can replace them with felt balls and stick them together if you don’t want to go through the stitching hassle. A colorful handmade addition to your home decor, which is cheap and affordable too.
Creating felt wool balls on your own isn’t difficult. You can make them by following the tutorial and assemble them with basic sewing skills to make your own rag for a living room or kid’s room. Try to explore different patterns with interesting designs.
Following the given instructions you can make a rug using felt balls as pretty as the one shown in the picture below.
An easy to follow tutorial explaining how to make felt ball rugs. You can translate this into English if you like the pattern.
Make amazing crafts with felt balls and try exploring new creative ideas! Try and maintain the felt rug properly at all times to keep away dirt and dust.
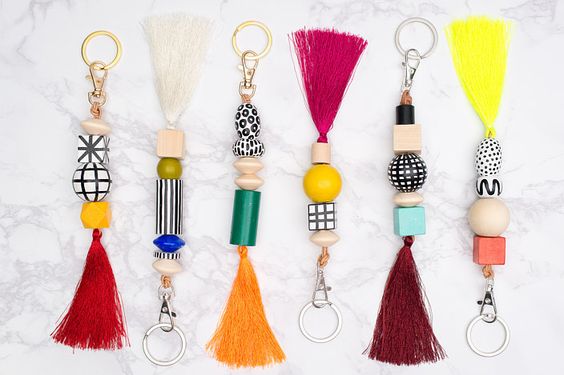
If you like creating accessories and keychains then try beading stylish designs. You can bead keychains in different ways, varying from Perler beads, gumball beads, seed beads, Hama beads etc. The DIYs listed below have used a variety of beads such as clay, plastic, seed, wood, metal etc. Go through the various DIYs and Tutorials with detailed step-by-step instructions showing you how to make beaded keychains.
You May Also Like ~ “DIY Cute Keychain Ideas“
Use a mix of different shaped beads and make this quirky design. They have used both wooden and plastic ones to give it a colorful element.
Make these cute keychains with colored beads and animal charms. A great kids friendly DIY. You can easily use them backpack zipper charms. Just follow the step-by-step instructions to make these adorable key rings. You can use them as party favors too.
This is an easy-peasy project, easy enough for kids for sure. You’ll just want to make sure you have some gloves handy. I think it would be extra fun with a few ink colors to see how they blend, but I only had the one on hand
The linked video tutorial shows how to use crafting acrylic gumball beads to make funky key chain fobs. Supplies needed include: 4-6 chunky beads, spacer beads, wire guards, wire, crimp tubes, pliers, 6mm split rings. You can customize it with monograms or alphabets.
This is an inexpensive and easy project for kids (or adults) and would even be a fun birthday party activity. Just get some letter beads and make personalized keychains of your choice.
A fun craft for kiddos this summer holidays. They have used colorful pony beads to make the pattern. You can try making other animal figures too and explore your creativity.
You May Also Like ~ “Paracord Keychain Ideas“
Get ready for kickoff with this fun pony bead project! You can design and use colors of your football to match your team. Boys will love to use this cool football keychain.
Making this minimalistic yet classy keychain with leather lace and wooden beads is simple. Just follow the easy knots technique and your key chain is ready.
Bright nylon threads and alphabet acrylic beads are all you need to make this meaningful gift for your loved ones. You can make a pair of this to gift it to couples.
There are two-inch nail fashioned into a cross with wire and adorned with beads. You can use beads of your choice, but colored jeweled ones look so amazing! Tie a ring or carabiner at the top to make the keychain!
Made with cute pearl beads, this keychain can be used as hanging ornaments or zipper pulls too. Hope you could get some inspiration from it and enjoy the making process!
Use neon colored strings to make it vibrant. You can add tassels, small pom poms and other charms to make it innovative.
Learn how to make a heart keychain with pony beads using the peyote stitch technique! An ideal gift for Valentine’s day.
You can make similar patterns for beaded alligator or crocodile keychain.
I loved these gratitude charm beaded keychain designs. The linked tutorial has made key chains with positivity charms as a reminder that when we leave home with our keys, we take the attitude of gratitude along with us.
Stringing wooden beads onto leather cords can be a fun crafty idea to make keyrings. The linked tutorial also shows how to color wooden beads of different shapes. Just follow the simple instructions and you’re done!
These easy picture bead rainbow and unicorn keyrings are a trendy update for your keys. You can follow the pattern attached or make up your own design or even your initials. Free pattern in the linked tutorial.
Similarly using these beads you can make other animals if you want like an elephant, horse or a hippo.
Learn how to create a very stylish and chic keychain and bracelet in less than 5 minutes.
Use innovative keychains using colorful beads and macrame knotting techniques. The pretty flower design in green looks adorable.
Learn how to make beautiful soy wax candles and illuminate your home with nice smelling candles all over. This candle making project calls for some ingredients like natural soy wax flakes, cotton wicks, some scented fragrance oil, and a recycled glass container of your choice.
Soy candles have some great advantages as they burn longer and cleaner than regular paraffin candles. Soy candles does not emit carbon dioxide into the air which is eco-friendly and beneficial overall. There are very basic supplies needed to make your own soy wax candles at home. The following DIY tutorials give you an idea of using natural soy wax to make beautiful candles yourself.
Add charm to your home decor with DIY Candle projects. You can turn simple mason jars into beautiful scented candles and put them in your rooms.
You May Also Like ~ “DIY Mason Jar Candles & Candle Holders“
Celebrate light and coming of spring with handmade candles made from soy wax. An easy to make craft ideas for kids too. Flowers and candles always enhance the ambiance and add an element of calmness!
You can use small tea cups or coffee mugs as containers to make these candles. They make great gifts and are pretty easy to make! You can add essential oils or color to add a soothing element to the candles.
You May Also Like ~ “DIY Seashell Candles & Candle Holders“
The recipe for the making the citronella soy wax candles is very simple. The fragrance helps to keep mosquitoes and bay and you can enjoy your time nicely in your backyard. You can recycle small planters, cups or glass jars as the containers for the soy candles.
Lighten up your home with these beautiful homemade soy candles. They make wedding favors, you could also use for gifts for special occasions like birthdays or Mother’s Day. Once the candles are made you can add embellishments and give it a unique packaging style.
If you have spare teacups at home use them to make beautiful soy candles for those winter seasons!
Easily make your own homemade soy candles using just 2 simple ingredients – soy wax flakes and the essential oil of your choice. Enjoy 50% longer burning with soy candles and fewer toxins in the air.
If you’re looking for an easy last minute gift these pine scented, striped soy candles are such a lovely way to spread a little Christmas cheer!
Try interesting ways to display your handmade candles and give your decor a facelift. Follow the tutorial below to make amazing designs!
Learn how to make soy wax candles quickly using plastic tealight cups. You can use them as floating candles too!
There’s something about candles floating on the water that gives off a peaceful and even romantic feeling. They make great centerpieces as enhance your room decor!
Follow the step by step tutorial on how to make some soy candles of your very own!
You can use crayons of your choice to add color to the soy wax. A great blend of colorful scented candles will deck your living room and add some romantic vibes.
Soy wax candles are a greener alternative to paraffin wax, being less toxic and safer for the environment also.
Decorate and light your home with the warm glow of candles this Easter. These agg shaped candles are a treat to the eyes and are super easy to make!
You can also try making these pumpkin spice candles from soy wax flakes. Kids will love to decorate their house with these candles burning around.
Why buy expensive candles when you can make customized ones yourself. Make these candles in bulk for Christmas and gift it to your near and dear ones!
These beautiful candles look and smell divine, but by doing them yourself, you won’t have to splurge on those fancy candles. Click the linked tutorial to get the complete candle making guide!
Here’s great way and tips on how to make soy candles with essential oils or perfume fragrance.
Once you have melted the soy wax flakes add some essential oil drops of your choice and fill small glass bottles/jars to make amazing candles. You can use flavor of your choice for the scented candles be it peppermint, lavender, vanilla or citronella.
Light your candle on a chilly fall night and remember those farmer’s market flowers that brightened so many summer days.
Aromatic candles are pretty accents that amplify the charm of your home.
Though these candles look like traditional candles, they’re actually a solid body oil blended with essential oils. Once lit, the oils melt at a warm temperature that can be poured directly into your hand and massaged into the skin.
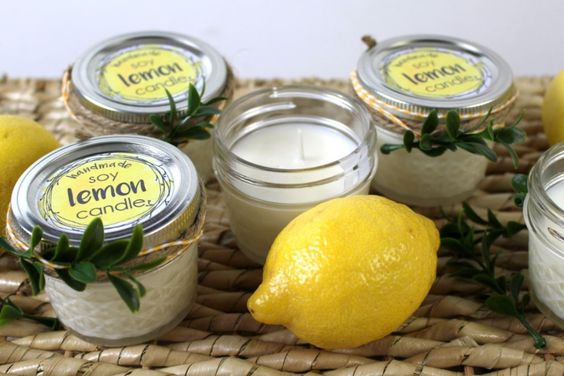
Make these lemon-scented soy candles in less than 30 minutes. They are cleaner and great alternative to paraffin wax for a cleaner and eco-friendly light.
Recycle and transform wine bottles into handmade candles made from soy wax and essential oils for fragrance. These make fabulous Christmas decorations and gifts. They have used wooden wicks and soy wax flakes to make this one!
Learn how to make citrus and spice scented candles using cinnamon sticks, clove bud, cardamom essential oils and and some soy wax chips.
You can place these beautiful candles in your bedroom for a romantic lit-up night.
Add a decorative twist to the surroundings with these pretty soy candles.
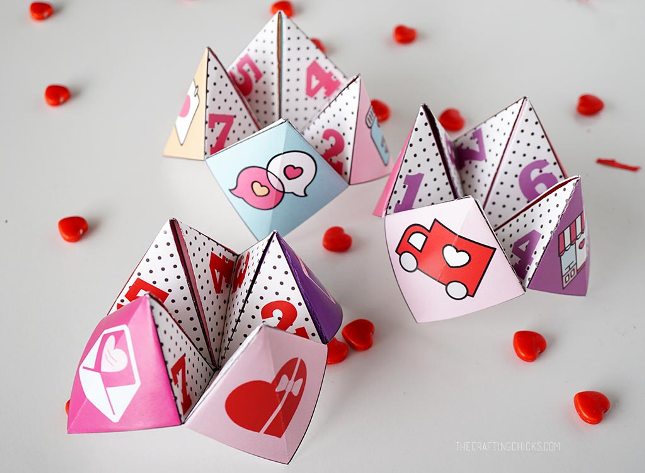
Cootie catchers a.k.a fortune tellers, chancers, chatterboxes, scrunchies, call them with any names. The little paper toys are easy to make and fun to play with. You can make them quite easily yourself, but if you want lots for a party, wedding, hen night, birthday or slumber party, it’s great to be able to print your own. We have compiled the best cootie catcher designs and ideas for various occasions with the free template and PDF patterns available for many.
If you grew up in the 90’s, then you’ll probably remember making these origami cootie catchers or “fortune tellers” at school! These creative cootie catcher projects are great for kids and grownups alike!
Read the full tutorial for this paper fortune teller game here.
For those of you who like the idea, this tutorial is designed for summer fortune tellers to print out. Patterns and numbers are included. All you need to do is print, fold and fill them with activities.
Get the Full Instructions & Free Printable Here
For all Potterheads, this is going to be fun. Put the Harry Potter characters of your choice and have a great Halloween! This fortune teller will decide which Hogwarts house you should belong to!
Get the full tutorial and template here!
Personalize your fortune cootie catcher and play with friends and family with interesting text in it.
Get the full tutorial and free template here.
Instructions and Free Templates here.
This super cute lion design for kids is taken from a tutorial on Moodkids.nl
This wonderful easy paper game idea for kids. You can find full instructions in this tutorial here at thecountrychiccottage. Print a few of these designs and include them in your kid’s table during Thanksgiving dinner. A fun way to keep the kids occupied while the adults talk.
You can download free pdf template to make this pattern here.
Want to make a non-sugary treat for kids? You can make these Halloween Cootie Catchers and use them as a party activity or fun game or even pass them out at Halloween.
For full instructions visit this tutorial on lililuna.
Get Free Printable for this pattern here.
Learn how to assemble these cool cootie catchers for Christmas this year. Kids will love these cute characters like Rudolph and Santa as Fortune Tellers. A fun 5-minute craft for kids this holiday.
Get the complete tutorial with instructions here at Redtedart
Create this eye-catching fortune teller for your kids this Easter. Handmade crafting ideas is always special for kids.
Get the full tutorial on EasyPeasyandFun
Paper cootie catchers are an interesting holiday treat for kids that won’t clutter your home and can be completed in just a few minutes.
Get this tutorial with folding techniques here on Brendid.Com blog.
Grab the free printable for a fun April Fool’s prank with these cute cootie catchers.
Get this tutorial with folding techniques here on Brendid.Com blog.
You can get free printable and instructions to guide to and kids to make fabulous cootie catcher designs. Vibrant and colorful and make great party favors too.
Get this colorful cootie catcher here on Tangarang.blogspot.com
This amazing fortune teller can be made by adults with messages and jokes on Valentine’s Day. A great crating idea to re-visit old days.
Get detailed instructions for this DIY here on Thecraftingchicks.com
These DIY Fortune Teller Invitations are the perfect way to invite your friends to a dinner party or birthday.
You can get the step-by-step instructions here on Fun365
Have a look at this elegant cootie catcher wedding DIY Idea on Ohlovelyday.com
Make this cute fortune teller with colorful paper and make fun games for the New Year.
Get the full tutorial from this site.
Get the Instructables and Free Templates Here
Get the full step-by-step tutorial on Vintage Toys Blog!
Get the Video Tutorial Here!
We hope you enjoy these fun cootie catcher crafts ideas with kids and have fun making interesting designs and patterns. Please share your creations in the comment section below.
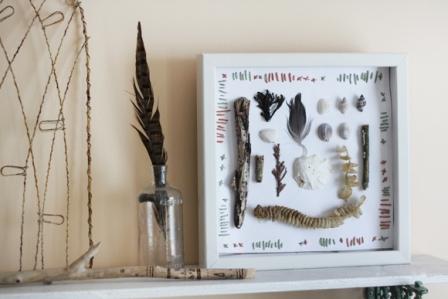
Summers are back and time to make some seashell crafts and create mementos of your beach treasures. make adorably classic and chic DIY Seashell Shadow Box in a matter of minutes. Seashell Shadow Boxes are easy to make and is a great nature craft and shell craft for children as well as adults, especially in summers.
Get some beachy inspiration and use your seashells to make beautiful shadow boxes. They are easy to make and affordable too. You can get cheap shadow box frames at a local store and arrange your seashells in it. As they say, every seashell has a story, so this will be the perfect keepsake of your coastal memories.
The edges of the frames have a rustic driftwood appearance. You can add shells, rock stones, pebbles, starfish and more to give it a pretty look. A super treat for all of you seashell and nautical lovers!
A very neat craft idea to display your cherished coastal possessions. This makes an ideal gift item for your friends and family. You can place this on your tables or hang it around your room.
The linked article showcases a breathtaking array of seashell art on a shadow box. You can personalize it by placing a photo or other keepsake inside it. The seashell decorations around the box are very creative and unique.
If you have a collection of different shapes and types of shells like the conch shells, then you can make this creative shadow box and keep your beach memories last forever. This will look stunning when mounted on a wall and will add an antique touch to your home decor. You can make a different design too depending on your creativity.
A beautiful handmade shadowbox made with a star-shaped cookie cutter and shells. You can buy shells from your local store or online if you don’t have much to fill the mold. The blue stripes add to the beachy theme and give it a vibrant finesse!
This unique framed seashell shadow box in white is a vintage wall art which provides a nautical flair with a twist. You can use pieces of driftwood, shells, features, pebbles and other coastal collections to decorate it.
A great DIY souvenir idea for travelers and beach lovers. Add your favorite pictures in the frame and fill it half with sand and add some shells to it. Hang it on the wall and relive the amazing moments.
Wondering how to freeze your favorite beach memories? Make this picture frame shadow box and display the shells and sand in it to give it the perfect coastal finesse.
Seashell tables are a great way to display all those amazing handpicked shells you’ve collected in your travels.
Did you like the designs of the shadow boxes? Get creative and try making one for yourself and share your projects with us!
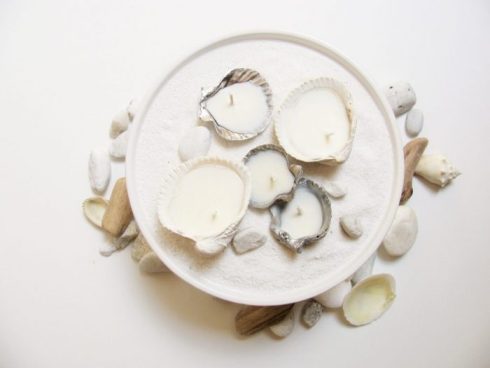
I’m sure we all have collected seashells from our beach trips and cherishes them. Seashells of different shapes and sizes. We had shown how to make cool bracelets with seashells in our posts. But did you know you can turn them into beautiful seashell candles or can be made into adorned candle holders?
These candles are perfect for dressing up a table arrangement or even accessorizing a bathroom. When they’ve burnt out just remove the old wick and refill them again. You can use scallop shells, oyster ones or conch shells of pearl or round shapes. Scroll down for some interesting and unique seashell candles designs with step-by-step instructions in the tutorial.
A great summer craft idea for all candle lovers. You can use bivalve shells as used in this tutorial to make these candles using beeswax. A set of candles can be made of different shapes and sizes. They make great centerpieces and will be great to gift as favors too.
Made from natural seashells, the aesthetic flair of the handmade candles gives the room a rustic touch and an ambiance for an impromptu beach party. This DIY tutorial is from Sheknows.Com and is great to see how to make your own decorative candles from seashells.
If you live near the beach then I’m sure you will love this craft idea. This tutorial uses white seashells and if you don’t have them you can use spray paint as well. The combination of sand and shells goes hand in hand.
When lit these candles look beautiful and adds a modish touch of elegance to your room. Easy to make and affordable craft idea. You can use seashell candles as wedding favors or for a beach theme party decoration.
Adding a little essential oil to the tealight candles added to the seashells will add a wonderful ambiance to your room. You can get creative and make it more decorative. An ideal handmade gift for your mother and loved ones.
If you love to collect big shells then create this centerpiece for a Summer dinner outdoor. The candles can be placed on a tray or a colored dish like this one, together with hydrangea petals and smooth pebbles.
The small shells are embedded and scattered around in the candle to create an instant vignette. The yellow candle tutorial is from runningwithsisters.com
Have you a beach-theme wedding in your mind? Make your own gel candles with shells to make it amazing without going for any extravagant options.
Use your beach treasures, shells and sands to create this visually stunning candle holder and place your shell candles on them. A beautiful way to decorate your house. You can make pairs of such candle holders and use them as unique party favors too!
Here’s another fascinating craft idea for showcasing some beach beauty in your home. First, wash and clean the oyster shells properly and then glue all the shells to form an arc shape and then place the candle in the center.
You can use these homemade shell candles to decorate the base of your candle holders and give your plain, boring pillar candles a jeweled beach look.
Learn to turn your seashells into pretty candles and make your own shell centerpieces.
Learn how to make seashell candles, using seashells, beach sand, starfish and a glue gun. These candles are affordable, quick and easy to make! Great crafting idea for a beach wedding, beach party or as a gift or party favor, to bring the coastal touch to your home or office!
The shiny shells treasured from your vacations can be turned in wonderful candles to decorate your tables.
Don’t you feel the aesthetic appeal of the candles increases manifold when made using conch shells? Try making on today!
You can us glitters inside the melted wax or on the shell to make it a decorative floating candle.
It’s awesome to see them meltdown and expose seashells hidden inside of them.
You may have a bulk of shells with you. You can use them to decorate the candle ring and see how shells and candles decorate your room.
This interesting tutorial is from purpluhuesandme.com, visit site for step-by-step instructions
You can also use glass mason jars to replace these glass bowls. All you need to do is fill the glass with sand and your beach treasures and then place pillar candles or flameless tea lights or led ones inside them.
Spice racks are a great addition to your pantry or kitchen and help you organize your spice jars. However its difficult to find the perfect spice rack matching your container sizes and your requirements. Why buy one if you can get creative and make your own spice rack using wood, wire, magnets and other supplies. Let’s browse the different ways to make stunning spice rack designs yourself which is cheap, affordable and easy to make.
Go creative with a coca cola crate and give a rustic touch to your kitchen decor. A great handmade furniture to stack your spices! You can hang or mount them on your kitchen wall and reach the spices in no time! A vintage and classic wooden spice rack at no cost!
Spice racks can do great wonders to minimize the mess in your kitchen and keep your spices organized in your cabinets. This magnetic spice rack is a cool addition to your furniture and saves your time. Follow the step-by-step instructions and build your own custom rack for spices! Make sure the magnets are strong enough to hold the containers.
An organized kitchen makes cooking a lot more fun. This wall mounted spice rack has a chalkboard attached to it to make it more creative. Label your spices to make it easy for you to locate your spices when you need them.
This spice rack is a creative one, using a frame and some shelves to organize all spices.
You can use the unused gaps in your kitchen and fill it with your sliding homemade spice rack. A great idea to keep your spices and herbs in one place. You can make the shelves and drawers as per the size of your jars.
This is quite a cool spice rack idea made using identical tin containers for spices and heavy duty magnets and velcro. An easy to make DIY craft project.
Wall mounted spice racks are one of the best handmade spice racks. You can mount the spice rack shelves into different tiers as per your requirements. The wooden shelves are durable to hold the number of spice containers and are idle for your large stack of spice jars.
A unique rack organizer for your jars of spices in your pantry using foam and marbles. A quick and easy do it yourself project. This video tutorial shows in details with step-by-step instructions to make this budget-friendly spinning spice rack.
Build your own revolving spice rack and sort your spice jars in one place and easy to reach with the revolving feature.
If you have your spices all over the kitchen then organize them in a handmade spice rack. Easy to make and assemble with some wooden pallets and simple supplies.
Recycle your old wooden pallets and create this simple yet utility oriented spice rack. This design is wall mounted, you can place it on the countertop or corner if you don’t have a wall free for the rack.
A very cool and unique spice rack idea using nails and glass jars. Twine the wire around the bottleneck and hang them on the wall. Instead of white jars, you can pick colorful ones to add some creative element.
Mason jar crafts are in rage these days. Make this cute and small spice rack with some wooden planks and mason jars. You can add holes if you have more jars to accommodate. A great space-saving spice rack idea for a homemade craft.
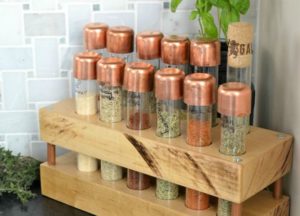
This spice rack made with test tubes and copper lids is a beautiful and rustic addition to your kitchen decor. Making this on your own is a great woodworking project for holidays. Although a little time taking, the end result is surely going to be worth the efforts and the copper lids give it an antique look.
Making a 2 tiered or 3 tiered spice rack can be a great storage idea when you are short of a place in your kitchen. It can accommodate all jars and spices in one place. Once the wooden pallets are assembled you can paint the rack matching to your decor. A great utility furniture to be added to your kitchen.
If you have empty drawers, then making a spice rack in one of them is a great idea. It keeps them in one place and is out of reach of kids. Labeling the spices makes it easier to reach out when you need them.
Falling short of space to manage your spice jars? No worries! Utilize the space under your cabinet and build a cool magnetic spice rack with some simple supplies and jars.
This wooden spice rack is designed to rest on your kitchen countertop. Download the free spice rack plan and follow instructions to make this on your own.
Customize your spice rack as per your needs and jar size and make one for yourself!
Tie-dying techniques has its origin in ancient times. Off-late it has gained immense popularity and is a great summer craft. From tie-dye shirts, bags, shoes and lot more ideas are the new trend. I’m sure you love your pair of Sketchers, Adidas, Converse or Vans.
Maybe they are old and worn out but it’s difficult to part with them. So why not give them a cool makeover using different tie-dye techniques. A splash of various hues on your old pair will give them a new look. You can use various ways to tie dye shoes – you can use fabric dye, food-coloring, bleach, markers, sharpies and more to dye your shoes. Explore the array of ideas for this summer project and make your own stunning shoes!
Give your boring white tennis shoes a new vibrant look and tie-dye them in shades of your choice! It’s a quick craft to do with kids too.
Wondering how to tie-dye watermelon shoes? A unique idea to turn your pair of canvas or keds into sassy footwear. Follow the step-by-step instructions to make your own dyed shoes!
An amazing tutorial to dye your white canvas athletic shoes and give it a cute and funky makeover. A great style statement for this summer look. DIY today!
Turn your favorite Nike Sneakers into a colorful one with fascinating shades of tie-dye colors.
Tie and dye on shoes is a great fun craft for kids. They love to mess around and get creative with colors. This ombre pattern makes a great fashion statement. A simple design that can be worn by men, women, and kids. All you need is your white canvas and tie-n-dye kit to get going!
This cool blue ombre pattern is a great one for summer days! A quick 20-minute craft with simple supplies. The color combination of contrast laces is stylish.
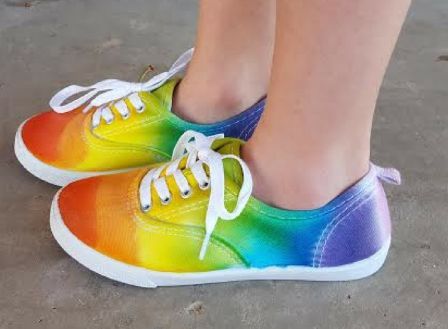
Splash some colors this summer on your old white shoes and make it trendy. A rainbow pattern with all colors looks funky and adds a bright element to the footwear.
This stunning design in purple is surely going to get you lots of compliments. Girls wear your art and make amazing designs for your shoes. You can use your skating or basketball shoes which have gone for a toss and give them a pretty makeover!
This dye pattern is called Ikkat. A magnificent design to add to your pair of tennis shoes!
These high top converse shoes look great with denim and skirts. You can dye them in 2 different shades to make it trendy.
Pair this homemade tie and dyed shoes with your denim or white pants and sport a cool look for summers.
A freaking awesome tie-dye project for craft lovers. You can have a fun crafty time with family and friends and recycle your old shoes and design them new!
This YouTube Video tutorial shows the steps how to dye your own white Converse Chuck Taylors.
An amazing technique using shaving cream, baking soda, and food coloring to turn your bland plain white shoes into abstract art. Follow the video tutorial and make this easy DIY today!
Once you have made your design with the markers on your canvas, you need to rub alcohol on them so that the color blends and gives the desired look.
These homemade dyed shoes are a perfect match with your uber-cool white trousers or denim this summer.
Re-purposing your old, unused stuff is a creative way to protect our planet, and create a fun and fairly inexpensive project with your kids. Making Milk Jug Bird Feeder is a great craft idea for this holidays! Birds will flock to your yard when they find this bird feeder full of yummy seeds and cheerios. Time to make interesting bird treat house with these easy tutorials with step-by-step instructions.
Making your own bird feeders is an easy and fun craft for adults and kids as well. Kid’s will love to see the birds sit and chirp in their backyard. Re-purposing unused milk jugs can be interesting and unique DIY Ideas for holidays!
With the onset of summers lets your backyard buzz with birds chirping. Recycling old milk jugs (Gallon Jugs) and turning them into bird feeders is a great idea! It’s simple to make and interesting for all bird lovers! Hang them around your garden and enjoy bird watching!
Hanging bird feeders made from old milk jugs in your garden or yard can be a fun craft to teach your kids to go green and importance of re-purposing old stuff. You can decorate them as you like.
Using a masking tape will smoothen the edges and also give the bird feeder a bright look. Use a twine or a strong rope to hang it to a tree. Follow the tutorial and get detailed directions to make this amazing craft!
All you need to do is, cut out a large hole in your old milk jug and hang it around for your feathered friends. A super easy craft idea to feed birds during winters when finding food for them is a daunting task.
If you are running out of ideas how to use your stacked milk jugs, time to create some recycled crafts. Kill your boredom with some useful craft making your own bird feeders with simple instructions.
Make this easy plastic bird feeders from milk jugs and paint them beautifully to give it a creative touch. You can decorate it with sticking twigs or small sticks for a rustic touch. The bright colored bird feeder will attract birds easily.
Make a wonderful treat-house for your birdie friends this summer! A simple to make crafting idea for kids and family. Adding a twig or stick at the bottom will make it easy for the birds to sit on it and eat!
Recycled birdhouses make great crafts to overcome your boredom. Try making this unique and creative design to make it look interesting and enjoy your bird watching.
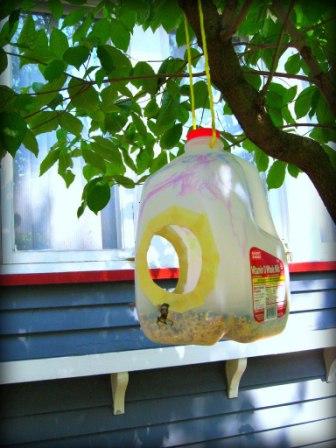
Take a craft knife and cut out two neat circles on the opposite walls of the milk jug. Use a hanger to hang it outside your window or outdoors on the porch.
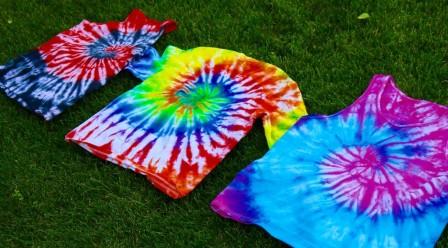
Tie-Dye is one of the most popular and fun ways to re-create a plain t-shirt. When you tie-dye fabrics, you become your own designer by making an original piece of art. Let’s jazz up a plain t-shirt and create super cool patterns. In this post browse through the different techniques and process of making tie-dye shirts pattern with tutorials to guide you!
While there are no fixed rules for tye dying, you can follow these tips and tricks to make amazing designs. The folding, scrunching with rubber bands is a very important step for creating fine patterns. The tighter the rubber bands the better the results will be because the folds will resist the color from reaching those places. If you wish to create smaller patterns, keep the folds narrow and for larger designs keep wider folds on the fabric.
Become a walking piece of art with this homemade summer project. A cool experiment with colors can turn your old tops, shirts, and tees in new stylish outfits.
Create your own funky tie-dye t-shirts for the summers. Its a fun and easy to make summer project. You can make interesting patterns using different colors!
Camo shirt is one of the top preferences for men. A peace symbol will look great for casual wear!
Shibori is the traditional tie-dying technique of the Japanese. The indigo blue and white is an all-time favorite. Though there are various patterns you can try with tye-dying, but this age-old technique gives a unique look which is evergreen.
Try making stylish diagonal striped tie-dye pattern that sports some eye-catching results! A fun summer project for everyone.
Go designer this summer with designing your old tee with cool tie-dye patterns. Re-purpose your old tops and use the traditional tie-dye techniques for an amazing new design.
There are many ways to make spirals on t-shirts with the tie dye method. This tutorial shows the step-by-step techniques to make this super cool design. The various colors used make it look vibrant and is the best wear for summers.
Make a set of adorable cute American Flag designs on your shirts and dresses and sport a colorful look.
Learn different folding techniques to tie-n-dye this star pattern on your white based shirts!
With summers approaching get inspired to make this amazing reverse tie-dye technique using bleach on a black shirt.
Amanda has been tie dying for years and has learned all the best ways to create vibrant, beautiful shirts and shows you different ways to do the same!
This fall make this super cool tie-dyed shirt with a skull print for the upcoming Halloween!
Dress to impress with this urban chic summer outfit which is fringed and fabulous!
You can die cotton fabric and shirts with food coloring as well. While the results won’t be as bright and vibrant as a clothing dye, but the project is still fun and a great introduction to tie dye patterns.
The design is a little complicated and this tutorial is apt for advanced dyers which explains the process on how to tie dye a Grateful Dead Stealie on a tee.
Sharpie tie dye projects are very amazing and quick to create tye die effects on the cotton fabric.
Turn your ordinary white tees into wonderful mickey mouse designer shirts! A great fun project to make for your full friend’s group and create outstanding eye-catching outfits.
The spiral or the pinwheel is the most famous designs used for tie-dying shirts.
In this Youtube video tutorial the how to tie-dye process to make a mandala or star/ lotus blossom pattern is explained with directions!
Splash some colors to your shirts and go trendy this season. You can easily turn your old or worn out shirt a new look with this handcrafted white pattern.
Make these fashionable sleeveless Captain America’s printed shirt to enjoy the outings to beaches this summers. Kids and adults whose favorite superhero is Captain America will love this for sure!
Make the perfect “V” pattern on your shirt and make fancy designs yourself this summer.
Add a splash of colors to your worn white t-shirt and give it a new look with this simple technique. In the tutorial, they tried some interesting ideas with salt to give it a creative look. Pair this casual top with denim and skirt to go cool this summer!
A blend of pastel shades with deep colors on a sleeveless shirt will look amazing on a summer afternoon. The folding and bundling of the fabric is quite an integral part of the project as it makes the patterns more precise.
Learn how to tie the fan fold to dye your shirts to give them a bright makeover!
From toddlers’ onesie to plus size and oversized ones, time to tie and dye all sizes and make amazing self-designed-shirts for the whole family with the heart-shaped effect. It looks adorable when everyone is wearing customized theme outfits.
This method of tie-dyeing enables you to use various dye colors and apply them precisely where you want them to be.
People often have a question, can you tie-dye colored shirts? Or can you tie-n-dye a grey shirt? Then the answer is Yes. All you need to do is replace the color with bleach. The bleach doesn’t immediately turn the fabric white. The longer you leave it on, the lighter the sections become. So you need to tie and fold the shirt meticulously to make sure the bleach doesn’t bleed beyond the places you want it.
The snowman design is always a popular one amongst kids and adults. Make a unique handmade tshirt pattern this holiday season for your children.
This cool print gives you ample scope to experiment with different shades and hues. You can add colors of your choice matching or in contrast with the base color of the tee.
The heart design is one of the most popular for tie-dye shirt patterns. Go patriotic with the blue, white and red color combination!
A new trend and way to tie-dye fabrics is by using ice. Experiment with new techniques and turn simple tees in fashionable ones!

Looking for unique and romantic Valentines gift ideas? Make an amazing Valentine Candy Bouquet, a perfect token of love for your significant other. Indulge your creativity to let him/her know how much he means to you. They are easy to create and very inexpensive, making this a good gift on Valentine’s Day to give their family and friends! Browse interesting ways of making an awesome Valentine Candy Bouquet with creative and unique ideas!
Say “I love you” in a unique and meaningful way by crafting your own bouquet of candies and chocolates. You can do this easy project quickly in no time!
Show your love to your loved one, with a handmade edible bouquet made from candies! You can explore and add interesting add-ons to be more creative. Insert pieces of candies and chocolate bar in the back of the centerpiece. The candy bouquet should look cute from all sides!
Why buy a gift when you can make one for your loved one! Handmade gifts are always special! Making a bouquet out of chocolates in a coffee mug, mason jar or a glass vase is a great affordable gifting idea for Valentines! You can add bows, accessories, ribbons, and embellishments to decorate it!
If your boyfriend or spouse has a sweet tooth, time to load your bouquet with candies and bars! A splash of his favorite red and colored candies for the day! It’s a fun craft and easy to make too! Follow the tutorial for step-by-step instructions!
An interesting last minute craft idea, if you skipped taking a gift for your Valentine. All you need is some favorite chocolates, candies and arrange them to make a beautiful and delicious bouquet!
Learn how to make a stunning Valentine present that is affordable and quick to make!
Decorate a bouquet basket with her favorite candies and chocolates for this Valentine’s!
Make this Cool Valentine Bouquet for your loved one and enjoy their excitement. You just need to stuff the bottom of the can with styrofoam and put the sticks in it!
The candy bouquet is such a fun addition to our Valentine’s Day decor. Now the challenge will be to not eat it until Valentine’s Day!

Have you ever wondered what to do with those precious items of clothing that belonged to your loved ones who have passed away? They are beautiful sentiments to keep forever. You can hold on to those memories and turn them into amazing memory bears. Hugging a cute stuffed bear made from loved one’s clothes can be something really special to hold onto. Handmade memory teddy bears make great gifts to friends and family in remembrance of the deceased! Time to create some tangible memory with our memorial teddy bears.
Embrace the love and cherish the memories of a deceased family member or friend and make a nice memorial bear on your own. You can still feel the warmth of your loved one by keeping the bear close to you by using their old denim! A very interesting and unique pattern. Add eyes and nose to this cute little memory sake!
Losing your loved ones and the ones dear to you is heart-breaking. But we can always keep them alive in our memories. Memorial handmade teddy bears is a great craft from people who love sewing. If you miss your grandparents or someone close, you can use their clothing or fabric and sew a cute teddy bear. This will always remind you of them when you cuddle your little gummy bear.
Make cute and adorable stuffed bear from the outfits your baby wore home from the hospital or another piece which is really special to you will be a memory for a lifetime to cherish! You can add accessorize or bows and decorate it.
Here is a simple DIY video tutorial showing how to make your own Teddy Bear and with t-shirts or baby clothes or items that were loved by those passed. Add embellishments, ties, bows of your choice!
Use your grandpa’s piece of shirts or your dad’s or any loved one and make keepsake bears with treasured memories in their remembrance!
Cherish your kid’s childhood memories and repurpose their clothes to make cute lovable memory bears. Follow the step-by-step photo tutorial and create your own Keepsake, Teddy! A fun sewing craft for creative enthusiasts.
All Rights Reserved by (c) Ideas4DIY.com
