Author Archives: Rhea
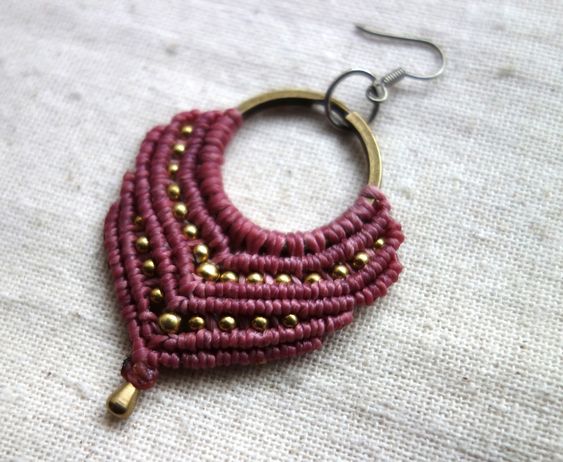
Do you ever get excited by intricately designed macrame jewelry? We love them too and so we have compiled some of the most gorgeous DIY macrame earrings tutorials for you. These complex-looking knots and fringes give a great finesse to the handwoven earrings which are easy to make at home too. Macrame earrings are the perfect ensemble to compliment a Boho-chic look for the summers.
For making macrame jewelry usually micro macramé technique is used. In this project usually, very thin cords are used to create delicate and intricate macrame accessories including bracelets, necklace, and earrings. In the tutorials mentioned below both traditional and micro-macrame techniques are listed.
Things Required for the Project
- Cotton Cord or Hemp Cord
- Jewelry Pliers
- Pins
- Project Board
- Earring Hooks
- Beads (if required)
- Scissors
15 DIYs – How to Make Macramé Earrings
-
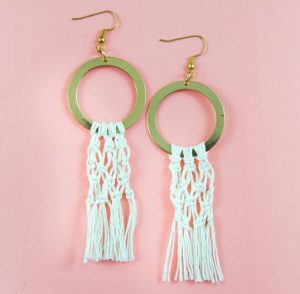
Macrame Earrings Pattern
This elegant design is made using simple square knots and lark’s head knot macrame techniques. The small fringes at the end of the dangler make this handmade trinket an exceptional addition to your outfit.
-
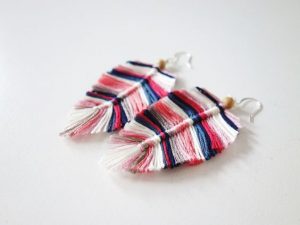
How to Make Macrame Feather Earrings
Feather earrings are one of the most popular accessories for ladies which is always a great add-on in their wardrobe. Try making these earrings in your favorite colors, and you will have a pair of earrings for wearing or gift-giving.
-
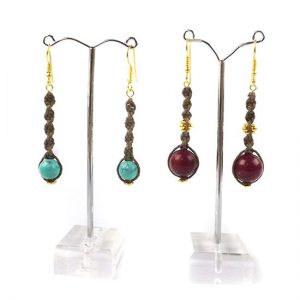
Easy Spiral Macramé Earrings Tutorial
The hanging earring design is made using hemp cord for the traditional jewelry look. Try making this simple yet cool pattern with a colorful bead of your choice. Add some creativity and big sized beads for the perfect tribal look.
-
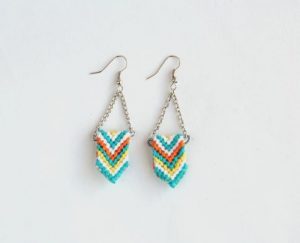
Colorful Macrame Friendship Earrings
This is quite a unique and creative macrame project. A two-in-one versatile DIY where you can easily transform your macrame bracelet into beautiful macrame danglers to adorn your ears. You can easily wear them for a contemporary look.
-
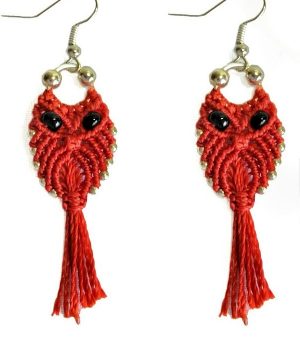
How to Make Macrame Owl Earrings Pattern
-
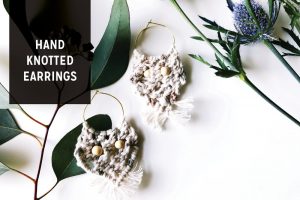
Make Your Own: Hand-Knotted Tassel Earrings
-
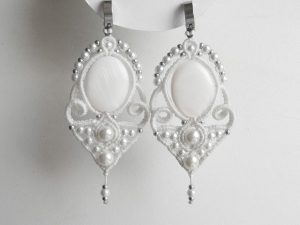
Make Your Own Macrame Wedding Earrings
An elegant piece of art, these ear drops are made using pearls and waxed thread. They will look stunning when paired with a formal gown for a wedding.
-
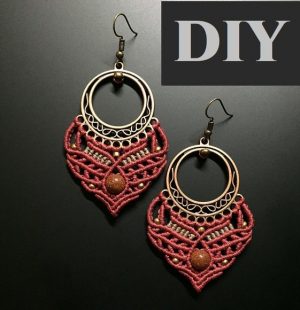
How to Make Earrings using Macrame Knots
These fascinating big hoop earrings are surely gonna make a chic fashion statement.
-
Easy Micro Macrame Earrings Instructions
-
Macrame Earrings – Diagonal Double Half Hitch Knot
-
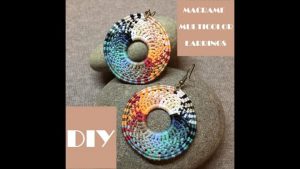
Multicolored Macrame Round Earrings
-
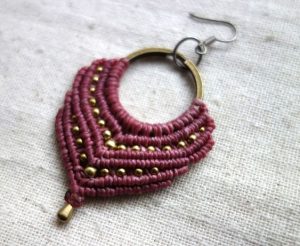
Macrame Gypsy Hoop Earrings Ideas
-
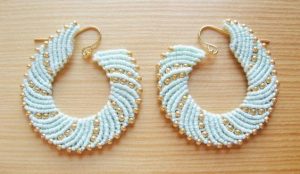
White Macrame Twisted Earrings
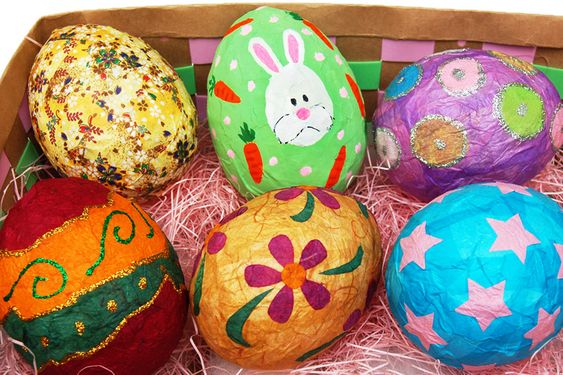
If you’re gearing up for Easter with some handmade stuff then DIY paper mache eggs are fun to make and look lovely placed in your house decor. They easily add a spark of brightness to the mundane decor. So get your kids along and indulge in this crafty affair which is simple to make and fun to design. Today we are discussing some interesting ways to make your own paper-mâché egg for this spring with simple ingredients available at your home.
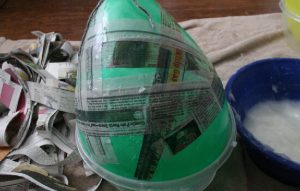
For people who haven’t tried paper mache craft before here are the steps involved in making the perfect recipe for mache eggs.
- Mix some glue and water in a bowl in the ratio of 3:2 and mix them well (For paper mache paste)
- Now, dip the paper cuttings in the glue completely.
- Start with sticking the newspapers strips on your plastic egg or balloon.
- Be sure, you completely cover the egg with the glued paper strips.
- Once dry and hard paint and decorate them.
DIY Paper-Mâché Egg Tutorials with Instructions
1. Paper Mache Easter Eggs
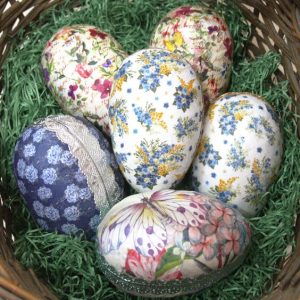
These cute painted paper mache eggs are made with easily available materials such as strips of paper, glue and plastic eggs (as a base) for this project. You can also alternatively use styrofoam as the base. Once the eggs are ready and dried, paint it with interesting patterns.
2. Paper Mache Eggs Made with Confetti
These set of colorful eggs are made from small balloons and filled with treats for little kiddos to go crazy for. And the eggs are decorated with bright confetti and this craft will surely get your children excited.
3. Making Paper Mache Eggs from Cardboard
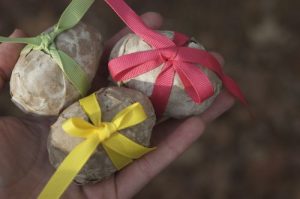
This is quite a simple tutorial which can be made using balloons, plastic eggs of cardboard. Once the paper-mâché is dried on the egg you can paint it or wrap it with paper and ribbons to fill your egg cartons this Easter.
4. Decorated Paper Mache Eggs
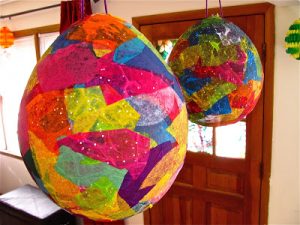
This is quite a colorful design and is quite simple to make with bright and torn tissue papers, glue, water, and some balloons. Try using both smaller and bigger balloons, for the project. As the smaller ones will be ideal to decorate the Easter basket, while the big ones can be your hanging decorations.
5. Paper Mache to Make Giant Easter Eggs
Learn to make Paper Mache Letters – Here
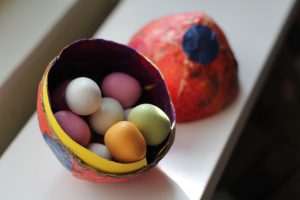
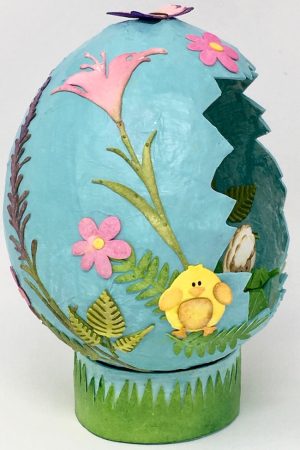
6. Just Hatched Paper Mache Eggs for Easter
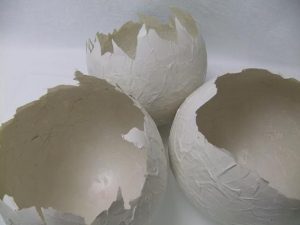
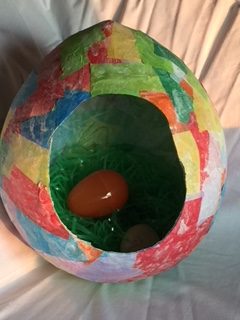
I loved these quirky unfinished eggs designs. You can easily use them as ornaments to decorate your interiors or fill these half-broken eggs with treats for the little ones.
7. Paper Mache Dino Eggs Tutorial
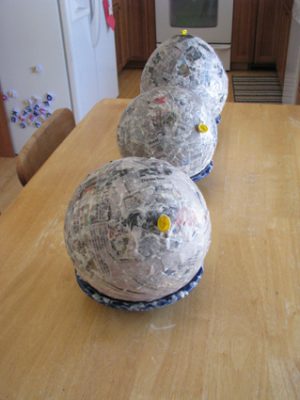
Since these are dinosaur mache eggs in the tutorial, you need to use big balloons for this craft. Kids love playing with Dino eggs and they are fun and messy to make them. The big eggs are placed on a bowl and you may also fill them with small gifts for your child. Once they find these eggs they will be thrilled to get their gifts along with the eggs.
8. Make Edible Paper Mache Eggs this Easter
9. Paper Mache Dragon Egg Craft for Kids
You can make a dinosaur also and place these eggs beside him. A lovely theme for your Halloween parties too.
10. Cute Papier-Mache Easter Eggs
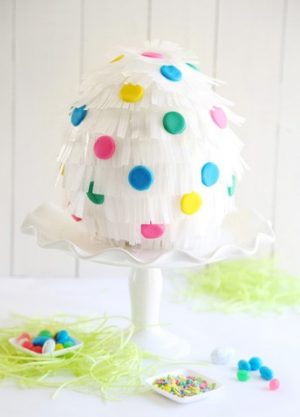
I loved these polka-dotted Easter Eggs. You can create them easily with small water balloons, some tissue paper and fill them with toys and treats and tie interesting messages to the string. Kids will be quite excited to see these and to open them to see their gifts.
11. Paper Mache Egg Boxes
If you want to make paper mache eggs without using balloons, then this the best option. This tutorial uses homemade glue and egg boxes. You can easily store your itty bitty stuff inside it and kids love to play with them.
12. Hand-Painted Paper Mache Eggs
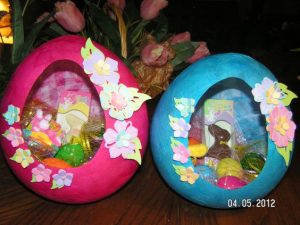
13. Paper Mache Egg Baskets for Easter
14. Adorable Paper Mache Easter Egg Craft
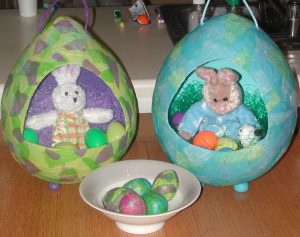
I love the detailing and design done in this tutorial. A perfect Easter Egg Basket to keep your bunnies and treats.
15. DIY Papier Mache Eggs with Tissue Papers
The egg is decorated with tissue papers at the end. You will need the balloon pump to blow those tiny water balloons in this project.
16. How to Make Paper Mache Eggs with Flour
17. Large Paper Mache Eggs
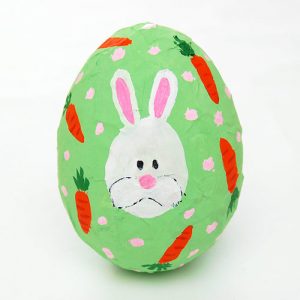
To make painted eggs, use plain white paper to make the topmost layer of your papier mache once the eggs are dry and hard. Paint patterns, textures or some Easter-themed images like bunnies, flowers and carrots and add some glitter to it.
18. Egg Decoration with Paper Mache
Once your eggs are done, you can also use printed antique wrapping papers to wrap the top layer and add a vintage look to your eggs.
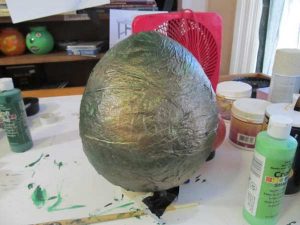
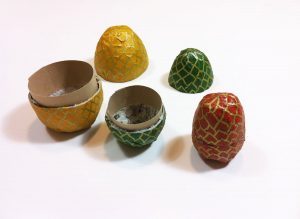
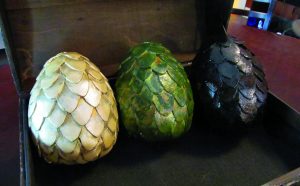
19. Making Game of Throne Eggs with Paper Mache
This is a very interesting one for all Game of Thrones fans. A unique design with a classy touch to put on your tables.
20.Decoupage Papier Mâché Easter Eggs
21. Intersting Designs for Paper Mache Baskets
22. Paper Mache Egg Craft for Kids
With so many designs now you are good to go and make funky paper mache decorations for your home. Attach some strings to your creations and hang them or place them in a basket near your Easter bunnies. Use your creativity to add to the charm to your hanmade decor, and share these ideas with friends and family online.
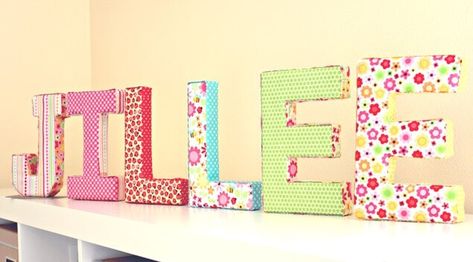
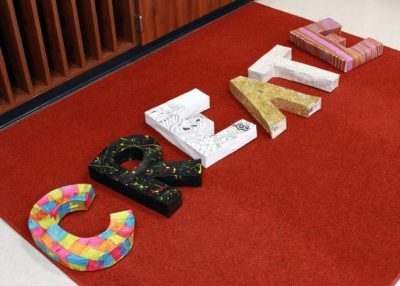
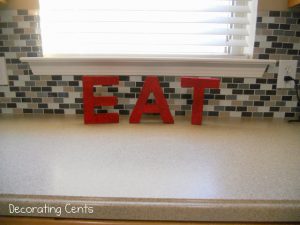
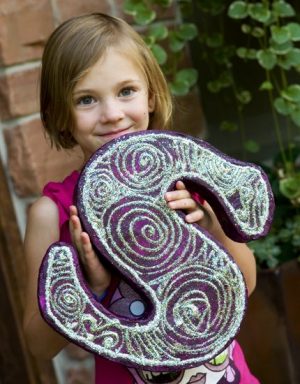
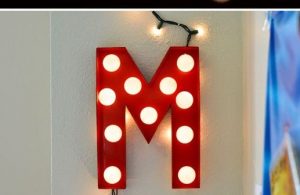
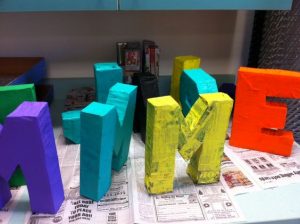
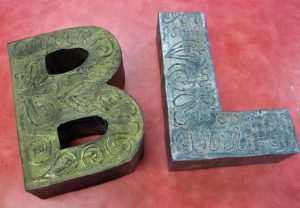
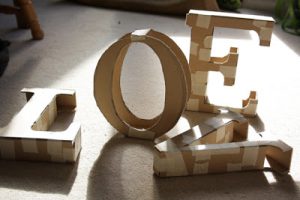
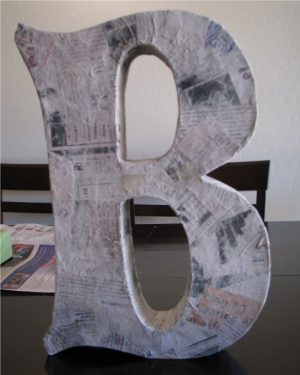
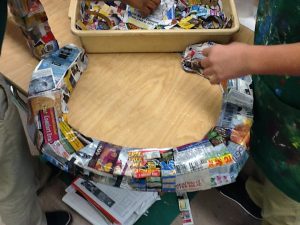
Making paper mache letters is quite simple to make than anyone could have ever thought. The letters are prepared by mixing shreds of old papers in water and glue, is an interesting craft material that can be molded into some outstanding artworks. It also brings out the little creative side to you along with a quick way to impress your beloved in an inexpensive way as well. So if you are wondering how to make paper mache letters then here are 25 incredible ways in which a paper mache letters can be used beautifully, incredibly and innovatively.
Learn How to Make Paper Mache Boxes Here
How to Make DIY Paper Mache Letters Tutorials
1. Small Paper Mache Letters
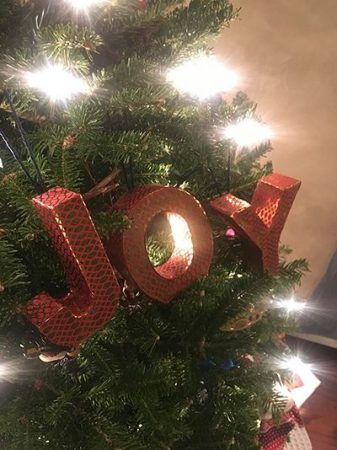
You can use handmade papers to make these small paper mache letters. Also you can opt to create homemade letters to decorate your trees and place them anywhere to add a touch of creativity in the festive season.
2. 3D Giant Paper Mache Letters
Large paper mache letters are a great way to decorate your home parties or gift to any of your favorite people. These mache letters are really easy to be made only using paper, glue, and water and won’t cost you much too.
3. Small Paper Mache Letters
A small to medium-size paper mache word has its own beauty in bringing out a realistic effect n the piece of art. You can easily place this in your kid’s nursery or toy room to add to the brightness of the decor.
3. 24-inch Paper Mache Letters
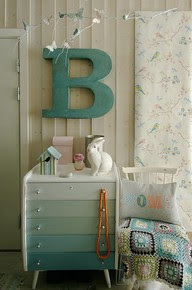
A 24 inch paper mache letter is not a matter of joke and can be used as a wall, door or kitchen hanging. You can easily add colors and glitters to it to make this monogram letter more embellished.
4. 23.5-inch Paper Mache Letters
A 23.5-inch paper mache letter can also be used as a beautiful theme decorative purpose. I loved the black and white effect given to it making it elegant and yet charming.
5. DIY Paper Mache Marquee Letters
This is very simple to make vintage theatre-style marquee lights or even a monogram for a room. Kids love to decorate their rooms with this kind of decor.
6. 8-inch Block Paper Mache Letters
What is the best way to paint paper mache letters? Here this tutorial goes with s small-sized letter is an awesome décor fitting in everywhere in the room.
7. Paper Mache Letter Cut-Out in 12 Inches
Pop up your room with these ideal sizes of paper mache gifts and decors. You can place this letter in your room wall and make a bold statement with this. Easy to make and adds a quirky element to the decor.
8. Paper Mache Letter Cutout
A size that can be hung outdoors or indoors for an inevitable glamor to your room. You can make this with 12-inch or 18-inch variety.
9. DIY Glitter Paper Mache Letters
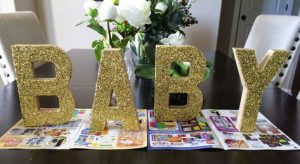
Glitter can add a new oomph to the paper mache letters. These letters can be a really good decoration for parties, baby showers and can be a pop tassel banner.
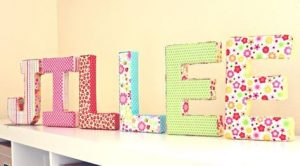
10. Fabric Covered Paper Mache Letters
This tutorial is awesome, where it can be used as a home décor especially by the sofas because anyone can be mistaken by thinking it to be a cushion. Covering paper mache letters with printed fabric is ideal for a girly room decor.
11. Easy Paper Mache Letter Pattern
Place it anywhere to get yourself appreciated by visitors with these beautiful creatives.
12. Decoupage Paper Mache Letters
These are really interesting ideas that can be customized with any occasion possible. And once the letters are ready to paint them with your fav colors.
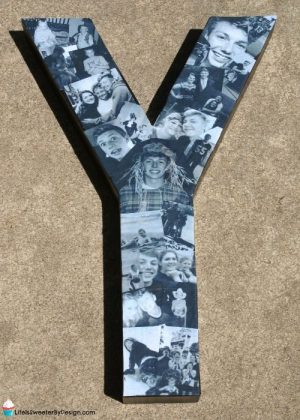
13. Paper Mache Letter Collage
A personalized gift, that can make anyone cherish the happy and golden memories. Personalize it with your favorite photos and make it special.
14. Paper Mache Letters Extra Large
A huge party needs huge decors and what else can be ideal but simple than this?
15. How to Make Paper Mache Letters with Lights
Making paper mache letters with lights is the cheapest thing that one can make to add class and glamour to one’s room.
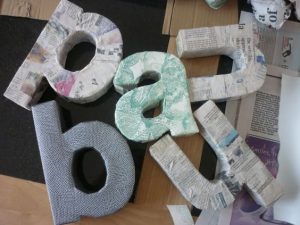
16. Lowercase Paper Mache Letters
Lower case paper mache letters are the easiest type of craft gift that can be made.
17. Paper Mache Monogram Letters
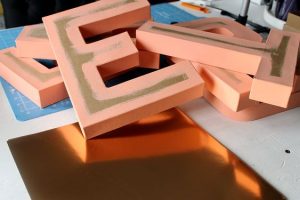
The monogram letters are not only easy but also classy. And you can use your old cheerios boxes to make the base of these alphabets. With the use of golden and silver metallic colors gives it a rustic and elegant look.
18. Paper Mache Letters with Sequin
Some birthday or class party round the corner? Paper mache letters are so flexible to be constructed that even Greek letters are possible to be made. Thus adding a crafty element of sequins makes it beautiful.
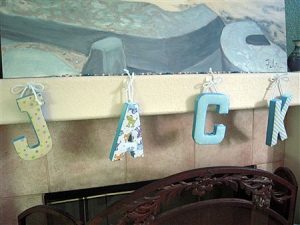
19. How to Hang Paper Mache Letters with Ribbon?
Make your baby shower décor prettier by hanging the baby’s name or initials with ribbons.
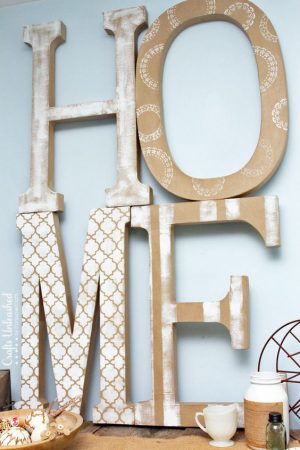
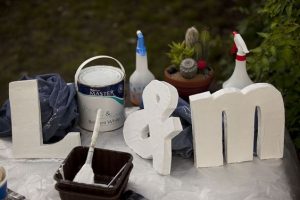
20. Free Standing Paper Mache Letters
A strong paper mache letter would stand steadily in any extreme party condition to maintain the look of your place. You can make this for your wedding decor and give the decorations a special handmade touch.
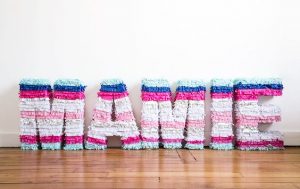
21. Paper Mache Craft Pinata Letters
Impress your teacher with easily crafted letters made by your own choice.
22. Paper Mache Cardboard Letters
Making a paper mache letter strong is very necessary to make it last longer. That is why cardboard letters are a good choice.
23. Large Paper Mache Letters
24. Illuminated Paper Mache Letter Craft
25. Cheap Paper Mache Letters for Kids
Preparing the paper mache with the mod podge can be messy at times, but it’s quite a fun craft, where you can put a lot of your creative instincts to work with.
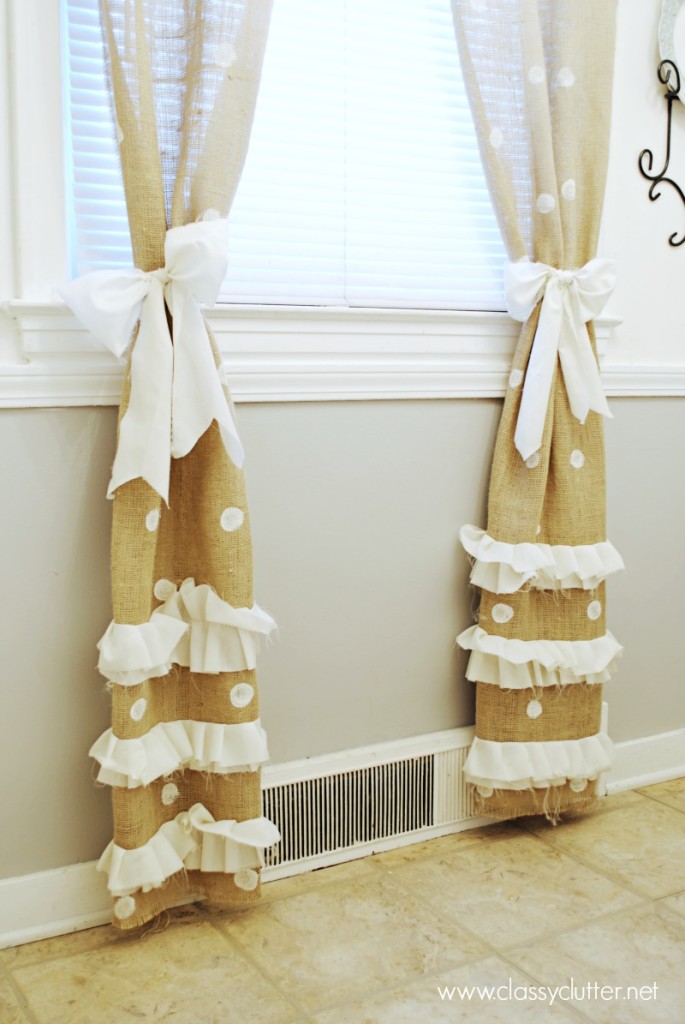
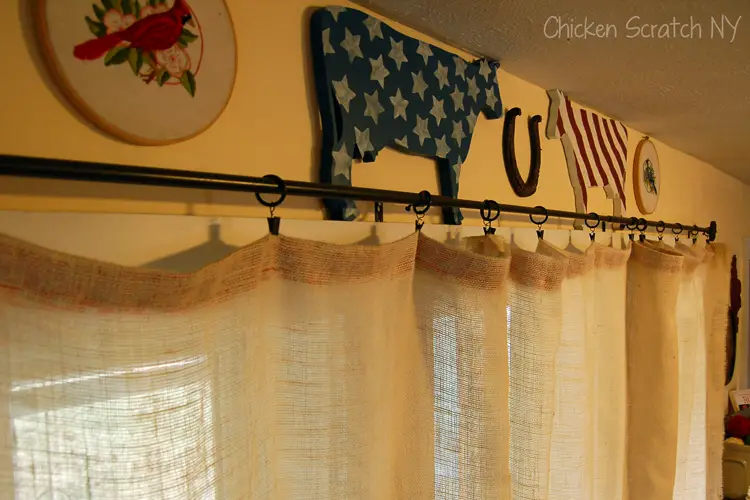
Burlap bags and burlap sacks have become quite popular. These eco-friendly items have made their way to your closet swiftly. They are recyclable and versatile and that is why people are using more and more burlap fabrics to create their own accessories. Bags and sacks have become common now, so why not try something absolutely new and novel? Let’s make burlap curtains. Yes you read it right, burlap curtains! Just when you thought that you have exhausted every kind of use of burlap fabrics, voila, enters the curtains!
Have you every seen the beauty of burlap fabrics? The net-like texture is perfect for curtains as they create a soothing sunlight effect in your room. The earthy, rustic color goes perfectly with your room, and if you dislike the brown color then you can always dye them. You have the liberty to decorate them according to your taste. Want to know, how to make burlap curtains? Search no more, as here is some DIY step by step easy and creative guides to create your own burlap curtains.
Collection of Quick, Simple DIY Burlap Curtain Ideas & Tutorials
1. Burlap Shower Curtain
Ever thought to give your bathroom the much-needed attention? Start by using a burlap shower curtain. These are sure to make your bathroom look fantastic and give your guests something else to look into rather than your medicine cabinet.
2. Lined Burlap Curtains
Lined Burlap curtains will give your room the much needed details. You will be surprised with the result. If you have an abundance of burlap fabrics then go for this option.
3. Burlap Curtain Panels
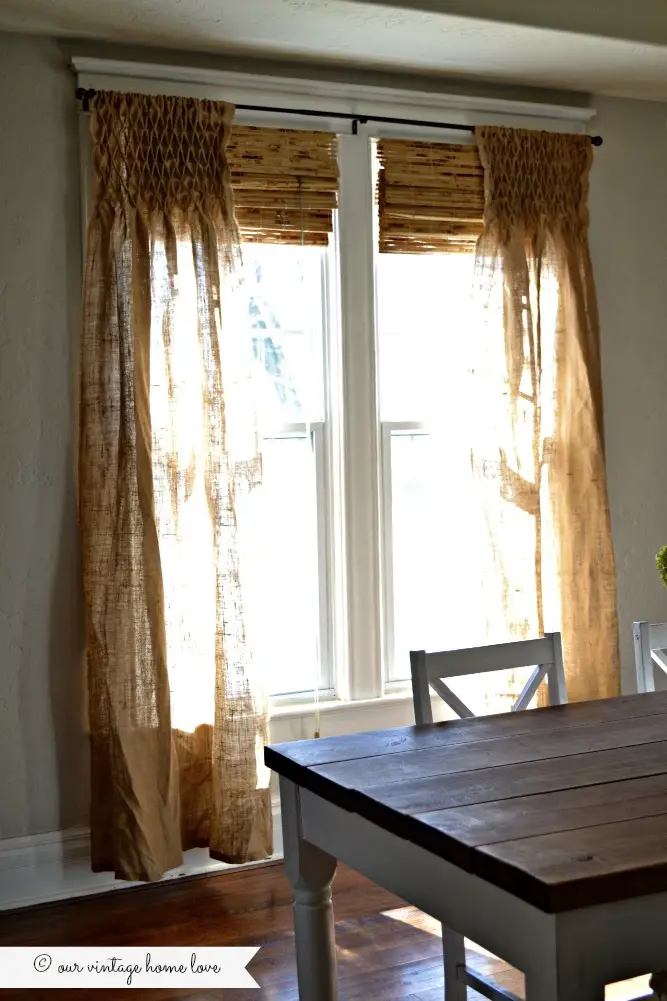
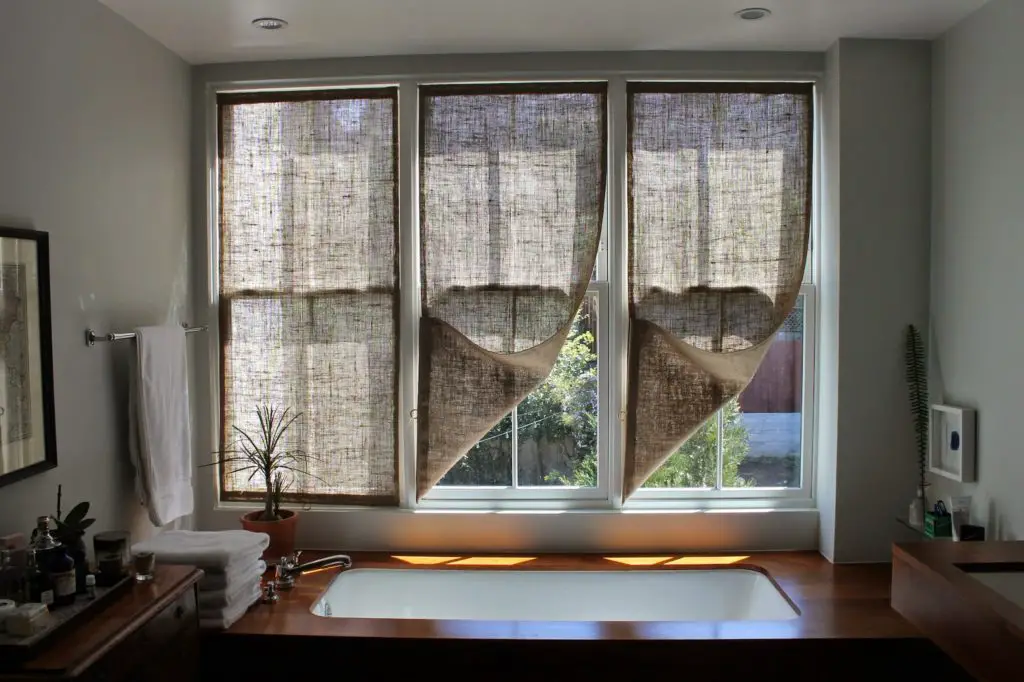
What’s best about burlap fabrics is its netted texture. This texture allows the light to pass through them, making your room illuminated enough that you feel a level of coziness. Make burlap curtain panels and revel in its wonder.
4. Smocked Burlap Curtains
This is a burlap curtain idea you won’t be able to ignore. Just look at the intricacy of the design. What more could be better suited for your room?
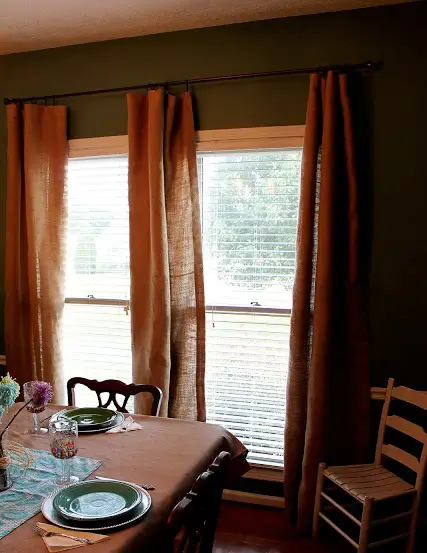
5. Brown Burlap Curtains
This is perhaps one of the easy burlap curtains to make. The brown color of the burlap fabric will add a rural farm-like touch to your room. For best effect use it against the white or earthy wall color.
6. Burlap Kitchen Curtains
Curtains are an important kitchen décor. With this guide, you will be able to make homemade burlap curtains for your kitchen in simple, easy steps.
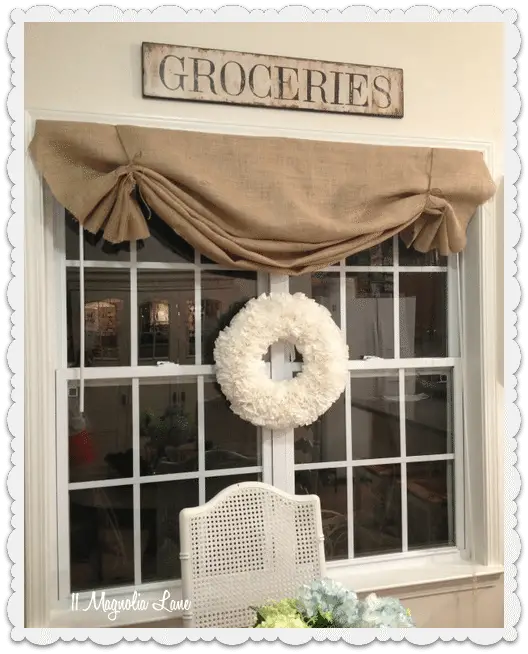
7. Burlap Valance Curtains
Valance Curtain designs add a level of elegance to your home. Making them in burlap fabric will give you that same elegance and sophistication, yet it keeping you rooted. This tutorial will give you an idea of how to make your own burlap valance curtain easily.
8. Burlap And Lace Curtains
Lace and burlap is a match made in heaven. The fine detailing of lace goes perfectly with the blunt design of the burlap fabric. Make one yourself and witness the beauty.
- White Burlap Curtains
You can easily dye the burlap fabrics and make white colored burlap curtains to go in contrast with the color of the walls. Easy tutorials like this will show you how to dye a burlap fabric white.
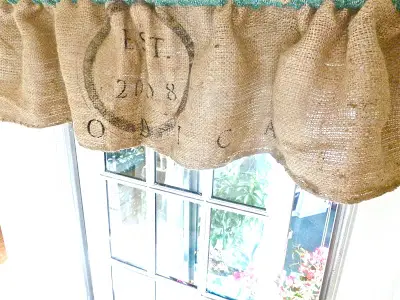
10. Burlap Cafe Curtains
Burlap fabrics are best for cafes. The brownish-yellow color of the fabrics goes perfectly with the coffee colored theme of the café. Most cafes are painted with earthy tones to psychologically impact you with the taste of coffee. Burlap curtains fit right into that theme. Moreover, you can recycle the burlap coffee bags or sacks to make interesting curtains that go perfectly with the coffee theme of the café.
11. No Sew Burlap Curtains
Who has so much of time to sit and sew a curtain? Just get some glue, anything that has a strong adhesive power and you are good to go. These will finish in no time and you will be left with a curtain that no one will even understand the difference.
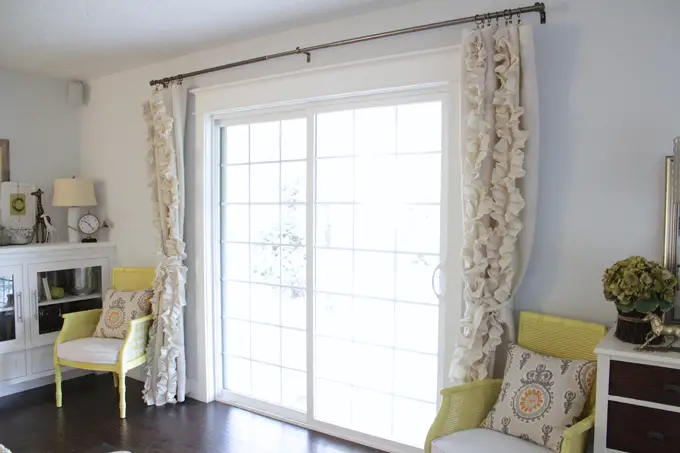
12. Burlap Ruffled Curtains
Designs and patterns are what make a curtain beautiful. This ruffled design will also do the same. Follow the guide to make these unique looking curtains to go with your amazing home décor.
13. Burlap Curtain Tie Backs
The burlap curtain tie backs are easy to make and you can make them at your home just by following the step by step guide provided. Once you have completed, you will be proud of your achievement.
- Burlap Shower Curtain With Bullion Fringe
Bullion fringe are a beauty in itself. Add to them the tone and texture of burlap and you have a winner in your hands. The burlap shower curtains with bullion fringe are perfect to get a little but crafty and produce something so beautiful that your guests could say nothing but appreciate it.
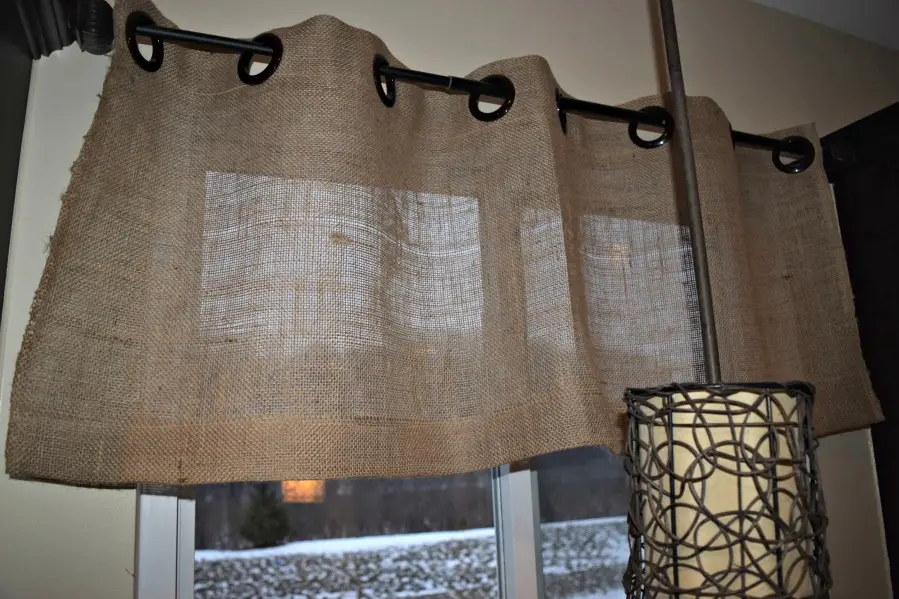
15. Burlap Grommet Curtains
These curtains made from burlap are something every home needs. Easily created, yet it adds a value of labor to the creation, as they seem that you have spent days to create such a stunning piece of décor.
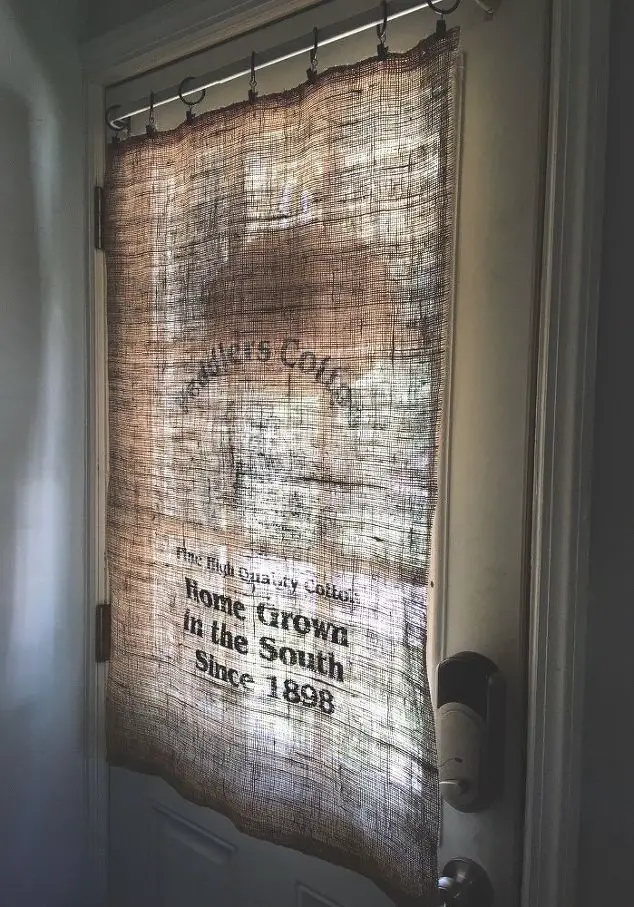
16. Burlap Sack Curtains
Burlap fabrics have a strong durability and a long shelf value. It is for these reasons that you can recycle burlap sacks to make pristine curtains for your home.
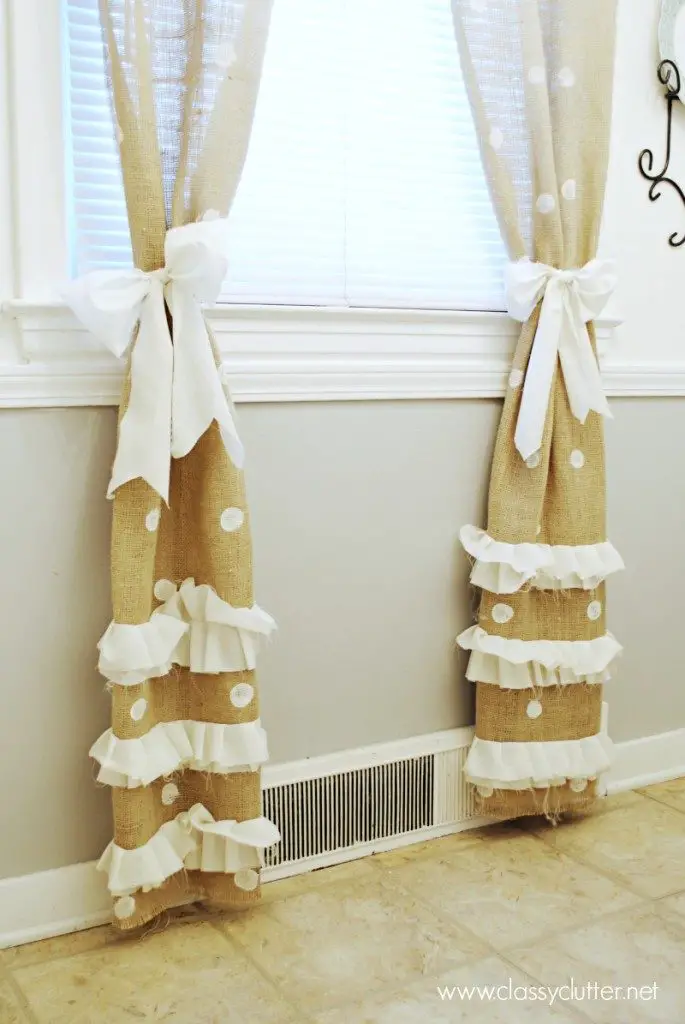
- DIY Painted Burlap Curtains
There are so many DIY tutorials for you to make your own painted or decorated burlap curtains. You can design them as per your own taste and you can use acrylic colors to paint them. Use stencils to paint interesting and fun designs. Get crafty!
Burlap Blackout Curtains
Use a thick cotton lining to create your own burlap blackout curtains. The thick cotton lining will not allow any light to pass through the curtains. These are the best option during summer.
Rustic Burlap Curtains
Burlap, the fabric in itself is rustic and earthy. These fabrics carry the flavor of earth and the color, the texture, and even the smell will testify to that. Making burlap curtains are nothing but adding the rustic touch to your home.
Now that you have acquired every possible knowledge to create your own burlap curtains, what are you waiting for? Buy some burlap fabric and get started with your unique burlap curtain. Make sure that you wow your guests with your fantastic creation.
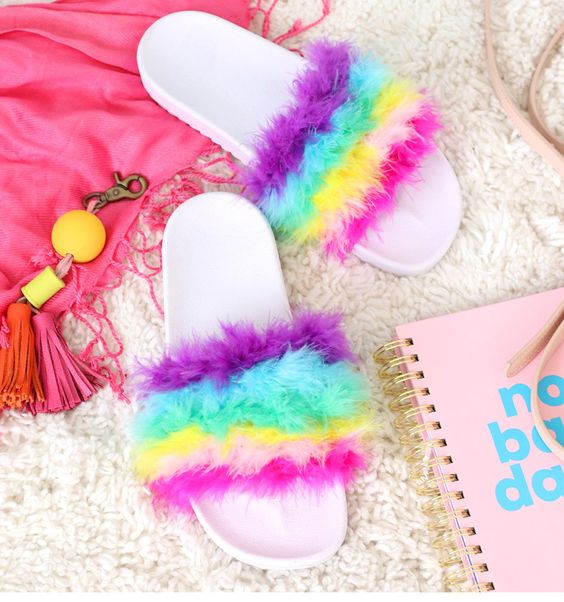
Do you love to wear fur slides as sport a stylish catty look but don’t want to cough $70 or more for it? Fret not, as we’ve got you covered. Wearing slides shoe sandals is quite a trend for summers and spring. So we are sharing some interesting ways to make your own fur slides and don’t feel a pinch on the pocket too. You can pick from a wide range of colorful faux furs. White, black, brown add to your elegance while hot pink, blue and red will add to your style quotient.
For More Interesting Shoe Lacing Ideas: Read Here
5 Interesting Ways to Make Furry Slides at Home
-
Do-it-Yourself: Fur Slides
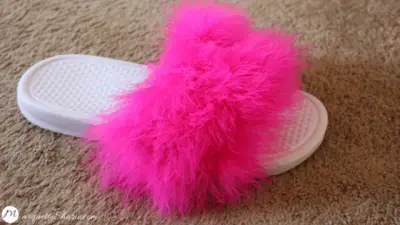
This is quite a cute design made with Nike slide sandals and pink boa. This tutorial is fairly easy to make homemade slides within $30. You can easily team this up with your dresses on holidays too. This tutorial is taken Marquettesharie.com. Click the linked tutorial for step-by-step instructions.
-
Big Faux Fur Slide DIY
If you don’t like it too heavy, you can use short fur to make this project. A fun way to create cool footwear most reasonably.
-
Make Your Own Fluffy Slides
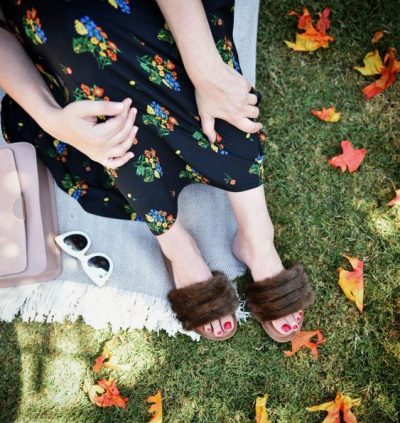
This design and choice of the fur color are very subtle and classic. You can easily wear this with your denim or dresses for a chic look. Choose your sandals with little heels to give it a glamorous look.
-
DIY Slides Sandal Instructions
This design is made layering 3 strips of trimmed faux fur. Using dark colored fur like brown or black is easy to maintain.
-
DIY Rainbow Fuzzy Slides
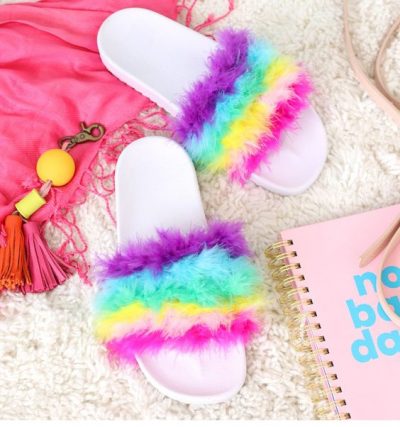
Try making these colorful slides for a cool summer look. These slip-on will look great on young girls too.
Try making these fun designs for your unique look and pair it right with a sassy outfit. You will surely gather compliments for this amazing craft.
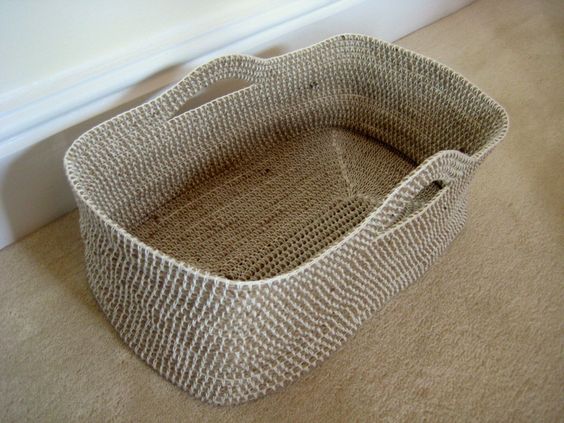
Creating crochet projects as interior accessories is a great idea to add a textured touch and making space to organize your clutter. Take a break from the conventional wooden and plastic storage boxes and create a handmade basket of different shapes and sizes and use them as little containers.
You can easily experiment with different designs and patterns to make wonderful crocheted baskets. Try giving your craft a twist, by using hemp, twine, ropes, and other cords.
Today, we are sharing these handpicked crochet patterns to make a basket with you. We have rounded up our favorite free patterns and we know you will love them. You can use these baskets as gift baskets, bathroom storage baskets, laundry baskets, and a lot more.
33 Free Crochet Basket Patterns for Beginners, Intermediate and Skilled Crocheters
-
How to Crochet a Basket
-
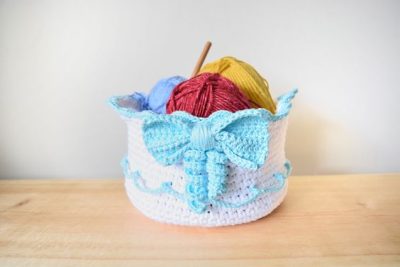
Crochet Frosted Basket Pattern
Adding a bow and ribbon around the basket adds a dash of creative knitting. You can choose yarn colors matching your interiors and give it a contrast edging.
-
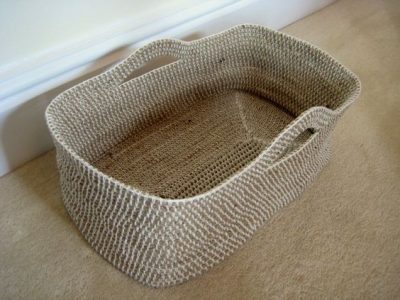
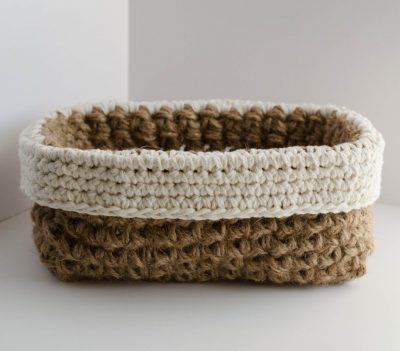
Crochet Rectangular Rope Basket
To create this design you need some rope and stash yarn. This makes a great laundry bag and is sturdy enough to hold weighty stuff. This handmade basket adds a rustic touch to your decor.
**This uses a technique similar to the thrumming, where you crochet over another thread to add bulk to a fabric.
-
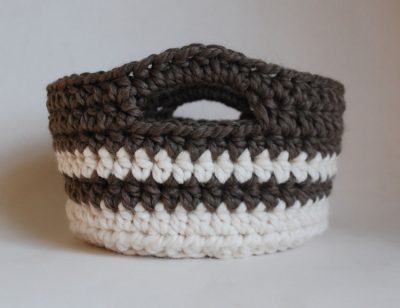
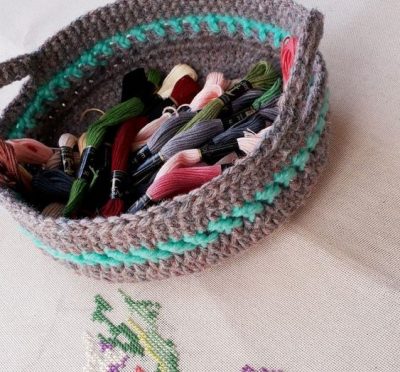
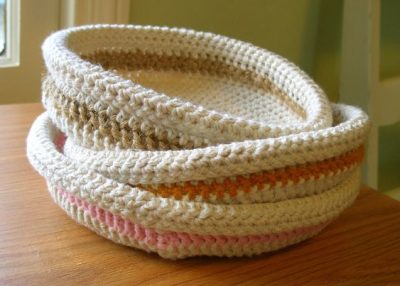
DIY Crochet Basket Design
The use of contrasting worsted yarn makes this little round tray basket adds to your storage utility space which can be displayed in your living room. The linked tutorial uses basic crochet stitches thus making it easy for beginners as well.
-
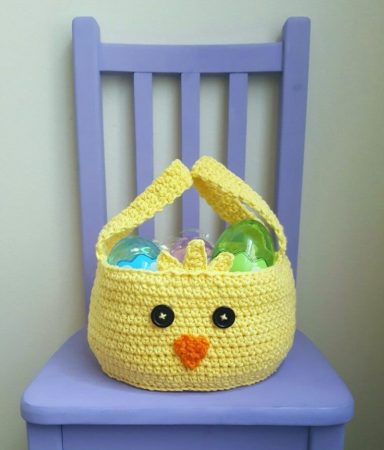
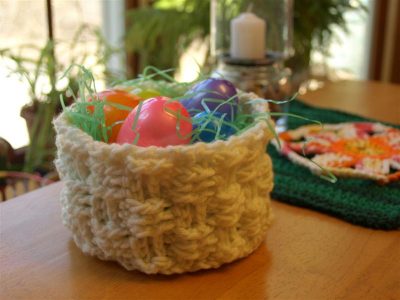
Crochet Easter Basket Pattern
An Easter basket pattern suitable for beginner crocheters. You can add handles to the basket to make it easier to carry.
-
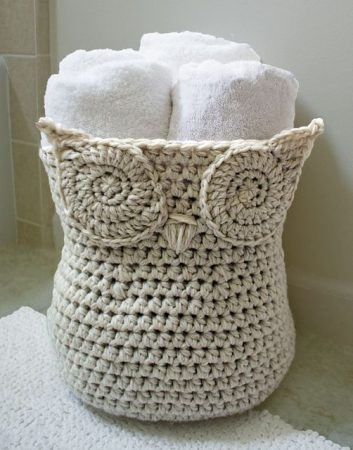
Owl Basket Crochet Pattern
This monochromatic crochet basket has a popular Owl design giving a vintage touch. It is ideal to use to store your towels rolled and stacked in a corner.
-
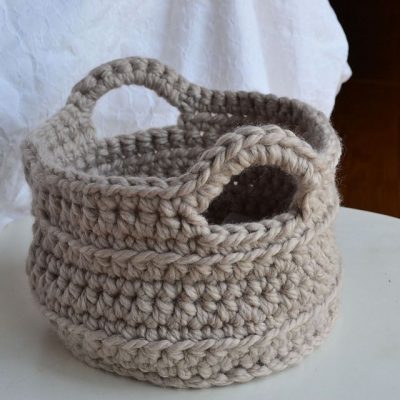
Crochet a Basket with Handles
-
Free Chunky Crochet Basket
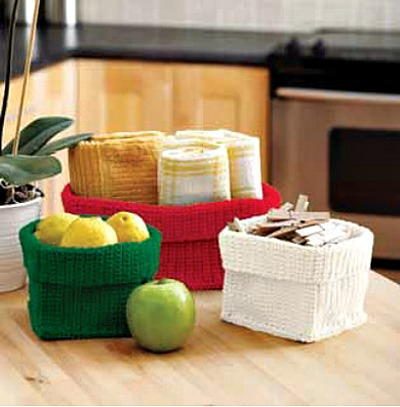
This rustic finish crocheted basket is a cute storage bag that actually stands up on its own! You can make a mini one in size or a bigger one to store your groceries and use it as a fruit basket. Just use some bulky yarn and make this amazing pattern which is ideal for intermediate crocheters.
-
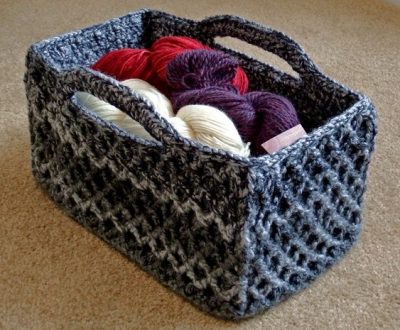
Crochet Storage Basket [Free Pattern]
-
Mini Crocheted Basket
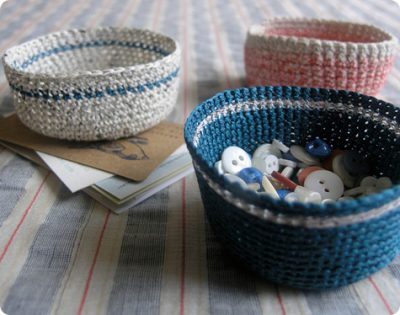
These small sized crochet baskets look cute and are useful to keep crafting accessories, stationery items, paperclips, coins, buttons, etc. You can weave multiple ones and use it for storing small items. It makes an ideal gift for crochet lovers.
-
Ombre Crochet Basket
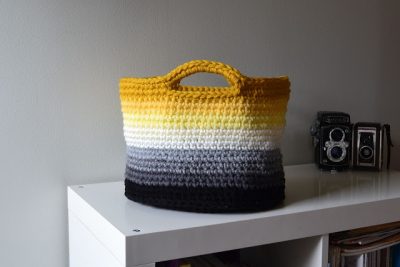
The use of colorful threads to create the ombre effect is quite eye-catching. You can use this crocheted basket bag to store utilities or use as a picnic bag.
-
Spring Easter Crochet Basket Instructions
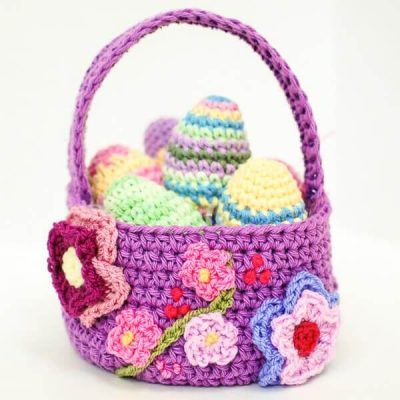
A great tutorial to make a handmade Easter basket. You can try to make the cool sprinkle Easter eggs too.
-
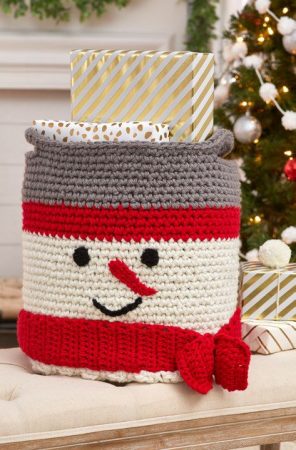
Crochet Snowman Basket Tutorial
This image courtesy of redheart.com -
Crochet Christmas Basket Pattern
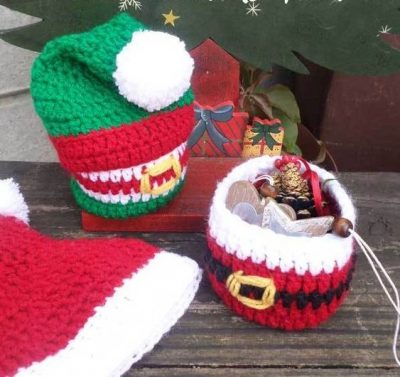
This is a fun and easy crochet project for Christmas. You can fill these cute little baskets with candy and goodies. Making these wonderful baskets with lids is a great holiday craft option.
-
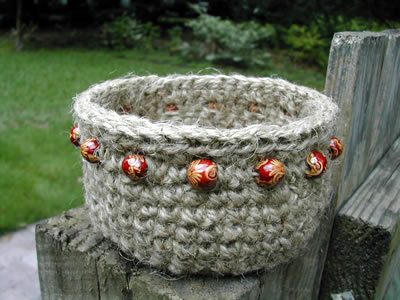
Beaded Jute Crochet Pattern for Basket
-
Simple Hanging Crocheted Basket
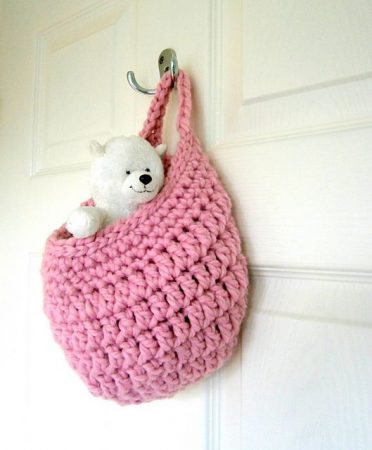
This design is great for your kid’s room or the laundry, bathroom or as an addition to your wardrobe to add some storing space. You can hook and hang this to store small toys, fruits, accessories or more.
-
Oval Shaped Crocheted Baskets
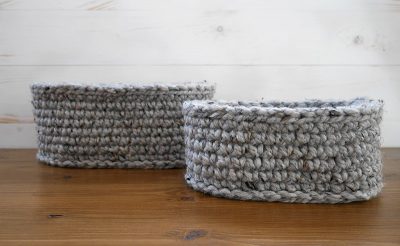
This makes adorable DIY spa baskets, which has a large base and is easy to stack the essentials.
-
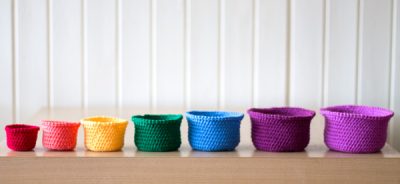
Rainbow Crochet Nesting Basket Set
-
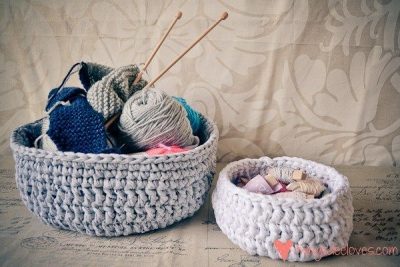
Crochet Basket with T-Shirt Yarn Ideas
-
Easy Crochet Weave Basket
-
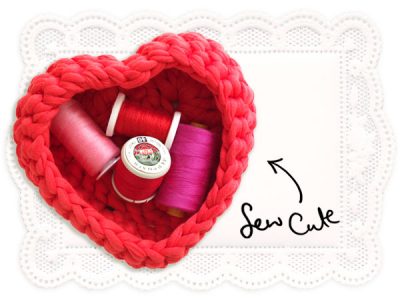
Crochet Heart Shaped Basket Design
-
Basket Weave Crochet Pattern Instructions
-
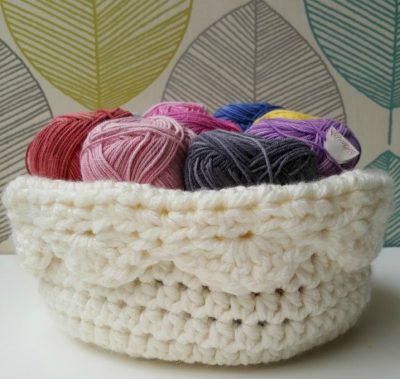
Touch of Scallop Crochet Basket
-
Spring Tunisian Crochet Basket Pattern
-
Crochet Strand Basket
-
Crochet Jute Basket Pattern
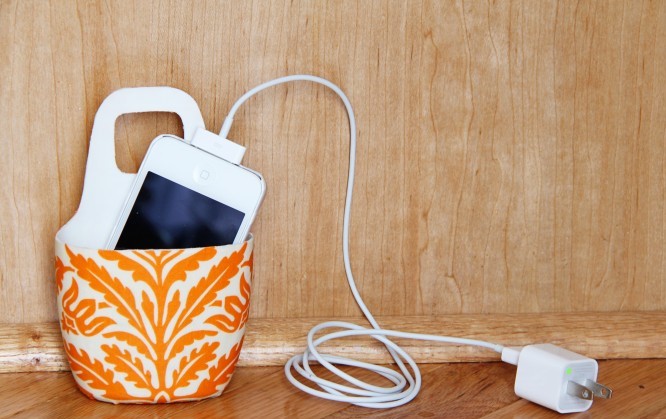
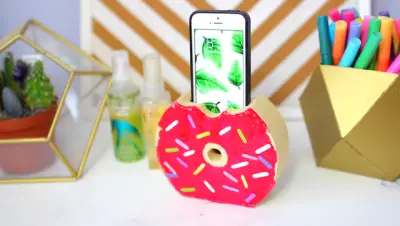
Do you love your phone and always want to keep it within your reach? Handmade phone charger holders are a very convenient way to charge your phone! You don’t have to keep your phone on the floor and this organizes the untangled cord giving your room a tidier look. Check out these easy tutorials to create little cell phone charging pouches and hang them on the plug.
Also Read: How to Make Cool Duct Tape Phone Cases – Here
15 Cool Ways to Make Your Own Phone Charger Holder
-
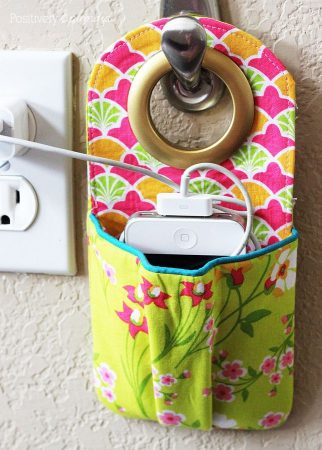
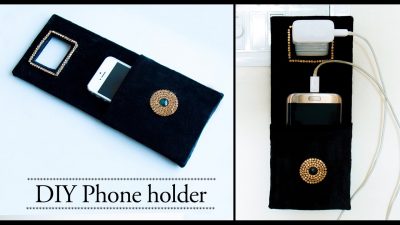
DIY Phone Charger Holder
Now if your charger cord is too short or inconvenient, make yourself this cute and handy charger holder. You can choose the dimensions as per your phone and make it a big enough for your phone to fit. Depending on your sewing skills this one won’t be a tough one!
-
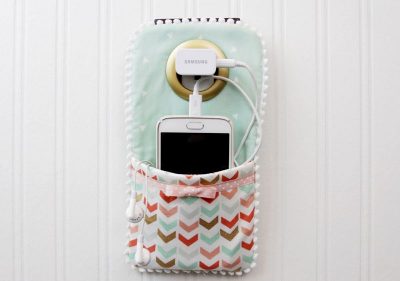
How to Make Your Own Phone Charger Hanger
This cute little mobile pocket holder will be an absolute stunner in your room. Adding a little pom-pom lace and a curtain grommet will add to the convenience of charging your mobile within your reach without dropping it.
-
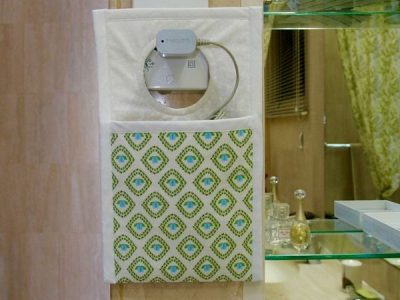
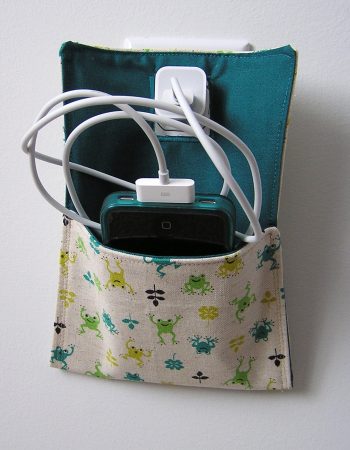
Fabric Cell Phone Charger Pouch Tutorial
This is quite an easy sewing tutorial to make your own handmade phone hanging holder. You can choose cute printed fabrics to create a quirky holder.
-
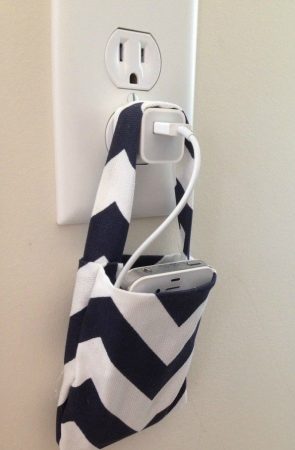
No Sew Fabric Phone Holder Instructions
A chevron printed fabric holder made from using hot glue will add to your convenience when you want to reach your phone. This is a simple tutorial which requires no sewing and is just apt for beginner crafters.
-
Easy Phone Charger Holder
When you find it really difficult to track your charging cords, then making this phone pouch will be at your rescue. This organizes your cables and makes sure you can hang them near the plug point easily.
-
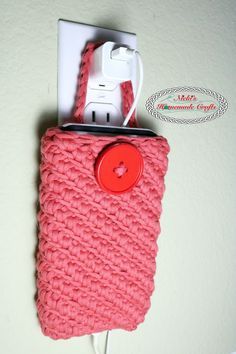
Crochet Pattern for Cell Phone Pouch
An interesting project for all crochet lovers. You can knit this pouch in no time and this serves as a multi-purpose pocket pouch for mobile phones!
If you’re not confident with your sewing skills, there are some other tutorials which show how you can make a phone charger stand with plastic bottles, washi tape, felt, cardboard and other materials too, some of which are no-sew tutorials.
-
How to Make a Simple Phone Holder Charger
Keep your cell phone off the ground and reachable while it’s charging with this easy charger holder made from a cereal box. This cute customization makes it trendy and adds a dash of an element to the holder.
-
DIY Plastic Bottle Cell Phone Charger Hanger
This holder is made recycling a plastic bottle and a fabric to cover this. Time to transform an empty shampoo or lotion bottle into this beautiful mobile hanger. You can easily hang this on the charging point and keep your phone in it. A fun craft to keep your kids busy and make useful household stuff.
-
DIY Cardboard Donut Phone Holder
-
Do-it-Yourself: Cell Phone Charger Holder
-
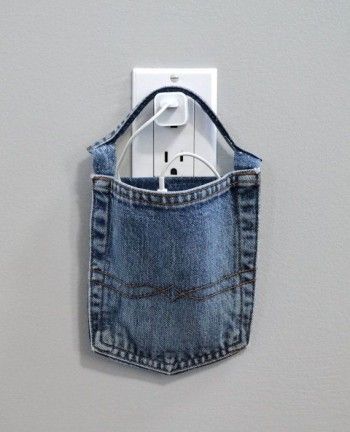
Jean Pocket Charger Station DIY
If you don’t want to throw away with your favorite denim, then you can easily turn them into this creative mobile charger which looks cool when hanging from the charging point on your wall.
-
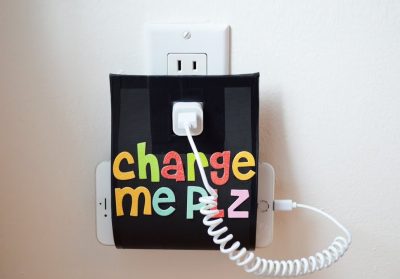
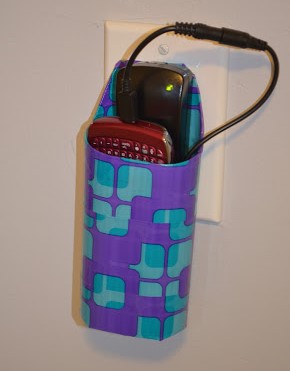
Cute Duct Tape Cell Phone Charging Holder
This cut out handle provides an outlet to the cord plug and is easy to make within minutes using plastic and duct tape.
Creating these fun and easy projects will be easy and useful summer craft. Try making them organize your wires and keep away from tripping them.
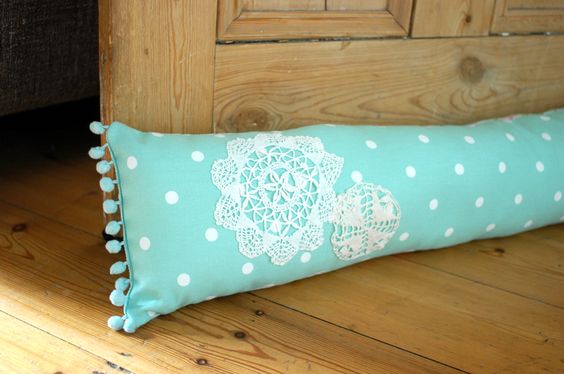
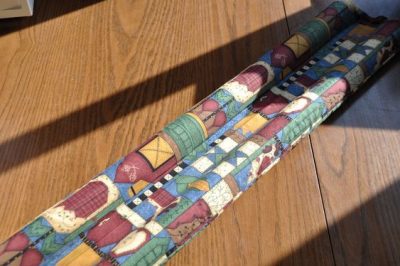
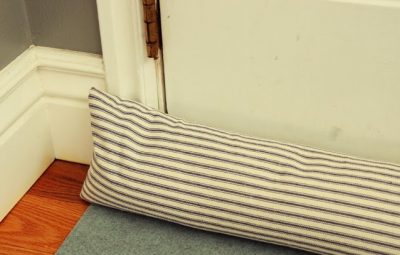
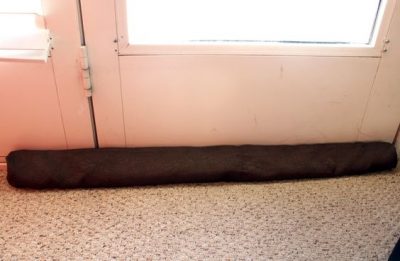
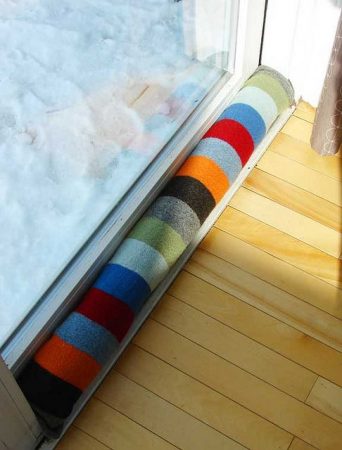
A draft stopper (also known as a door snake, draft dodger, door pillow, draft blocker, etc.) is basically to knock off the cold drafts out to where it belongs. If chilly winds are invading your house, make your door draft stopper with handy things and fabrics available in your house, which won’t cost you a dime.
These draft excluders are simple to make and do not take much of your time. Sewing them needs basic skills and even beginners can make it perfect. With your homemade stoppers, drafts won’t be bothering you anymore this winter! You can experiment with different designs and stay warm indoors to seal the cold wind seeping in from the gaps.
How to Make Door Draft Stopper to Fight Chill this Winter
-
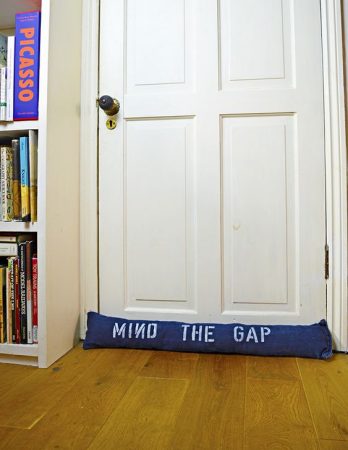
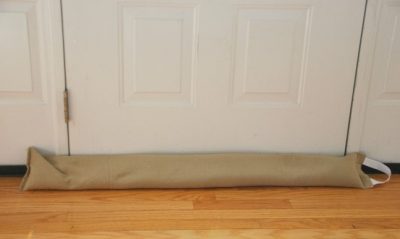
Door Draft Stopper DIY
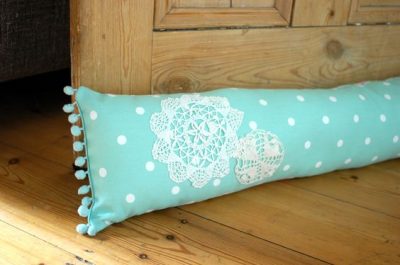
This elegant draught excluder is a great handmade addition to your interior doors to keep your house cozy. You can use heavy cotton fabric to make this one and add embellishments and lace to give it a vintage look.
-
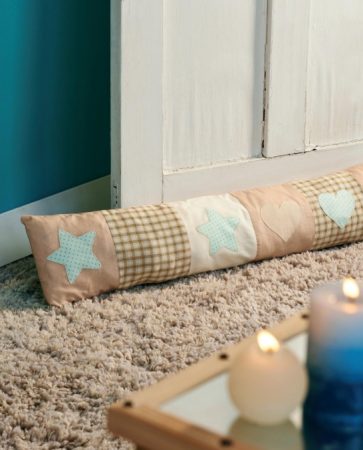
Door Draft Stopper Pattern
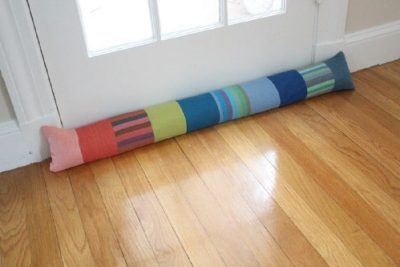
This draft guard is made using scraps of fabric sewed and patchworked in a draft stopper. You can use colorful printed fabric cuttings to make it bright and add embellishments like small poms to add a dash of an element to it.
-
Make Your Own Denim Door Draft Stopper
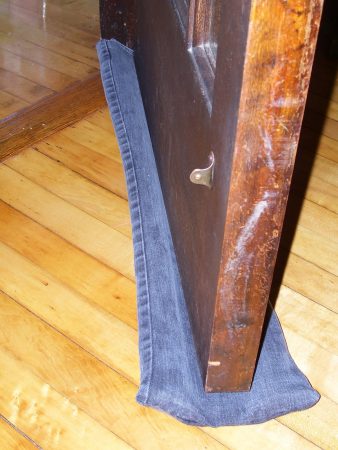
Turn your old denim into a useful wind draft stopper. It’s inexpensive and can be a great recycle project for the coming winters. This jeans stopper slides under your door and blocks out all air that would try to get in.
-
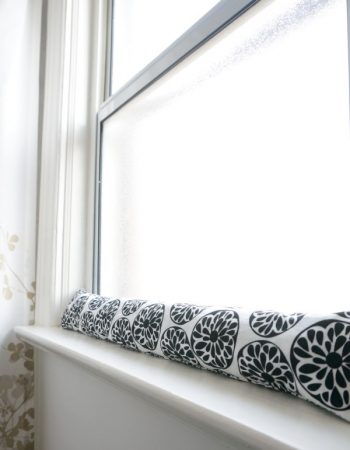
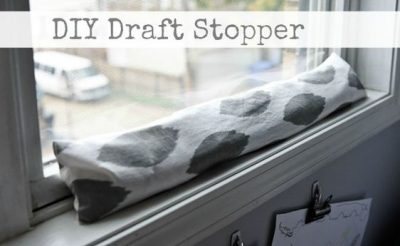
DIY Rice Draft Stopper for Window
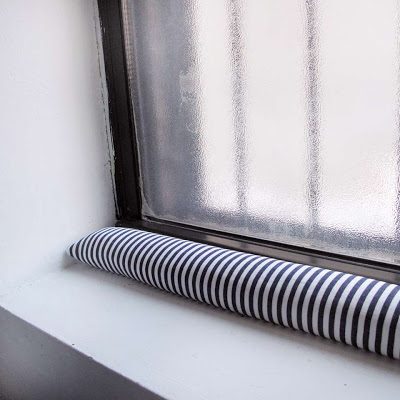
This is a cute draft stopper which is stitched in no time and filled with rice to keep the breeze off from penetrating inside the room. An ideal craft to keep your room warm this winters.
-
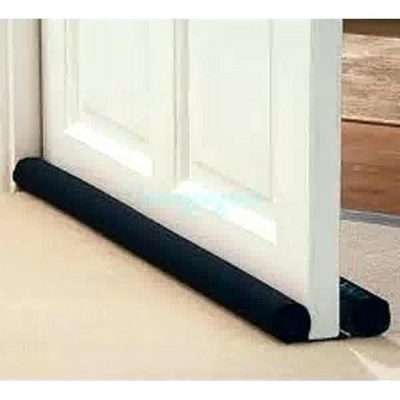
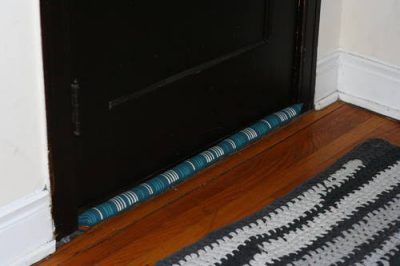
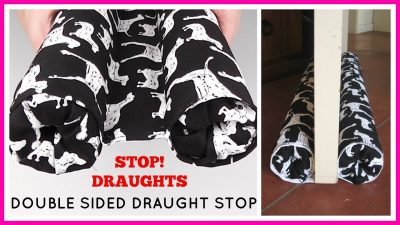
Double-Sided Door Draft Stopper for Doors
This is quite a useful creation to keep light and wind away from peeping from the door gaps on a chilly day. A double-sided door draft which will slide down the door and make no noise while the door opens. You can use printed fabrics with quirky patterns to give your room a colorful element.
-
Mismatched Door Draft Guard Pattern
A great tutorial to put your missing socks into use. To repurpose old things and create a new project is surely an exciting thing for kids. Try your hands on this DIY and make some eye-catchy vertical door cold stoppers.
-
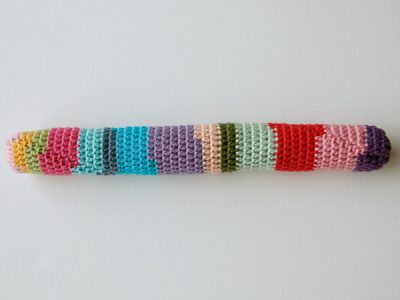
How to Crochet a Door Draft Excluder
This is surely a treat for all crochet lovers. You can add colorful yarn to this draft stopper to make it more appealing and gather compliments from guests. This is a great design to gift it on holidays to your loved ones.
-
Easy Draft Excluder Pattern
The thick cotton fabric will be a good insulator and keep your room warm. This draft door stopper is easy to create and will be completed within an hour. You need to know basic sewing techniques and voila your winter breeze combat is ready.
-
How to Sew a Draft Stopper for Beginners
-
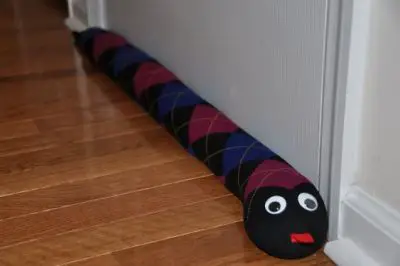
Old Tight Sausage Dog Draft Stopper
You can easily transform your old tights or knee socks into warm and cute dog draft stoppers. This will be a fun craft for kids too. Just stuff your tube tights with some wool and add some embellishments and poppy eyes to beat the cold. The linked tutorial is taken from guardian.com
-
Mickey Mouse Door Draft Blocker
Are you a Disney fan? If yes then delight your kid’s with their favorite cartoon character and place them under their room doors to stop the air from sweeping in.
-
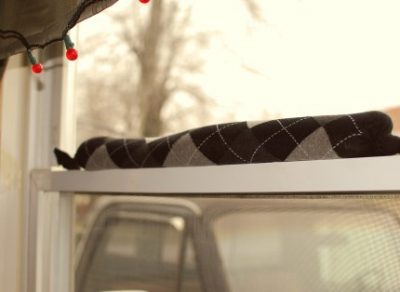
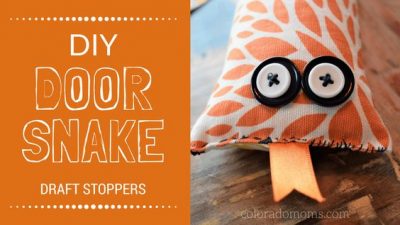
How to Make Door Draft Snakes
I loved this stuffed door draft snake to keep the chills out and stay warm. You can recycle your old knee socks for this project and use it for windows, doors or even let your little kiddo play with it in his nursery.
-
Door Draft Blocker with Patchwork
This is such an adorable design for a kid’s room. For the door draft fillings, you can use sand, rice, grains, wool, or other things. Just be sure they are firm but don’t overstuff it, otherwise, it won’t be flexible enough.
-
Make Your Own: Under Door Draft Stopper
The size of the draft stoppers varies according to your door measurements. They can be 24 inches, 32inches, 42 inches, or 72 inches.
-
DIY Tree Branch Draft Dodger
-
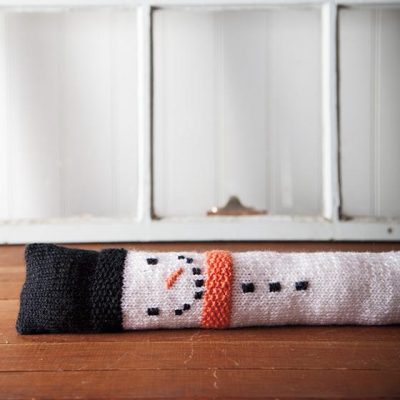
Homemade Snowman Door Draft Stopper
-
How to Make Draft Dodgers using Plastic Fillings
-
DIY No Sew Draft Stopper
This draft dodger or draft snake is a relief for people who don’t know much about sewing. You simply need to fill long socks or tights with cotton or rice tie the ends into a knot. This easy peasy tutorial won’t take much of your time and will be effective in blocking the cold vibes on a chilly night.
-
Double-Sided Draft Guard Instructions
For those extra cold days when it’s quite windy, it recommended using a dual draft dodger under your door to keep the draft at bay. A handmade draft dodger will save you from high heating bills and keep you warm and cozy with no pocket pinch.
-
Personalized Jeans Door Guard Draft
-
Rainbow Draft Dodger DIY with Plastic Pellets
One of the best ways to dodge the cold chill of winter from seeping through your windows.
-
DIY Fabric Door Snake Draft Stopper
Cut your energy bills this season with these simple DIY hacks and handmade door draft snakes.
-
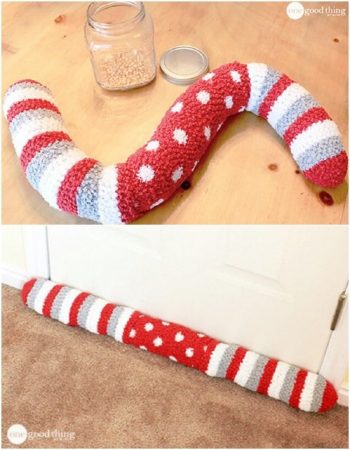
Socks Draft Stopper for Christmas
I love this stunning design which you can make for the holidays and display it on your front door to decorate your house and beat the chilly breeze at the same time. The red and white socks used for the tutorial will add brightness to your decor on cold dull days.
-
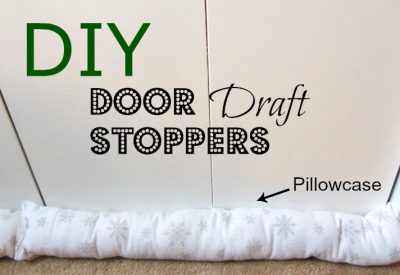
Make A Draft Stopper from Pillow Case
This is one of the easiest ways to keep your house warm in winters. Transform your old pillowcases into draft stoppers and keep the winds from seeping in the gaps, cracks, and window sills and doors.
-
How to Make a Simple Draft Guard
-
Making a Side Door Draft Stopper
-
Step-by-Step Instructions Double Sided Draught Stop
This video tutorial helps you to make an easy draft stopper using printed fabric.
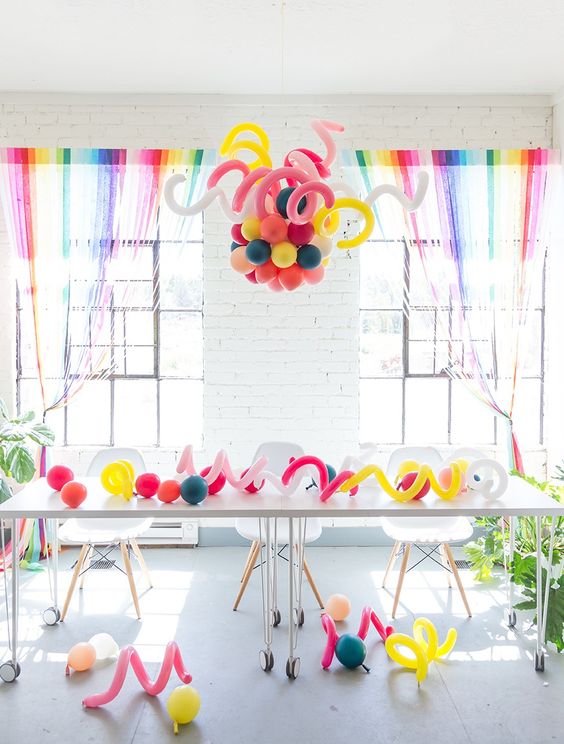
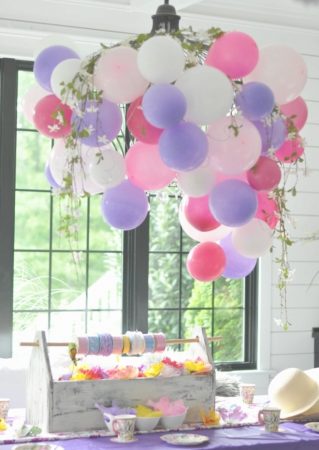
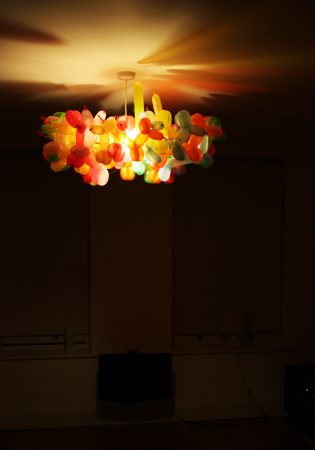
A cool and unique balloon decoration surely adds color and life to parties, baby showers, and wedding events. It’s a favorite glam factor for kids and even adults. Let’s explore unique ways to make balloon chandeliers which will complement your party decor.
-
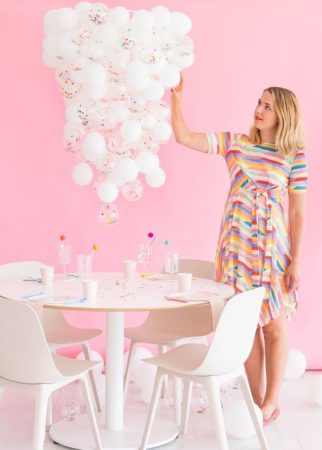
Do-it-Yourself: Confetti Balloon Chandelier
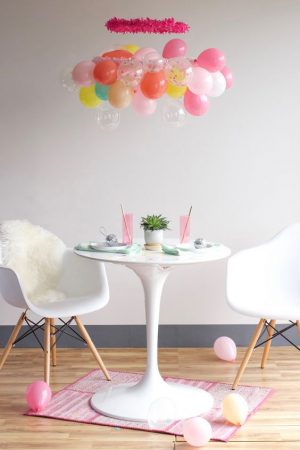
A cool confetti balloon garland hanging above your dinner table will be perfect to dazzle your room. The combination of white and confetti balloons looks classic and is perfect for any occasion, from birthday parties to dinner dates.
-
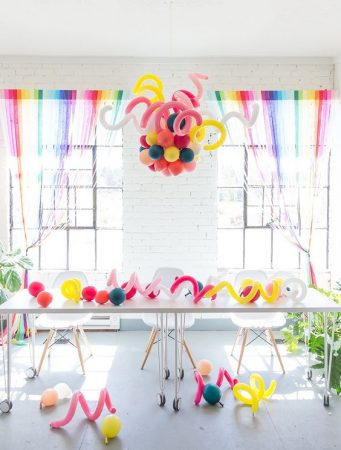
How to Make a Cool Balloon Chandelier
Adding a twist to your regular shaped balloons will give it a stunning look. Create different designs and add to your creativity. You can use hot air balloons for this tutorial and keep them hanging near the ceiling or you can place these balloons under the light to make them a glowing chandelier.
-
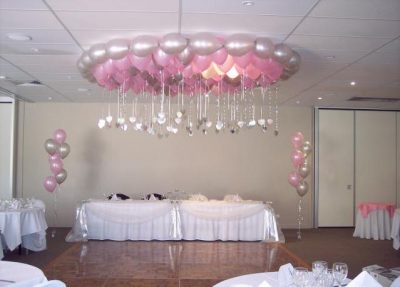
Air Balloon Chandelier for Birthday
Time to spruce up your little girl’s birthday decor with these cute and elegant pink and silver balloons chandelier. You can easily make them for themed birthday parties or baby shower event.
-
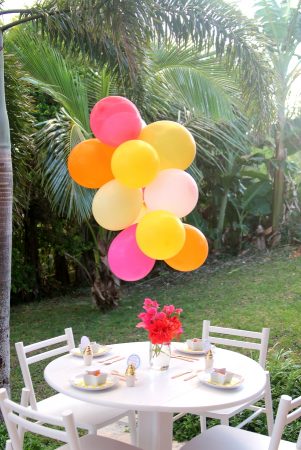
DIY Party Balloon Chandeliers
Minimalistic yet bright table decor for a tea party in your garden or backyard. The tutorial is a simple one and will be easy to brighten up your decor in no time.
-
Simple Air Balloon Chandelier DIY
-
Decorative Balloon Chandelier for Wedding
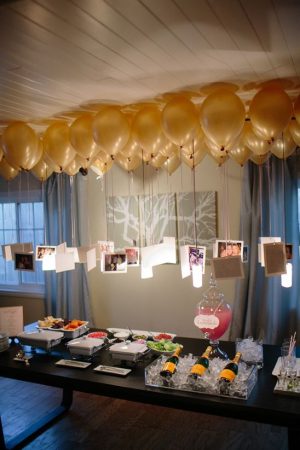
With a few supplies of gold or rose gold colored balloons you can easily create this decorative balloon chandelier display your memorable photos hanging from the balloons and cherish all the beautiful memories on your wedding anniversary.
-
String Chandelier with Balloons
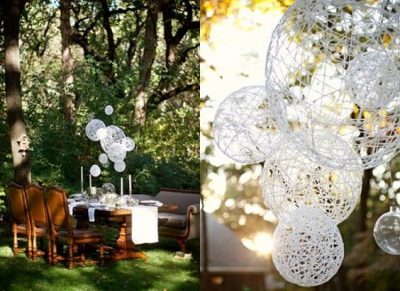
You can easily change the decor of your room or your outdoor yard by using balloons, some twine, and glue. These chic balloon lanterns look amazing when hanging from the ceiling for your wedding. You can use it later as showpiece too.
-
How to make a Chandelier from Balloons: Video Tutorial
-
DIY Yarn Balloon Chandelier
-
Ceiling Animal Balloon Chandelier Ideas
-
Vintage Hot Air Balloon Hanging Chandelier
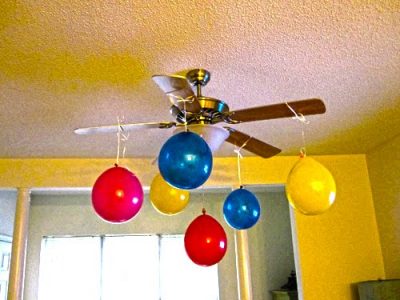
This is one of the most simple decors you can do to in no time to pep up your room. All you need to do is tie some balloons to your fan’s blade and make sure you use colorful ones. Just be sure your kid doesn’t switch the fan on which will pop all of them.
-
Colorful Balloon Hanging Chandelier
-
Large Balloon Decor Chandeliers
If you have planned a big party space, then this amazing huge chandelier will be a stunner for the guests. This will definitely take time to create, but the finished product will gather all compliments.
If you want to go for budget-friendly party decorations which are inexpensive yet eye-catching, then try one of the designs featured above. From polka dots, printed, confetti balloons, you get an array of choices to try to creativity and make visually stunning centerpieces to decorate your venue.
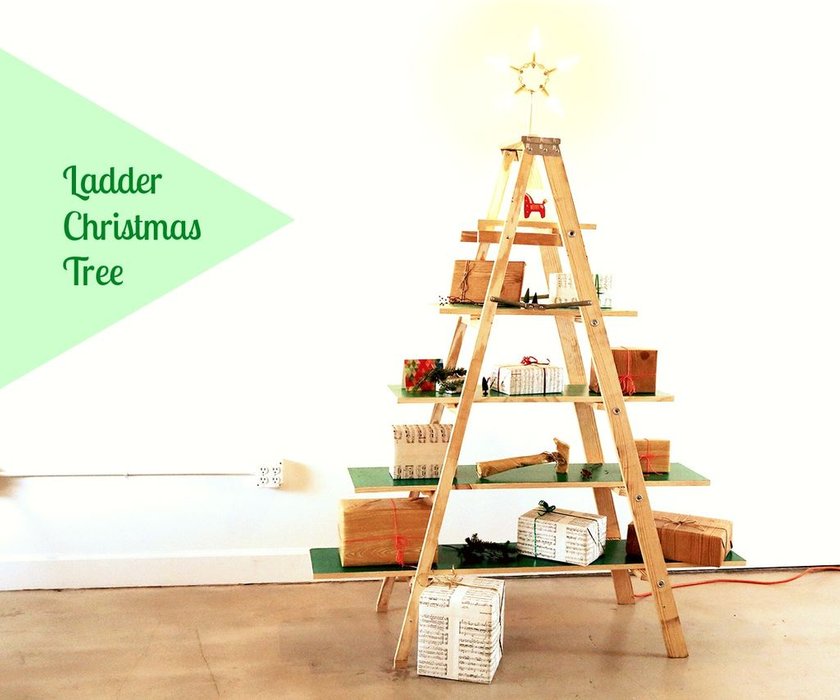
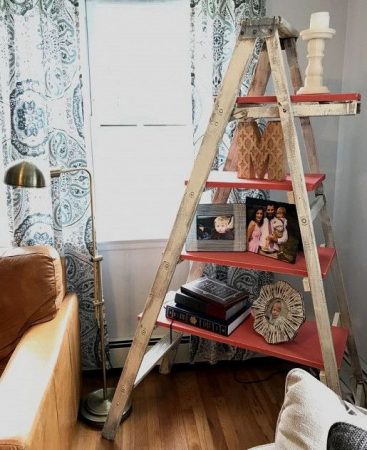
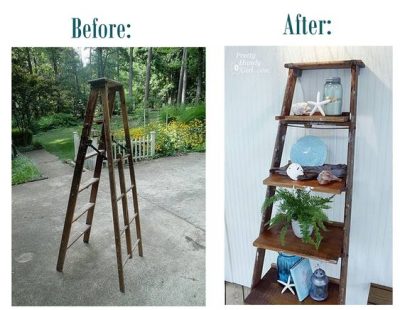
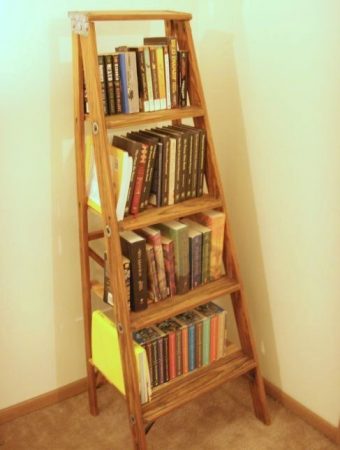
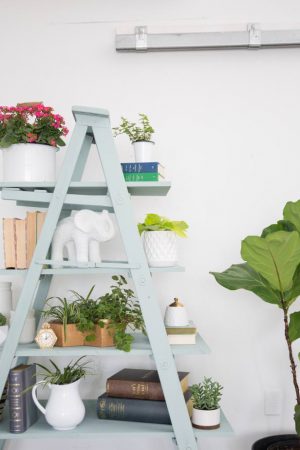
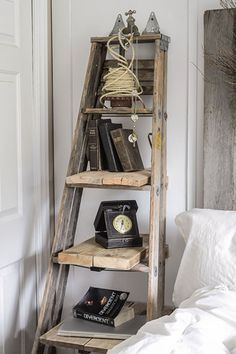
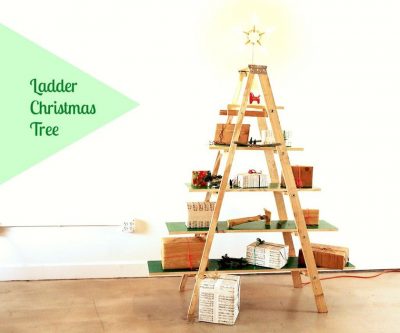
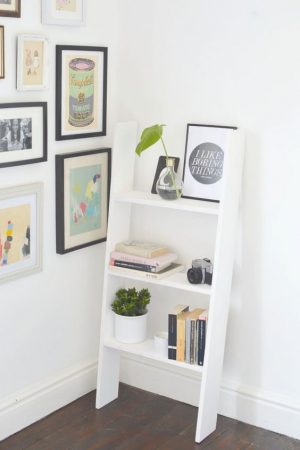
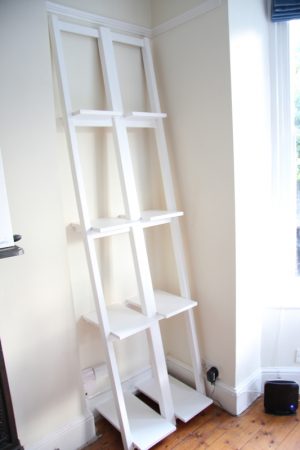
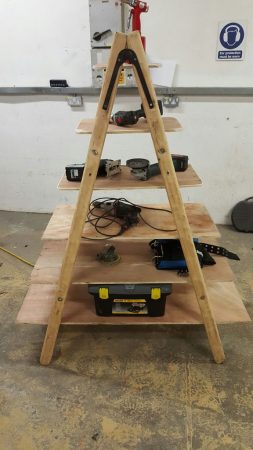
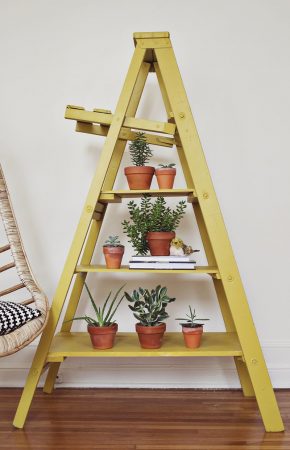
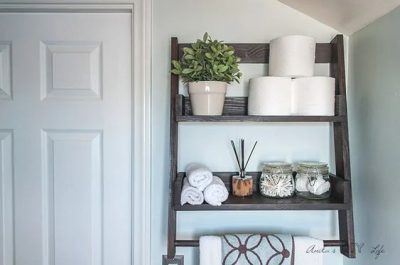
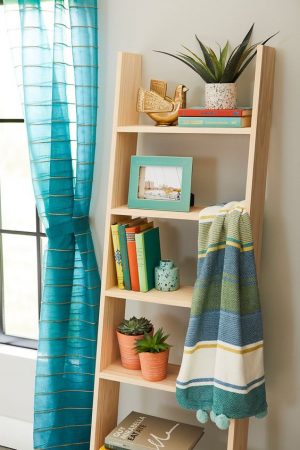
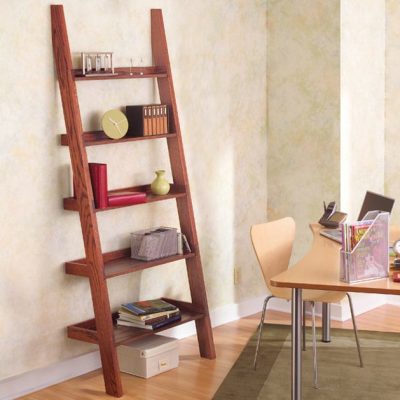
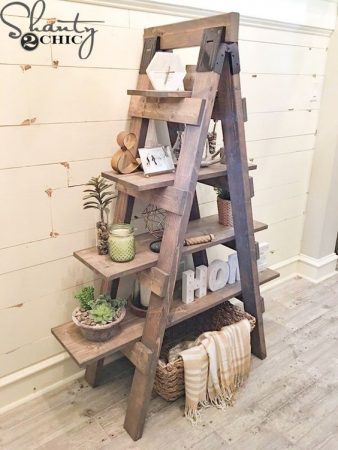
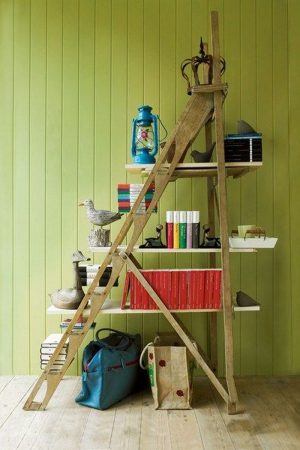
Repurposing an old ladder into a bookshelf can instantly turn a room into a library and organize your cluttered corner into a modern storage space. Building a functional home décor by recycling distressed ladders is a trending style these days. You can make a new ladder from pine wood or pallets or use an old one and lean it against the wall for a cool display or your books. Learn how to transform old ladders into a new bookcase with step-by-step instructions in the tutorials to guide you.
You May Also Read: “DIY Pallet Bookshelf Plans”
31 Ways to Build Unique Ladder Bookshelves and Ladder Bookcase Ideas
-
Ladder Bookshelf DIY (Horizontal)
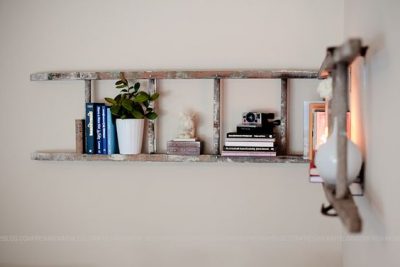
If you want to add a rustic stunner to your living room, then this simple yet classic project is surely the answer. You can easily install this on the wall using L brackets and repurpose your old ladder. You can display showpieces and small plants to add more element to the interior space with this unique horizontal bookshelf.
-
DIY Ladder Shelf (Vertical)
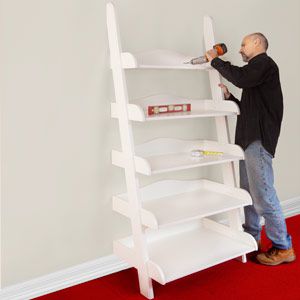
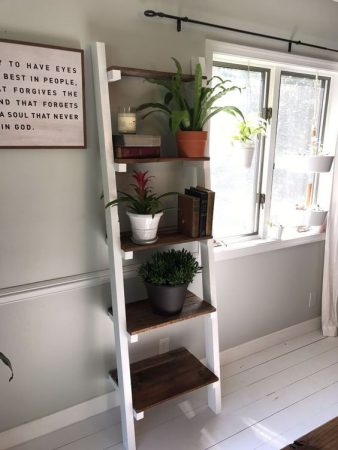
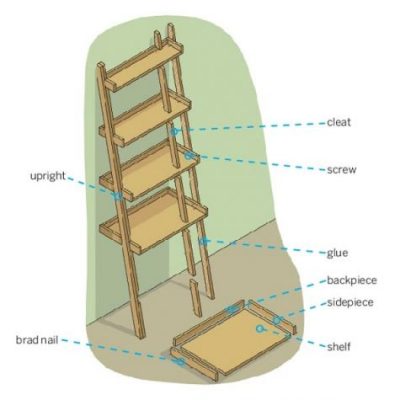
This is a simple ladder shelf which is ideal for beginners who want to make their own furniture. This shelving unit is comprised of 2 legs and 5 shelves. The linked tutorial demonstrates step-by-step instructions and plans to build this shelf in a day!
-
How to Build a Ladder Bookcase
This bookshelf is a wide one, giving all bookworms ample of space to accommodate their treasured books and reading essentials. If you need a small library, just add some more shelves to the plan. You can use wooden pallets or plywood to create this tutorial.
-
Leaning Ladder Bookshelf Ideas
This DIY tutorial shows you how to upcycle an old ladder. You can make 3 shelves using wooden planks. This is a great project for beginners, as you only need a power drill, sandpaper, wood screws, and paint from the hardware store.
-
Build a Corner Ladder Bookshelf
This is a simple re-do of an old ladder dumped in the storehouse. You can easily alter it a bit and place it in the corner of your room and decorate it to refurbish it. A pocket-friendly addition to your furniture with a custom touch.
-
Instructions to Make a Ladder White Bookshelf
-
DIY Mini Frame Ladder Shelf
This is a great way to recycle old wood and make affordable and quick DIY rack to keep your books. This is a small rack which is ideal for little kids to reach their books easily.
-
Rustic Ladder Shelf Tutorial
This is a creative way to display your favorite collection of storybooks and novels in your room. This can be left unfinished to add to the rustic look or you can customize it to your choice and paint it to decorate it further.
-
Vintage Ladder Bookcase Plan
-
Corner Ladder Display Bookcase Project
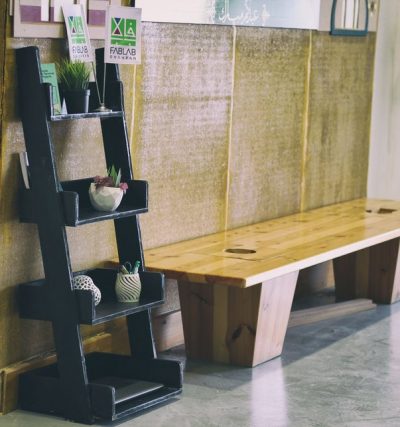
This design is made using MDF and other essentials. An ideal fit in your study with the classic black look.
-
4-Tier Ladder Book shelf Décor
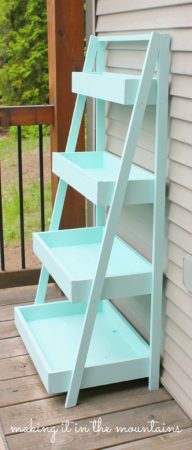
A handmade eye-catcher in the disguise of a bookshelf, the ladder shelf can give a tough competition to the designer shelves available in stores. You will need some basic tools and supplies from the hardware store to make this project. However, I would love to fill one corner in my study room with this bright bookcase.
-
Antique Ladder Shelf Directions
Retaining the natural, unfinished and distressed look is amazing for all you who have a fetish for antique décor.
-
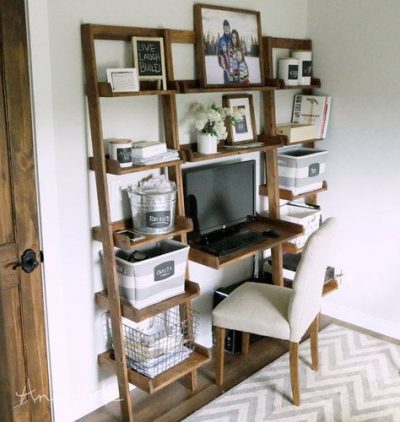
Leaning Wall Ladder Desk
This is a tall leaning ladder transformed into a bookshelf with laptop desk space. An absolute eye delight, and big enough to store books and other accessories. This bookshelf has an additional feature of a laptop desk space where you can sit and work/study comfortably.
-
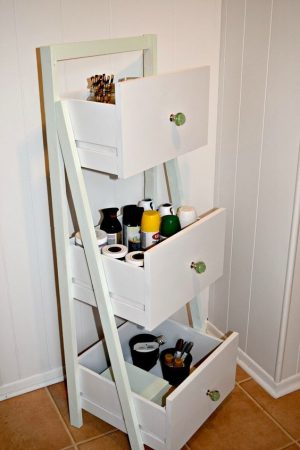
DIY Ladder Bookshelf Organizer with Drawers
If you have a plethora of books and you find difficult to organize them, then this tutorial is the answer. You have ample of storage space to stack your books in the deep drawer shelves.
-
How to Build a Tall Ladder Bookshelf
-
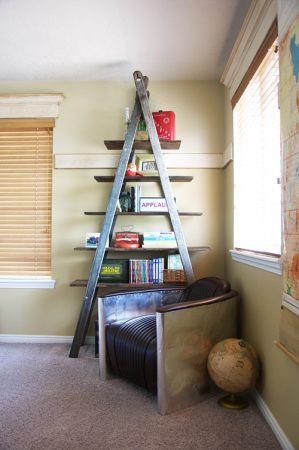
5-Tier Ladder Christmas Tree Bookshelf
-
Easy Short Ladder Bookshelf
-
Cheap Wood Ladder Shelf
-
Wall Bookshelf with Ladder
You can easily transform your wall with these chic shelves. A great storage solution for students.
-
Industrial Ladder Bookshelf Instructions
-
Homemade Nesting Ladder Bookcase Display
Get a traditional ladder from your store and place some shelves in between them for holding books or potted plants. You can paint the ladder in the color of your choice to rustic piece a modern touch.
-
DIY Floating Ladder Shelf
This DIY combines floating shelves and ladder shelves to create this unique open shelf which can be mounted in any wall of the room. This is wide enough to provide extra storage space for your books. A free downloadable PDF plan for the project is provided in the linked tutorial.
-
How to Make Ladder Style Bookshelf
I loved the slim, modern bookcase which is leaning against a wall like a ladder. This is a perfect vertical storage unit for books and adds to the home decor. Get complete instructions on bhg.com which is linked in the tutorial.
-
Decorative Ladder Furniture for Books
-
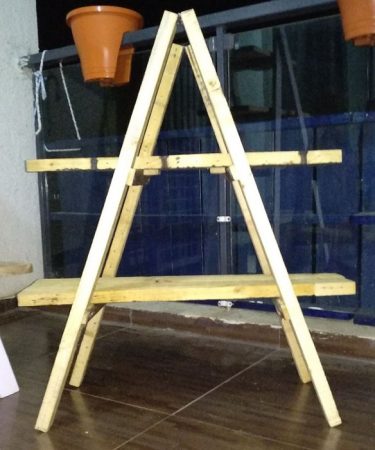
Easy A-Frame Ladder Bookcase
-
Large Bookshelf from Old Ladder
-
Ladder Bookshelf Plans Free
-
Download Free PDF Plan for Ladder Shelves
Give your treasured books a new space with these projects listed above and give your room a makeover.
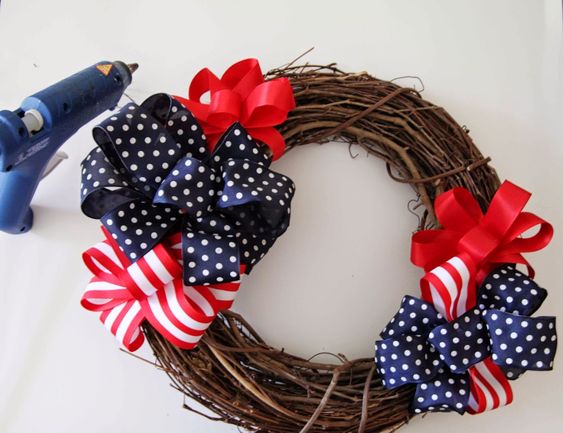
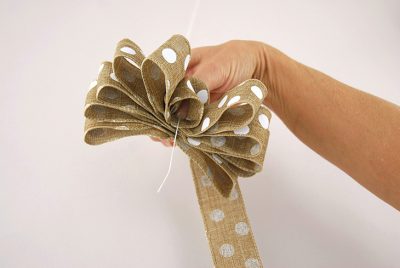
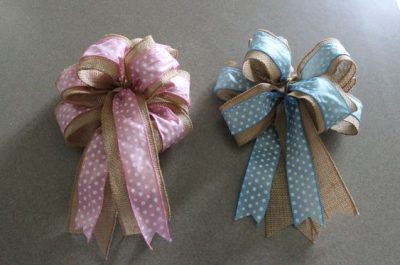
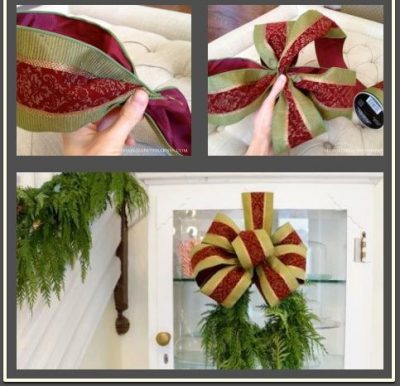
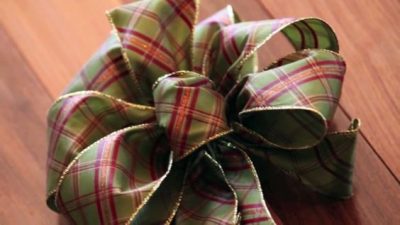
Wondering how to tie a perfect bow for a wreath? It isn’t as difficult as you think! Learn different techniques to make a bow with burlap, ribbons, mesh, tulle, and other materials. A simple bow is excellent for all sorts of decorative crafts. Add it to a DIY wreath, a wrapped present, or even a seasonal craft like a painted pumpkin! Let’s explore how to make pretty bows for a wreath!
You May Also Like to Read: “How to Make Beautiful Wreaths at Home“
Interesting Ways to Make a Pretty Bow for a Wreath this Festive Season
-
Making a Ribbon Bow for a Wreath
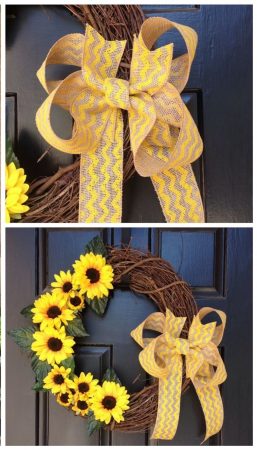
This pretty bow made from a yellow and golden ribbon is perfect to decorate your wooden wreath this Fall. The step-by-step instructions in the linked tutorial shows you how to tie this simple bow.
-
DIY Easy Wreath Bow from Ribbon
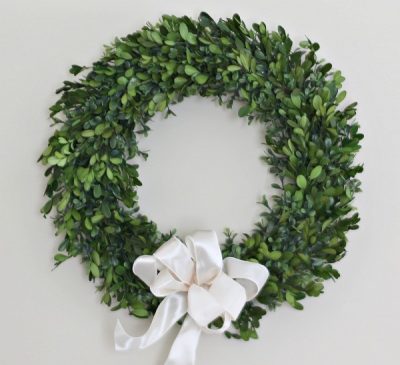
This simple yet elegant satin ribbon bow is ideal to add to your wreath or your gifts. This will uplift the look and you’ll to decorate your Christmas wreaths with this white bows. You can always choose a wider ribbon size to make a bigger bow.
-
How to Tie a Fancy Bow with Wide Tinsel Ribbon
This tutorial shows you how to make this amazing ribbon bow without a bowmaker.
-
Big Double Bow for a Wreath Instructions
-
Layered Bow for A Wreath
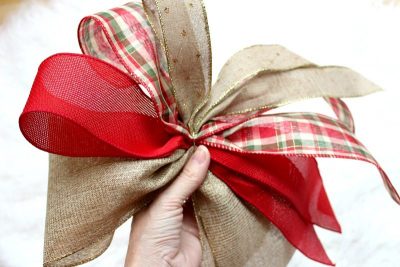
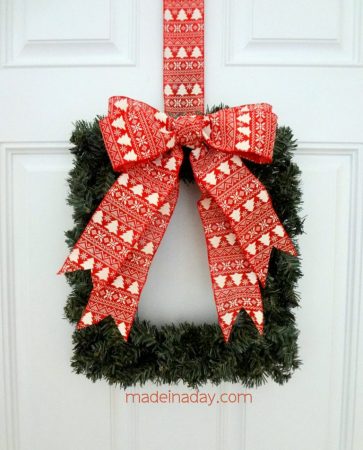
You can choose different fabrics or ribbon, and burlap for this tutorial. Fold them neatly and follow the instructions to tie it with floral wire. Printed ribbons teamed with burlap is a great combination. This bow makes a great Christmas tree topper or a wreath deco.
-
How to Make a Loopy Bow at Home
-
Steps to Make a Burlap Bow to Decorate Wreath
-
Red Christmas Bow for a Wreath
To make this wreath use extra large ribbons which are wired so that loops are stiff and in shape. This beautiful bow will be a great decor for a front-door wreath or tree topper.
-
How to Make Bow with Wired Ribbon
Learn how to make this easy bow using wired ribbon with simple folding techniques. These handmade bows are perfect to enhance the look of a harvest wreath or a traditional Christmas tree.
-
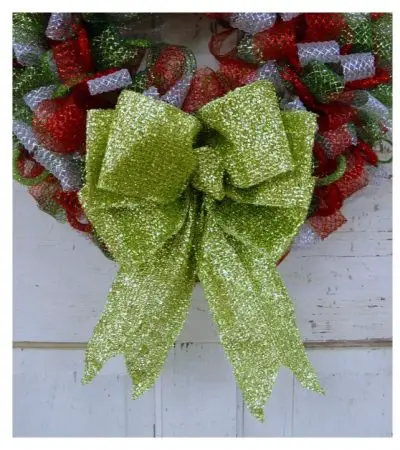
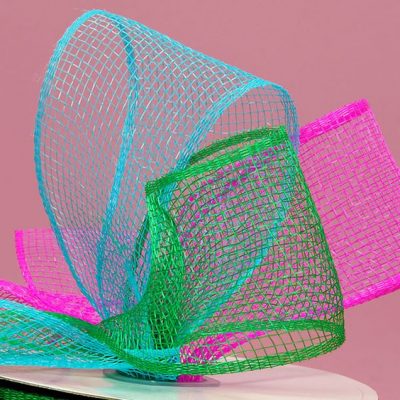
How to Make a Deco Mesh Bow for Wreath
-
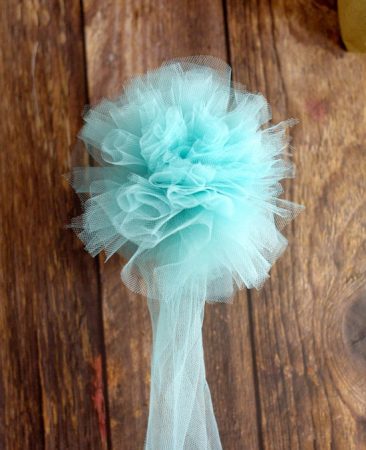
Tutorial to Make Tulle Bow for Wreath
Tulle bows are popular in wedding decors and look elegant to enhance the look. You can easily create your own bows in no time and hang them on to your wreaths.
-
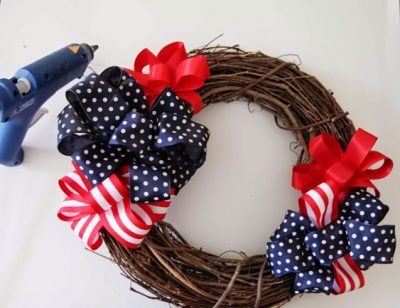
DIY Floral Patriotic Bow for Decoration
This 4th of July try making these cute bows to hang them on your front doors or your wreath. This handmade bow is simple to make and takes no time.
-
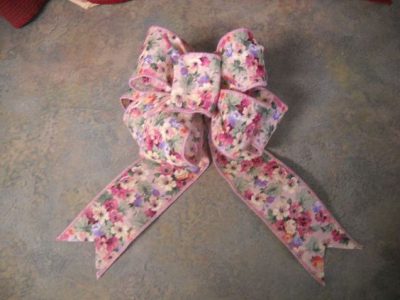
Big Bow Made from Unwired Ribbon Craft
This is a super cute florist bow made from printed wide ribbons. This will look great as party decorations, gift packing and as a wreath decor. Make your own bows in different prints quickly.
-
How to Make a Triple Christmas Bow with Velvet Ribbon
To make elegant and fluffy bows for your Christmas, choosing a red velvet ribbon adorned with beads at the sides is the perfect option. Make your wreaths look prettier and brighter with the red bows on the top.
-
How to Make Holiday Bows for Wreath
This red ribbon bow will make your front door bright on the green wreath. If you want it to be bigger, just adjust the length of the ribbon that you cut in the first step.
-
Beautiful Layered Bow to Decorate Christmas Wreath
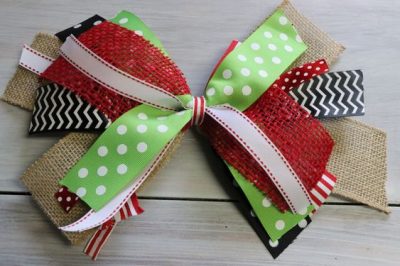
This is one of the most simple yet trendy bows which is a no stitch tutorial. Just place all the ribbons on top and tie it in the middle as shown in the linked project.
There are a lot of creative ways to make and decorate your handmade bows. You can go through any of the tutorials above and follow the instructions. Share your creations with us in the comments section below!
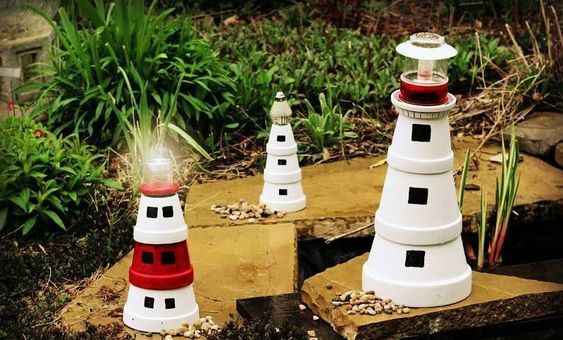
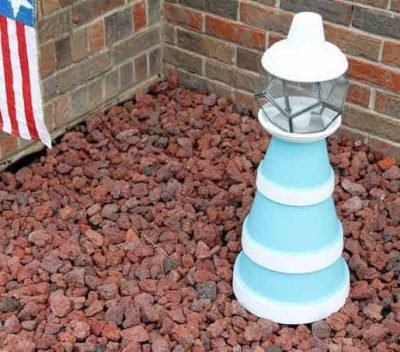
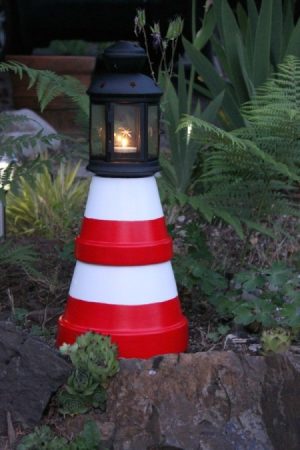
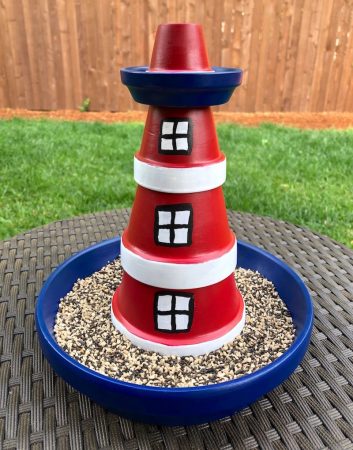
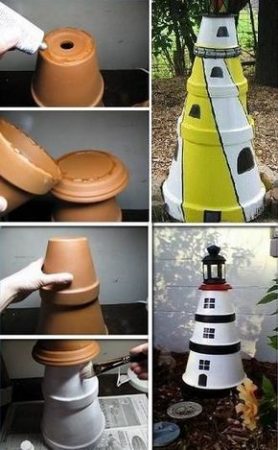
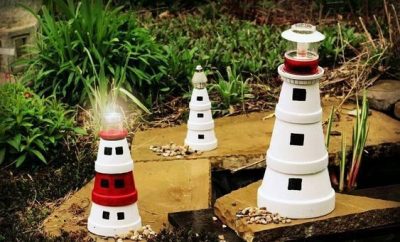
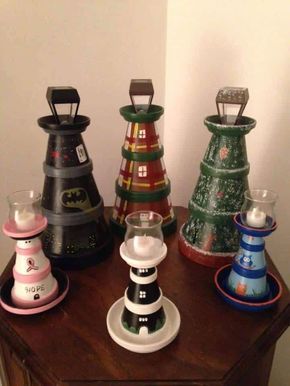
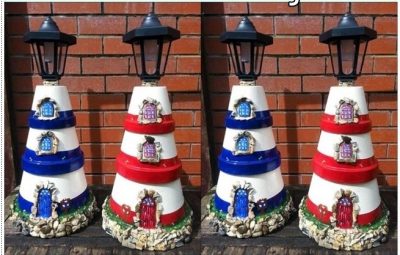
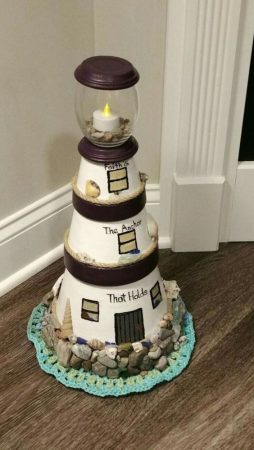
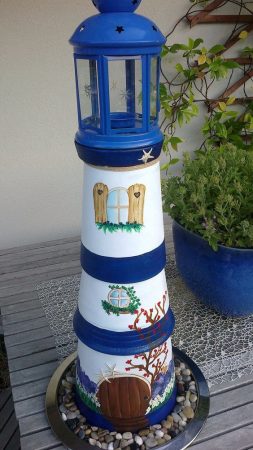
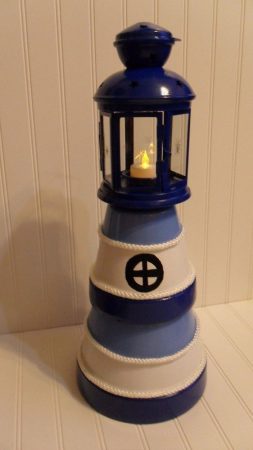
These clay pot lighthouses are a great decoration for your garden. You can make them tall, paint them bright and adorn in between the plants. A great craft for all nautical and sea lovers. You can also do this project inside in preparation for great weather, so let’s get started with the tutorials with step-by-step instructions to guide you.
15 Simple Flower Pot Lighthouse Tutorials for Your Garden
-
How to Make a Lighthouse made with Clay Pots
This is such a cute lighthouse made with earthen clay pots. This is a great crafting idea for a sea lover! You can add seashells, pebbles, and starfishes to give it a beachy effect.
-
Build a Clay Pot Lighthouse
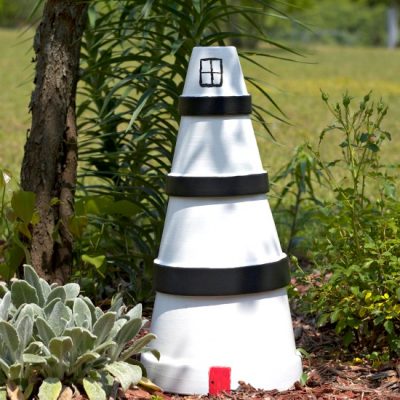
The cute black and white lighthouse is quite a tall one and will be a wonderful addition to your backyard/garden. They have used different sizes of the clay pots to make this one!
-
Flower Pot Lighthouse DIY
-
Nautical Flower Pot Lighthouse DIY
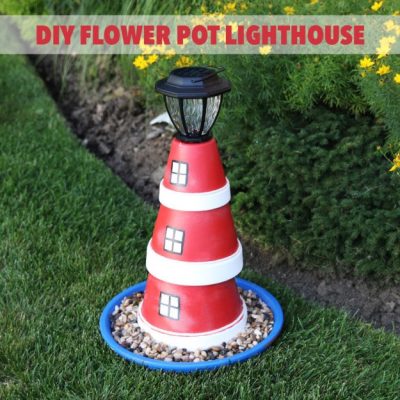
This will be a beautiful addition to your garden, terrace or outdoor porch. You can decorate the base with pebbles and other embellishments. You can add solar light on top of your clay pot lighthouse to make it eco-friendly.
-
Clay Pot Crafts Lighthouse
-
How to Build a Flower Pot Lighthouse
This is an easy and fun craft and even your kids can help you with this project!. There are two clay pots used in this tutorial. You can always add the clay pots and make it higher to add to its charm.
-
Lighthouse Birdfeeder out of Flower Pots
In place of the light or a lantern, this tutorial uses a tiny flower pot to create the lighted top of the lighthouse. Finishing up the red and white paint gives it a weathered and rustic look. You can add a tray or large plate carrying bird seeds to attract birds and create a beautiful bird feeder lighthouse for the spring and summers.
-
Easy Terra Cotta Pot Lighthouse Project
-
Lighthouse from Clay Pots Instructions
-
Simple Lighthouse Out Of Clay Flower Pots
-
Clay Flower Pot Lighthouse DIY
Learn how to make a clay pot lighthouse garden art project which is a nautical project made from stuff you may already have around your garden. Decorating it with pebbles, ribbon, etc will enhance its look.
-
Homemade Lighthouse Ideas from Clay Pots
-
Painted Clay Pot Lighthouse
-
Clay Flower Pot Lighthouses Covered With Bright Paint
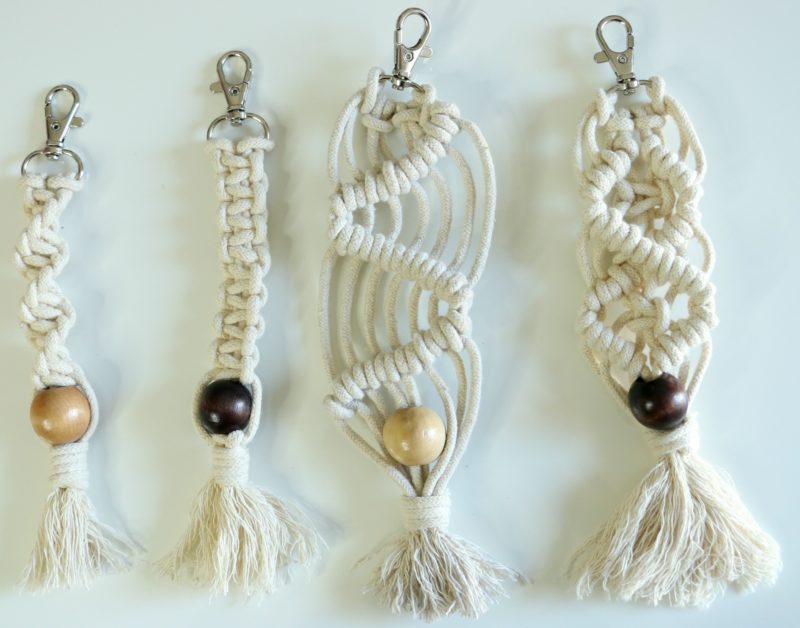
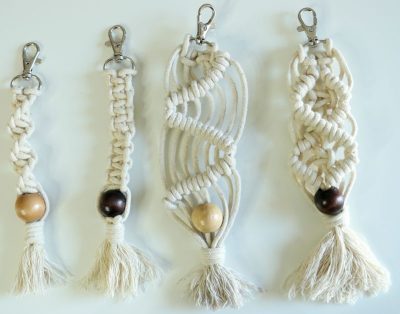
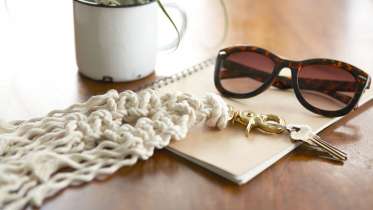
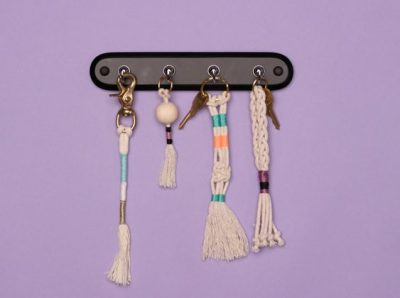
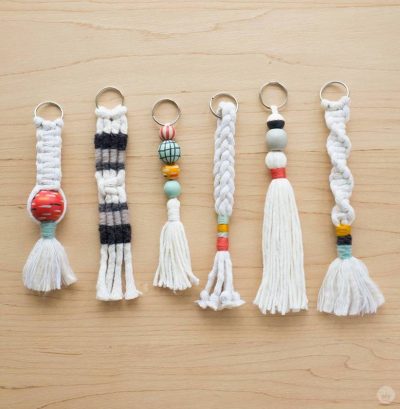
Macramé is not just popular for wall hangings and curtains, but custom macramé keychains are trending these days. They look elegant and artistic at the same time. Try these amazing knots and make your own keychains with macramé techniques. We have compiled some of the coolest macramé keychain tutorials with instructions to guide you.
You May Also Like: “How to Make Macrame Hammock“
How to make Macramé Keychains: 23 Unique DIY Ideas
-
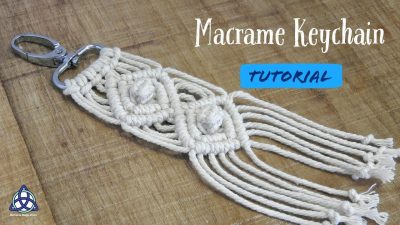
Macramé Keychain for Beginners
This is an adorable macrame keychain is made using beads and easy macrame knots. You will need a metal clasp, some beads, and some macrame cord to finish this project. The finished product with amazing patterns is a great handmade gift for macrame lovers. Follow the amazing linked video tutorial by Melanie in melaniekham.com for the detailed instructions to guide you.
-
Macramé Bird’s Eye Tassel Keychain
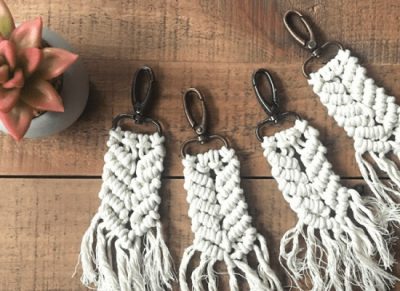
Make this rustic yet designer keychain pattern using square macrame knots. This textured pattern will surely be an eye-catching accessory to add to your charm.
-
Handmade Macramé Keychain: Step-by-Step Instructions
Making interesting macrame keychain designs seems a cake walk with this tutorial. You can weave and knot amazing patterns using beads, colorful threads, and macrame cord.
-
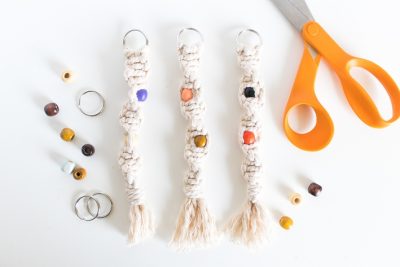
Macramé Keychain DIY
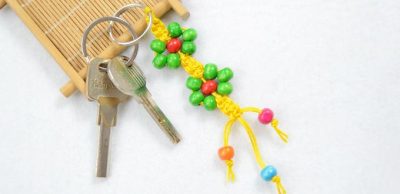
I loved these interesting patterns from Creativkits.com.au. The different knotting techniques used with colorful wooden beads, fringes, and keyrings are tempting enough to make one of your own.
-
Easy Macramé Owl Keychain Tutorial
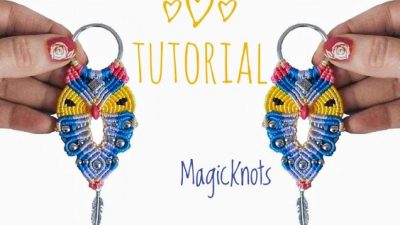
Making macrame owl designs is one of the most popular designs for all macrame lovers. For more macrame owl patterns click here.
-
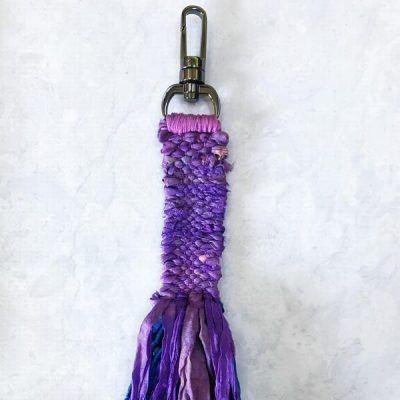
Woven Macramé Keychain with Ribbon
This is quite a creative Do-it-Yourself macrame project to make your own unique keychains. You can use trendy colored ribbons to add to your creativity.
You May Also Like: “How to Make Beaded Keychains“
-
How to Make a Macramé Heart Keychain
Learn how to make this macrame heart design for keychains, necklaces, and decorations for your loved ones on Valentine’s Day.
-
Make a Beautiful Flower Macrame Keychain
-
Mini Macrame Keychain Ideas
This is an aesthetically beautiful design made with intricate macrame knots. This Boho touch looks amazing and is a wonderful gift for loved ones.
-
Simple Macrame Keychain
-
Cute Macrame Keychain Holder
-
Cool Macrame Keychain Hanger
This intricate design involves the basics of macrame knotting techniques and helps you create a textured keychain hanger that will gather all compliments. You can add them to formal bags for a quirky look.
-
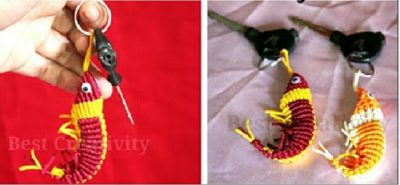
Macrame Fish Keychain: How-To
-
Twisted Macrame Keychain Tutorial
Whether you’re looking for a cool handmade keychain or an elegant beaded one that gets compliments everywhere, this tutorial is your answer.
-
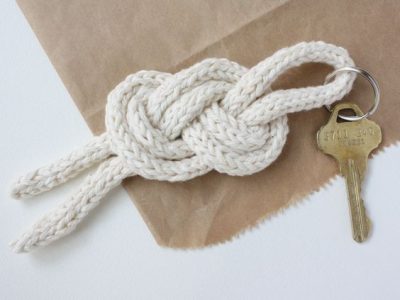
Macrame Sailor Knot Keychain Project
-
How To Make Macramé Cotton Yarn Keychain
-
Make Your Own: Simple Macramé Keychain
-
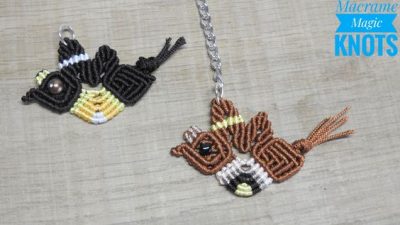
How to Make A Macrame Bird Keychain Tutorial
-
Macrame Lizard Keychain Pattern: Youtube Tutorial
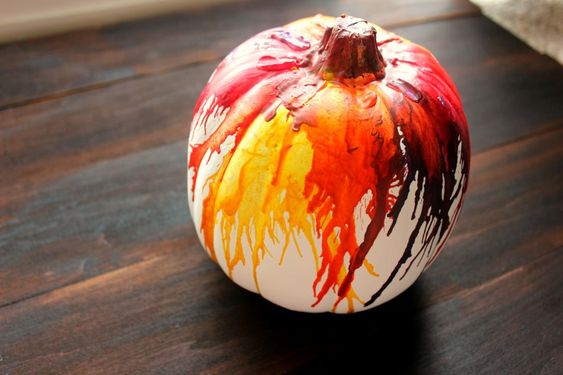
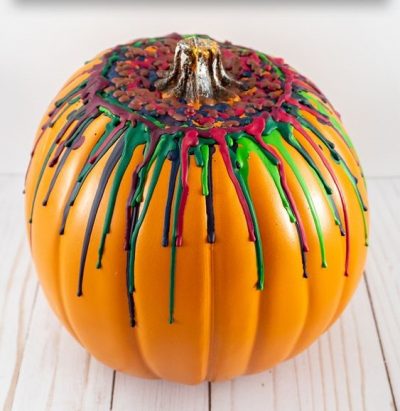
This Halloween find unique and spooky decoration ideas for your pumpkins. You can try this cool melted crayon pumpkin ideas which require no carving. This craft is easy to make and is a fun project for kids and adults.
You need some simple supplies to make this craft;
- Crayons( old and broken will also do),
- A hot glue gun
- A hair dryer or a heating tool
- Pumpkin/Faux Pumpkin
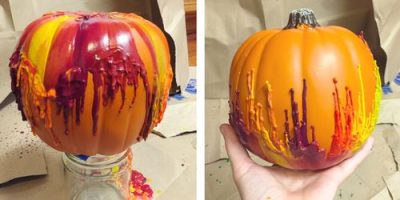
The melted crayons gradually drip down due to the heat, creating fun patterns on the sides of the pumpkin. This color splatter might turn out to be a bit messy at times, so you can use some sheets or newspaper below the pumpkins while making this. A crayon pumpkin is easy to make and you can create them in all sorts of colors from Halloween colors to rainbow colors and beyond! Learn interesting techniques about how to melt crayons on a pumpkin to decorate it.
You May Also Like: “How to Make Styrofoam Pumpkin“
How to Make Melted Crayon Pumpkins: 12 Tutorials with Instructions
1. Melted Crayon Pumpkin DIY
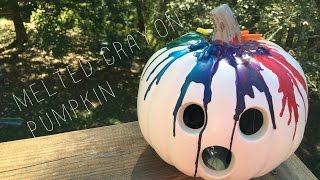
This DIY tutorial uses a faux white pumpkin to get the best effect with melted crayons. This is quite an easy yet creative idea to make your own no-carve pumpkin. All you need to do is get some old crayons and stick them on the top of the pumpkin near the stem with a hot glue gun. Use your hairdryer and have fun watching the crayons melt and make beautiful designs.
2. Melted Crayon Orange Pumpkin Tutorials
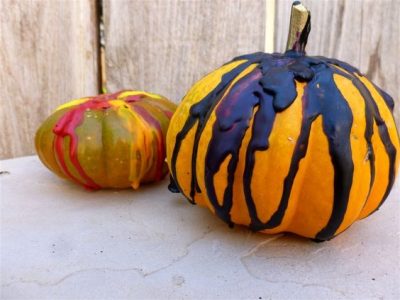
These mini pumpkins are decorated with melted crayons but with a unique twist. A fun craft activity which will make amazing and spooky decorations for the Fall and Halloween. You can use different sizes of pumpkins to make a classic arrangement.
3. How to Make Melted Crayon Dripped Pumpkin
4. Rainbow Pumpkin Crayon Art Ideas
This is such a fun and easy craft ideas for kids and adults too. This Fall, try melting crayons to make beautiful pumpkin decorations.
5. Melted Crayon Pumpkin Decorating Ideas
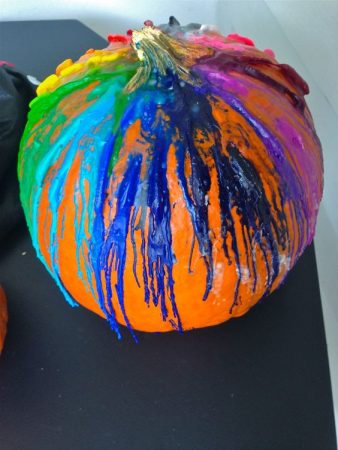
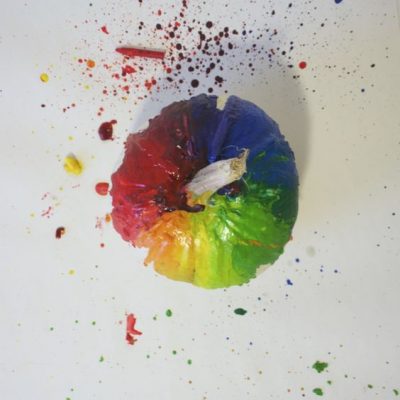
If you are done with the conventional orange, white and black pumpkin ideas, try this rainbow colored pumpkin with melted wax or acrylic crayons. The scattered pattern looks creative and gives your Halloween decor an artistic touch.
6. White Pumpkin Decorated with Melted Crayons
7. Directions to Make Melted Crayon Pumpkin
8. Melting Crayon Pumpkin Instructions
9. Crayon Melting Art on a Carved Pumpkin
This Youtube video tutorial will guide you with step by step instructions to create this carved pumpkin by melting crayon colors.
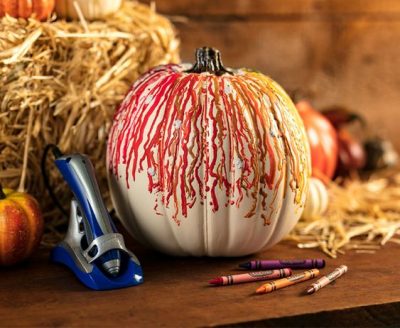
10. Make Crayon Dripped Pumpkin with Crayola Crayon Melter
Now kids can easily use their old and broken crayons and give them a new life with this Crayola melter. Make amazing patterns on a pumpkin with this for this autumn and decorate them creatively. Using black colors will add to the spooky effect.
11. Cute Melted Crayon Pumpkin Decorating Ideas
12. How to Decorate Pumpkin with Crayons
You May Also Like: “Pumpkin Painting Designs“
If you’re looking for a fun autumn craft with a twist for your Halloween centerpieces, then you will love making this crayon-drip pumpkin project.
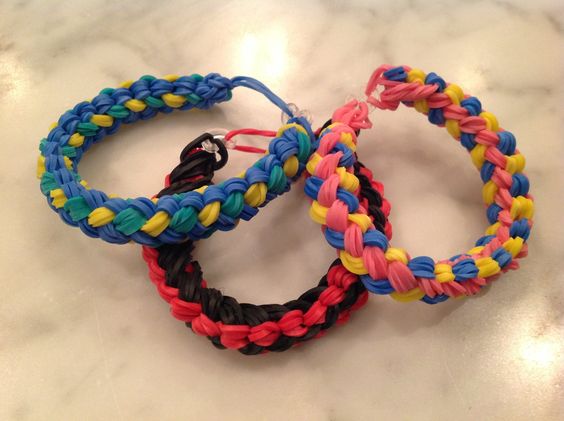
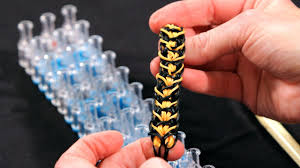
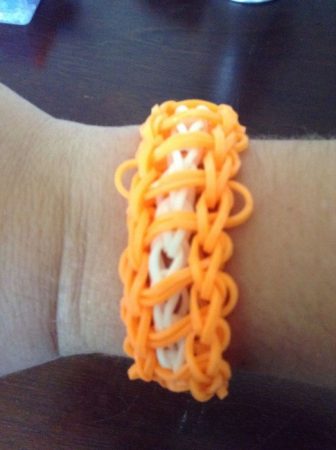
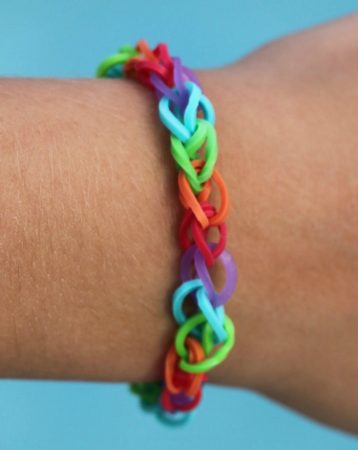
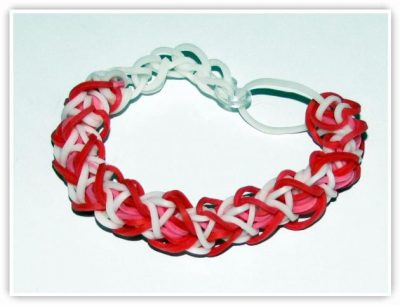
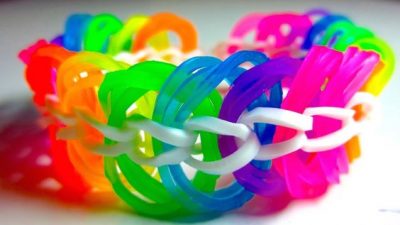
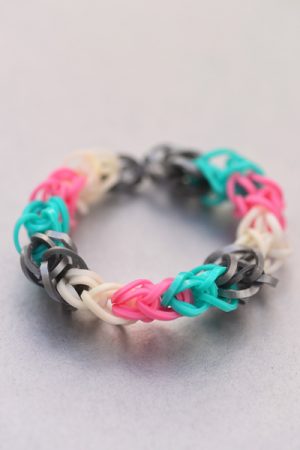
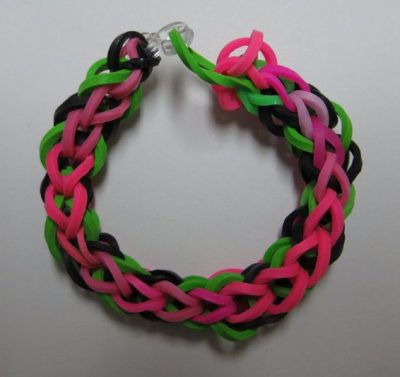
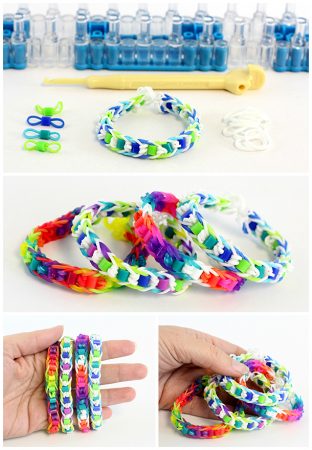
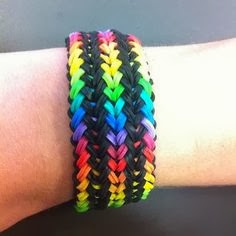
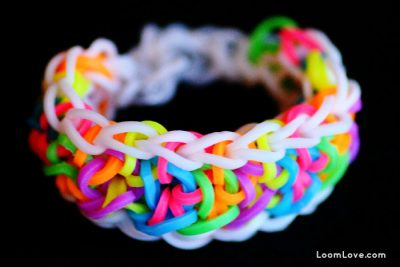
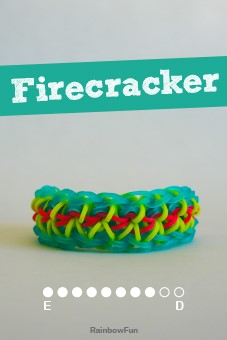
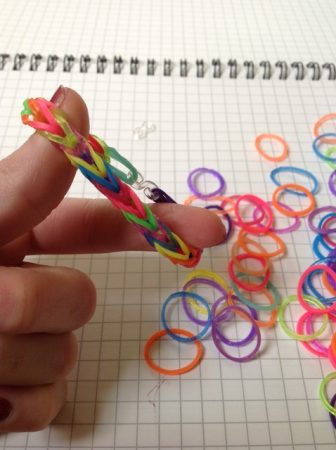
Rainbow Loom bracelet is a fun colorful band which is quite popular among girls, boys and even adults around the world. The technique uses a plastic tool to weave colorful plastic and rubber bands into decorative accessory such as bracelets.
You get the rainbow loom bracelet kits in craft stores and is a great craft for kids. You can weave various patterns from simple braided one, fishtail designs, ladder rainbow loom and more into wonderful accessories and wrist bands.
These amazing handmade bracelets are cheap (doesn’t cost a dime), easy to make and make wonderful gifts to friends and family. We have compiled some of the best tutorials to guide you to make your own unique rainbow loom bracelets.
35 Designs & Tutorials: How to Make Rainbow Loom Bracelets
1. Rainbow Loom Bracelets DIY (Tiger Striped)
This is a very intricate tiger striped design which will enhance the look of the bracelet. The linked video tutorial helps you with step-by-step instructions to make one yourself.
2. Rainbow Loom Butterfly Blossom Bracelet Tutorial
If you are deeply immersed in the loom band bracelet craze then try making this butterfly effect. It will look pretty on your little girl’s wrist.
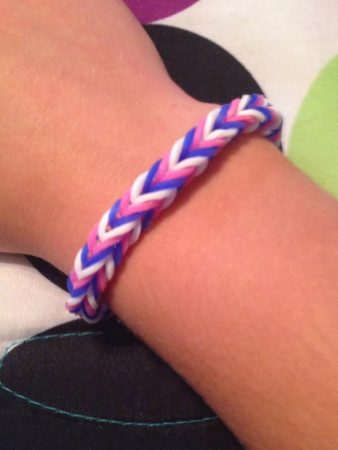
3. Instructions to Make a Fishtail Rainbow Loom Bracelet
The fishtail braid is one of the most popular techniques used to make a loom bracelet. Use funky rubber band colors to create this clean band in less than 10 minutes. They make great friendship bands.
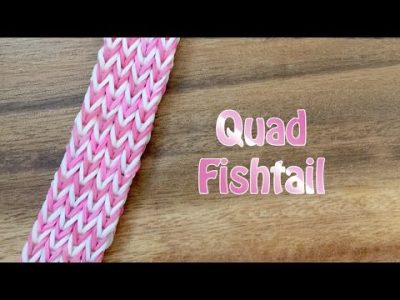
4. Quadruple Fish Tail Rainbow Loom Bracelet
5. Easy Tutorial to Make a Rainbow Loom Ladder Bracelet
The ladder effect is one of the top designs for a loom bracelet. An intricate pattern and a unique one too. You can use your fingers to create this if you don’t have looms at your disposal.
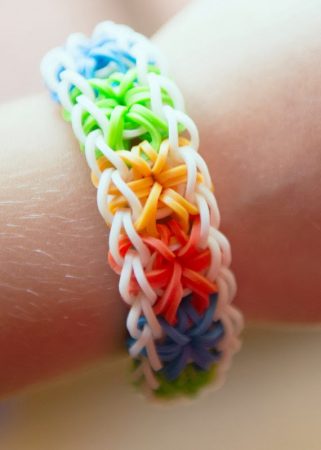
6. Rainbow Loom Starburst Bracelet Design
This is one of my favorite patterns for rainbow loom bands. The starburst gives you bracelet a thick and vibrant look and is a great addition to your handmade accessory collection.
7. Making a Rainbow Loom Bracelet by Hand for Beginners
Get crafty with this cute rainbow bracelet made with colorful rubber bands with the help of a C clip. If you don’t have a loom and still wish to weave a great wrist band, then tutorial will guide you with the step-by-step instructions.
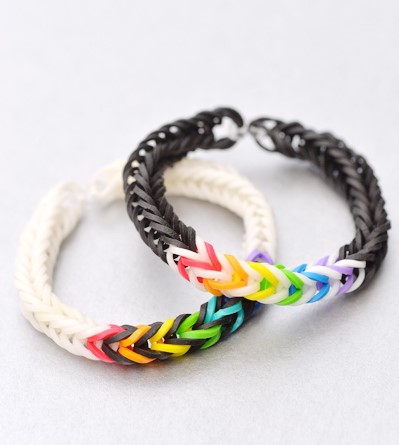
8. How to Make a Double Rainbow Loom Bracelet
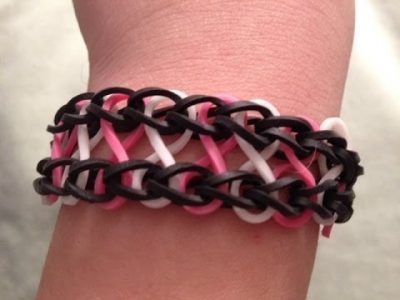
This pattern is identical to the fishtail pattern, they have just doubled it up. The use of colored bands in the middle of white/black looks stunning. You can experiment and try different combinations of your own.
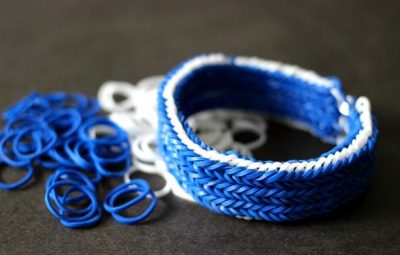
9. Free Pattern for Making a Triple Fishtail Rainbow Loom Bracelet
The blue and white bands look so classy weaved into this thick rainbow loom bracelet. This triple fishtail braid design is great for boys who want to sport a funky look on their wrists.
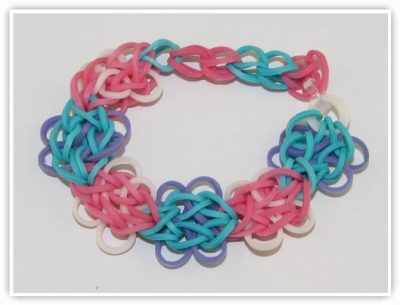
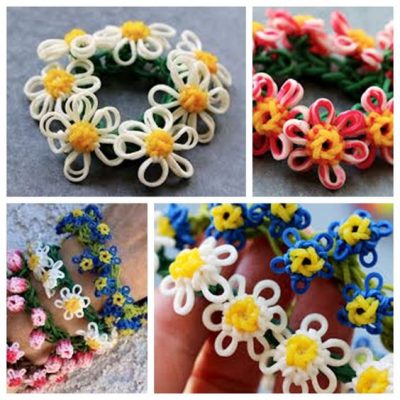
10. Instructions for Making a Rainbow Loom Daisy Flower Bracelet
These gorgeous daisies will make a pretty bracelet for young girls. With the intricate design and amazing choice of colors, you can easily make an addition to your accessorize collection with these handmade loom bracelets.
11. Zig Zag Bracelet with Rainbow Loom
12. Hexafish Rainbow Bracelet DIY
13. Easy Rainbow Loom Heart Bracelet Pattern
14. Way to Make Rainbow Loom Bracelet without a Loom
This video tutorial shows you how to make a triple link chain bracelet using two pencils. You can also use a mini loom to do this because it works the same.
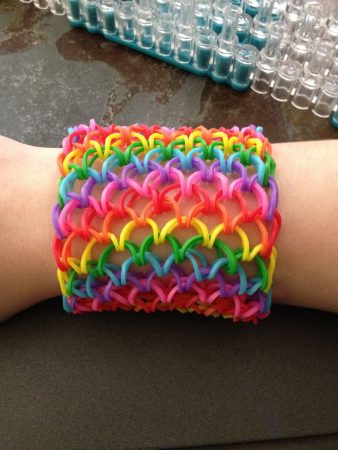
15. Crazy Dragon Scale Cuff Rainbow Loom Ideas
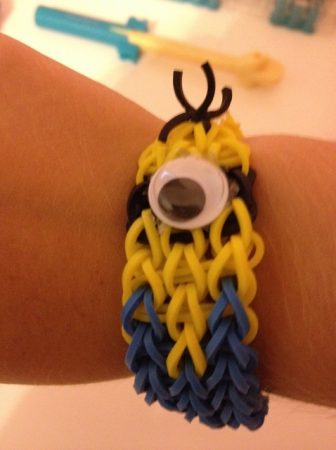
16. Making a Minion Bracelet with Rainbow Loom
This famous Minion bracelet is a cute idea for kids who love this cartoon character. Add googly eyes to this bracelet and give it life.
17. Unique Diamond Bracelet Rainbow Loom Design
18. How to Make a French Braid Rainbow Loom Band
19. Cute Owl Charm Bracelet using Rainbow Loom Technique
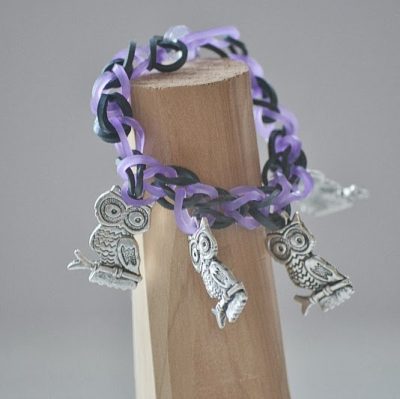
If you are looking for a funky and chic rainbow bracelet for your friends, then try adding some charms or embellishments to decorate it further. The owl charms look amazing in the bracelet. Follow the instructions in the video tutorial to create this pattern in no time.
20. Simple Rainbow Loom Bracelet With Perler Beads Tutorial
The Perler beads added to the loom bracelet gives it a unique look. You can try and personalize it for your friends with the letter beads (adding monogram) making it stylish.
21. Snake Belly Rainbow Loom Bracelet Tutorial
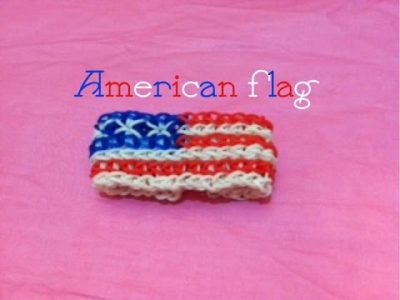
22. How Do You Make an American Flag Bracelet with Rainbow Loom
A great bracelet idea for the 4th of July or Patriotic day. Kids and even grown-ups will love to wear this and flash their love for their country!
23. Interesting Way to Make Rainbow Loom Infinity Bracelet
24. How to Make a Pokemon Rainbow Loom Bracelet
25. How to Make a Sailor Knot Bracelet using Rainbow Loom
This tutorial uses bright neon bands to make this bracelet using the sailor knot technique. A great design for young girls and boys.
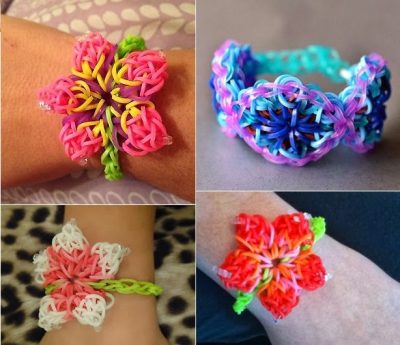
26. Hibiscus Rainbow Loom Bracelet Tutorial
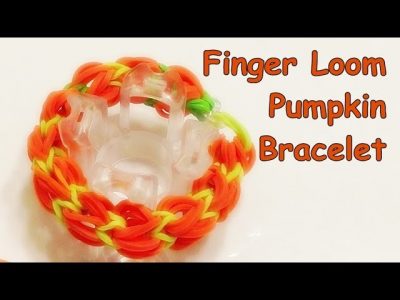
27. Rainbow Loom Pumpkin Bracelet Design for Halloween
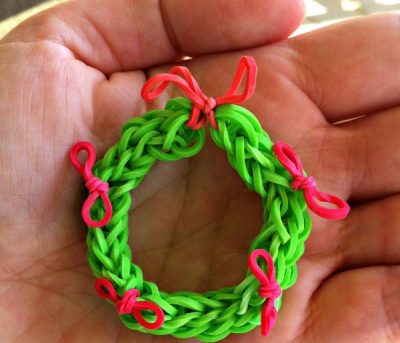
28. Make a Christmas Wreath Ornament Bracelet with Looms
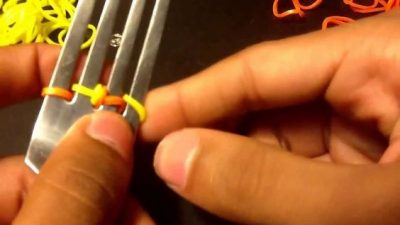
29. How to Make a Rainbow Loom Bracelet with a Folk
30. Simple Steps to Make a Thick Rainbow Loom Bracelet
31. How to Make a Rainbow Loom Bracelet using Fingers
32.
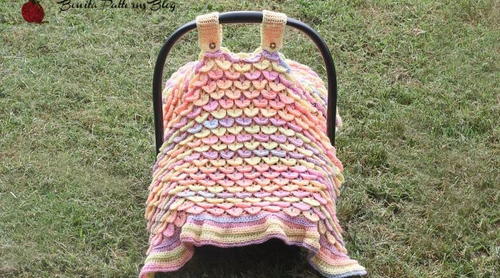
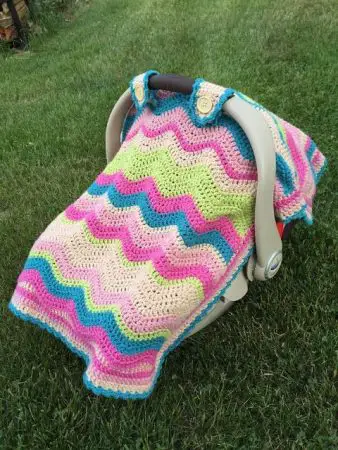
You can create a very special baby car seat cover, tent, or canopy crochet pattern. Baby car seats are very practical and safe for infants. But where can you find a good cover for a car seat? The stores have all sorts of baby blankets and covers, but sometimes they are too big and bulky. You can easily make your own crochet baby car seat covers and customize them as per your needs.
10 Free Crochet Baby Car Seat Cover Pattern & Tutorials
1. How to Crochet a Car Seat Cover
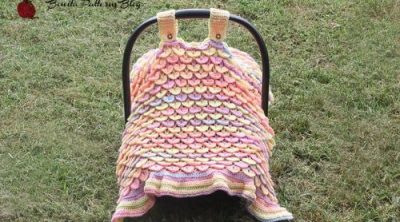
2. Crocodile Stitch Car Seat Cover with Free Pattern
Pattern attributes and techniques include Crocodile stitch and Post stitch.
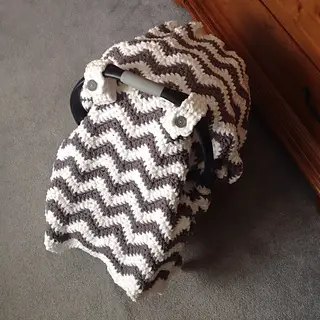
3. Chunky Chevron Car Seat Canopy Cover
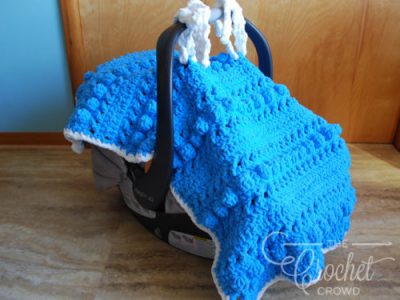
The chevron design is very popular amongst crocheters. Make this adorable pattern for the baby car and gift it on baby showers to close ones. It is made of chunky yarn and is ideal for winters to protect your baby from the cold wind, light, and dust. It will allow your baby to rest inside and have a cozy sleep.
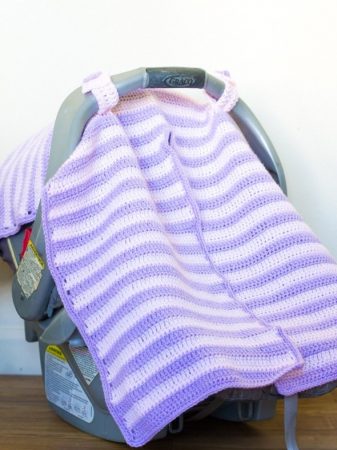
4. Crochet Car Seat Cover DIY
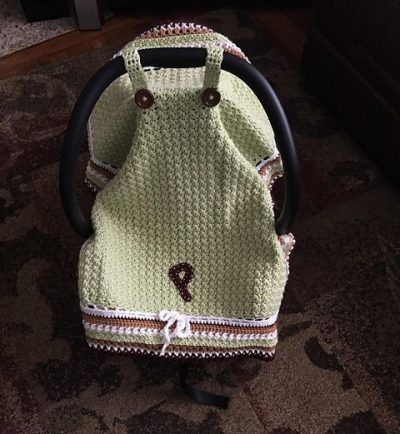
This cute pattern has a split in between to make it easy for you to check and reach your baby. You can use different colored yarns and crochet several covers in different colors, so you have one for each season. You can choose pink colors for baby girls and blue and brown for boys with some vibrant element.
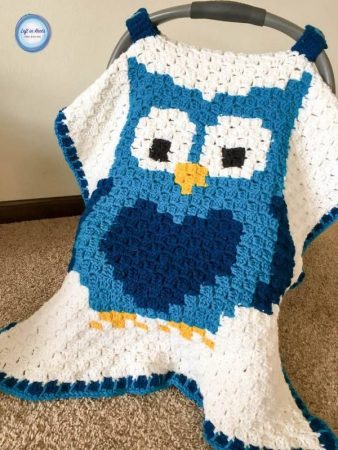
5. Crochet an Owl Car Seat Canopy
6. Crochet Car Seat Tent Tutorial
The minimalistic design and the personalized name monogram patchwork will be a delight for your baby seat. This amazing car seat tent is made by Maria Vazquez and the full instructions are available on Ravelry for free. You can embellish it with lace or very thin borders at the ends to give it a creative element.
7. Crochet Hug and Kisses Baby Car Canopy

