Author Archives: Rhea
Many individuals still argue that painting wood is a job for anyone. All you need is the perfect brush and paint, and you’re good to roll. However, it’s until they set on the task that they realize how complicated it can turn. A regular paint job can give your chair, for example, a fantastic look, and hence a lovely home. On many online platforms, you will find some painting ideas. However, only a few share tips on how to do the job like a pro.
Here are some tips that can upgrade your painting art from amateur to professional in no time.
1.Cover up the floor like a pro
Covering up the floor or surrounding furniture is a simple step, and that should never be ignored. It’s vital. However, many people find themselves either forgetting or doing it in the wrong manner. For example, many individuals tend to use an old newspaper or plastic sheeting to cover up the areas. At times this covering may work, but this doesn’t guarantee a perfect paint job.
The newspapers and the plastic sheeting can be slippery and thus mess your home. Besides, they may leak and hence allowing some paint through and therefore messing with your sweet house. Platforms such as Ideias decor always insist that the perfect material to do the covering is a canvas painter’s drop cloth or a contractor’s paper. But, you can also add some plastic sheeting below to prevent any leaks that may appear.
2. Clean the wood first
Many people assume that paint can help in covering up the stains and hence cleaning is not needed. However, you should know that cleaning the surface is essential and should never be ignored. The staining means that there is a coat of urethane or some finish, and which can mess with your final paintwork. It’s advisable to use tri-sodium phosphate to get the cleaning job done. Removing the stains ensures that the paint bonds well with wood grain. In other words, painting on a stained wood means that your paint job won’t last even a year.
3. Sand the wood
Once the TSP has dried up, the next step is sanding. It’s critical and should never be ignored. Many people argue that wood bought from the factory doesn’t require sanding, and that’s wrong. It’s not ready to paint. You should get the right sander from your workshop, the orbital sander, for example, and get the job done. However, if you don’t own one, you can always buy. It’s efficient since you’ll use it for the next time. Also, you can rent, and that’s in case you don’t do the sanding often.
Also, when sanding, it’s advisable to start with a fine grit of #150. However, #200 works perfectly. Remember, the idea behind sanding isn’t to strip the stain from the wood. Instead, the sanding provides the paint with something to grab. After that, clean the wood thoroughly to remove the dust from the surface. Avoid using the blower here since it redistributes the dirt back to the surface. Instead, you can use a shop vac, tack cloth or cloth rag rubbed with alcohol.
4. Prime the wood
Priming the wood is crucial. It’s a step that separates the talented painters from the rest in the crowd. The professional painters understand that a perfect painting job requires an even surface to enhance the bonding, and that can only be achieved through priming. In other words, priming helps in preventing the problem of flashing.
Flashing is when the final piece of work looks as if you used different sheens of paint. It makes the job look awful. Today, there are different types of primers in the market. So, you must check to ensure that you pick the right one. Luckily, the paint manufacturers have specific primer base, and which can help you get the paint job done using less paint. Remember, cheap is not always the best. So, don’t pick a cheap primer and expect great results.
5. Use the right brush
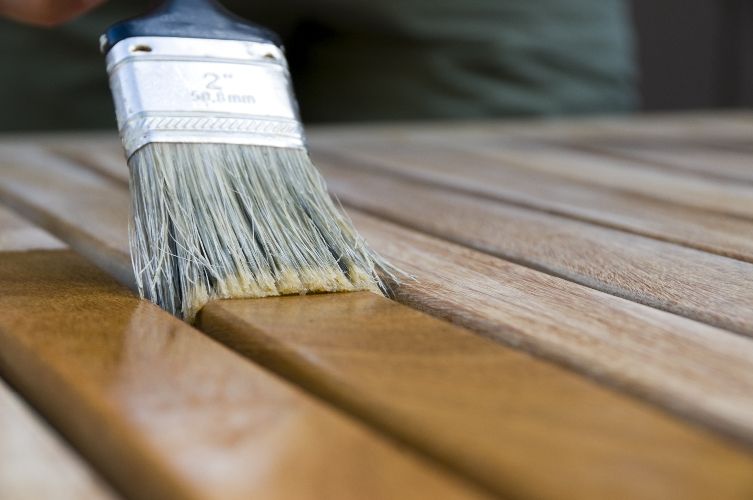
With all said and done, having the right tools is among the last steps that you should never forget. Without the right tools, all your effort and investment may all go into waste. First thing first, you should make sure that you have the right paint brush that will make the painting job easy and perfect. Some platforms insist that a Wooster 2-inch brush is the best because it can paint latex or oil.
Most of the brushes available in the market shed their bristles all over the wet paint and hence messing with the final job. Besides, for larger paint jobs, you should get a roller and a roller screen. The two makes the work less tiring while saving you some money because the screen forces the excess paint out of the roller and hence conserving the paint.
Painting is a task that gives a new life to the wood. Many assume that it’s a simple job and that can be done by anyone. However, it’s a job that requires some tricks as explained in the article to ensure perfection. The five tips can help you take your skills to the next level.

Every room in the house provides a unique experience for the residents. The dining room is important because it provides an ample environment for the family to come together to eat, chat, and celebrate.
This makes the dining table to be one of the core aspects of the home. Dining tables come in different sizes, colors, designs, shapes, and finishes to meet the diverse needs of homeowners. Below are five reasons why a lovely dining table complements every kitchen.
1. Multifunctional Purposes
A lovely dining table is highly practical, convenient, and multipurpose. It can be used solely for dining or as a multifunctional piece of furniture. A dining table can be used for an array of purposes such as holding private conservations, children can do their homework from there, the family plays board games from there and birthdays are celebrated there. In other occasions, a dining table is used as an office or storage.
2. Center of a Home
A lovely dining table is considered as the heart and center of the home that complements all furniture and accessories. After your bed, the dining table is the most important piece of furniture in your home. It is a place where all family members are present at the same time. The dining table is a quiet and warm place where you welcome guests. The interior design and décor of the dining room have a big impact on guests and homeowners alike.
3. Add style to a home’s décor
A lovely dining table adds style and complements the home’s décor. It fits into the home’s décor and enhances its aesthetics. For instance, if your home has a modern style, the dining table must have a modern style. The table adds liveliness to the room and makes it appealing for guests and homeowners. The style of the dining table should match your home’s décor and personal style.
4. Conveys different Meanings
Dining tables come in different sizes, shapes, and colors to symbolize different things. These features communicate volumes about the people living in a home. A small dining table can denote a small family and a love for intimacy. In the Chinese culture, the dining table is a sign of status and wealth. A big table shows that you can feed a large family so the bigger, the better.
5. Good fit
A lovely dining table fits into the dining area to complement every kit. If your dining table is too big, it will not fit into the dining area and hence will not go well with the other kits. Therefore, an ideal table has to fit in the stipulated space and give room for chairs and movement. Large dining tables are elegant and fit beautifully in spacious homes.
The dining table plays an important role at home and brings good energy and social connectivity. It is a symbolic piece of furniture that depicts status, strength, unity, and community with guests. A lovely dining table complements every kitchen because it is multipurpose, the center of a home, and adds style to a home’s décor.
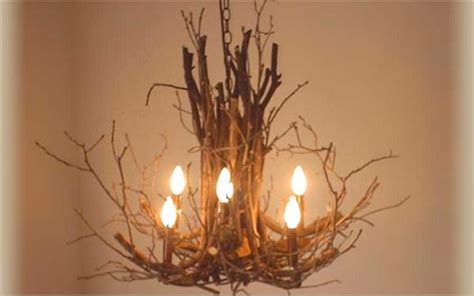
It’s autumn and Christmas is coming soon. DIY enthusiasts love to create unique crafts for the holiday season and utilize almost everything available. We had earlier shown how to make candle holders using twigs. Now let’s see how to transform a fallen tree branch and twigs into stylish chandeliers.
It’s time to create handmade chandeliers with twigs and bring some nature into our interiors.
Interesting Ways on How to Make DIY Twig Chandeliers
-
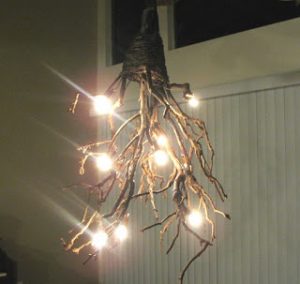
Rustic Twig Chandelier
Turning some dry branches into a beautiful hanging chandelier isn’t that difficult. The linked tutorial shows you the step-by-step instructions to make this out of small-medium twigs lying around in your backyard.
-
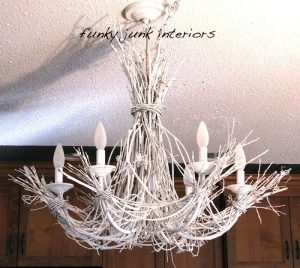
Hanging Twig Chandelier
An ideal chandelier to light up your house this Halloween and give it a natural and rustic look. In this tutorial white tree branches have been used. The use of twine and branches is eye-catching!
-
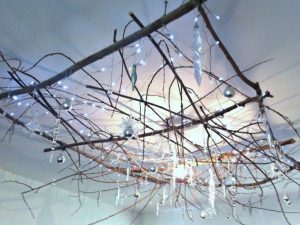
How to Make Tree Twig Hanging Chandelier
Create the most stunning lighting for this corner of your house with natural twigs, tree branches, and fairy lights. This tutorial sets-up this interesting Christmas rustic ceiling decoration which a treat to your eyes.
-
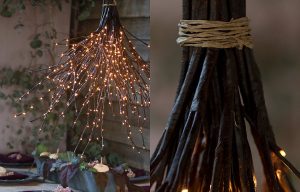
Easy Natural Brown Twig Chandelier
Tangle your twig lights together and tie the upper stems together using bind wire. You may choose to stagger the heights of the stems to create a longer, narrower chandelier. A very classic design which can be assembled easily to create some great lighting.
-
Nature Inspired Twig Branch Chandelier
This simple yet creative chandelier hanging from the ceiling is quite a creative addition to your decor. An interesting winter craft to brighten your house with some handmade light display.
This fall you have a great reason to upcycle the fallen branches, twigs and collect them and turn them into beautiful wreaths or chandeliers to light your house. Share your ideas and creations with us in the comment section below.
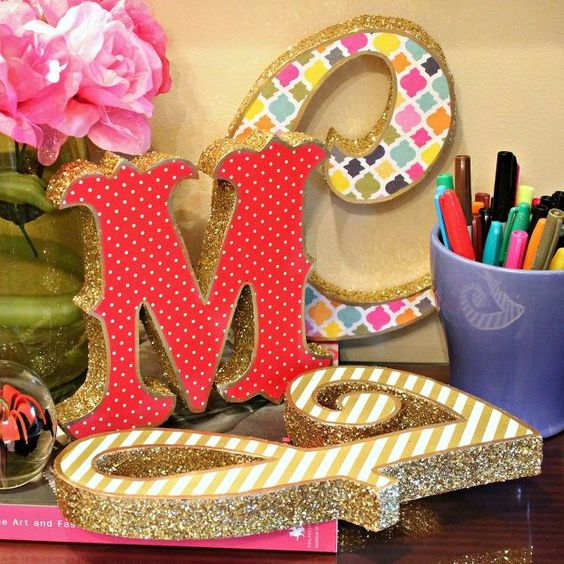
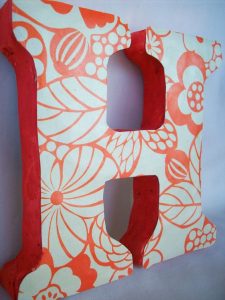
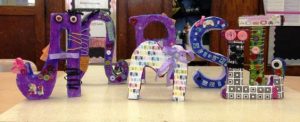
Styrofoam is a highly versatile and a creative craft material for creating letters (alphabets), numbering or designs. You can choose a font style and print size from any word processing program on your computer. Polystyrene foam letters and numbers great for decoration, arts & crafts, DIY for kids too. The cutouts can be decorated with water-based paint, glitter, flowers and customized to your creative levels. Let’s explore the amazing ways to cut of styrofoam letters.
How to Make Styrofoam Letters ~ Tutorials with Instructions
-
DIY Styrofoam Letters
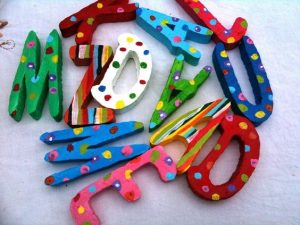
Create unique and colorful wall art with large styrofoam letters. A great idea to show your love to your loved ones on Anniversaries, Weddings or Valentine’s Day. Once the alphabets are cut, add some color and get some life to it and use as decorative centerpieces.
-
Styrofoam Letter Tutorial
Jazz up your walls with funky homemade styrofoam signs, letters, and numbers. A cool makeover for your walls which can add glitz to any party.
-
Make Your Own Styrofoam Letters
-
How to Make Letters from Styrofoam
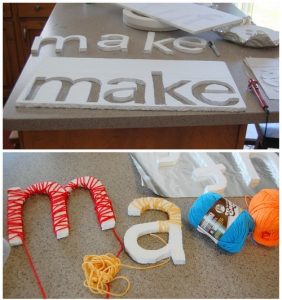
A great combination of styrofoam and colorful strings to make amazing art for decorating your room.
-
Large Styrofoam Letters: Step-by-Step
Wondering how to make giant letters out of Styrofoam? If you want a standing letter sign then take a Styrofoam with good thickness.
-
Jumbo-Sized Styrofoam Letters Instructions
-
Styrofoam Block Letters Ideas for Decoration
-
Making Styrofoam Wall Letters
-
Over-Sized Styrofoam Letters
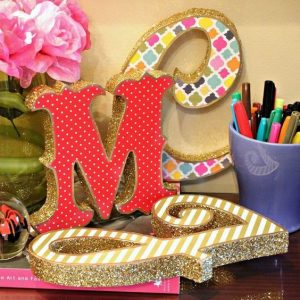
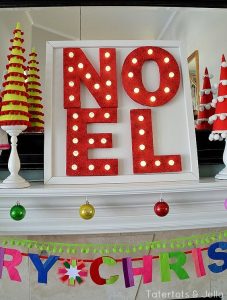
Recycle some discarded styrofoam to make these marquee letters with patterned paper printed and some glitterati.
-
Styrofoam Studded Wall Letters: DIY
-
Glitter Styrofoam Letters for Decoration
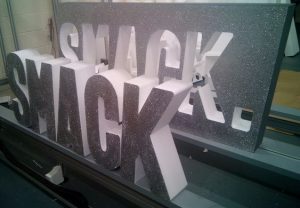
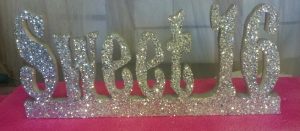
Glitter, paints, and styrofoam can make great party props. Be it your wedding anniversary, baby shower party or sweet 16 birthday, make great letters and signs with foam at affordable prices.
-
Styrofoam Script Letters Design
-
Styrofoam Letters for Homecoming
-
Cool Styrofoam Letters for Pool Party
-
Cute Styrofoam Letters for Birthday Party
Making your own jumbo letter cut-outs as a backdrop for the birthday party will be a perfect budgeted decoration. You can add red, pink or blue depending on the theme of the party. The linked tutorial guides you with step-by-step instructions on how to cut and paint styrofoam alphabets.
-
Styrofoam Letters for Baby Shower
Make cute DIY Centerpiece Ideas using Styrofoam Shapes to welcome the angel in your life. Add glitters, ribbons and more to further embellish it.
-
Styrofoam Cursive Letter Designs
-
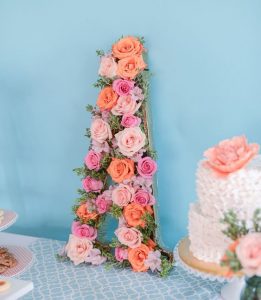
Styrofoam Letters: Flower Decoration
-
Styrofoam Letters for Wedding
These styrofoam/polystyrene letters make a striking centerpiece. You can spray paint them any color you want. You can even cover them in glitter, sweets or sprinkles should you prefer.
-
Huge Letters Cut-Out in Styrofoam
-
Styrofoam Lighted Marquee Letters
A great crafting prop for parties and festive season. You can also download the free PDF template for the alphabets.
-
Cool Styrofoam Letters in 3D Design
Carve out great props for your party or occasions with styrofoam and paint them with bright colors.
-
Styrofoam Monogrammed Letters Standee
-
Easy Painted Styrofoam Letters For Kids
-
Styrofoam Letters Template
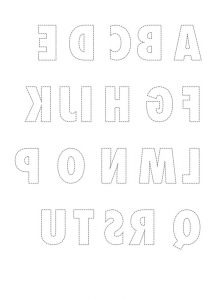
You can download the free templates of reversed numbers and alphabets and trace them on the styrofoam to make a neat cut out.
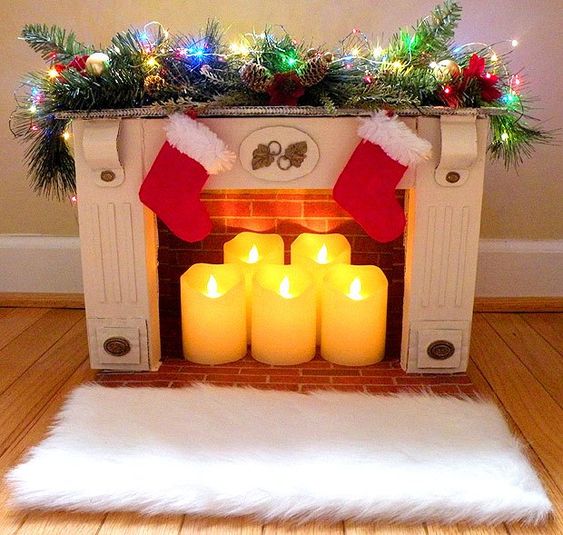
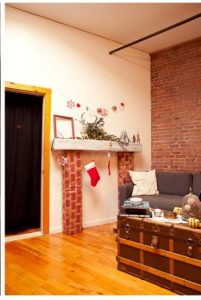
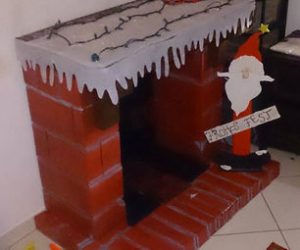
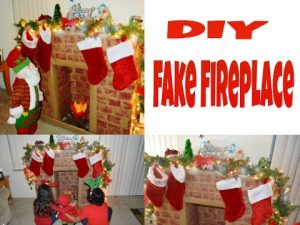
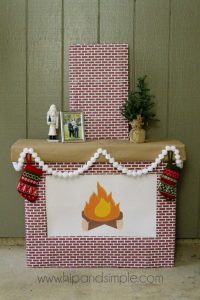
If you are deprived of the comfort of having a warm fireplace at your home, fulfill your desire by creating a fake one using recycled cardboard, to enhance the decor of your house especially when the festive season is around the corner. Sharing a collection of great DIY’s and tutorials to help you out with step-by-step instructions.
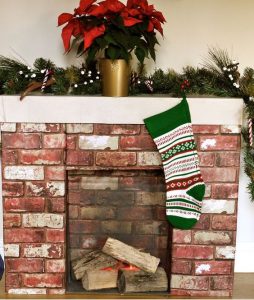
A faux fireplace can be used just at Christmas time or all year round to add a fun architectural detail to the home. Place LED candles or a basket of wood in the open center part of the fireplace to complete the effect during the chilling winters. Hang the stockings and make it look so real even Santa gets confused!
How to Make DIY Cardboard Fireplace with Instructions
-
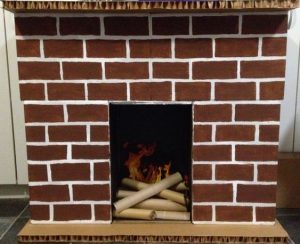
DIY Cardboard Fireplace
If you are a creative junkie and don’t have a real fireplace this Christmas to lighten your house, make this beautiful craft and make a warm elegant corner for your room.
-
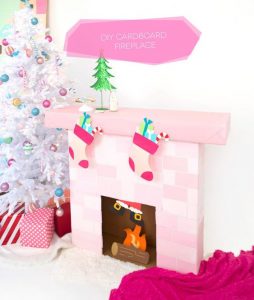
Cardboard Fireplace for Christmas
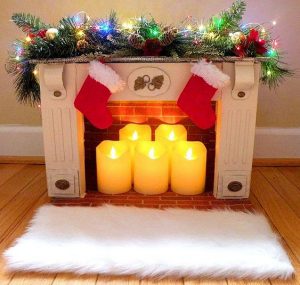
Add a warm and cozy charm your room and decorate it with garland, lights and filled with flameless candles. It is made from all recycled materials and it is very easy to create. You can add your own holiday decorations to make it your own style.
-
DIY Cardboard Fireplace for Halloween
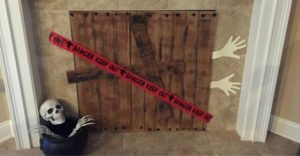
This Halloween fireplace cover will add a great charm to your decor. Paint some bats and hands and create a spooky effect.
-
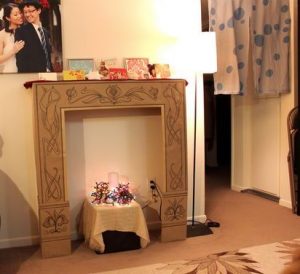
Vintage Cardboard Fireplace Instructions
A lovely fireplace that looks real. Add some warmth to your home decor with this handmade fireplace. Decorate it with stockings and Christmas ornaments.
-
How to Decorate Cardboard Fireplace
Your kids will enjoy to add Santa coming down the chimney along with a warm fire, all made from paper and cardboard.
-
How to Make a Fake Fireplace from Cardboard
-
Easy Mini Faux Fireplace of Cardboard
Add some homey holiday feeling with cardboard boxes and light in one corner this winter and create a faux fireplace. Making some cute designs with your colorful sharpies will give it a unique artistic touch for the festive season.
-
Homemade Cardboard Fireplace Display
-
Making a Fireplace from Cardboard Boxes
-
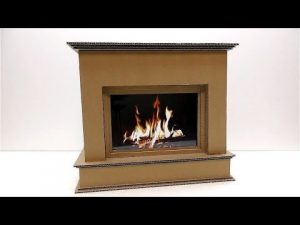
Easy Cardboard Fireplace Ideas (Video Tutorial)
With the help of a tablet screen, the fake fire effect has been created. This will surely amaze your friends in wonder.
-
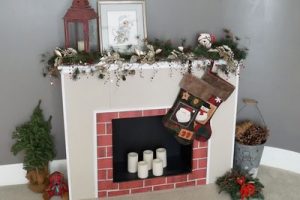
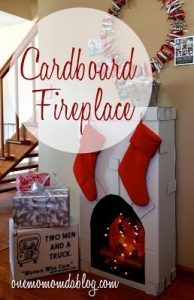
White Cardboard Fireplace for Christmas
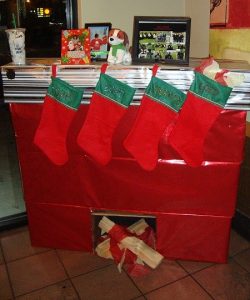
Your kids would be elated on seeing this awesome fireplace as it would serve as an ideal place for them to hang their stockings and eagerly wait for the special gifts brought for them by Mr.Santa.
-
Cardboard Fireplace with Lightbulb for Fire
-
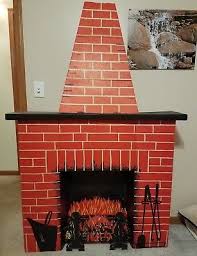
Cardboard Fireplace with Chimney Craft Ideas
Why buy a fireplace when you can build your own with a custom vintage effect. Just add a big triangle cut out to attach a chimney to your fireplace, just like the one shown in the picture below.
-
Making an Artificial Cardboard Fireplace
-
Instructions to Make a Cardboard Fireplace
-
Create an Antique Cardboard Fireplace
The old vintage brick style fireplace is always a treat to your eyes. Follow the simple instructions to create a decorated fireplace yourself.
-
Making a Cardboard Fireplace Mantle
Add props, trees, stockings and Christmas garlands to embellish it further for the cute festive look.
Try making this cute cardboard Thomas Tank Engine Costume from this tutorial.
Place your faux fireplace against the wall or in the corner to create a Christmas look anywhere. Stockings, lights, small bulbs, and garlands can be hung with simple thumbtacks. These design cannot hold a lot of weight, however, so use caution when filling stockings and adding decorations to the mantel.
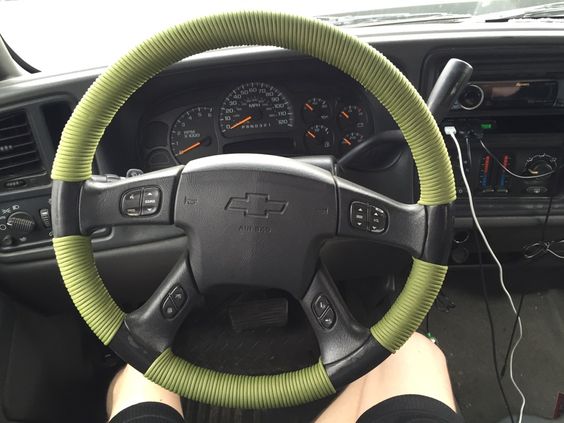
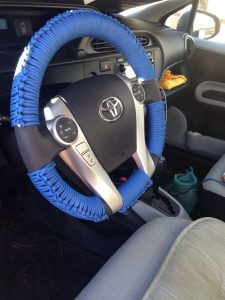
Add some color and texture to your aged steering wheel with paracord. Paracord Steering Wrap is a great way to have paracord for survival situations. Plus it gives you a firmer grip upon the steering wheel.
To protect your steering wheel from further damage, clean your steering wheel, choose a material like a cool paracord, and proceed to upgrade your worn-out wheel to a handcrafted beauty.
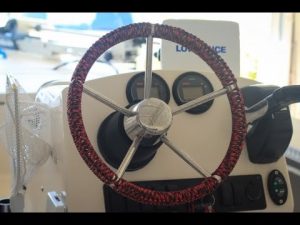
For all paracord crafters, we are sharing some cool ways to use paracord to cover your steering wheels. You can apply it to steering wheels of a car, jeep, boat etc.
For some more paracord project, Read More!
How to Make Steering Wheel Wrap with Paracord
-
Easy Paracord Steering Wheel Wrap
Bored of the usual black steering wheel of your car? Upgrade it with some paracord look. Use amazing color in solids and stripes and make it easier to use in rainy days and snow too.
-
Paracord Steering Wheel Wrap Tutorial
-
Paracord Steering Wheel Wrap Instructions
In this video tutorial, they have demonstrated how to tie a paracord steering wheel wrap. A great way to add some grip to your steering wheel. Plus it is very comfortable! They have used the 3 stranded ringbolt hitching technique for this project.
-
Paracord Boat Steering Wheel Wrap
-
Fishscale Paracord Steering Wheel Wrap
Try creating different knots and have a great grip to get rid of those sweaty hands while driving.
-
How to do a Paracord Steering Wheel Wrap
Try these simple tutorials to give a firm grip and a cool makeover to your steering wheel. Please share your creations with us in the comments section.
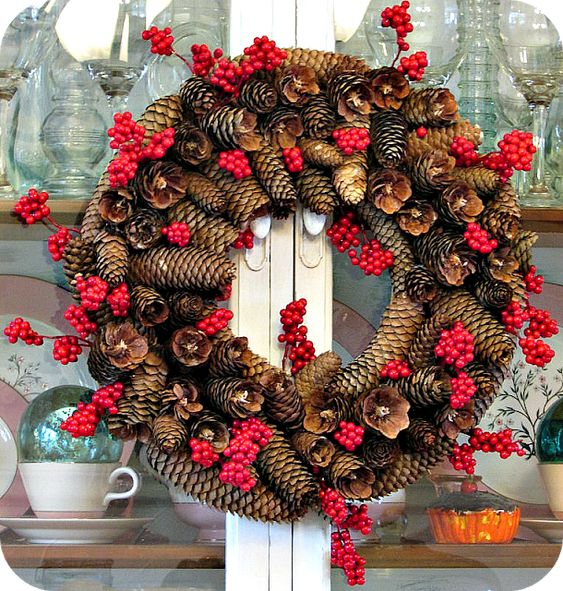
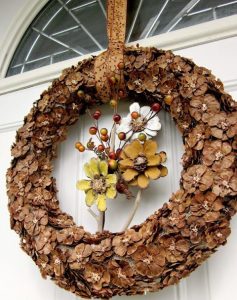
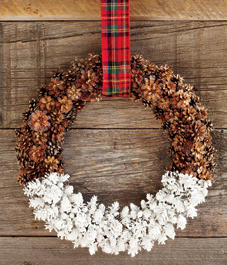
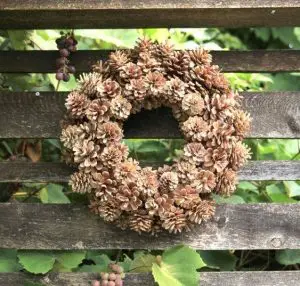
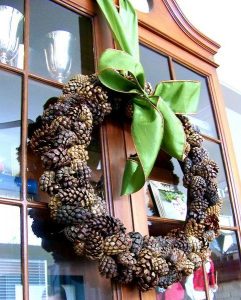
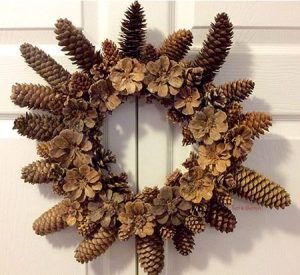
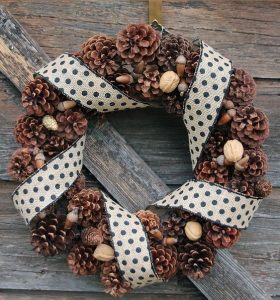
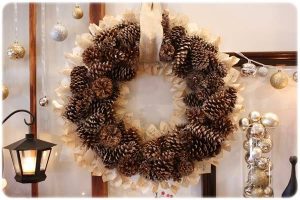
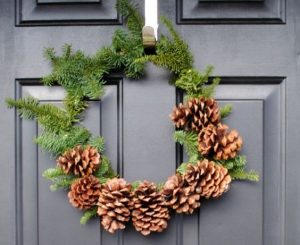
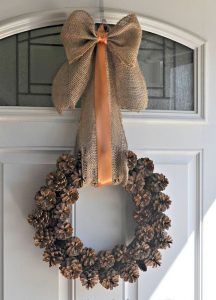
Making pinecone wreath is a fun and creative way to welcome guests and add a little curb appeal during holidays. Gathering natural objects from the outdoors like pinecones, acorns, some greens and bringing them together in a creative manner keeps you connected to nature. Create a fabulous wreath using the freshly cut pine cones, this might be one of your preferred craft idea for this holiday season. We have compiled some amazing tutorials which may make your wreath making project an easy one! It’s simpler than you think and getting the pinecones ready makes your house smell amazing!
How to Make Decorative Pinecone Wreath~ Tutorials & Instructions
-
Pinecone Wreath DIY
These wreaths are spray painted and glittered, with bead decorations and a bow attached. You can choose to keep the original color of pinecones to have that rustic country look on your entrance. If you are wondering how to make a pinecone wreath on a wire frame, then this is the perfect tutorial for you!
-
Homemade Pinecone Flower Wreath
This winter white wreath is the perfect decoration to greet guests with a warm, holiday welcome.
-
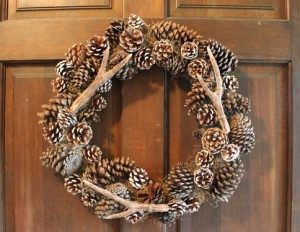
DIY Pinecone Wreath with Faux Antlers
-
Directions to Make Holiday Pinecone Wreaths
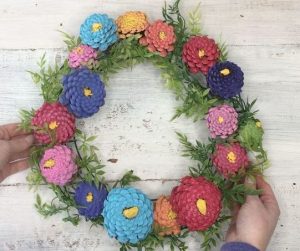
Turn these pinecones into an abundance of flowers and colors for a festive fall touch that will last you through Thanksgiving or Christmas!
For Wine Cork Wreath Tutorials ~ Read Here
-
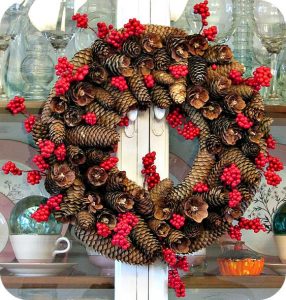
DIY Woodland Pinecone Wreath Tutorial
A great one for beginners, bring some holiday cheer to your front door with this woodland, pinecone wreath adorned with artificial berries. It looks lovely displayed all winter long!
-
Festive DIY Wreath Made from Pinecones and Greenery
An amazing combination of greens, mini pinecones, glitter, ribbons and more. Adorn your front doors with this holly combination sets off the mood for the festive season.
-
Pinecone Wreath from Wire Hanger Tutorial
-
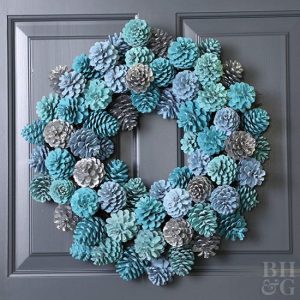
Instructions to Make Ombre Pinecone Wreath
Make a pretty wreath for the holidays (or any time of year!) with pinecones, spray paint, and a few other basic craft supplies.For DIY Coffee Filter Wreath ~ Read More
-
How to Make Paint Dipped Pinecone Wreath
You can also opt for a three-color dip (red, white and green or blue), for Memorial Day or Christmas likewise.
-
Making Monogrammed Wreath with Pinecones
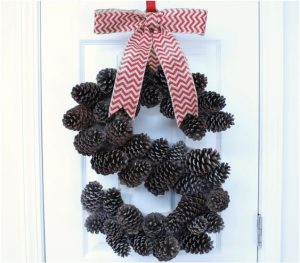
Upcycle pinecones to make a warm and welcoming door decoration. Personalize it for some one special or in remembrance of a loved one! -
Directions: Rustic Burlap Pinecone Wreath
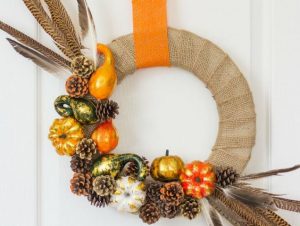
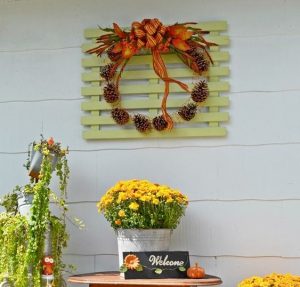
With a burlap base and pumpkins, gourds, pine cones, and pheasant feathers, this rustic DIY wreath screams fall! It would look great either outside on the front door or indoors as part of your fall and Halloween decor.
-
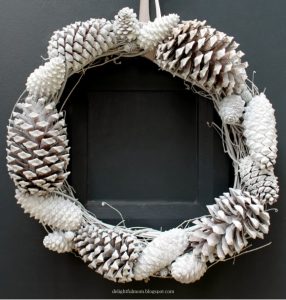
Making a Bleached Pinecone Wreath for Fall
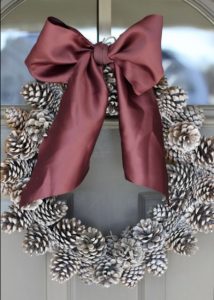
Bleached pinecones are all the rage! While pinecones have always been a staple of autumn and winter décor, bleaching them gives them a softer, brighter, more modern look than untreated pinecones.
-
Handmade Pinecone Wreath for Spring
Grab some ferns and pinecones from your backyard and turn them into a pretty wreath in for the spring. A lovely house decor with colors and hues.
-
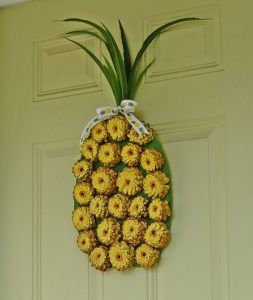
Pineapple Pinecone Wreath for Summer
Give your front door a warm and welcoming summery vibe with this cute and thrifty Pine Cone Pineapple Wreath!
-
Scented PineconeWreath for Autumn/Fall
To give it a natural look the grapevine is used instead of the styrofoam. A splash of bright colored bow makes it look more lively. You can get more creative and try adding elements for a new look.
-
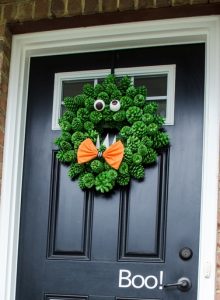
DIY PineconeWreath for Halloween
-
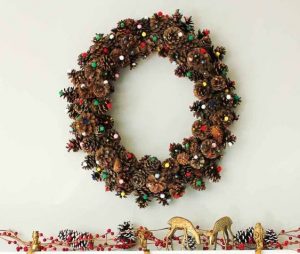
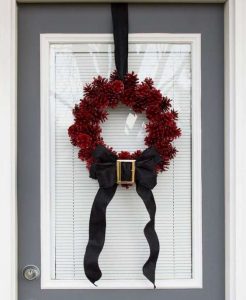
Traditional Pinecone Wreaths for Christmas
A great Christmas craft with natural pinecone supplies and small colorful pom-poms. You can also use tassels, ribbons, bows to embellish it further. Hang it on your front door or wall and get amazing compliments.
-
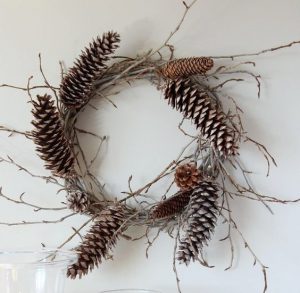
Make Your Own Winter Pine Cone Wreath
This woodland wreath can be made using twigs and pine cones gathered up on a family nature walk. A fun and thrifty home decor project for holidays!
-
Christmas Pinecone Wreath Ideas
-
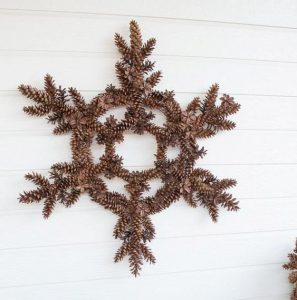
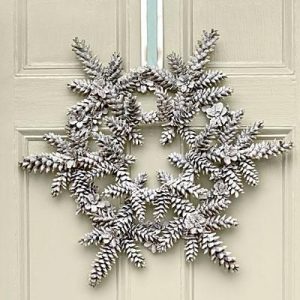
Pinecone Christmas Wreath Snowflake Design
A perfect pattern for a snowy season decoration this winters. Use it to dress up your home from Christmas until Valentine’s Day.
-
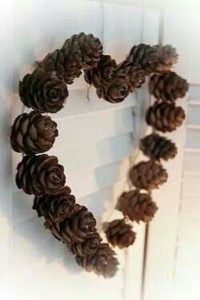
Heart-Shaped Pine Cone Wreath
This easy-to-make Pinecone Wreath is the perfect addition to your Fall/Autumn decor. You can add a touch of red ribbons, bows or little paint to use it for Valentine’s Day too.
-
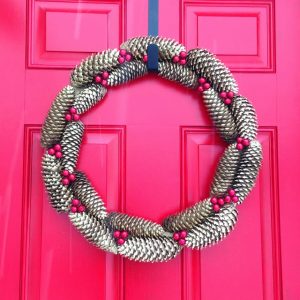
DIY Gold Pinecone Wreath
-
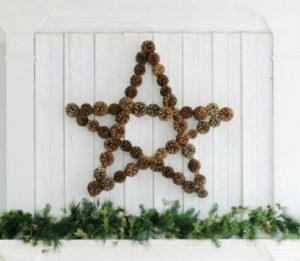
Big Pinecone Star Wreath Craft
All you need is some 5-6 yardsticks to make the star shape. Once done, stick the pinecones on them meticulously. Add a bow or ribbon to make it more colorful.
-
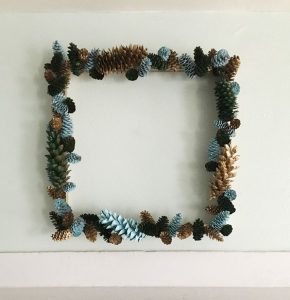
Square Pinecone Wreath Tutorial
Bored of the regular round wreaths? Then try making a square one with pinecones beautifully spray painted. You can use these to decorate your walls all year around.
-
How to Make a Vintage Pinecone Wreath
-
Pinecone Wreath with Wired Wreath Frame
You can use nuts, acorns, berries, etc to give it a natural close to nature look. I loved the way they have designed it with it.
-
Pinecone Advent Wreath Art Tutorial
-
Snowflake Wreath Made with Skinny Pinecones
-
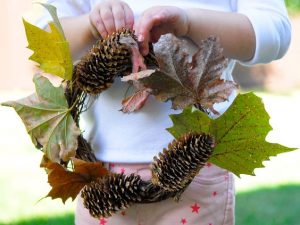
How to Make a Small Pinecone Wreath
Make a little wreath with kids to showcase all the beautiful things you find on your nature walks!
-
Zinnia Pinecone Wreath Ideas
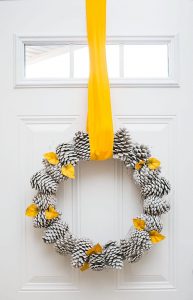
Paint it all white for a modern, monochromatic look that’ll last through the winter or make your front door pop with brightly colored pinecones. -
Unique Pine Cone Wreath with Book Pages
-
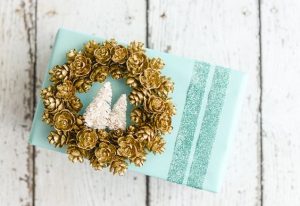
How to Make Miniature Decorative Pinecone Wreath
No matter whether your style is rustic or glamorous, these pine cone ornament wreaths are sure to be the perfect crowning touch for your gifts.
-
Wintery Pinecone Wreath Tutorial
You can decorate them with ornaments, flowers, and lights to brighten up your decor!
-
DIY Pine Cone Wreath for Wedding Decoration
DIY with this inexpensive (under $10) winter white pine cone wreath! It is a great activity to make with the kids and look how pretty it compliments a front door or back patio or an elegant wedding decor.
-
Easy DIY to Make Pinecone Grapevine Wreath
This stylish wreath would look gorgeous when hanging on your window or door!
-
Creative Idea to Make Pretty Pinecone Wreath
-
How to Make Chicken Wire and Pine Cone Wreath
-
DIY Metallic Pinecone and Acorn Wreath
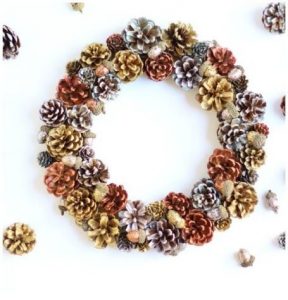
Just pair some natural pinecones and acorns with shiny metallic gold, silver, and copper paint and glitter. The end result is both rustic and glam at the same time.
-
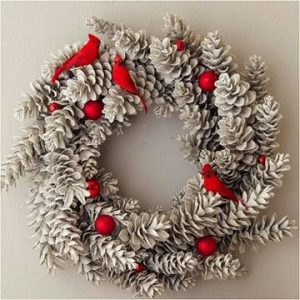
Pinecone Wreath with Cardinals: Do-it-Yourself
-
How to Make: Pinecone Wreath Tutorial
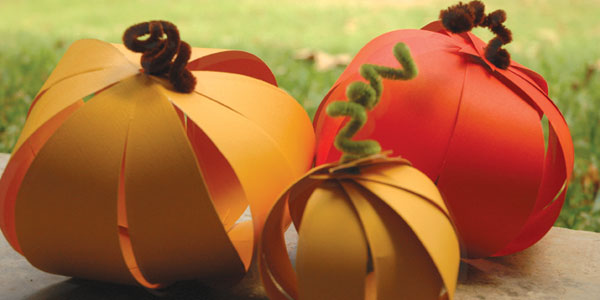
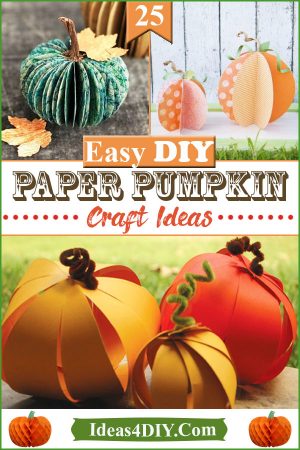
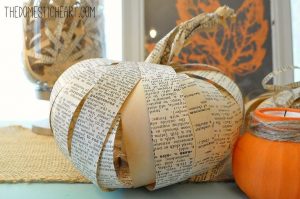
Keep your Halloween or Thanksgiving table setting a bright and fun look by adding DIY decor that’s easy, inexpensive and so cute, it might even grab the attention away from the turkey! These little handmade pumpkins are so much fun to make.
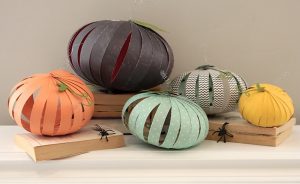
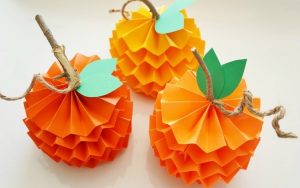
It’s a fun Fall craft you can do with your kids or a great adult craft to spruce up your mantel or table decor. You can try it with different colored papers (crepe, tissue, cardstock, old book papers, newspapers, scrapbook pages etc.) in different patterns as well. Go through the versatile DIY tutorials and make your own paper pumpkin craft this Halloween!
How to Make Easy Paper Pumpkins ~Tutorials & Instructions
-
DIY Paper Pumpkin
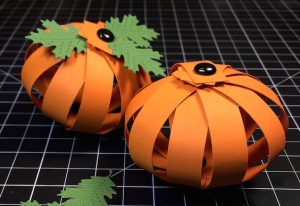
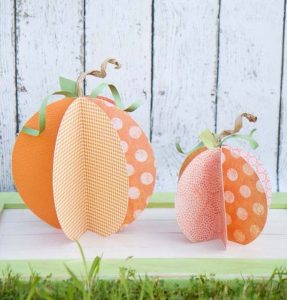
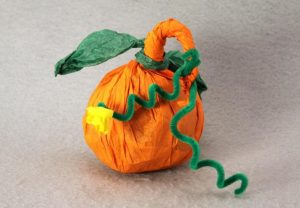
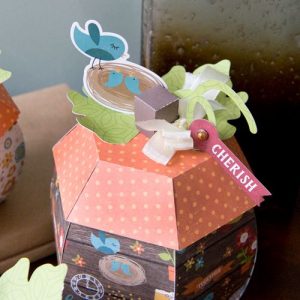
These lovely pumpkins are made from patterned paper in different colors and prints. You can decorate your house with these cute different sizes of pumpkins made from scrapbook paper.
-
Unique Paper Pumpkin Craft for Fall
Craft enthusiasts can draw some inspiration from the amazing DIY origami tutorial to give their indoors a Halloween facelift. You can play around with the sizes, colors, and patterns. Group a few together at a kid’s table, adult’s dinner table with decorated skull heads, and the gothic zombies.
-
Pumpkin Paper Craft with Card Stock Strips
-
Paper Pumpkin Project Ideas
A very unique project with a vintage touch. Use printed crepe papers or paper of your choice and create decorative centerpieces for your Thanksgiving table or sideboard this Fall. A free template for the pumpkin design is given in the linked tutorial.
You May Also Like ~ “Halloween Pumpkin Designs & Ideas“
-
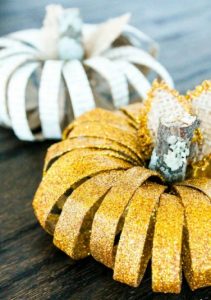
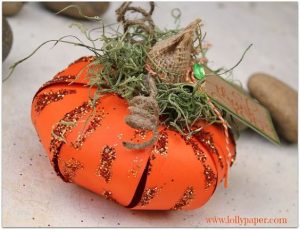
Instructions to Make Decorative Paper Roll Pumpkin
Spend more time to decorate your pumpkins you could do different colors of glitter, gold leaf flakes, or buttons or paint them too. Let it last till Thanksgiving to double up the fun quotient. Using cinnamon sticks as stems give it a beautiful rustic touch.
-
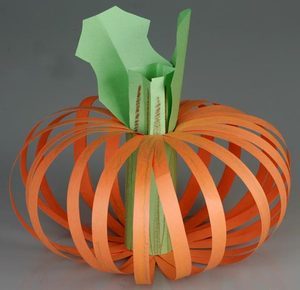
Make Pumpkin using Paper Strips
The Halloween fever will increase manifold with glow-in-the-dark pumpkins that can be placed at the doorstep or in the yard alongside those twinkling lights.
You May Also Like ~ “How to Make Halloween Table Runner“
-
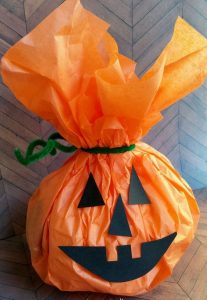
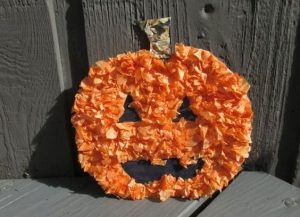
Easy Tissue Paper Pumpkin Ideas for Kids
Get the kids involved in Halloween and Fall decorating with these super easy kids’ tissue paper pumpkins. -
Paper Pumpkin Crafts for Pre-Schoolers
A super easy crafting idea to make pumpkins with scrapbook papers. Kids will love this holiday project. You can further decorate the pumpkins using glitters, ribbons etc.
-
How to Make a 3D Paper Pumpkin
Handmade pumpkin will give you not only the warmth and good humor but some unforgettable moments of creativity too.
-
Scalloped Paper Pumpkin Decorating Ideas
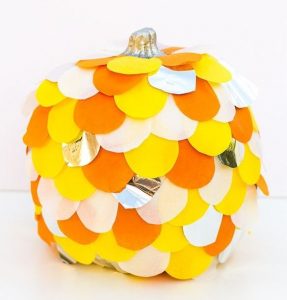
Create a beautiful ombre effect with this no-carve pumpkin decorating project. An interesting way to make pumpkins for this Halloween.
-
Paper Pumpkin for Halloween: Step by Step Instructions
-
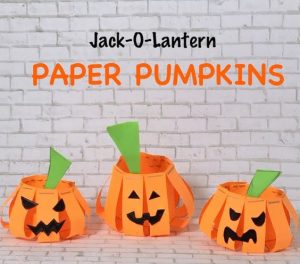
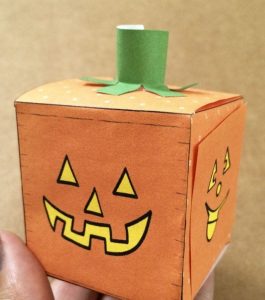
Jack-O-Lantern Paper Pumpkins
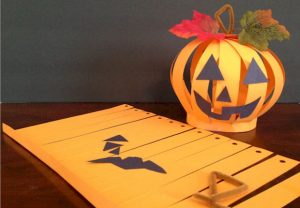
These smiling Jack-O-Lantern Paper Pumpkin puppets will surely get a smile on your munchkin’s face.
-
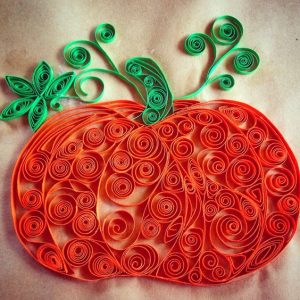
Paper Quilling Pumpkin Ideas
Learn how to make a beautiful pumpkin using quilling techniques. An easy to make a tutorial for beginners as well. You can hang them on walls or your doors for this Fall.
-
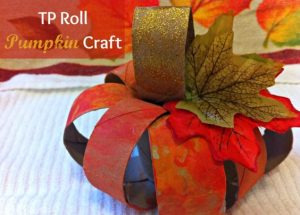
Toilet Paper Pumpkin Roll Crafts
Elementary, classy and vintage, this pumpkin look great with the maple leaf and glittered stems. Display them on your walls, tables, or hang them on the door as these are versatile enough for a lovely display.
-
Paper Pumpkin Tutorial for Kids
Directions for making a spooky, Halloween pumpkin decoration from paper. Kid crafters can indulge in this impressive pumpkin cut-out fall project to bring back the old-fashioned glamour to the Halloween party. -
Directions to Make: Paper Pumpkin
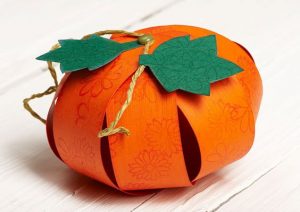
Celebrate the fall season and add colorful handmade paper pumpkins to your home décor. The linked tutorial has used orange and green construction paper for a sturdy finish.
-
Free Paper Pumpkin Favor
-
Paper Pumpkin Craft Video
-
Vintage Brown Paper Pumpkin Tutorial
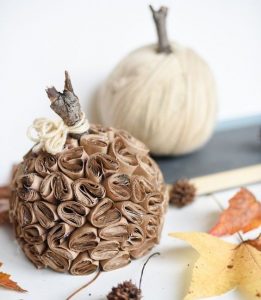
Folded strips of old brown paper are the perfect pumpkin crafting material to add some neutral-toned rusticity to your tablescape.
-
3 Dimensional Paper Pumpkin
-
Free Paper Pumpkin Pattern PDF Download
-
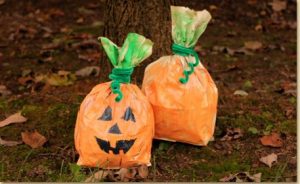
How to Make: Pumpkin Paper Bag Puppet
Funky and quirky Halloween design made by turning an ordinary paper lunch bag into a pumpkin favor bag with just a few simple craft materials and splashing some colors.
-
Glittery Pumpkin Out of Construction Paper
-
Simple Pleated Pumpkin Made Out of Paper
-
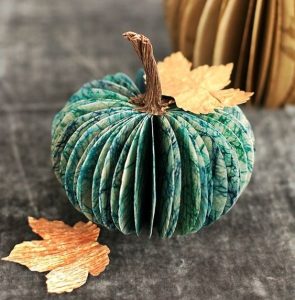
Pumpkin Made from Book Pages
These fun paper crafts projects are so splendidly simple that you can make whole pumpkin patches of decoration for your tablescape, decorating your doorstep, porch display or mantel. Enjoy and share your unique creations with us in the comment section below.
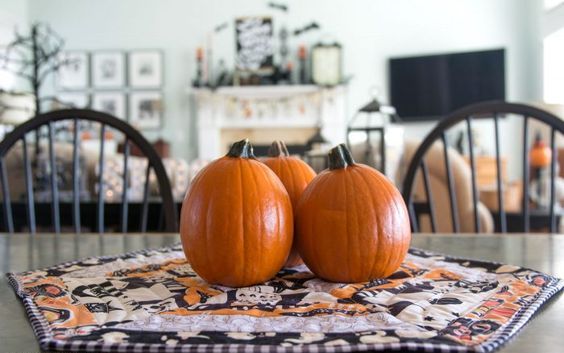
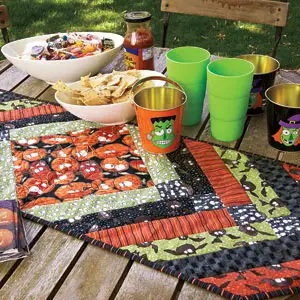
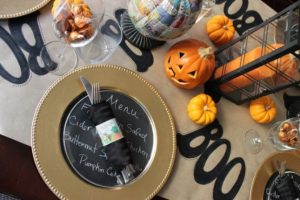
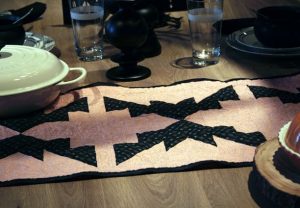
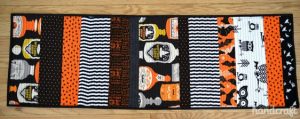
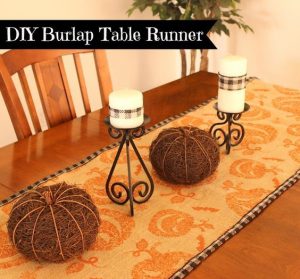
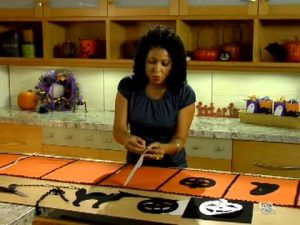
This Halloween turn your table decor to a crafter’s paradise. If you love to spruce up your whole house in Halloween, don’t let your dining tables be an exception. Table runners are an easy way to dress up your table setting for any Halloween gathering! Make your meal spook-tacular with these great homemade table runners! Obviously, the color code would be majorly orange and black to go with the theme. We have some amazing easy to make Halloween table runner patterns which are free and ready to be put to work.
Most of the tutorials listed need some simple supplies and do not need a lot of time to be made. The crochet and sewing ones need a bit of detailing. Choose your craft idea be it, cutting, painting, sewing or crocheting and get started now!
Collection of Free Halloween Table Runner Patterns for this Fall
-
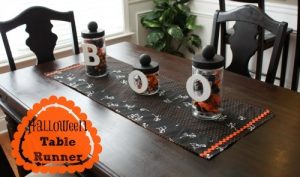
Halloween Table Runner DIY
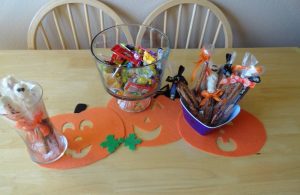
Display with some of your favorite Halloween Decor or maybe even a big bowl of Halloween candy! Add some fright to your table for Halloween in just a few minutes.
-
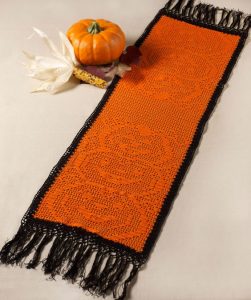
Halloween Crochet Table Runner Patterns with Lace
Crocheting the stacked pumpkin design on the table runner will be an amazing addition to the table decor. The fringes on the ends complete the Halloween look.
-
Table Runner for Halloween
What a spooky quilt perfect for the Halloween season! You will surely need to throw a party to show off your creations!
-
Halloween Table Runner Tutorial
This Monster Munchies quilted Halloween table runner pattern is a great way to showcase any group of holiday fabrics and it’s so quick, you can stitch it today for your party tonight!
-
How to Make: Halloween Table Runner
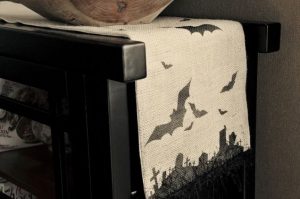
Add a rustic touch to your Halloween table setting with a burlap runner decorated with ghostly bare branches and ravens. -
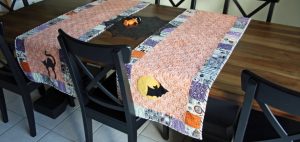
Free Halloween Bat Table Runner Patterns
Sew this “Bat Table Runner” to decorate your tabletops in a unique way. I loved the technique used in the tutorial. You need to know basic sewing to make this one. They look cute and spooky at the same time!
-
Make Your Own: Halloween Table Runner
To give it some creative element you can add beads or tassels to the ends.
-
Black Halloween Table Runner Ideas
-
Chevron Halloween Table Runner Patterns
-
Halloween Table Runner Sewing Pattern
-
Reversible Halloween Table Runner Idea
-
Handmade Halloween Table Runners
-
Velvet Halloween Table Runner Style
Try making these cute pumpkin table mat cum runners. You can add a dash of colors to the stenciled felt and make it gothic with amazing carvings.
-
Easy Halloween Table Runner (No Sew)
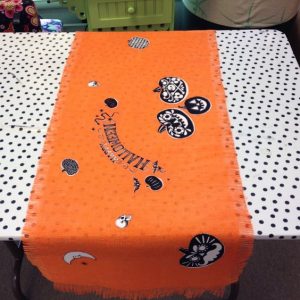
Once you got you cool jack o’ lantern pictures and spooky pumpkins ready just iron them on the burlap and you’re done with a great table runner for your Halloween decor. A black or an orange burlap would be a perfect choice for the occasion. A quick tutorial which requires no sewing fuss. Time to make yours today!
-
Directions to Make: Halloween Spider Table Runner
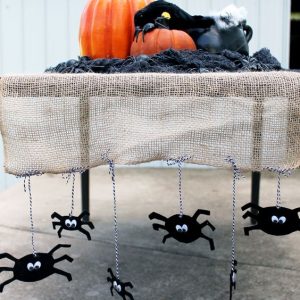
You will love the cute dangling spiders on this table decor and just how easy it is to make. You may even have everything you need to make this one at home.
-
Halloween Hexagon Table Topper
-
Black and White Table Runner for Halloween
-
Make Your Own: Handpainted Halloween Table Runner
-
Free Halloween Table Runner Video Tutorial
-
Free Halloween Table Runner Patterns PDF
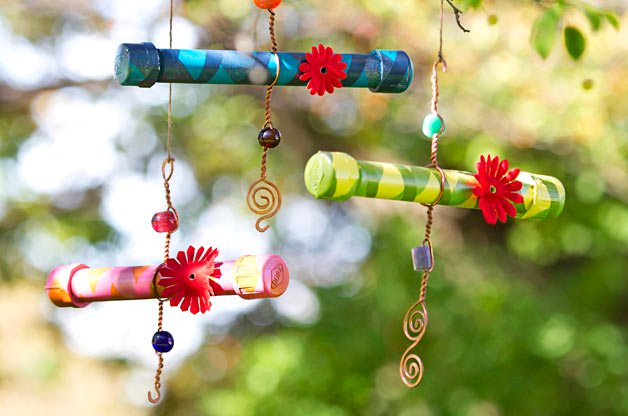
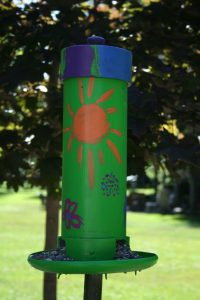
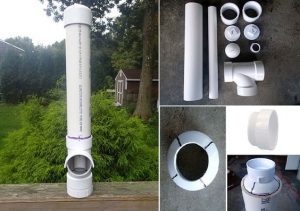
We have explored in earlier posts how to make bird feeders from old wine bottles, milk jugs, pine cones and more. Now let’s see how to build interesting designs for bird feeders from PVC pipes.
DIYs on How to Make Bird Feeder Out of PVC Pipe
-
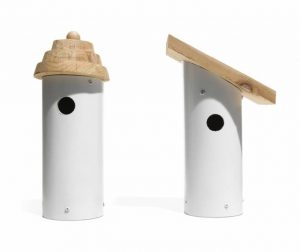
PVC Bird Feeder
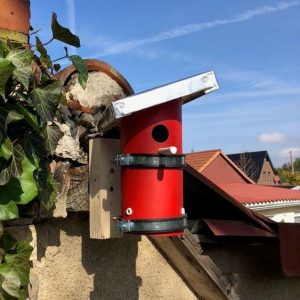
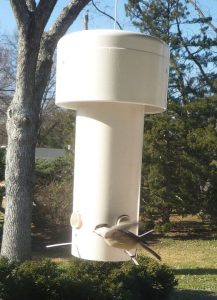
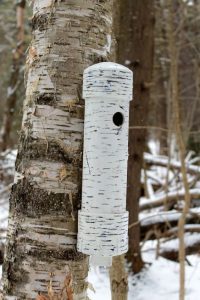
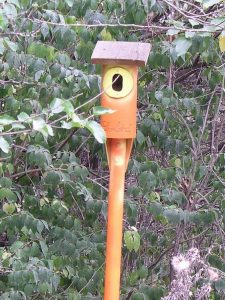
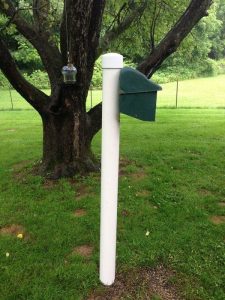
The linked tutorial has made two similar bird feeders with different dimensions. They are shaped like a mailbox for a newspaper (horizontal pipe) and one which looks like a common birdhouse (vertical pipe with a small roof). Paint it with colors of your choice to add a spring touch to your garden.
-
Homemade PVC Pipe Bird Feeder
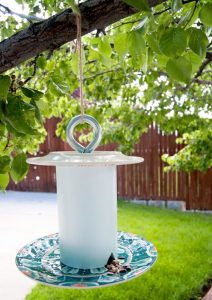
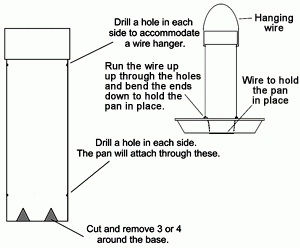
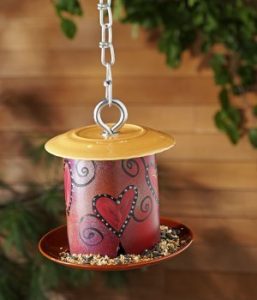
Now just find a tree branch to hang it on with some string and you’re set to feed some birds. You will need plastic dishes the support the PVC pipe from the top and bottom. The bottom one holds the birds feed.
-
DIY Hanging PVC Bird Feeder
You can make a small-sized feeder if you want. Selecting the right location for a feeder is critical to preventing unwanted animals (raccoons, squirrels, rodents) from accessing the food and damaging the feeder.
-
How to Make PVC Pipe Bird Feeder
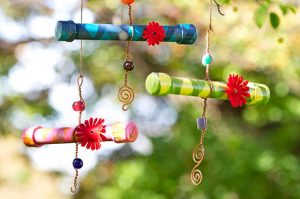
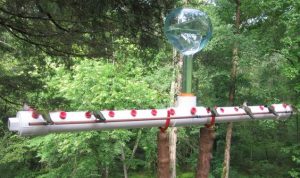
Add some color and creative element in your garden/backyard with these cute little handmade birdfeeders for hummingbirds. Splash your favorite colors on narrow PVC pipes and hang these decorative feeders on trees. Birds will surely be attracted soon to their new feed station.
-
Directions: Bird Feeder from PVC Pipes
Learn how to use old PVC pipes to make simple and easy to install bird feeders. The linked tutorial explains step-by-step instructions which help you to make one in no time.
-
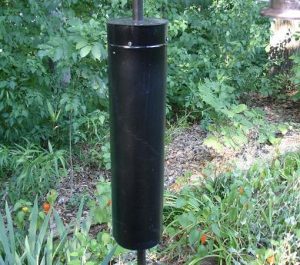
Squirrel Proof PVC Bird Feeder
Keeping the squirrels away from the feeder can bring the birds back to your yard. The slippery surface of the PVC pipe stops the squirrels getting a grip.
-
Free PVC Bird Feeder Plans
-
PVC Bird Feeder Pole Instructions
These non-traditional birdhouses are fun to build and display to feed birds with food in your backyard or lawn. If you don’t have much space you can install the post in the corners of the trees.
-
DIY Recycled PVC Bird Feeder Designs
A feasible way of eliminating food waste without any additional cost from an easy do-it-yourself project.
-
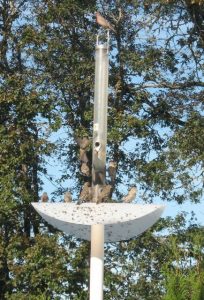
PVC Weather Proof Bird Feeder using Frisbee
Turn basic into beautiful with this bird feeder idea for your winged buddies. This tutorial will show how to make a gravity feed bird feeder from some salvaged PVC pipe, cheap and forgotten frisbee, and a few PVC plumbing fixtures.
-
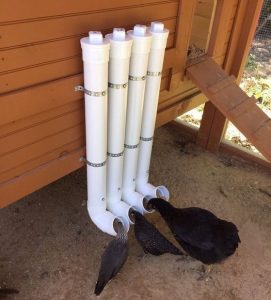
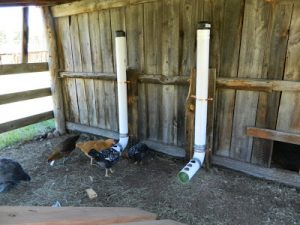
Gravity Fed Poultry Feeder
This feeder is a great one for ducks and chickens. It’s simple and very easy to make. You need about a 10-foot PVC pipe for this and the steps can be finished with 10 minutes.
-
Ways to Build a Chicken Bird Feeder
These bird feeders are ideal for a countryside home and have been designed in such a way that the poultry birds (chicken, duck) can have the food easily.
-
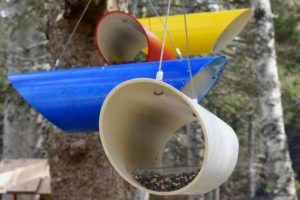
Unique PVC Tube Bird Feeder (Horizontal)
All you need is a hollow PVC cutout and tie it to a tree branch. The design is simple to make and offers an easy entry for birds from both sides. Since it is a highly unstable structure make it difficult for squirrels to hang around.
-
Build a Large PVC Bird Feeder Stand
-
PVC Telescoping Bird Feeder Tutorial
-
Making Bird Feeder Pole from PVC Pipe
-
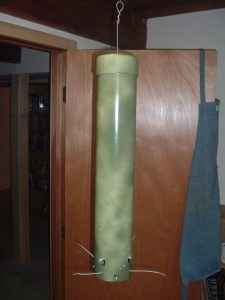
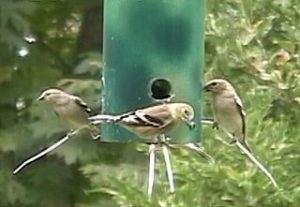
How to Build “Flexi-Perch” Bird Feeder from PVC Pipe within $10
Make this PVC pipe bird feeder which is an inexpensive, easy-to-build, and effective squirrel-proof birdfeeder. Hang it outdoors in your backyard or garden and enjoy watching your feathered friends a great time. The linked tutorial is by Billr on Instructables.
-
Free DIY Bird Feeder from PVC Pipe
-
Ideas to Build a Long PVC Bird Feeder For Humming Birds
-
How to Make PVC Gravity Bird Feeders
-
Build a PVC Bird House/Feeder Project
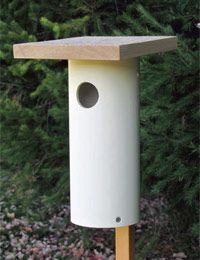
Here’s how to build a simple shed roof birdhouse. All you need are a short length of 4-inch PVC pipe and a 2-foot-long, 1-inch-by-6-inch cedar board, both available at home centers.
Try being close to nature and birds with these bird feeders. You can enjoy bird watching with kids and have a great time. You can place or hang them in your balcony if you don’t have a garden.
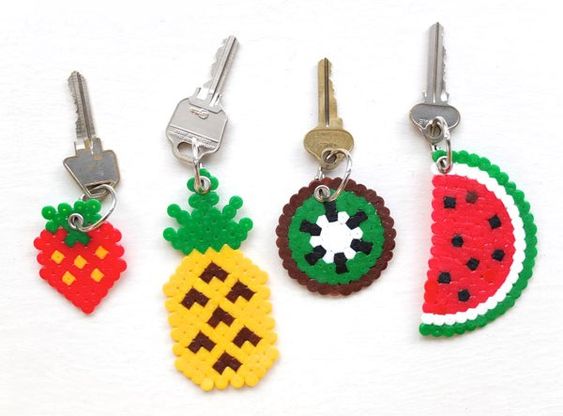
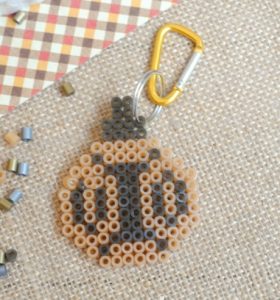
Perler beads also known as Hama beads are a surprisingly versatile craft material for kids and adults too. Perler bead keychains can be a great way to accessorize a purse, backpack, or lanyard in a unique and inexpensive way. We have compiled some cute DIYs and tutorials with free Perler bead template in most of them, which are printable and can be downloaded for free.
Supplies Needed to Make Perler Bead Keychains
- Perler Beads (also known as Hama Beads or Melty Beads, Fuse Beads)
- A Hama bead tray/Perler Bead Peg Board
- Keyring
- Iron & Baking Paper
- A little bit of wire/leather string to attach the beads to the keyring
How to Make Perler Bead Keychains with Step-by-Step Instructions in Tutorials
-
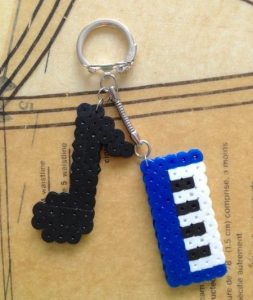
DIY Perler Bead Keychain
-
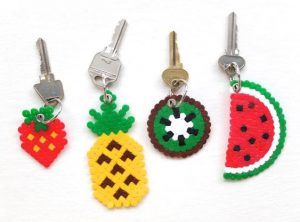
Perler Bead Fruits Keychain Patterns
These fun fruit keyrings from Hama/Perler beads are easy to make and make great stocking fillers and secret Santa gifts. You can use them as key rings, or cute handbag charms or zipper pulls.
-
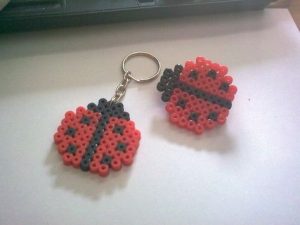
Perler Ladybug Keychain Tutorial
-
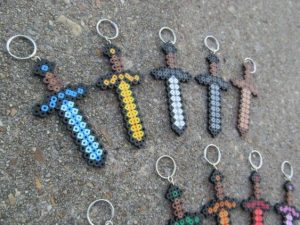
How to Make Perler Bead Minecraft Sword Keychain
Make innovative Minecraft crafts keychains with a trendy color combination.
-
Perler Bead Emoji Keychain Directions
-
Easy Hama Bead Animal Keychain
-
Easy Perler Bead Keychain Design
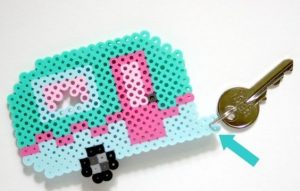
You can download the free printable pattern for this cute little retro camper Perler bead pattern in the linked tutorial.
You May Also Like ~ “Easy DIY Keychain Making Ideas” ~ Read Here
-
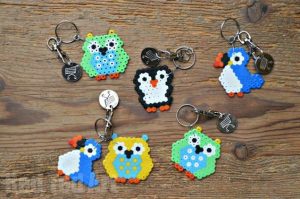
Perler Bead Owl Keychain Instructions
-
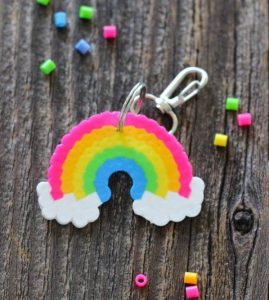
Making Mini Perler Bead Rainbow Keychains
-
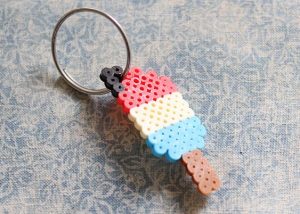
Cool Perler Bead Popsicle Keychain
-
Free Perler Bead Keychain PDF Pattern
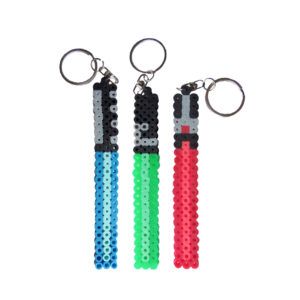
This tutorial is for all Star Wars fans. Make any combination of blade colors and handles and customize your own lightsaber key chain set. To get the video tutorial click here.
-
Free Perler Bead Keychain Template for Christmas
You May Also Like ~ How to Make Beaded Keychains ~ Read Here
-
Free Printable Patterns for Race Car Perler Keychains
You May Also Like ~ How to Make Bottle Cap Keyrings ~ Read Here
-
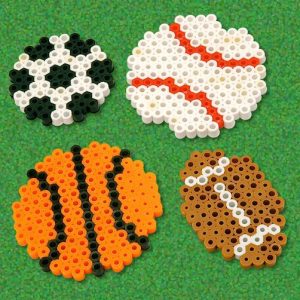
Hama Beads Ball Keychain Free Instructions
-
Perler Bead Doctor Who Tardis Keychain
-
Minecraft Hama Beads Keychain Instructions
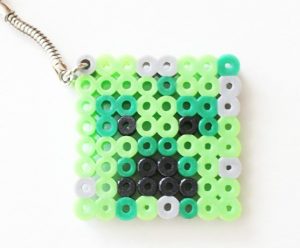
The linked tutorial has a file for all the free printable Minecraft Perler bead patterns and designs to make it easier for you! Wohooo!
-
Fuse Beads Pumpkin Keychain Ideas
-
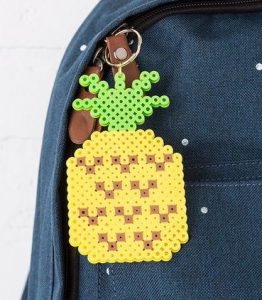
Fuse Bead Pineapple Keychain Pattern
-
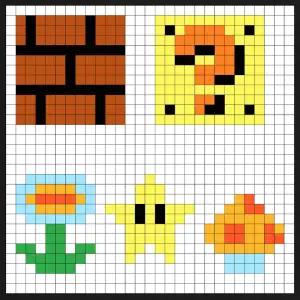
Super Mario Perler Beads Patterns for Keychain
I think these key rings would make a great gift for Father’s Day or Mother’s Day too, or for an Aunt at Christmas. Just follow the instructions to create your design from the list above!
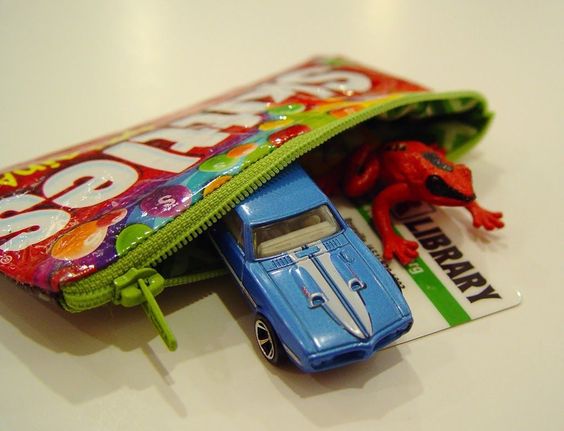
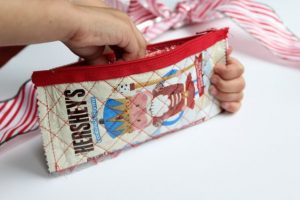
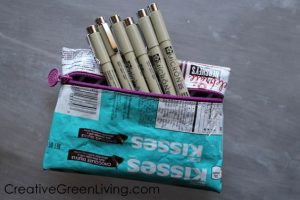
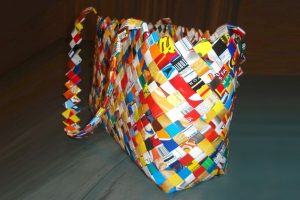
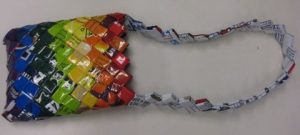
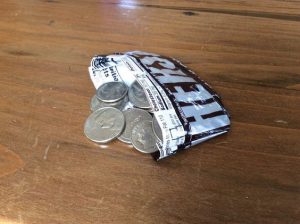
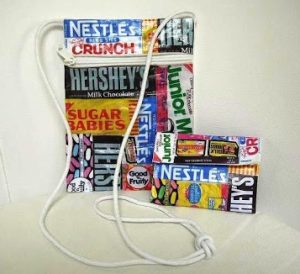
A candy wrapper purse or pouch is a handbag made from folded candy wrappers. Most purses are relatively small clutch styles, although you can make a larger shoulder bag with a strap if you desire. These are generally brightly colored and modern styled. Making a candy wrapper purse is a wonderful project for the frugal crafters since you don’t need to purchase any expensive supplies. We have explored some fun crafty ways to use candy wrappers to make interesting purses.
How to Make Candy Wrapper Purse with Instructions
-
DIY Candy Wrapper Purse
A cute DIY to make a thinly quilted purse using candy wrappers and some basic stitching techniques. Add funky colored zippers to make it fun for kids to use them.
-
Purse made out of Candy Wrappers
These little pouches are perfect for filling with candy, cookies, stationery or gift cards.
-
How to Make a Flat Bottom Candy Wrapper Purse
-
Candy Wrapper Purse: Interesting How-To
If you can’t gather enough candy wrappers you can replace them with other upcycled materials like chips covers, magazines, top ramen packets, old catalogs etc.
-
How to Make Upcycled Purse from Candy Wrappers
Design your own purse, bag or wallet with candy wrappers. The linked tutorial will guide you with directions to make this.
-
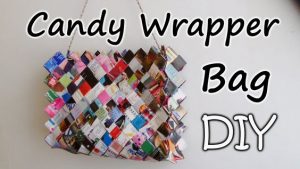
Candy Wrapper Bag DIY
-
Directions to Make: Candy Wrapper Wallet
-
Candy Wrapper Coin Purse Tutorial
You can alter the size of the purse as per your need. A smaller pouch will be easily tucked in your purse too.
-
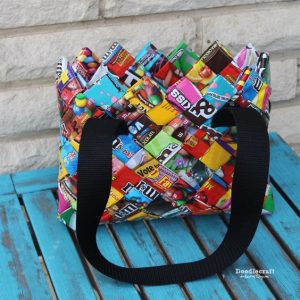
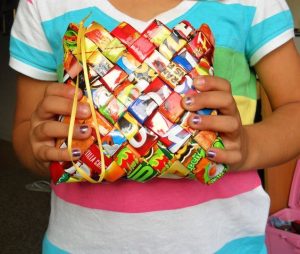
How to Make a Woven Candy Wrapper Bag
A cool way to re-purpose your candy wrapper collection. Make an adorable upcycled statement with this woven bag. Follow the step-by-step instructions and make this amazing bag at no extra cost!
-
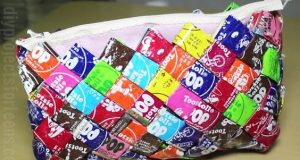
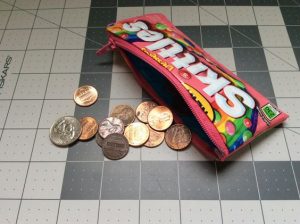
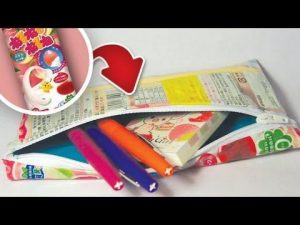
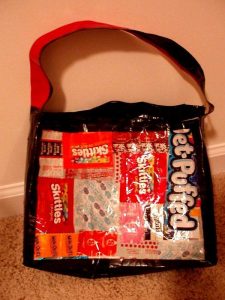
Making Zipper Pouch/Purse with Skittles Wrapper
The vibrant colors of the candy wrappers give the pouch a great look. You need to put a think fabric as lining to make it more sturdy. See your kids happy to use this candy wrapper pouch. If you want to make it of a bigger size you can use candy bar wrappers too.
-
No-Sew Candy Wrapper Pouch: Step-by-Step Instructions
An easy to make a fun craft for kids as this does not require sewing at all. All you need is your candy wrapper, some duct tape and staplers to pin the zipper to the pouch.
-
Candy Wrapper Coin Clutch DIY
-
Ways to Make Candy Wrapper Wallet with Duct Tape
-
How to Make Candy Bar Wrapper Purse
-
Candy Wrapper Purse Pattern
-
Candy Wrapper Hand Bag Purse: Instructions
All you need is lots of candy/gum wrappers and some clear duct tape to make this fun craft.
-
Zig Zag Candy Wrapper Purse Video Tutorial
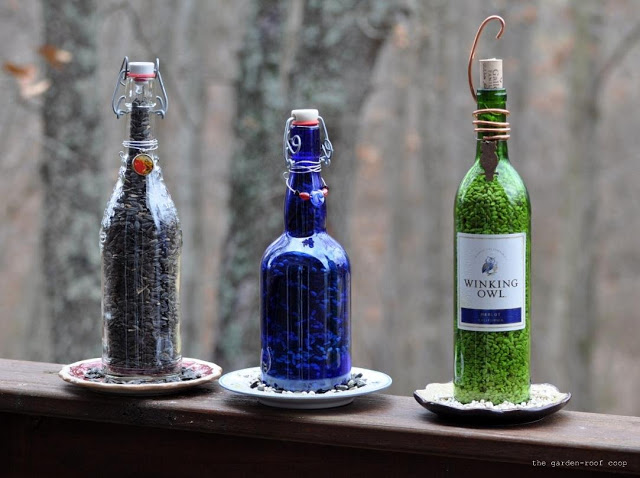
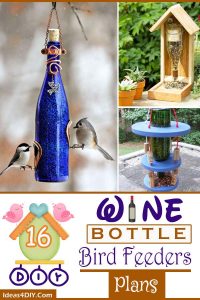
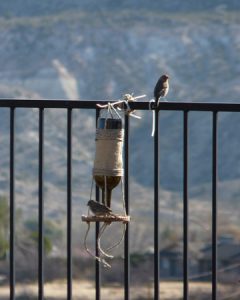
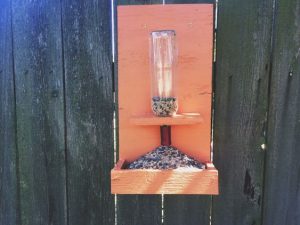
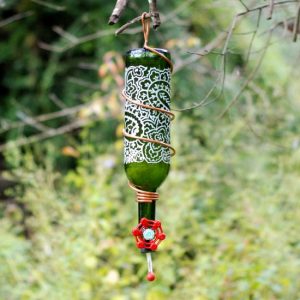
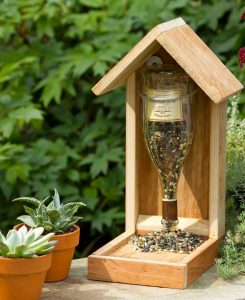
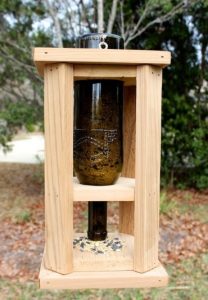
Wine bottle crafts are in rage these days. You can re-purpose them into useful projects. One of the best ways to attract birds into the garden is to feed them, and feeding them is equally essential during the harsh winter months. We have put a compilation of some tutorials which shows you to make a wine bottle bird feeder with it.
You May Also Like ~ “How to Make Wine Bottle Planters“
How to Make Recycled DIY Wine Bottle Bird Feeders Tutorials
-
Wine Bottle Bird Feeders DIY
Make a DIY bird feeder and attract beautiful birds to your backyard. This is the clear glass bottle feeder that hangs in the front yard. The hummingbirds love it and you will enjoy watching them.
You May Also Like ~ “How to Make Cheerio Bird Feeder“
-
Easy Wine Bottle Bird Feeder Tutorial
-
Upcycle Craft: Wine Bottle Bird Feeder
A few years back I upscaled my wine bottle bird feeder to include feeder ports that are incorporated into the bottle. This glass bottle feeder requires drilling 2 – 4 holes into a bottle – which would be very difficult to do without a drill press…
You May Also Like ~ “How to Make Pine Cone Bird Feeder“
-
How to Make Bird Feeders from Wine Bottles
You May Also Like ~ “DIY Milk Jug Bird Feeder“
-
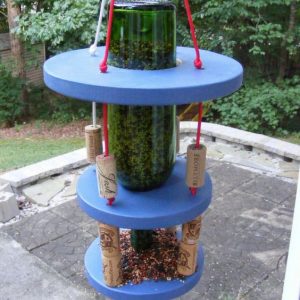
Paracord Wine Bottle Bird Feeders Tutorial
A unique combination of wine bottle craft, wood project, and paracord! A great sturdy design to feed birds with their birdy treats! Have fun in your backyard with your feathered pals chirping this summer all around!
-
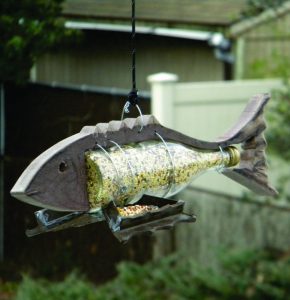
Directions to Make Fish Shaped Wine Bottle Bird Feeder
Learn how you can make an attractive nautical bird feeder from recycled wine bottles and wood. All you need is a tree, a bottle, a PVC fence post top a jigsaw, heat gun and a little wire. This interesting nautical bird feeder is perfect for any waterfront, or beach decor.
-
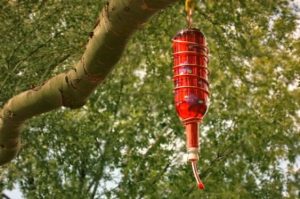
Make Wine Bottle Bird Feeder for Hummingbird
If you want you can add some bling by using glass paint to apply flowers or other decorations on the outside of the bottle before you fill it.
-
DIY: Bird Feeders with Wine Bottle
-
Homemade Wine Bottle Bird Feeder
Attract hummingbirds to your garden by creating this homemade hummingbird feeder from a glass bottle and some copper wire. Hummingbird feeders are not only useful for little birdies but also can become a beautiful garden decoration.
-
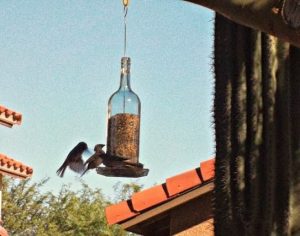
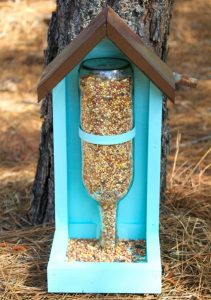
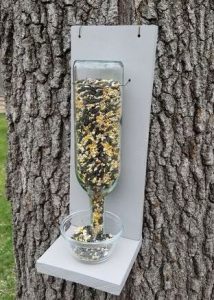
Wine Bottle Bird Feeders: Upside Down
Give an old wine bottle new life by turning it into unique bird feeders for your patio or yard.
-
Wine Bottle Glass Bird Feeders Plan
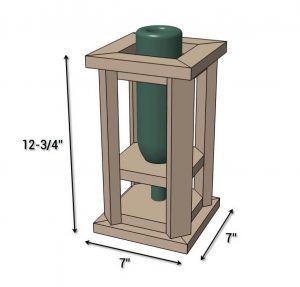
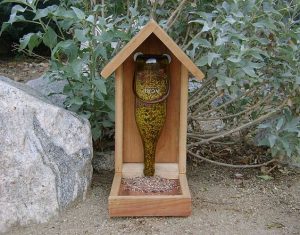
They have used some scrapped cedar and a single 1x2x8′ cedar board and a wine bottle to make this pretty awesome bird feeder. You can easily slide out the bottle to refill it with bird feeds.
-
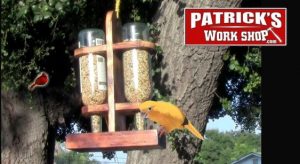
Double Wine Bottle Bird Feeder Project
Try making this new design that has a double wine bottle for a hanging bird feeder. The one in the tutorial is hung from a rope, that hangs from a tree, patio or roof edge.
-
Wine Bottle Bird Seed Feeder
-
Free Wine Bottle Bird Feeder Plans
-
Youtube Wine Bottle Bird Feeder DIY
-
Pallet Wine Bottle Bird Feeders
Enjoy your bird feeder! It may take up to several weeks for birds to find it.
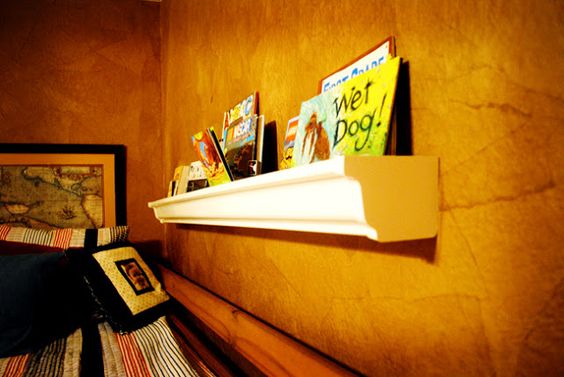
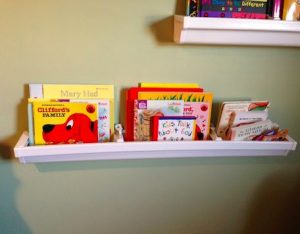
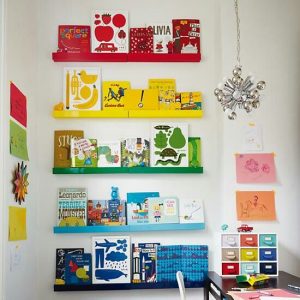
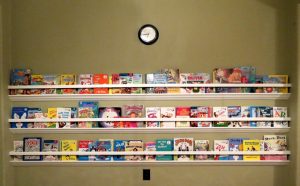
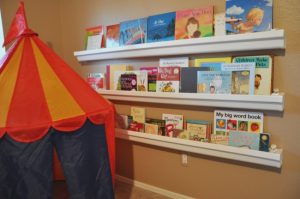
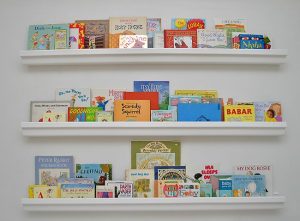
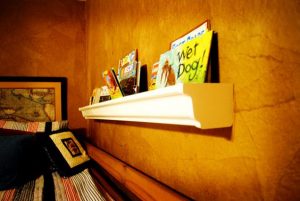
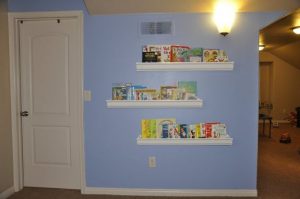
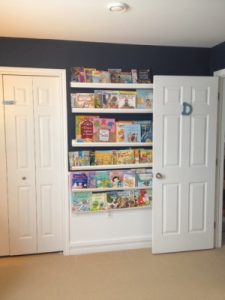
Rain gutter bookshelves is a great way to transform simple things into more useful ones. Rain gutters lie uselessly in our attic, so getting a little creative can result in useful decors! Rain gutters are sturdy and take only a short time to be installed. A big plus is the total cost for a few shelves is probably below $20. With the book fronts facing out, kids are likely to read more—and they can get and put away the books themselves.
How to Make Innovative Rain Gutter Bookshelves Designs with Instructions
-
DIY Rain Gutter Bookshelves
You May Also Like ~ “Pallet Bookshelf Ideas“
-
How to Make Rain Gutter Bookshelf
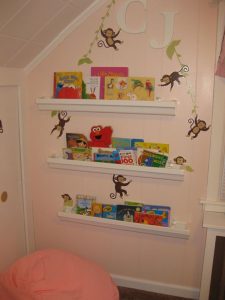
An innovative do-it-yourself project to add to your children’s study! You can paint the walls with quirky pictures of animals, trees, and cartoon characters and make book reading an exciting affair for your child. To make them more appealing, paint the racks with bright colors matching your room aesthetics!
-
Rain Gutters as Bookshelves
-
Easy Rain Gutter Bookshelves Ideas
Once you install your handmade rain gutter bookshelf on the wall, you can decorate it with paint or danglers and create a wonderful reading nook in your room.
-
Plastic Rain Gutter Kid’s Room Bookshelves
This bookshelf is made using Vinyl rain gutters. This will look amazing in your child’s nursery or the kid’s room where you can organize all the books in one place!
-
Instructions to Build: Rain Gutter Bookshelf
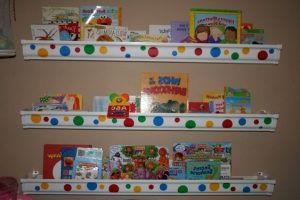
Here’s an easy and inexpensive way to create bookcases that are great for kids by turning rain gutters into wall-mounted bookcases! Paint them in quirky designs!
-
Rain Gutter Bookshelves for Classroom
An inexpensive and adorable recycling craft idea. Create the long rain gutter bookshelves for the classroom, Montessori and play schools. Kids will love to browse the books stacked in this cute bookshelf. You can paint them in different colors.
-
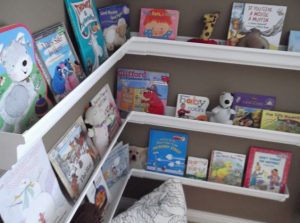
Making Rain Gutter Corner Bookshelves
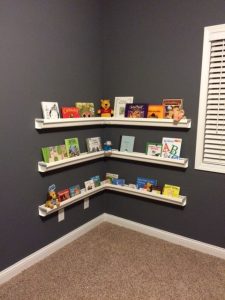
Long rain gutter bookshelves installed in the corner of the room is an ideal plan to use the unused spaces in the corners! It can add to the room decor and organize your books perfectly.
-
Make Plastic Rain Gutter Bookshelves
They are a great way to have the books visible and accessible to my kids and they made great use of an awkward spot behind the door or unutilized space in the room. For toddlers, you can place the rows closer to the ground so that they can easily reach them.
-
Vinyl Rain Gutter Bookshelves
-
Rain Gutter Bookshelves Tutorial
-
Simple Rain Gutter Bookshelves under $10
-
Using Rain Gutters as Bookshelves
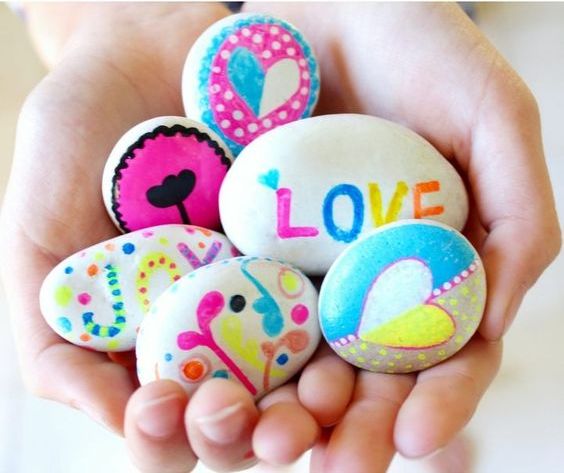
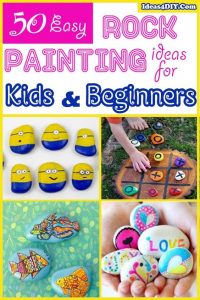
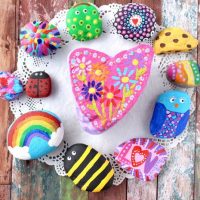
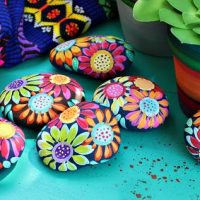
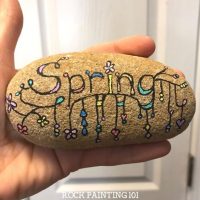
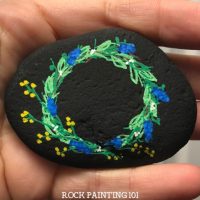
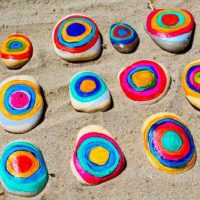
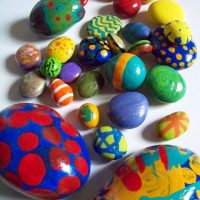
Turning plain rocks, stones, and pebbles into stunning works of art is always an exciting craft! Rock painting is super fun activity with kids and with spring right around the corner, we just had to join the excitement! Rock painting continues to be a popular trend. It’s fun and relaxing to make little works of art on this tiny, natural canvases. Wondering how to make beautifully painted rocks? Scroll down for a great collection of painted rock designs and patterns. You can use acrylic paint, spray paints or water paints.
Easy Rock Painting Craft Ideas for Kids
Scroll below the huge collection of easy-peasy rock painting ideas for kids and pre-schoolers. From funny images to inspirational ones we have it all for you in one place! Just click on the image to go to the tutorials!
Fun Rock Painting Tutorials for Beginners
Explore the free rock painting DIY Ideas to make interesting stone art! From animals to cute cartoon characters, your creativity has no limits.
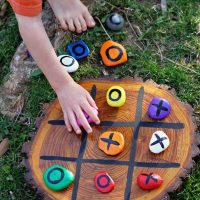
- Tic Tac Toe Painted Rocks
- Easy Rock Painting Ideas
Inspirational Rock Painting Patterns for Children
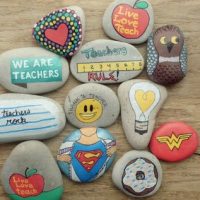
These rocks are painted with random inspirational and peace messages. Inspired by the Kindness Rocks Project! You can pick rocks of various sizes and spray paint them with bright vibrant colors.
- Rock Painting Ideas
- Inspirational Rock Painting Ideas
- Free Rock Painting Ideas
Cute Rock Painting Crafts for Kids
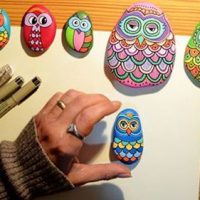
Kids will love to paint and pick out their pet cactus rock for this easy craft project! Minions and owl painted rocks are also quite popular these days. Try your creativity and make unique patterns!
- Minions Painted Rocks
- Cute Cactus Rock Painting Ideas
- Owl Rock Painting for Beginners
Cool Rock Painting Ideas For Seasons
Rock Painting Ideas & Designs for Summer
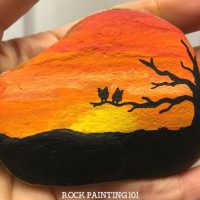
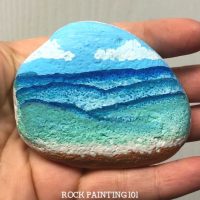
Painting rock outdoors is a great summer craft! You can draw flowers, beaches and other summer themes for the season and gift this to friends & family. Handprinted rocks make great decorations and gifts.
- Sunset Theme Painted Rock
- Beach Painted Rock Pattern
- Flowers Rock Painting
Rock Painting Tutorials for Spring
- Cool Rock Painting Ideas
- Spring Painted Rock Ideas
- Examples of Painted Rocks
Rock Painting Ideas for Occasions & Festivals
With holidays around the corner, keep your kids busy with some pebble painting crafts. You can color them based on a theme and make wonderful rock painted stories.
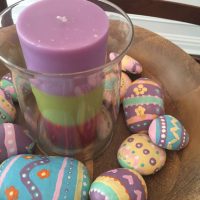
Rock Painting Patterns for Easter
- Easter Painted Rock Ideas
- Easter Rocks Painting
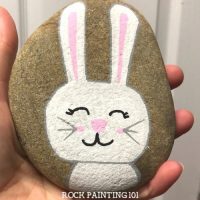
- Bunny Rock Painted
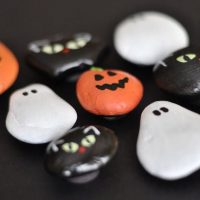
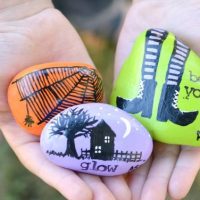
Rock Painting Ideas for Halloween
- Halloween Rock Painted
- Halloween Painted Rocks
- Pumpkin Painted Rocks
Free Rock Painting Ideas for Christmas
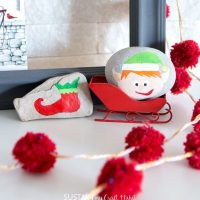
Its winters and Christmas is coming. Try and paint cute designs on pebbles and decorate it around your Christmas Tree. You can create snowman, snowflakes, stocking, Santa, Christmas Tree, Elf, gifts and more!!
- Christmas Rock Painting
- Rock Painting Christmas Tree
- Christmas Painted Stones
Autumn/Fall Rock Painting Ideas
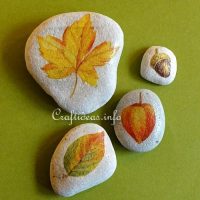
- Painted Rock Leaf Autumn
- Fall Leaf Stone Painting Ideas
- Rock Painting Ideas for Fall
Animal Rock Painting Ideas
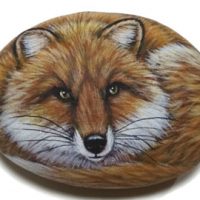
Learn how to draw and paint realistic animals on pebbles! You can turn simple rocks of all sizes into amazing artwork in some time. Try making unicorns, turtle, frogs, horse and more animals to make a collection. Kids are surely going to enjoy this!
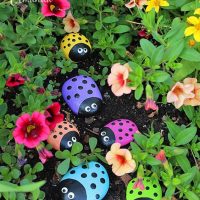
- Painted Rocks Lady Bug
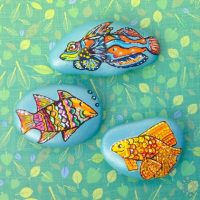
- Painted Fish Stones
- Fox Painted Rock DIY
Rock Painting Ideas for Garden/Outdoors
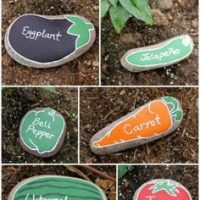
- Vegetable Painted Rock Ideas
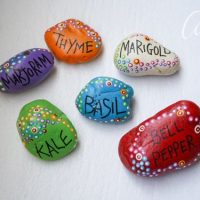
- Rock Painting Ideas for Garden
- Free Painted Rock Ideas
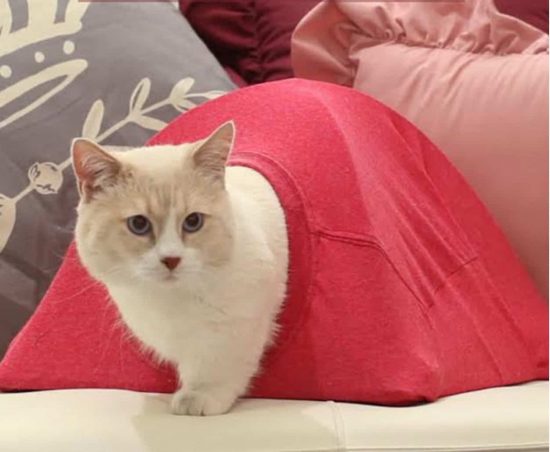
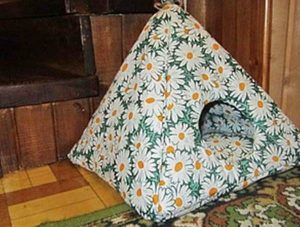
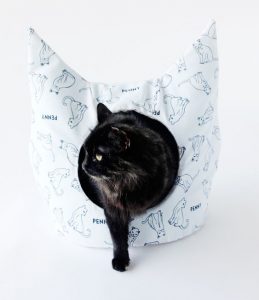
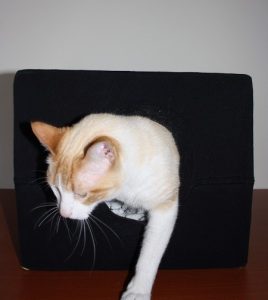
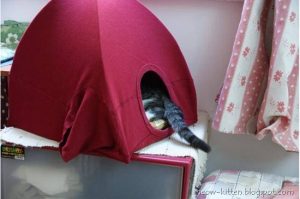
Cats love tiny, warm, dark places. But why buy a mini carpeted cat hole when you can make a cat tent with materials found around your house at most affordable prices? So if you need a DIY project for your cat, we have compiled some simple tutorials to make Cat Tents with recycled stuff like t-shirts, hangers and more.
How to Make Cool Cat Tents for Indoors & Outdoors
-
DIY Cat Tent
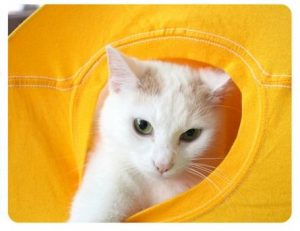
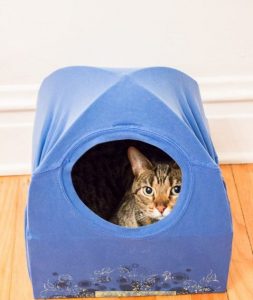
Your furry baby will love this cute cat tent as it’s new hideout. It’s easy to make and an inexpensive project using a cardboard box as a base. and an old T-shirt. They will be snug as a bug and love hiding out here. Create your own very simple kitty bed by repurposing an old coat hanger and t-shirt!
-
Cozy Cat Tent Bed Ideas
A very sweet idea for all cat lovers. All you need is some canvas, cardboard, and fabric. You can place a thin cushion at the base to provide a warm bedding for your kitty.
-
Pop-Up Cat Tent
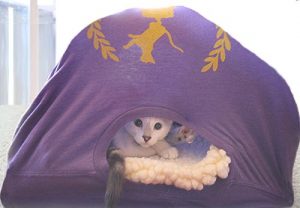
Use your old cotton shirt to create a comfortable and fun tent for your lovely cat. This tent project needs you to apply your simple sewing skills.
Pic Credit goes to Flynnside Out Productions.
-
Easy Cat Tent for Indoors
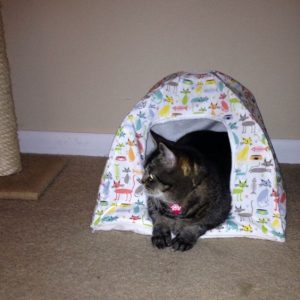
Make your furry friends happy with this handmade cute cat tents. They will love to crawl in and enjoy their time and relax. They will love this colorful hiding place to sneak in.
-
Patterned Mini Cat Tent
-
How to Make Cat Tents without Hangers
This is a quick DIY cat house that only takes 5 minutes to make using an old t-shirt and a cardboard box. Your cat will love to spend time in her privacy tent.
-
DIY T-Shirt Cat Tent (Portable)
Cats love boxes, so use your old litter box and tee and wire coat hangers to make an amazing tent for your kitty. You can involve kids in the fun craft.
-
No-Sew Cat Camping Tent
Give this no-sew simple tutorial a shot when out for camping with your pet kitty. They will surely love to snuggle in this warm private enclosure.
-
Making a Tent for Your Cat
We are sure your kitty would love playing in the tents made by you. You can add some toys to keep your cats busy in the tents.
-
Tents for Cats to Play In
You can alter the size of the tent if you have a big cat. You can make a big tent to accommodate your pet comfortably.
-
Cute Cat Tent Pattern Instructions
-
Sew a Mini-Cat Tent
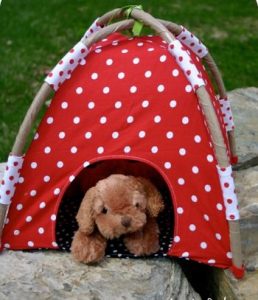
Build an adorable habitat for your loved cat and make them happy with their new shelter for your feline friend. You can choose personalized prints and colors for your furry friend.
-
Cat Litter Tent for Outdoors
Small towels or blankets as a base will also work to make the tent more warm and comfy.
-
Cat Tent DIY Video
This super simple DIY cat tent is fun to make and even more, fun to watch your cat enjoy – high fives all around!
-
Recycled Old Tshirt into Cat Tent

