Category: CRAFTS
Pine cones crafts is a wonderful way to make ornaments, centerpieces, and wreaths, especially during the holiday season. They are easily available and make unique and inexpensive crafts and are amazing for creating Christmas tree toppers and garlands too. This Fall you can make your own handmade flowers with pine cones and use them as decorations, arrange them as a bouquet or even use them on wreaths. Painting them with different colors and adorning them with glitters, ribbons will add to the faux flower charm.
We have rounded up some DIYs which will help you in making pine cone flowers with step-by-step instructions. The project needs very basic supplies like pine cones, paints, glitters and a cutter to cut the base of the pinecone depending on your design.
20 Tutorials to Make Pine Cone Flowers at Home
-
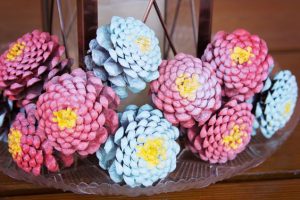
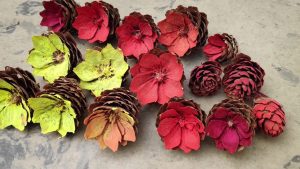
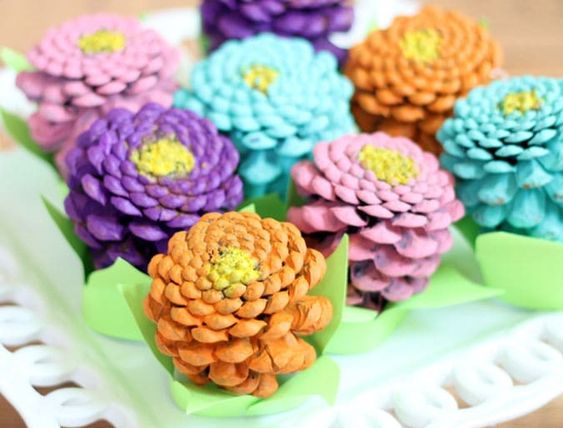
DIY Pine Cone Zinnias
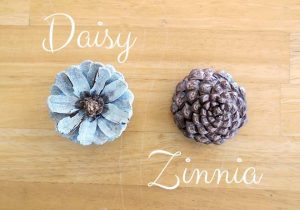
These beautiful flowers are quite simple to make and paint. The only exception being cutting the base of the pine cones. Pine cones are made of wood and cutting them can be a task at times. You will need a mini saw to shape them. The linked tutorial explains perfectly how to master the art. Turn your Pine Cones Upside Down and they turn into Zinnias. Once cut, just lay the Zinnias and spray paint them with colors of your choice.
-
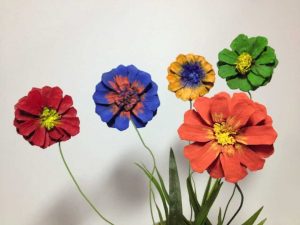
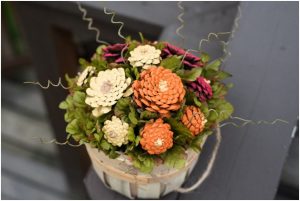
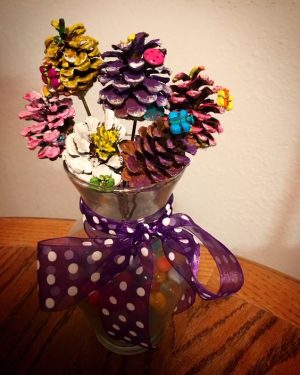
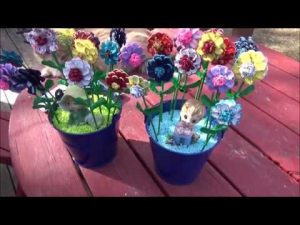
Handcrafted Pine Cone Flowers with Stems
To get the look of real flowers you can add fake stems made of cardboard to the pinecones and arrange them in a vase.
-
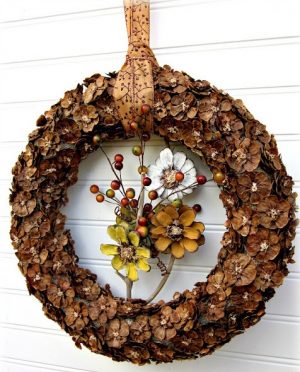
Pine Cone Wreath Tutorials
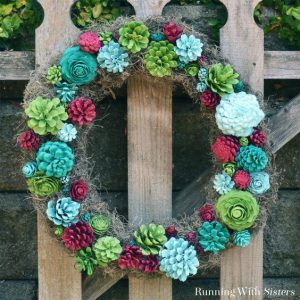
This Autumn try making this rustic faux succulent wreath with pine cones. You will need to gather some 50-60 pine cones for the project and cut them in different sizes. Then color them like succulents of your choice and place them creatively. This homemade wreath will surely make some heads turn and will gather all compliments.
-
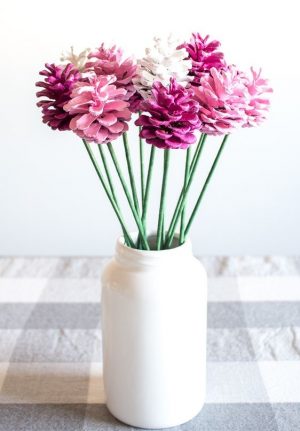
How to Make Pine Cone Roses with Stem
Arrange these pink and white roses in a mason jar and use it as handmade centerpieces in a wedding or any special occasion. In this project, they have used wooden skewers to make the stem of the flower. Alternatively, in the linked tutorial they have also shown how to use this bouquet in the Halloween theme and paint the flowers orange and black.
-
Floral Pine Cone Arrangement
-
How to Make Simple Pine Cone Flowers for Decor
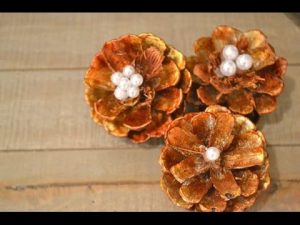
Adding pearls or beads at the center of the pine cones will give them an embellished look. These faux flowers can be used to decorate gifts, hampers and more.
-
How to Make Flower Refrigerator Magnets from Pine Cones
Give a handmade twist to the pine cone flowers by adding a magnet to them and use them as refrigerator magnets. You can make daisies, zinnias, lilies, and roses from the pine cones and color them red, orange and white to add a colorful element on your door.
-
Pine Cone Floral Wall Art Instructions
-
Pine Cone Flower Crafts for Halloween Decorations
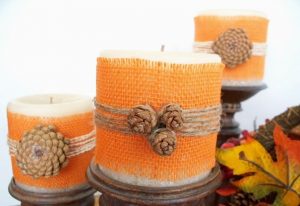
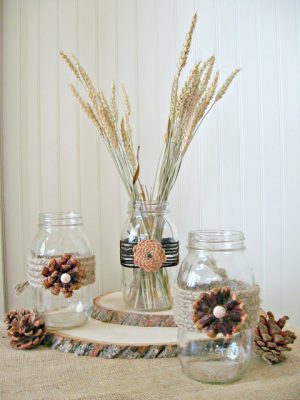
Add a rustic flair to your candles and decorate them with burlap, twine, and small pine cone flowers. They look amazing when the candles are lighted in the dark.
-
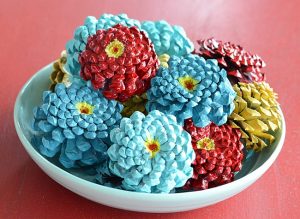
Directions to Make Colorful Pine Cone Flowers
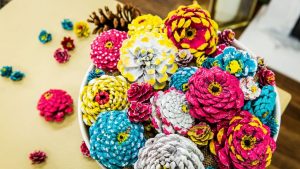
Lay these colored flowers in a bowl and arrange them beautifully as a decorative centerpiece. You can color these flowers red and put green leaves in a bowl if its Christmas.
-
Directions to Make Flower Garland Made from Pine Cone
-
Summer Sunflower Wreath from Pine Cone
-
Make Pine Cone Flower Bouquet Arrangement
-
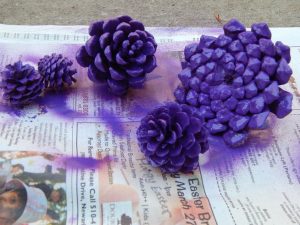
Purple Painted Pine Cone Flowers
-
How to Make Beautiful Pine Cone Zinnia Flowers
-
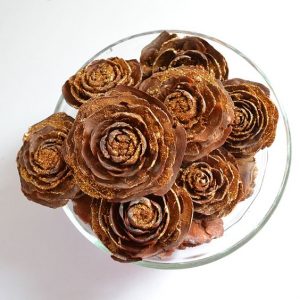
DIY Scented Cedar Pine Cone Roses
-
Mini Pine Cone Flower Potted Plant
This is a lovely craft idea for kids who would love to decorate the base of the planters with colorful supplies.
-
Easy DIY Flowers from Pine Cone for Autumn
-
How to Make Beautiful Pine Cone Wreath
-
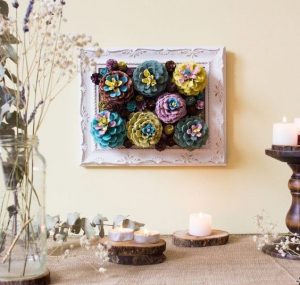
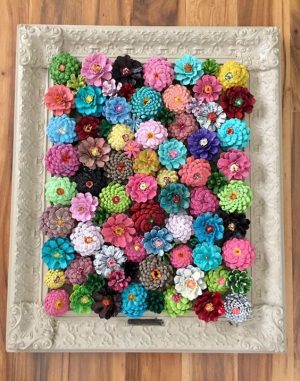
Framed Flower Decor Made from Pine Cones
-
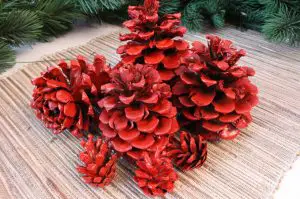
DIY Red Pine Cone Flower Ideas for Christmas
Mix some white, red, and green painted flowers and lay them in a bowl as a centerpiece during the Christmas for stunning decor.
-
DIY Pine Cone Flower Embellished Mason Jars
-
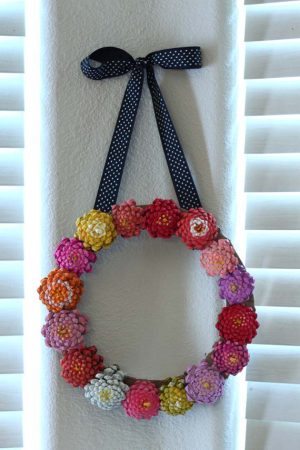
How to Make Colorful Flower Wreath with Pine Cones
For more pine cone wreath ideas click here.
These crafty ideas will surely keep you close to nature and add a rustic charm to your decor. Try making other crafts with pine cones like wreaths, Christmas trees, owls and more.
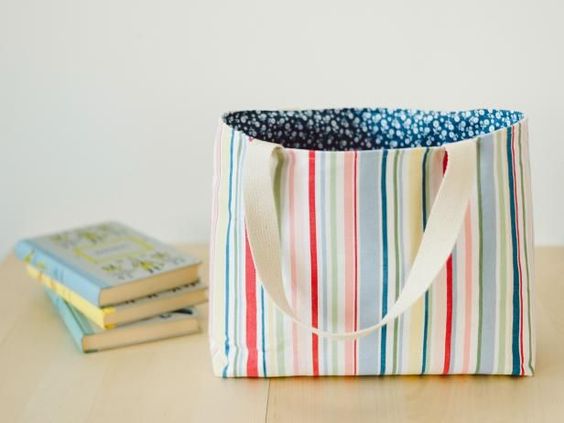
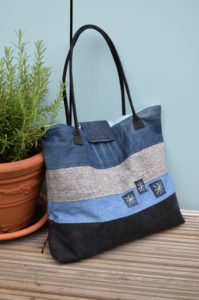
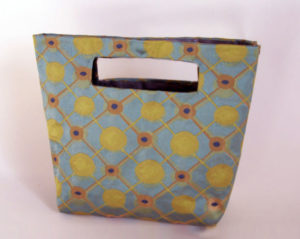
Tote bags are always handy to have around for beach trips, library sessions, or grocery shopping. Tote bags often have a flat bottom with squared corners. These bags have an extra piece of fabric on the bottom. A tote bag with a gusset or flat base can fit more items and makes it easier to access to those items. You can use different materials like cotton fabric, canvas or jute to make these useful bags depending on your purpose. Let’s browse through some of the tutorials which show how to make the perfect bags.
You May Also Like: DIY Tote Bag Designs n Patterns
-
DIY Tote Bag with Flat Bottom
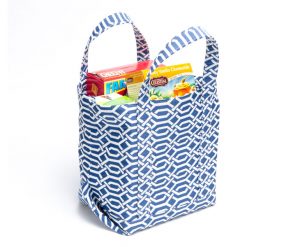
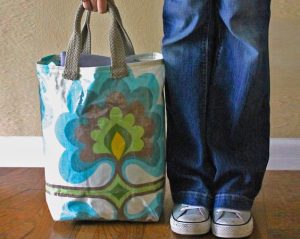
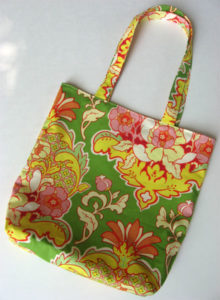
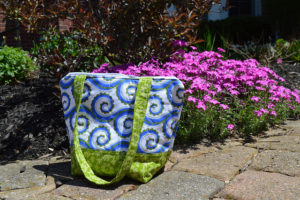
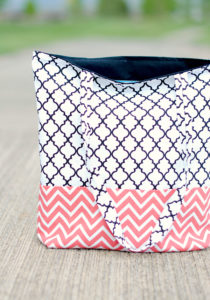
Pick up some quirky printed fabric and make a funky shopping bag. A wide base with squared corners gives you ample space to store your stuff.
-
How to Sew a Flat Bottom Lined Tote Bag
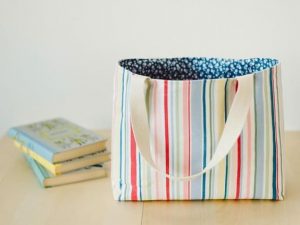
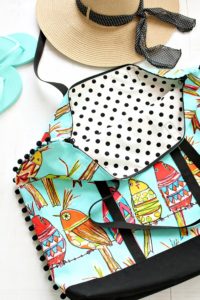
You can use printed fabrics for this design. If you like sewing, then you can get creative and make it a reversible tote, with different prints on the inner side and outside. These custom handbags are great to carry for grocery and other places. I loved the lined fabric used in this tutorial.
-
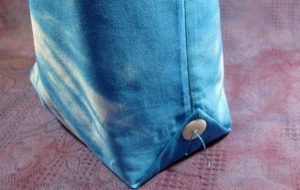
Making a Boxed Bottom Tote Bag
-
How to Make a Square Bottom Leather Tote Bag
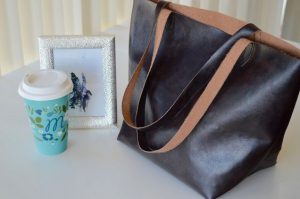
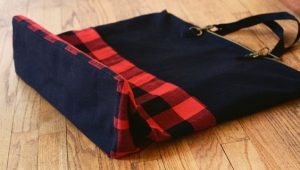
If you don’t want to shell money on expensive leather tote bags available in the markets, then this DIY is a total steal. All you need is some leather fabric to sew this stylish tote bag. The flat bottom makes it easy to store and carry your stuff.
-
How to Make a 70’s Tote Bag with Squared Bottom
-
Flat Bottom Tote Bag Pattern
This tutorial explains you exactly how to get the perfectly flat bottom for your bag to make it convenient to store stuff and carry to a beach, store or more.
-
Reversible Line Tote Bag with Wide Bottom
-
Handmade Canvas Bag with Flat Bottom
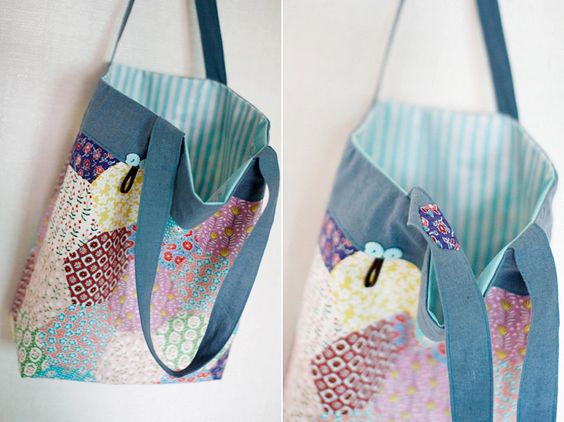
Do you love totes and just cannot find the perfect one for yourself which you can afford? Then what are you waiting for, go on and make one for yourself? You will just need some colorful threads, maybe your old clothes or you can even crochet one. It may seem difficult to you now but with this collection of tutorials listed below, you would be able to make cute DIY tote bags at home. So don’t fuss the next time you go out and you feel you don’t have a decent bag, just make one for yourself.
25 DIYs- How to Make Tote Bags with Step-by-Step Instructions
1. DIY Canvas Tote Bag: How to Make
Just pick up some acrylic paint and canvas and paint your heart out be it geometric shapes or even a scenery. All you have to do is paint on two canvases and then sew them together in the shape of a bag and here it is, your new tote bag is ready. The best thing about it is you can make it according to the color of your outfit. So don’t depend on the shops and do it yourself.
2. DIY Large T-Shirt Tote Bag
Are you worried about the fact that you don’t know sewing? Don’t worry this tutorial is just perfect for you. No sewing doesn’t mean plain and mainstream. Just look at it, it’s so beautiful and flowery. You just need a white t-shirt or even a black one would work. Painting on a black t-shirt would result in a dark floral tote which is just perfect.
3. DIY Tote Bag To Backpack Pattern (Black n White)
If you have an old tote which is of no use to you o you have grown pretty bored with it then why not transform it into something new? Follow this amazing tutorial to turn your old tote bag into a new backpack.
4. DIY Reversible Tote Bag Tutorial
This reversible tote bag is certainly something out of the box. It may seem tricky but every detail has been shown in a step-by-step manner in this tutorial. You just need some piece of cloth and a little bit of your time to complete this.
5. DIY Leather Tote Bag Pattern
Making DIY tote bags doesn’t mean they have to be of paper or fabric. They can be of leather too. Follow this simple tutorial and with a piece of leather and a bit of sewing, you will get a good tote bag for your groceries.
6. How to Make White Personalized Tote Bags
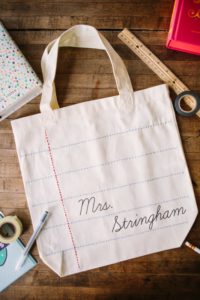
Gift your teacher or any friend this tote bag and surprise them with your creativity. Instead of a name, you can also put any appropriate quotation.
7. DIY Denim Tote Bag Tutorial
This denim tote bag doesn’t even look like it has been handmade. Get yourself a chic look with this tote. Take out that old denim you don’t wear anymore and sew the appropriately cut pieces into a tote. A denim tote is much durable than the others.
8. Fabric Tote Bag Design Tutorial
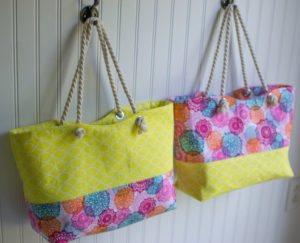
This fabric tote bag can be perfectly used as a beach bag. It’s colorful fabric, though you can use fabric of your choice, brings about a glowing and bubbly effect.
9.DIY No Sew Tote Bag Ideas
You just need to be handy with your scissors and you have your new tote bag ready. You just need o cut some fringes and tie them up so no problem if you don’t know sewing.
10. DIY Tie-Dye Tote Bags Instructions Step-by-Step
The tribal pattern that is done on this tote is no doubt amazing but you can do your patterns too. Don’t panic by the thought of dyeing something, trust me it’s a lot easier than anyone can ever imagine. You just need the right dye and a good pattern to highlight the overall appearance.
11. Pattern For Tote Bag With Flat Bottom (Medium Size)
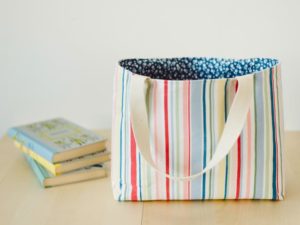
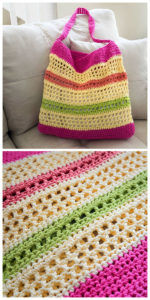
This striped flat bottom tote bag is a perfect one to make when stripes are in trend. Women! make your own statement by this unique tote bag.
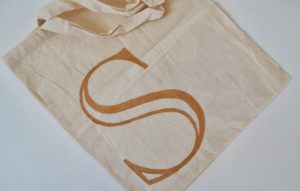
12. DIY Monogram Tote Bag: How to Make
You don’t even need to buy that tote bag as is shown in the tutorial. You can make yourself one by stitching two canvas clothes together as you have learned in the first tutorial mentioned in this list and then paint the monogram on it.
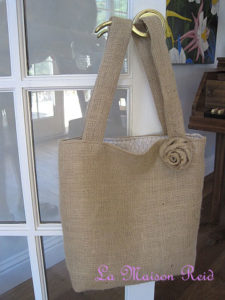
13. How to Make Burlap Tote Bags
Burlap tote bags are very much fashionable and trendy like the fabric ones. In fact, they give an additional rusty look which the fabric ones cannot give. Burlap tote bags have grown immensely popular not only because of their durability but also their impeccable appearance.
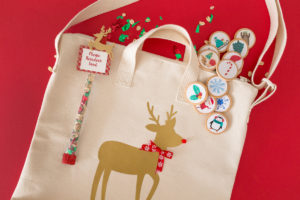
14. Amazing DIY Christmas Tote Bags Tutorial
This is no doubt one of the best Christmas gift ideas you can think of for a friend or a family member. After all, Christmas is the time we spread love and show gratitude towards others. What can be a better gift than this beautiful tote bag made by you?
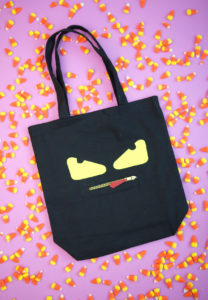
15. DIY Halloween Tote Bag
Gross looking candies and all other sorts of decorations are the most common gifts on Halloween. Gift your friend the wackiest gift she can ever think of – a tote bag designed especially for Halloween which will match her spooky outfit for the day.
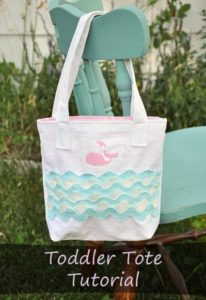
16. Free DIY Mini Tote Bags Design
Gift your little ones something unique and long-lasting. A gift does not always need to be expensive. It just needs to be made with love. This mini tote bag is the perfect one for that fashionable little lady in your house.
17. DIY Recycled Tote Bags (T-Shirt)
Recycle your old t-shirt or that tank top you don’t wear anymore and transform it into a cool tote bag. Do it yourself and don’t depend on the retail stores to rule over your choices. Make your own fashion.
18. Colorful Beach Tote Bags DIY Design
On your next trip to the beach, whether you are wearing monochromatic beachwear or colorful florals, take this bright and beautiful tote bag with you and flaunt it well. So don’t waste time and be vacation ready!
19. Make DIY Tote Bag With Lining
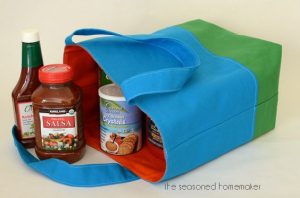
If you want a bag which will be able to hold heavy weights then you definitely need to sew a lining. The lining makes a bag strong. This bag would thus be perfect for your grocery store. This tutorial is extremely easy and the outcome is outstanding. The explanation is very vivid and you would not find any problem stitching your fabric into a beautiful tote.
20. Beautiful DIY Tote Bags
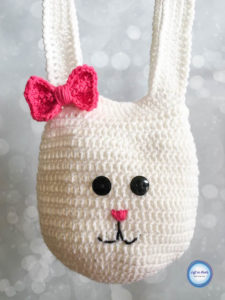
This cute bunny bag will leave everyone in awe once you finish the project. This will be the perfect weekend bag or the one which you can carry when you are going for a vacation. The materials are cheap and the overall cost of making this tote bag is quite affordable. The finished size of the tote is approximately 20” by 12” if you follow exactly what is given in the tutorial.
21. DIY Tote Bag With Zipper For Girls
Tote bags with a zipper are much safer than the open ones. The small things you carry like your makeup essentials or your sunglasses or even your headphones will never get the chance to slip out of your bag. With time the fashion trends change but tote bags are never out of fashion.
22. DIY Tote Bag With Duct Tape Project
This project will take only an hour. It does not even require sewing. Duct tape is used to make a wide range of things. This easy to make tote bag is not only beautiful but also the perfect one when you have to make a gift for someone within a 24-hour span.
23. Easy Tote Bag With Rope Handles
These DIY tote bags with rope handles are very pretty and sturdy. You don’t have to worry about the straps being torn away from the main body of the bag. These rope handles will never come off.
24. DIY Tote Bag Pattern With Pockets
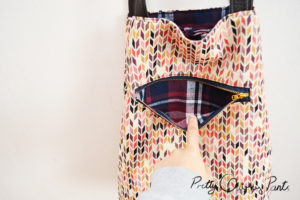
Do you sometimes feel the need of an extra pocket in your tote bag? It is certainly very difficult sometimes to keep all the things in a single compartment especially the smaller things which tend to camouflage among other things in times of need. This tote bag with an extra pocket which is again guarded by a zipper is perfect to carry your small essential things or even your money which certainly needs to be kept separate from all other things.
25. Small Tote Bags DIY Tutorial
This small and easy tote bag is super cute. Buying expensive clothing and branded bags is not what makes you trendy but how you carry yourself and employ the simple things in life to achieve a look that leaves an impact on others and makes them follow your trends. This tote bag will definitely be one of the trendsetters.
Here, I bring to you 25 amazing and easy patterns to make your own tote bags tutorials which will guide you on how to make these cute DIY tote bags at home.
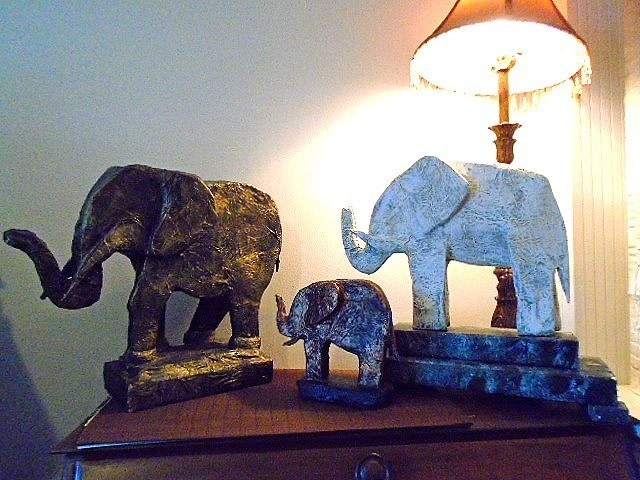
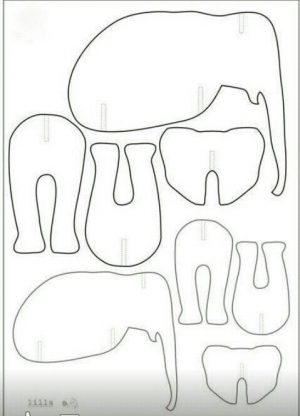
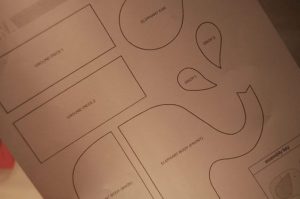
Paper mache is the popular art with the mache mix made from shreds of paper or paper pulp mixed with glue. This mixture could be molded into several shapes when it’s wet. Once they dry and become hard they are suitable for painting and decorating them. Paper Mache Elephants are quite a buzz these days. You can create numerous designs in it. This is a great way to make paper mache traditional toys, masks, pinatas, wall hangings, sculptures and more. We have listed all possible designs for the paper mache elephant. Let’s explore how to create your fav pattern.
How to Make Paper Mache Elephant with Step-by-Sep Instructions
-
Paper Mache Elephant DIY
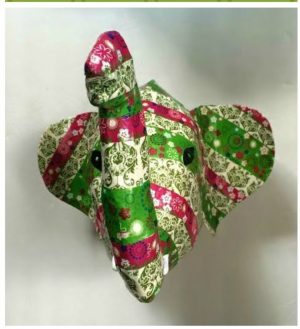
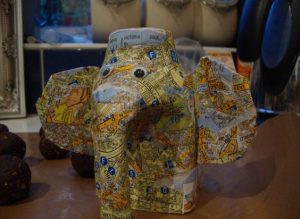
This sculpted elephant is made from using paper mache paste and cardboard. Once dry, paint it with traditional colors making it an elegant masterpiece. This is easy to construct and you can use it to decorate your side table. You can even use printed wrapping papers and cover the top layer with it to give it a unique look.
-
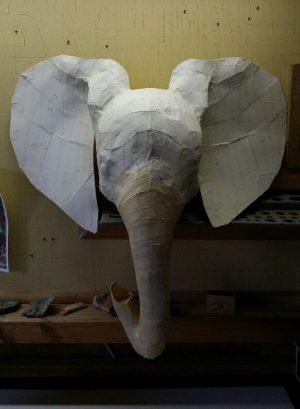
DIY Paper Mache Elephant Head
-
How to Make an Elephant out of Paper Mache
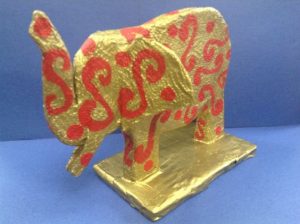
This standing sculpture of the elephant is an easy to make paper mache craft. All you need is some cardboard cut-outs, glue and paper strips to make the animal figure. Once dry, paint and decorate it.
-
How to Make a Paper Mache Elephant with Balloon
-
DIY Paper Mache Elephant Mask
-
Large Papier Mâché Elephant Tutorial
-
Instructions to Make Papier Mâché Elephant Head
-
How to Make a Paper Mache Baby Elephant
-
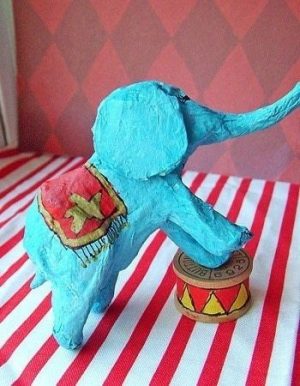
Very Easy Paper Mache Circus Elephant (Small)
This design works well if you want to work on miniature-sized paper mache animals. I loved the cute elephant which was super easy to make, just follow the instructions to make one of your own.
-
DIY Papier Mache Sculpture
-
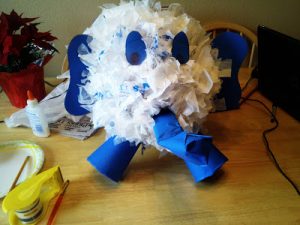
How to Make Pache Mache Elephant Piñata
Elmer the elephant is a colorful character. His heady optimism and unbridled sense of humor keep the entire community in a cheery mood. So try to decorate yor piñata with colorful confetti papers and let the kids enjoy the theme on birthdays and parties.
-
Unique Kashmir Paper Mache Elephant Idea
This traditional Indian design was initially made in Kashmir. The intricate designs showcase the artistic zeal of the Mughal Empire.
-
How To Make A Paper Mache Elephant using Chicken Wire
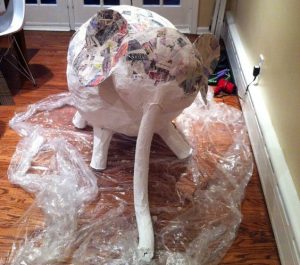
If you are keen to make a life-size elephant sculpture, then making the base frame with chicken wire is a sturdy and affordable option. It takes less time to create the animal figure and is easy too. Chicken wire is easy to mold into any shape and the material is light and solid too.
-
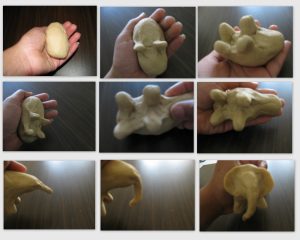
Paper Mache Clay Elephant Craft with Kids
-
Making Your Own 3D Elephant from Paper Mache
Once you are finished with your paper mache animal heads, we love the idea of using them as nursery decor or accents for a kid’s bedroom. You can hang them in your living room for some crafty inspiration for your next project.
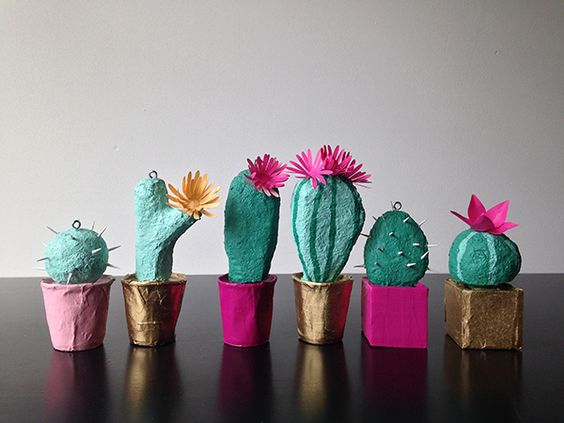
Paper Mache(Papier-Mâché) is a fun project for both kids and adults. If you are fond of succulents and can’t maintain real ones, so we have some adorable paper mache cactus (cacti) tutorials for you. Spruce up home with these green funky cactus plants which are easier to maintain. We have rounded up some of the best DIYs and paper mache recipe for this desert plant, which kids will have fun decorating.
Things Required for the Project
- Newspaper
- Modge-Podge
- Cardboard or Styrofoam
- Paints
- Toothpick
-
Easy Paper Mache Cactus DIY
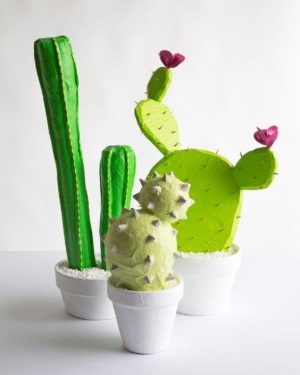
You can make a set of mini and large cacti plants from paper mache. Since cactus is quite popular these days and can be seen everywhere, try making one on your own. Add some extra spark to your prickly plants with toothpicks and colored pots and use them as beautiful centerpieces.
-
Paper Mache Potted Cacti Tutorial
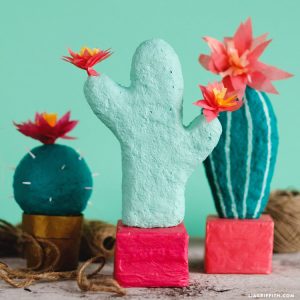
Add some beautiful cactus decor to your living room with these cute DIYs. You can make different shapes of the plant and adorn them with crepe paper flowers. These potted plants give a funky burst of colors to add to any space. Once the figures are hard, you can paint them and put embellishments of your choice. The tutorial has a free PDF template for the shape of the cactus plant.
-
How to Make a Large Paper Mache Cactus
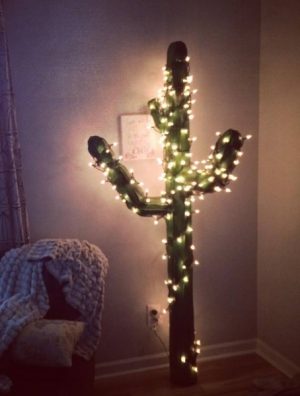
Decorate your outdoor space and gardens with these giant cactus made from paper mache. This project takes some time as it is a giant cactus, but the outcome looks beautiful when placed outside your house. You need a large stick or a broomstick to make it as the base and then cover it with newspaper paste and finally paint them in different hues of green.
-
Colorful Paper Mache Cactus Plant Ideas
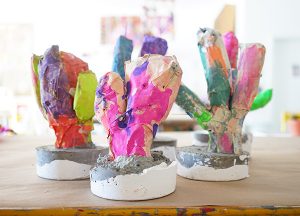
Your kids will love to do this paper mache project. It’s quite unique because of the use of unconventional colors for the cactus plants. They have used the concrete mixture to make the figures and place them in your rooms.
Paper Mache Letters DIY – Read Here
-
Paper Mache Flowering Cactus Instructions
With recycled newspaper and a little paper mache paste, you can easily transform your old waste into a lovely flowering Cactus that never needs watering.
-
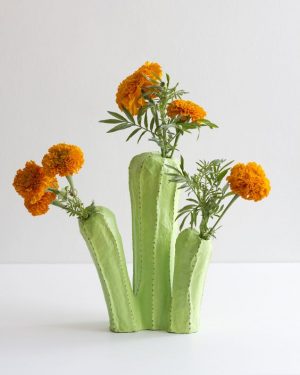
Make Your Own Paper Mâché Cactus Vase
-
How to Make Newspaper Cactus
These faux paper mache cactus designs are made from using old newspapers and paper mache paste which makes a beautiful home decor.
-
Giant Paper Mache Cacti Plant Tutorial
Showcase your handmade cactus plant on Christmas or a themed party and see your creation get compliments.
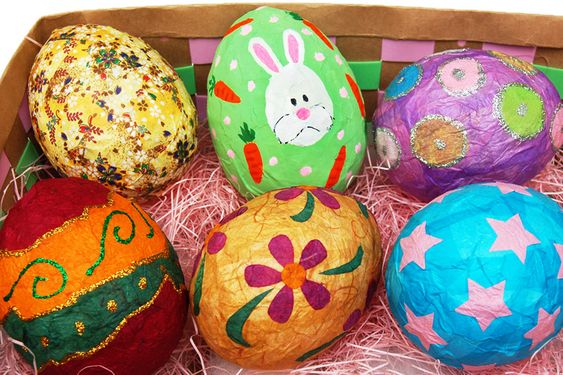
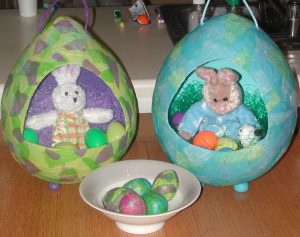
If you’re gearing up for Easter with some handmade stuff then DIY paper mache eggs are fun to make and look lovely placed in your house decor. They easily add a spark of brightness to the mundane decor. So get your kids along and indulge in this crafty affair which is simple to make and fun to design. Today we are discussing some interesting ways to make your own paper-mâché egg for this spring with simple ingredients available at your home.
For people who haven’t tried paper mache craft before here are the steps involved in making the perfect recipe for mache eggs.
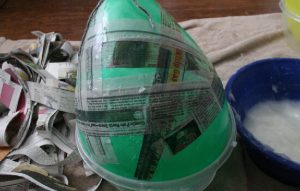
- Mix some glue and water in a bowl in the ratio of 3:2 and mix them well (For paper mache paste)
- Now, dip the paper cuttings in the glue completely.
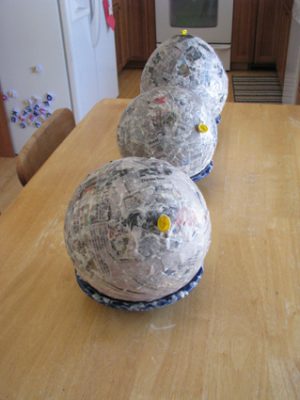
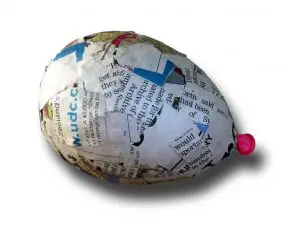
- Start with sticking the newspapers strips on your plastic egg or balloon.
- Be sure, you completely cover the egg with the glued paper strips.
- Once dry and hard paint and decorate them.
DIY Paper-Mâché Egg Tutorials with Instructions
1. Paper Mache Easter Eggs
These cute painted paper mache eggs are made with easily available materials such as strips of paper, glue and plastic eggs (as a base) for this project. You can also alternatively use styrofoam as the base. Once the eggs are ready and dried, paint it with interesting patterns.
2. Paper Mache Eggs Made with Confetti
These set of colorful eggs are made from small balloons and filled with treats for little kiddos to go crazy for. And the eggs are decorated with bright confetti and this craft will surely get your children excited.
3. Making Paper Mache Eggs from Cardboard
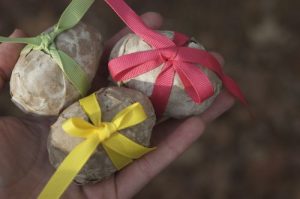
This is quite a simple tutorial which can be made using balloons, plastic eggs of cardboard. Once the paper-mâché is dried on the egg you can paint it or wrap it with paper and ribbons to fill your egg cartons this Easter.
4. Decorated Paper Mache Eggs
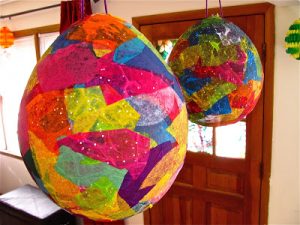
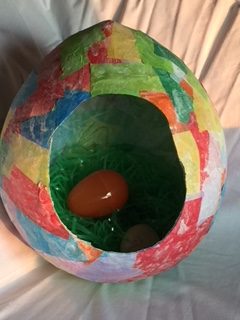
This is quite a colorful design and is quite simple to make with bright and torn tissue papers, glue, water, and some balloons. Try using both smaller and bigger balloons, for the project. As the smaller ones will be ideal to decorate the Easter basket, while the big ones can be your hanging decorations.
5. Paper Mache to Make Giant Easter Eggs
Learn to make Paper Mache Letters – Here
6. Just Hatched Paper Mache Eggs for Easter
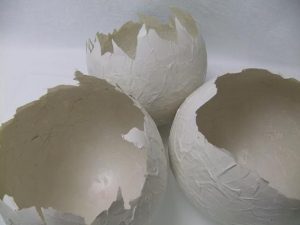
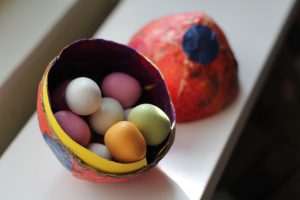
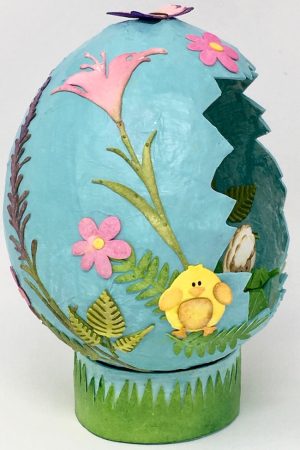
I loved these quirky unfinished eggs designs. You can easily use them as ornaments to decorate your interiors or fill these half-broken eggs with treats for the little ones.
7. Paper Mache Dino Eggs Tutorial
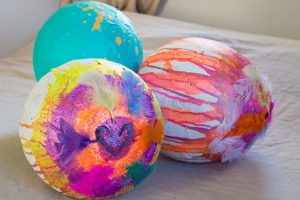
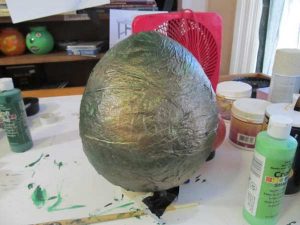
Since these are dinosaur mache eggs in the tutorial, you need to use big balloons for this craft. Kids love playing with Dino eggs and they are fun and messy to make them. The big eggs are placed on a bowl and you may also fill them with small gifts for your child. Once they find these eggs they will be thrilled to get their gifts along with the eggs.
8. Make Edible Paper Mache Eggs this Easter
9. Paper Mache Dragon Egg Craft for Kids
You can make a dinosaur also and place these eggs beside him. A lovely theme for your Halloween parties too.
10. Cute Papier-Mache Easter Eggs
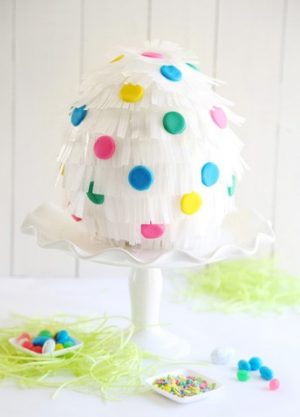
I loved these polka-dotted Easter Eggs. You can create them easily with small water balloons, some tissue paper and fill them with toys and treats and tie interesting messages to the string. Kids will be quite excited to see these and to open them to see their gifts.
11. Paper Mache Egg Boxes
If you want to make paper mache eggs without using balloons, then this the best option. This tutorial uses homemade glue and egg boxes. You can easily store your itty bitty stuff inside it and kids love to play with them.
12. Hand-Painted Paper Mache Eggs
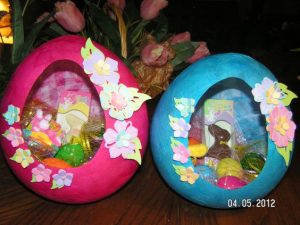
13. Paper Mache Egg Baskets for Easter
14. Adorable Paper Mache Easter Egg Craft
I love the detailing and design done in this tutorial. A perfect Easter Egg Basket to keep your bunnies and treats.
15. DIY Papier Mache Eggs with Tissue Papers
The egg is decorated with tissue papers at the end. You will need the balloon pump to blow those tiny water balloons in this project.
16. How to Make Paper Mache Eggs with Flour
17. Large Paper Mache Eggs
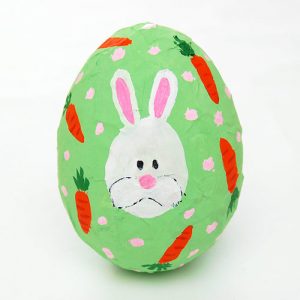
To make painted eggs, use plain white paper to make the topmost layer of your papier mache once the eggs are dry and hard. Paint patterns, textures or some Easter-themed images like bunnies, flowers and carrots and add some glitter to it.
18. Egg Decoration with Paper Mache
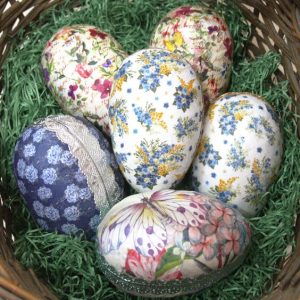
Once your eggs are done, you can also use printed antique wrapping papers to wrap the top layer and add a vintage look to your eggs.
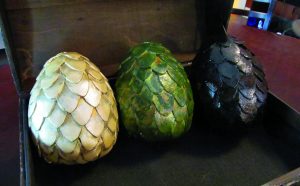
19. Making Game of Throne Eggs with Paper Mache
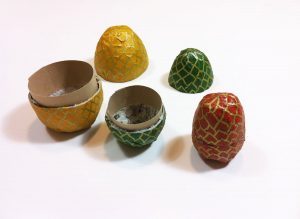
This is a very interesting one for all Game of Thrones fans. A unique design with a classy touch to put on your tables.
20.Decoupage Papier Mâché Easter Eggs
21. Intersting Designs for Paper Mache Baskets
22. Paper Mache Egg Craft for Kids
With so many designs now you are good to go and make funky paper mache decorations for your home. Attach some strings to your creations and hang them or place them in a basket near your Easter bunnies. Use your creativity to add to the charm to your hanmade decor, and share these ideas with friends and family online.
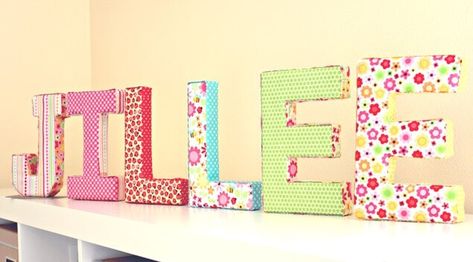
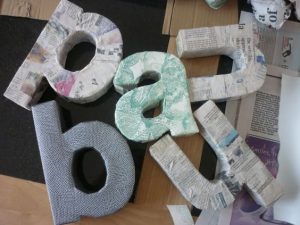
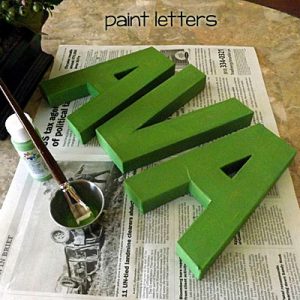
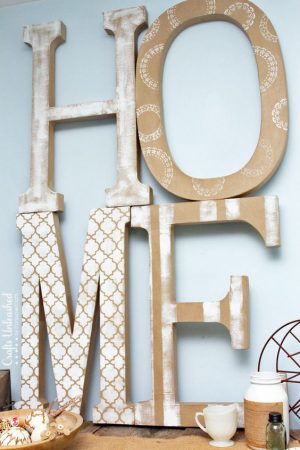
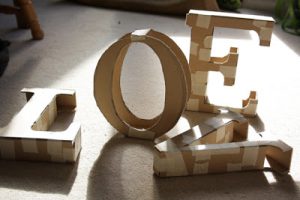
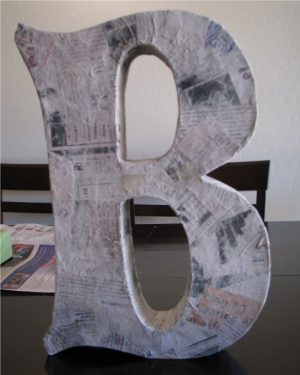
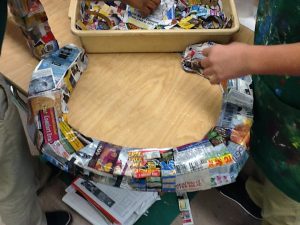
Making paper mache letters is quite simple to make than anyone could have ever thought. The letters are prepared by mixing shreds of old papers in water and glue, is an interesting craft material that can be molded into some outstanding artworks. It also brings out the little creative side to you along with a quick way to impress your beloved in an inexpensive way as well. So if you are wondering how to make paper mache letters then here are 25 incredible ways in which a paper mache letters can be used beautifully, incredibly and innovatively.
Learn How to Make Paper Mache Boxes Here
How to Make DIY Paper Mache Letters Tutorials
1. Small Paper Mache Letters
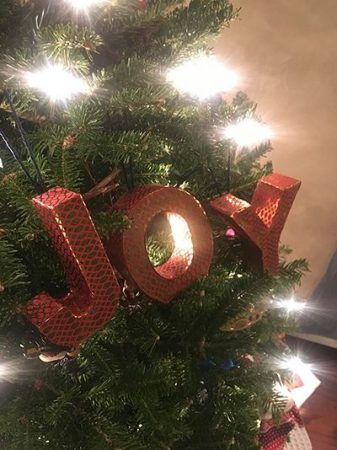
You can use handmade papers to make these small paper mache letters. Also you can opt to create homemade letters to decorate your trees and place them anywhere to add a touch of creativity in the festive season.
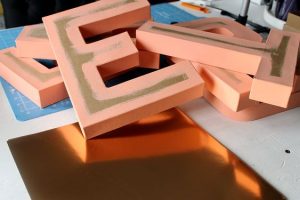
2. 3D Giant Paper Mache Letters
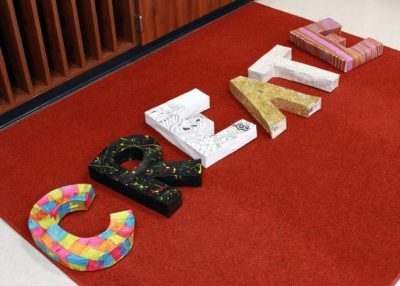
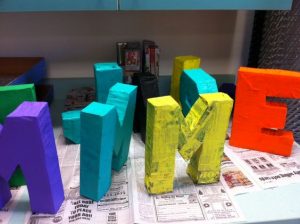
Large paper mache letters are a great way to decorate your home parties or gift to any of your favorite people. These mache letters are really easy to be made only using paper, glue, and water and won’t cost you much too.
3. Small Paper Mache Letters
A small to medium-size paper mache word has its own beauty in bringing out a realistic effect n the piece of art. You can easily place this in your kid’s nursery or toy room to add to the brightness of the decor.
3. 24-inch Paper Mache Letters
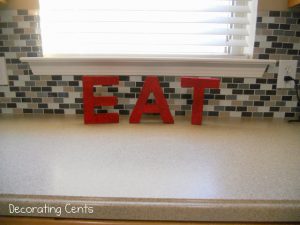
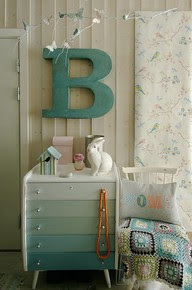
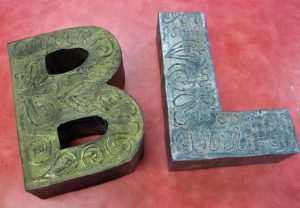
A 24 inch paper mache letter is not a matter of joke and can be used as a wall, door or kitchen hanging. You can easily add colors and glitters to it to make this monogram letter more embellished.
4. 23.5-inch Paper Mache Letters
A 23.5-inch paper mache letter can also be used as a beautiful theme decorative purpose. I loved the black and white effect given to it making it elegant and yet charming.
5. DIY Paper Mache Marquee Letters
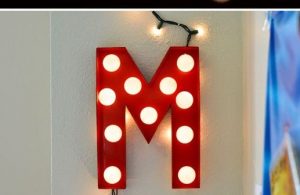
This is very simple to make vintage theatre-style marquee lights or even a monogram for a room. Kids love to decorate their rooms with this kind of decor.
6. 8-inch Block Paper Mache Letters
What is the best way to paint paper mache letters? Here this tutorial goes with s small-sized letter is an awesome décor fitting in everywhere in the room.
7. Paper Mache Letter Cut-Out in 12 Inches
Pop up your room with these ideal sizes of paper mache gifts and decors. You can place this letter in your room wall and make a bold statement with this. Easy to make and adds a quirky element to the decor.
8. Paper Mache Letter Cutout
A size that can be hung outdoors or indoors for an inevitable glamor to your room. You can make this with 12-inch or 18-inch variety.
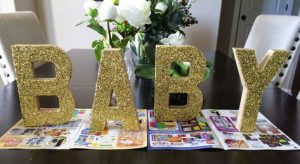
9. DIY Glitter Paper Mache Letters
Glitter can add a new oomph to the paper mache letters. These letters can be a really good decoration for parties, baby showers and can be a pop tassel banner.
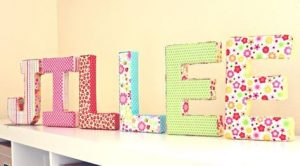
10. Fabric Covered Paper Mache Letters
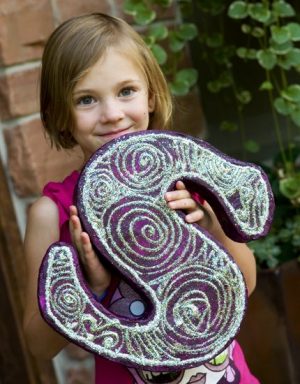
This tutorial is awesome, where it can be used as a home décor especially by the sofas because anyone can be mistaken by thinking it to be a cushion. Covering paper mache letters with printed fabric is ideal for a girly room decor.
11. Easy Paper Mache Letter Pattern
Place it anywhere to get yourself appreciated by visitors with these beautiful creatives.
12. Decoupage Paper Mache Letters
These are really interesting ideas that can be customized with any occasion possible. And once the letters are ready to paint them with your fav colors.
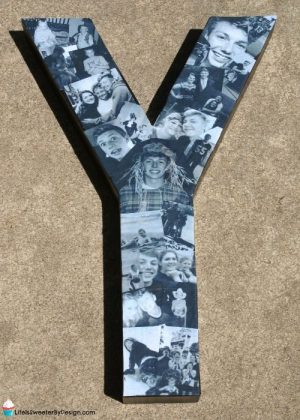
13. Paper Mache Letter Collage
A personalized gift, that can make anyone cherish the happy and golden memories. Personalize it with your favorite photos and make it special.
14. Paper Mache Letters Extra Large
A huge party needs huge decors and what else can be ideal but simple than this?
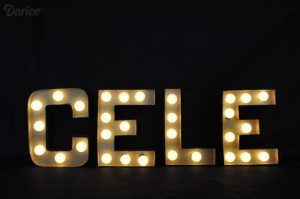
15. How to Make Paper Mache Letters with Lights
Making paper mache letters with lights is the cheapest thing that one can make to add class and glamour to one’s room.
16. Lowercase Paper Mache Letters
Lower case paper mache letters are the easiest type of craft gift that can be made.
17. Paper Mache Monogram Letters
The monogram letters are not only easy but also classy. And you can use your old cheerios boxes to make the base of these alphabets. With the use of golden and silver metallic colors gives it a rustic and elegant look.
18. Paper Mache Letters with Sequin
Some birthday or class party round the corner? Paper mache letters are so flexible to be constructed that even Greek letters are possible to be made. Thus adding a crafty element of sequins makes it beautiful.
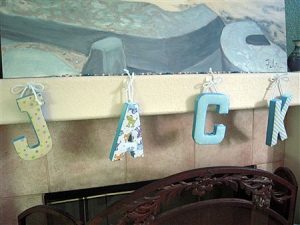
19. How to Hang Paper Mache Letters with Ribbon?
Make your baby shower décor prettier by hanging the baby’s name or initials with ribbons.
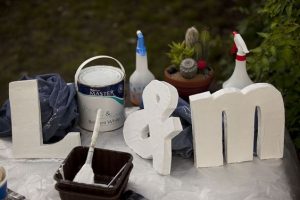
20. Free Standing Paper Mache Letters
A strong paper mache letter would stand steadily in any extreme party condition to maintain the look of your place. You can make this for your wedding decor and give the decorations a special handmade touch.
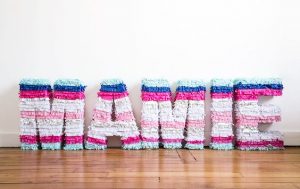
21. Paper Mache Craft Pinata Letters
Impress your teacher with easily crafted letters made by your own choice.
22. Paper Mache Cardboard Letters
Making a paper mache letter strong is very necessary to make it last longer. That is why cardboard letters are a good choice.
23. Large Paper Mache Letters
24. Illuminated Paper Mache Letter Craft
25. Cheap Paper Mache Letters for Kids
Preparing the paper mache with the mod podge can be messy at times, but it’s quite a fun craft, where you can put a lot of your creative instincts to work with.
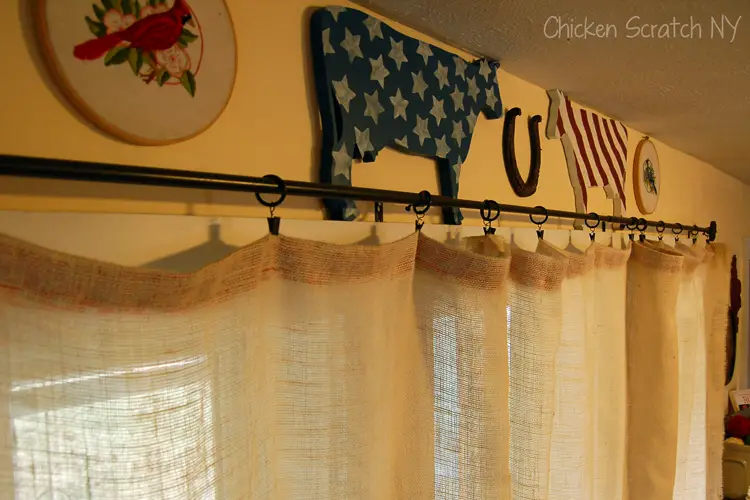
Burlap bags and burlap sacks have become quite popular. These eco-friendly items have made their way to your closet swiftly. They are recyclable and versatile and that is why people are using more and more burlap fabrics to create their own accessories. Bags and sacks have become common now, so why not try something absolutely new and novel? Let’s make burlap curtains. Yes you read it right, burlap curtains! Just when you thought that you have exhausted every kind of use of burlap fabrics, voila, enters the curtains!
Have you every seen the beauty of burlap fabrics? The net-like texture is perfect for curtains as they create a soothing sunlight effect in your room. The earthy, rustic color goes perfectly with your room, and if you dislike the brown color then you can always dye them. You have the liberty to decorate them according to your taste. Want to know, how to make burlap curtains? Search no more, as here is some DIY step by step easy and creative guides to create your own burlap curtains.
Collection of Quick, Simple DIY Burlap Curtain Ideas & Tutorials
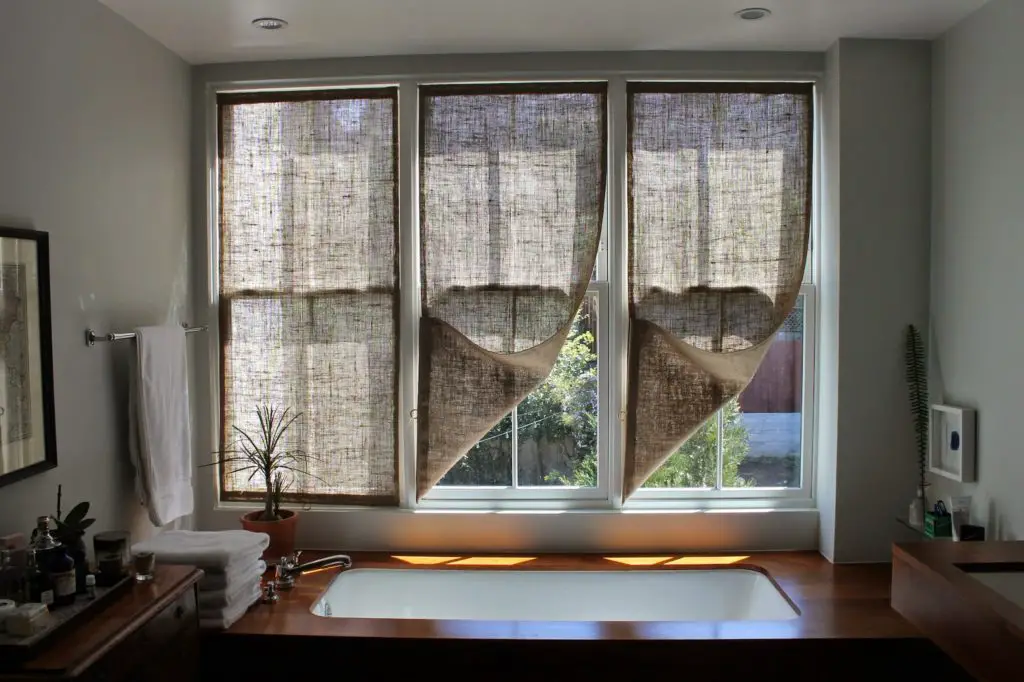
1. Burlap Shower Curtain
Ever thought to give your bathroom the much-needed attention? Start by using a burlap shower curtain. These are sure to make your bathroom look fantastic and give your guests something else to look into rather than your medicine cabinet.
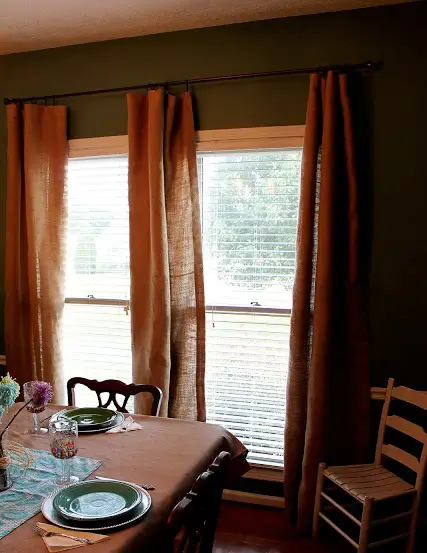
2. Lined Burlap Curtains
Lined Burlap curtains will give your room the much needed details. You will be surprised with the result. If you have an abundance of burlap fabrics then go for this option.
3. Burlap Curtain Panels
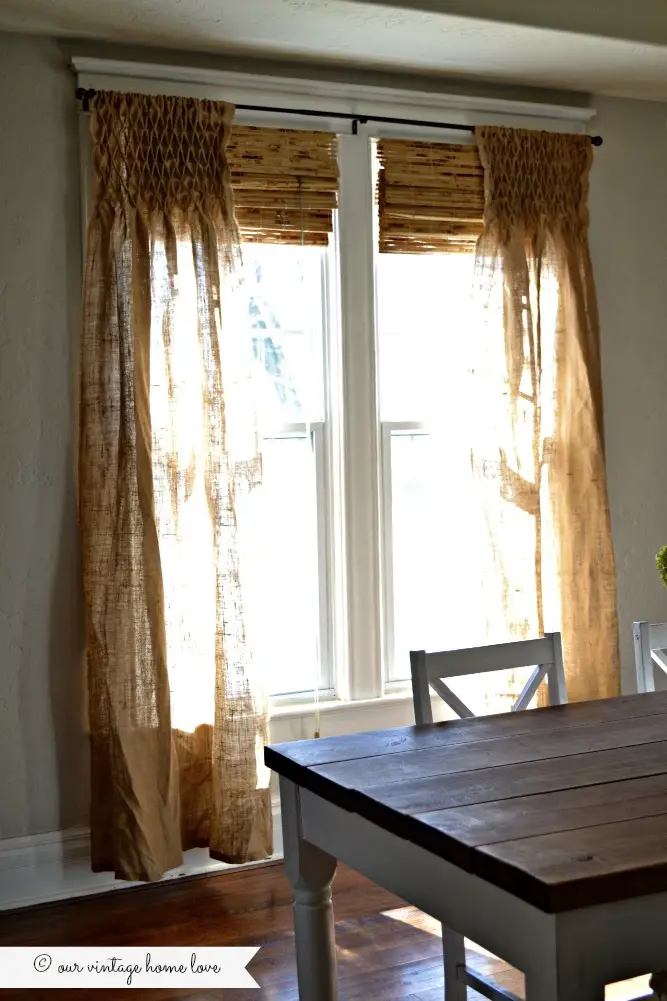
What’s best about burlap fabrics is its netted texture. This texture allows the light to pass through them, making your room illuminated enough that you feel a level of coziness. Make burlap curtain panels and revel in its wonder.
4. Smocked Burlap Curtains
This is a burlap curtain idea you won’t be able to ignore. Just look at the intricacy of the design. What more could be better suited for your room?
5. Brown Burlap Curtains
This is perhaps one of the easy burlap curtains to make. The brown color of the burlap fabric will add a rural farm-like touch to your room. For best effect use it against the white or earthy wall color.
6. Burlap Kitchen Curtains
Curtains are an important kitchen décor. With this guide, you will be able to make homemade burlap curtains for your kitchen in simple, easy steps.
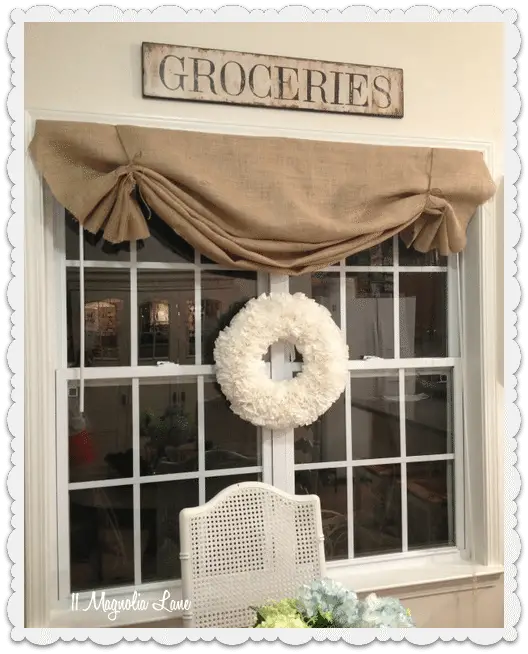
7. Burlap Valance Curtains
Valance Curtain designs add a level of elegance to your home. Making them in burlap fabric will give you that same elegance and sophistication, yet it keeping you rooted. This tutorial will give you an idea of how to make your own burlap valance curtain easily.
8. Burlap And Lace Curtains
Lace and burlap is a match made in heaven. The fine detailing of lace goes perfectly with the blunt design of the burlap fabric. Make one yourself and witness the beauty.
- White Burlap Curtains
You can easily dye the burlap fabrics and make white colored burlap curtains to go in contrast with the color of the walls. Easy tutorials like this will show you how to dye a burlap fabric white.
10. Burlap Cafe Curtains
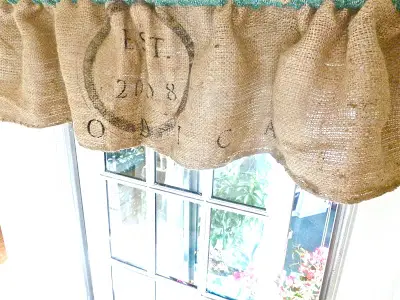
Burlap fabrics are best for cafes. The brownish-yellow color of the fabrics goes perfectly with the coffee colored theme of the café. Most cafes are painted with earthy tones to psychologically impact you with the taste of coffee. Burlap curtains fit right into that theme. Moreover, you can recycle the burlap coffee bags or sacks to make interesting curtains that go perfectly with the coffee theme of the café.
11. No Sew Burlap Curtains
Who has so much of time to sit and sew a curtain? Just get some glue, anything that has a strong adhesive power and you are good to go. These will finish in no time and you will be left with a curtain that no one will even understand the difference.
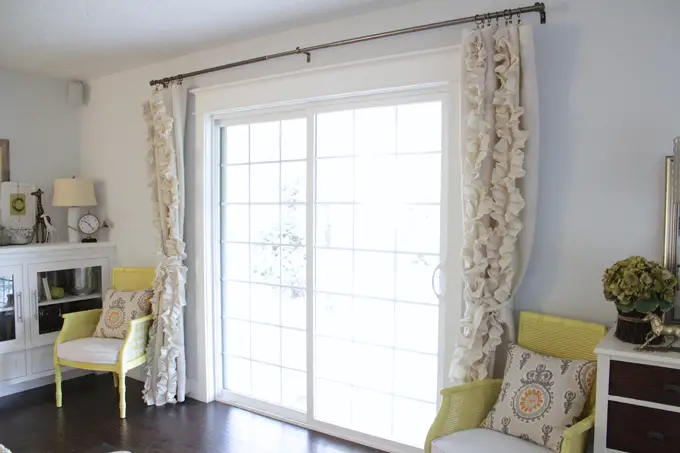
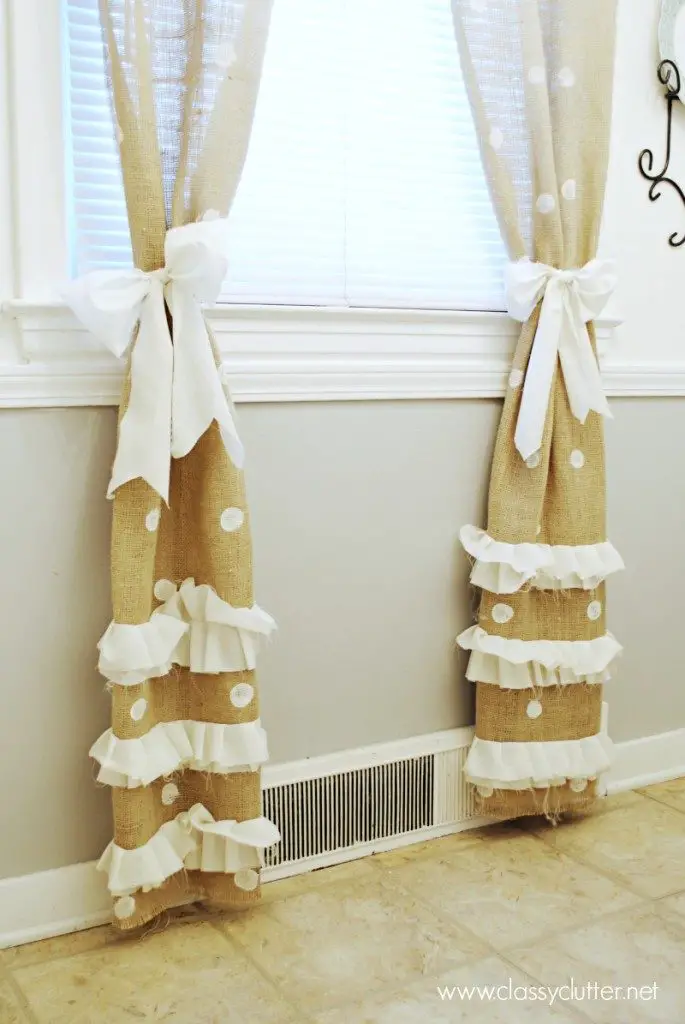
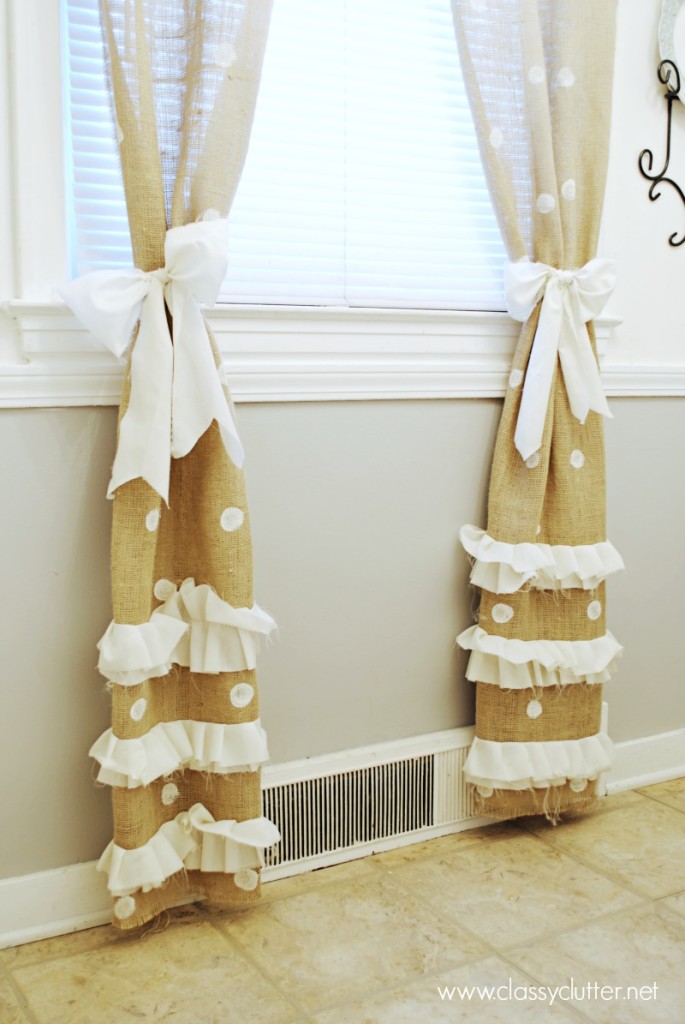
12. Burlap Ruffled Curtains
Designs and patterns are what make a curtain beautiful. This ruffled design will also do the same. Follow the guide to make these unique looking curtains to go with your amazing home décor.
13. Burlap Curtain Tie Backs
The burlap curtain tie backs are easy to make and you can make them at your home just by following the step by step guide provided. Once you have completed, you will be proud of your achievement.
- Burlap Shower Curtain With Bullion Fringe
Bullion fringe are a beauty in itself. Add to them the tone and texture of burlap and you have a winner in your hands. The burlap shower curtains with bullion fringe are perfect to get a little but crafty and produce something so beautiful that your guests could say nothing but appreciate it.
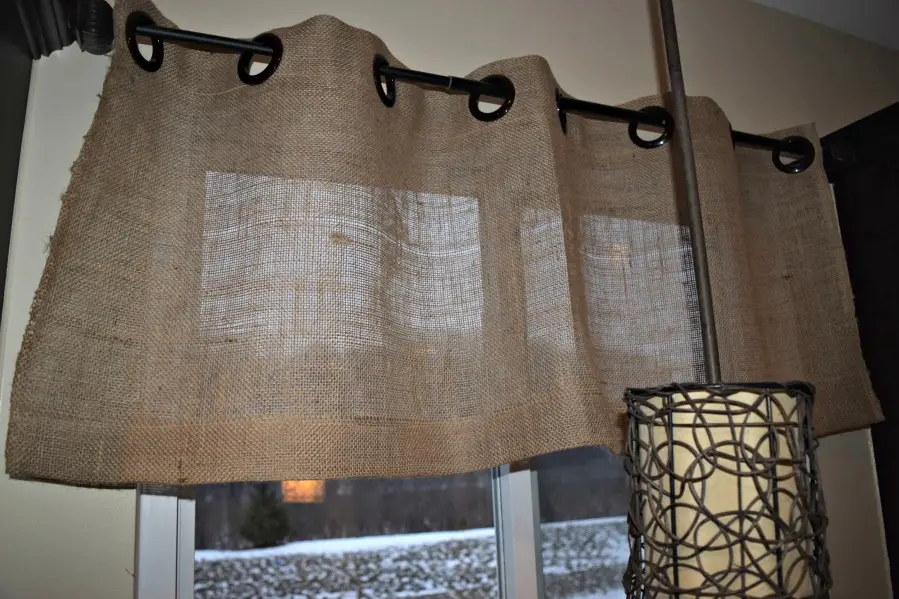
15. Burlap Grommet Curtains
These curtains made from burlap are something every home needs. Easily created, yet it adds a value of labor to the creation, as they seem that you have spent days to create such a stunning piece of décor.
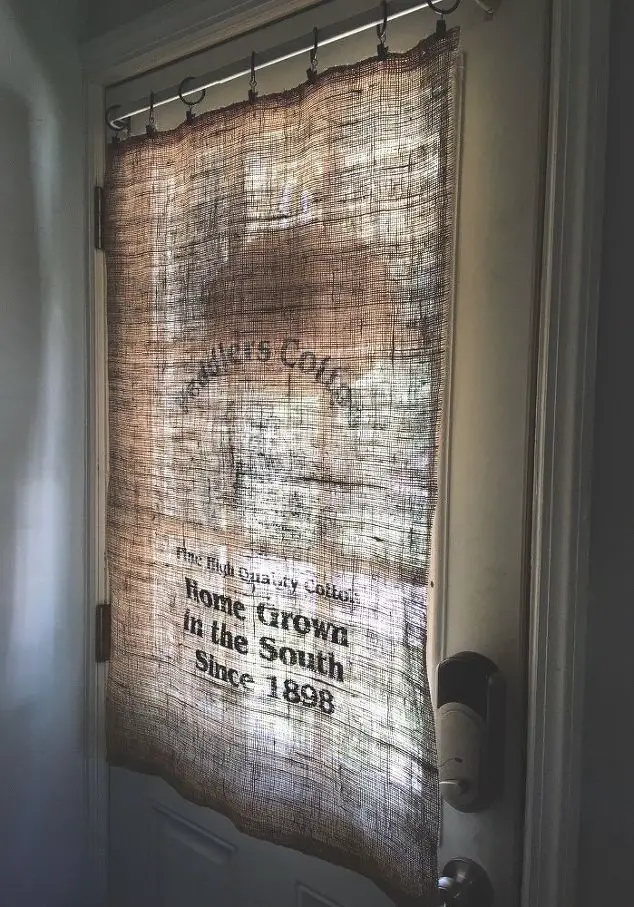
16. Burlap Sack Curtains
Burlap fabrics have a strong durability and a long shelf value. It is for these reasons that you can recycle burlap sacks to make pristine curtains for your home.
- DIY Painted Burlap Curtains
There are so many DIY tutorials for you to make your own painted or decorated burlap curtains. You can design them as per your own taste and you can use acrylic colors to paint them. Use stencils to paint interesting and fun designs. Get crafty!
Burlap Blackout Curtains
Use a thick cotton lining to create your own burlap blackout curtains. The thick cotton lining will not allow any light to pass through the curtains. These are the best option during summer.
Rustic Burlap Curtains
Burlap, the fabric in itself is rustic and earthy. These fabrics carry the flavor of earth and the color, the texture, and even the smell will testify to that. Making burlap curtains are nothing but adding the rustic touch to your home.
Now that you have acquired every possible knowledge to create your own burlap curtains, what are you waiting for? Buy some burlap fabric and get started with your unique burlap curtain. Make sure that you wow your guests with your fantastic creation.
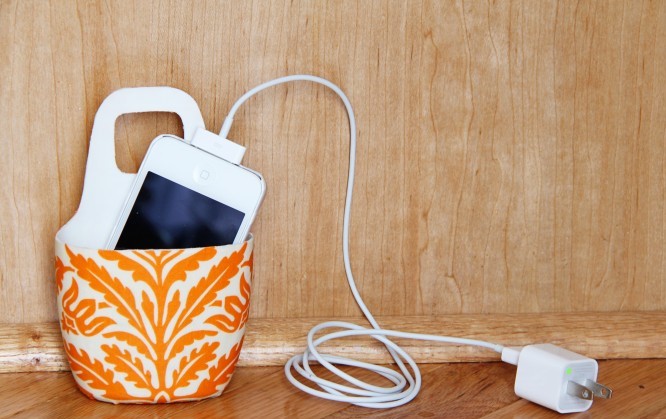
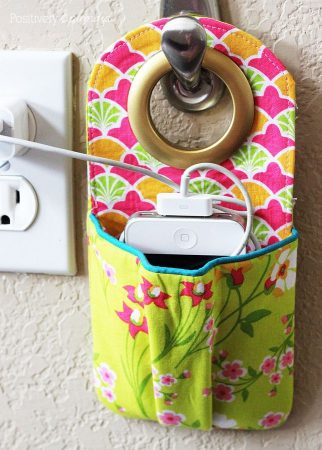
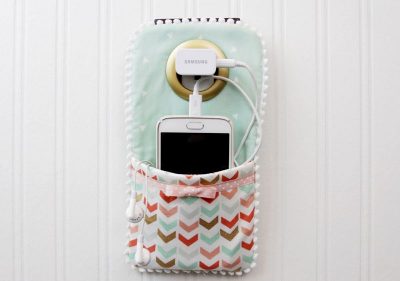
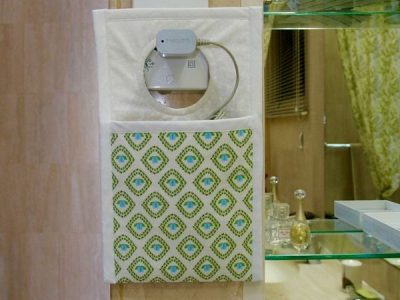
Do you love your phone and always want to keep it within your reach? Handmade phone charger holders are a very convenient way to charge your phone! You don’t have to keep your phone on the floor and this organizes the untangled cord giving your room a tidier look. Check out these easy tutorials to create little cell phone charging pouches and hang them on the plug.
Also Read: How to Make Cool Duct Tape Phone Cases – Here
15 Cool Ways to Make Your Own Phone Charger Holder
-
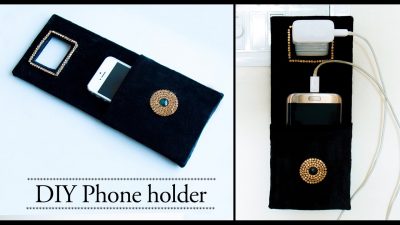
DIY Phone Charger Holder
Now if your charger cord is too short or inconvenient, make yourself this cute and handy charger holder. You can choose the dimensions as per your phone and make it a big enough for your phone to fit. Depending on your sewing skills this one won’t be a tough one!
-
How to Make Your Own Phone Charger Hanger
This cute little mobile pocket holder will be an absolute stunner in your room. Adding a little pom-pom lace and a curtain grommet will add to the convenience of charging your mobile within your reach without dropping it.
-
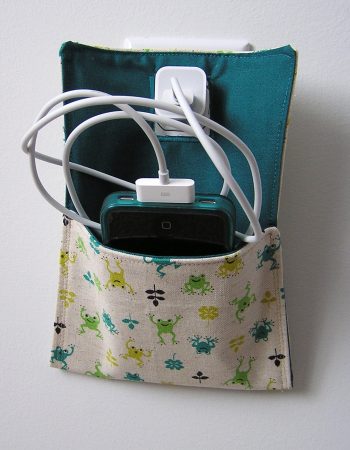
Fabric Cell Phone Charger Pouch Tutorial
This is quite an easy sewing tutorial to make your own handmade phone hanging holder. You can choose cute printed fabrics to create a quirky holder.
-
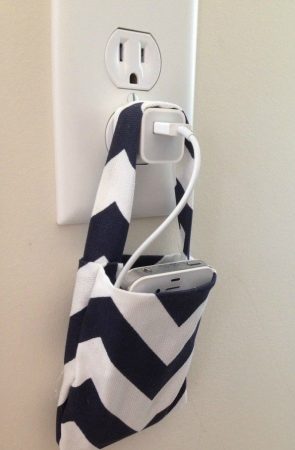
No Sew Fabric Phone Holder Instructions
A chevron printed fabric holder made from using hot glue will add to your convenience when you want to reach your phone. This is a simple tutorial which requires no sewing and is just apt for beginner crafters.
-
Easy Phone Charger Holder
When you find it really difficult to track your charging cords, then making this phone pouch will be at your rescue. This organizes your cables and makes sure you can hang them near the plug point easily.
-
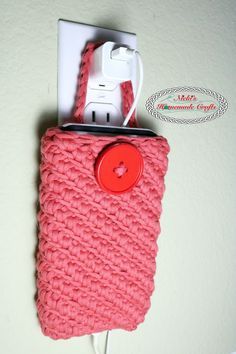
Crochet Pattern for Cell Phone Pouch
An interesting project for all crochet lovers. You can knit this pouch in no time and this serves as a multi-purpose pocket pouch for mobile phones!
If you’re not confident with your sewing skills, there are some other tutorials which show how you can make a phone charger stand with plastic bottles, washi tape, felt, cardboard and other materials too, some of which are no-sew tutorials.
-
How to Make a Simple Phone Holder Charger
Keep your cell phone off the ground and reachable while it’s charging with this easy charger holder made from a cereal box. This cute customization makes it trendy and adds a dash of an element to the holder.
-
DIY Plastic Bottle Cell Phone Charger Hanger
This holder is made recycling a plastic bottle and a fabric to cover this. Time to transform an empty shampoo or lotion bottle into this beautiful mobile hanger. You can easily hang this on the charging point and keep your phone in it. A fun craft to keep your kids busy and make useful household stuff.
-
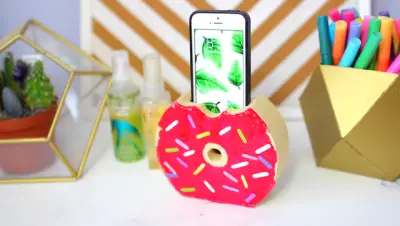
DIY Cardboard Donut Phone Holder
-
Do-it-Yourself: Cell Phone Charger Holder
-
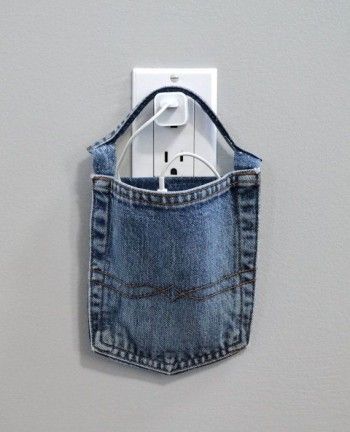
Jean Pocket Charger Station DIY
If you don’t want to throw away with your favorite denim, then you can easily turn them into this creative mobile charger which looks cool when hanging from the charging point on your wall.
-
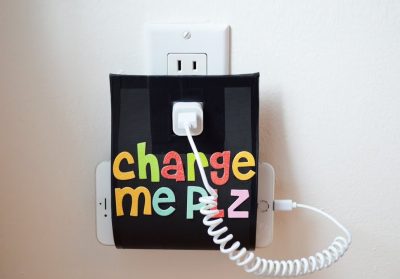
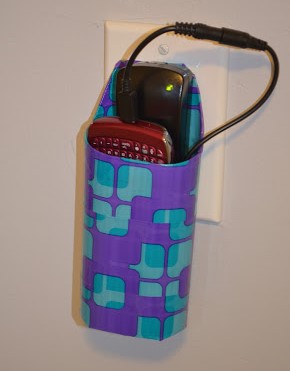
Cute Duct Tape Cell Phone Charging Holder
This cut out handle provides an outlet to the cord plug and is easy to make within minutes using plastic and duct tape.
Creating these fun and easy projects will be easy and useful summer craft. Try making them organize your wires and keep away from tripping them.
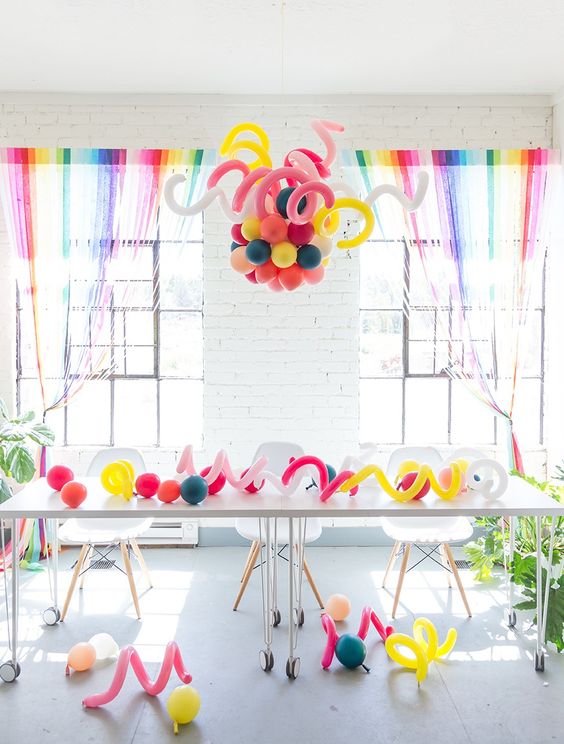
A cool and unique balloon decoration surely adds color and life to parties, baby showers, and wedding events. It’s a favorite glam factor for kids and even adults. Let’s explore unique ways to make balloon chandeliers which will complement your party decor.
-
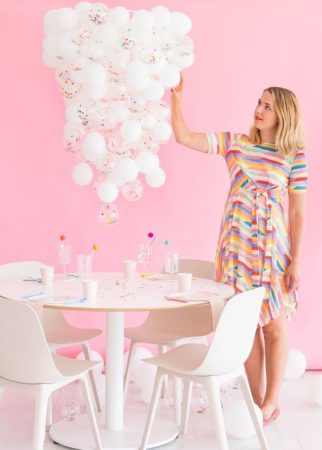
Do-it-Yourself: Confetti Balloon Chandelier
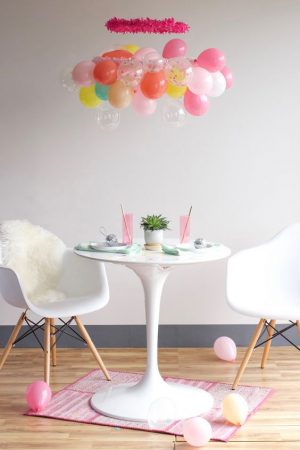
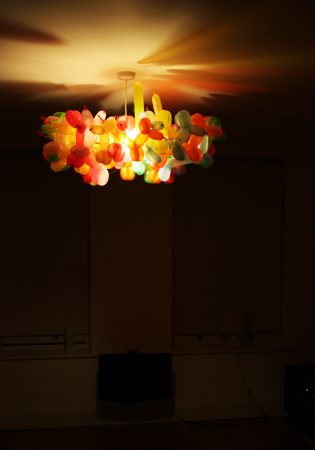
A cool confetti balloon garland hanging above your dinner table will be perfect to dazzle your room. The combination of white and confetti balloons looks classic and is perfect for any occasion, from birthday parties to dinner dates.
-
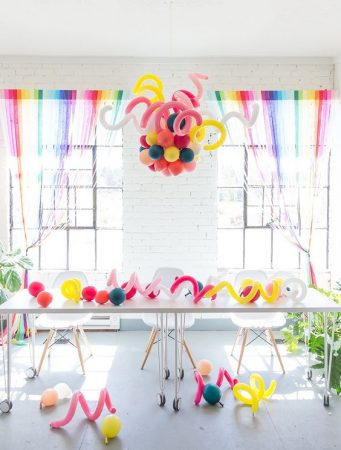
How to Make a Cool Balloon Chandelier
Adding a twist to your regular shaped balloons will give it a stunning look. Create different designs and add to your creativity. You can use hot air balloons for this tutorial and keep them hanging near the ceiling or you can place these balloons under the light to make them a glowing chandelier.
-
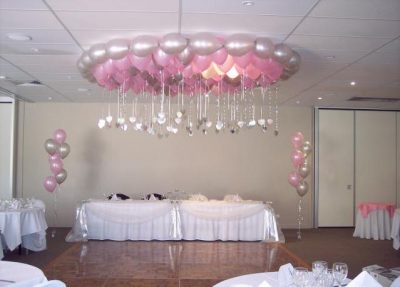
Air Balloon Chandelier for Birthday
Time to spruce up your little girl’s birthday decor with these cute and elegant pink and silver balloons chandelier. You can easily make them for themed birthday parties or baby shower event.
-
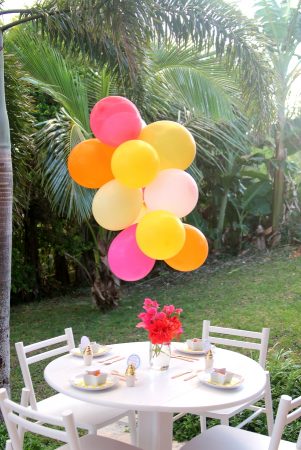
DIY Party Balloon Chandeliers
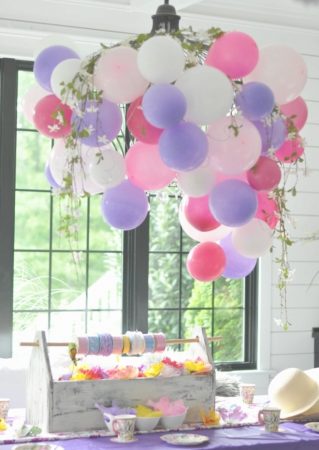
Minimalistic yet bright table decor for a tea party in your garden or backyard. The tutorial is a simple one and will be easy to brighten up your decor in no time.
-
Simple Air Balloon Chandelier DIY
-
Decorative Balloon Chandelier for Wedding
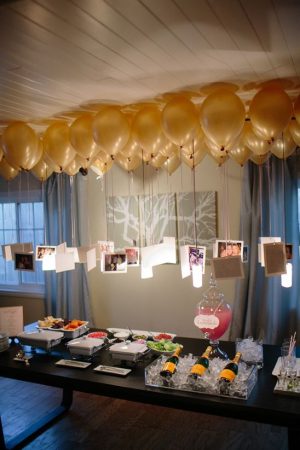
With a few supplies of gold or rose gold colored balloons you can easily create this decorative balloon chandelier display your memorable photos hanging from the balloons and cherish all the beautiful memories on your wedding anniversary.
-
String Chandelier with Balloons
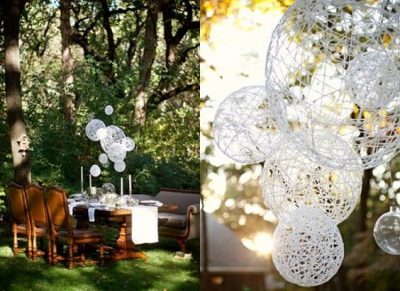
You can easily change the decor of your room or your outdoor yard by using balloons, some twine, and glue. These chic balloon lanterns look amazing when hanging from the ceiling for your wedding. You can use it later as showpiece too.
-
How to make a Chandelier from Balloons: Video Tutorial
-
DIY Yarn Balloon Chandelier
-
Ceiling Animal Balloon Chandelier Ideas
-
Vintage Hot Air Balloon Hanging Chandelier
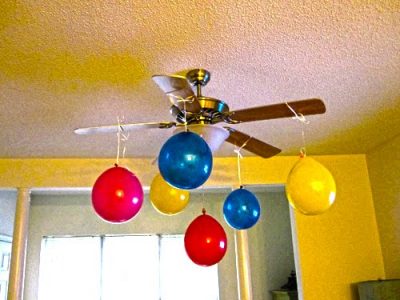
This is one of the most simple decors you can do to in no time to pep up your room. All you need to do is tie some balloons to your fan’s blade and make sure you use colorful ones. Just be sure your kid doesn’t switch the fan on which will pop all of them.
-
Colorful Balloon Hanging Chandelier
-
Large Balloon Decor Chandeliers
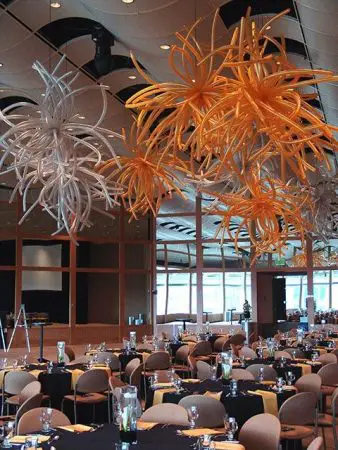
If you have planned a big party space, then this amazing huge chandelier will be a stunner for the guests. This will definitely take time to create, but the finished product will gather all compliments.
If you want to go for budget-friendly party decorations which are inexpensive yet eye-catching, then try one of the designs featured above. From polka dots, printed, confetti balloons, you get an array of choices to try to creativity and make visually stunning centerpieces to decorate your venue.
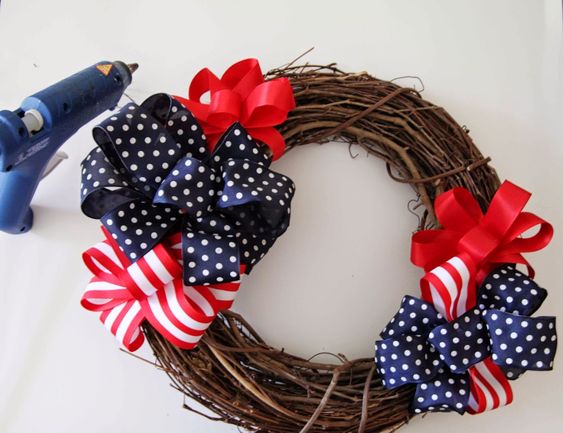
Wondering how to tie a perfect bow for a wreath? It isn’t as difficult as you think! Learn different techniques to make a bow with burlap, ribbons, mesh, tulle, and other materials. A simple bow is excellent for all sorts of decorative crafts. Add it to a DIY wreath, a wrapped present, or even a seasonal craft like a painted pumpkin! Let’s explore how to make pretty bows for a wreath!
You May Also Like to Read: “How to Make Beautiful Wreaths at Home“
Interesting Ways to Make a Pretty Bow for a Wreath this Festive Season
-
Making a Ribbon Bow for a Wreath
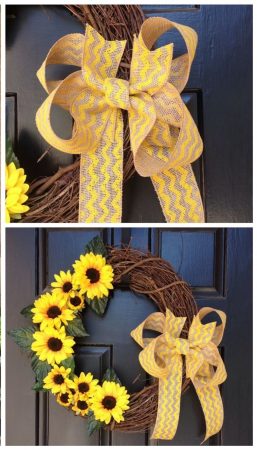
This pretty bow made from a yellow and golden ribbon is perfect to decorate your wooden wreath this Fall. The step-by-step instructions in the linked tutorial shows you how to tie this simple bow.
-
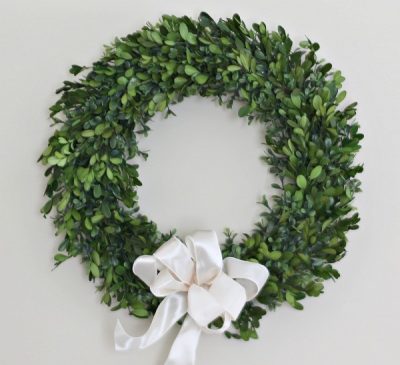
DIY Easy Wreath Bow from Ribbon
This simple yet elegant satin ribbon bow is ideal to add to your wreath or your gifts. This will uplift the look and you’ll to decorate your Christmas wreaths with this white bows. You can always choose a wider ribbon size to make a bigger bow.
-
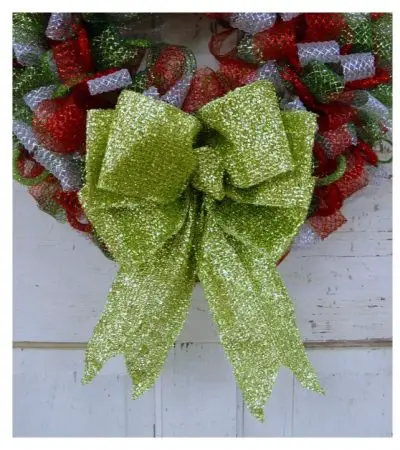
How to Tie a Fancy Bow with Wide Tinsel Ribbon
This tutorial shows you how to make this amazing ribbon bow without a bowmaker.
-
Big Double Bow for a Wreath Instructions
-
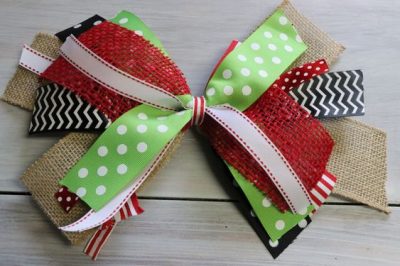
Layered Bow for A Wreath
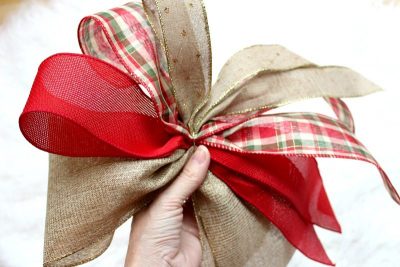
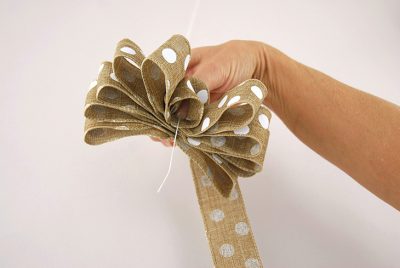
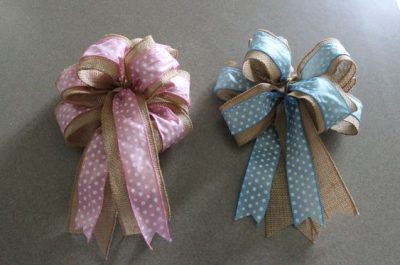
You can choose different fabrics or ribbon, and burlap for this tutorial. Fold them neatly and follow the instructions to tie it with floral wire. Printed ribbons teamed with burlap is a great combination. This bow makes a great Christmas tree topper or a wreath deco.
-
How to Make a Loopy Bow at Home
-
Steps to Make a Burlap Bow to Decorate Wreath
-
Red Christmas Bow for a Wreath
To make this wreath use extra large ribbons which are wired so that loops are stiff and in shape. This beautiful bow will be a great decor for a front-door wreath or tree topper.
-
How to Make Bow with Wired Ribbon
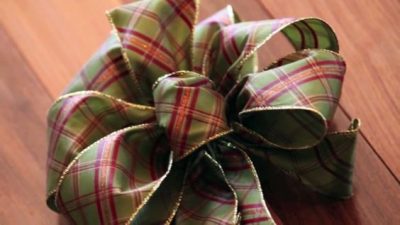
Learn how to make this easy bow using wired ribbon with simple folding techniques. These handmade bows are perfect to enhance the look of a harvest wreath or a traditional Christmas tree.
-
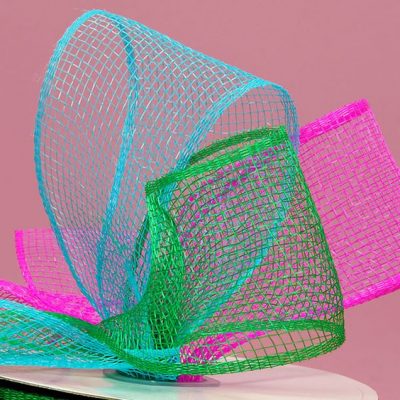
How to Make a Deco Mesh Bow for Wreath
-
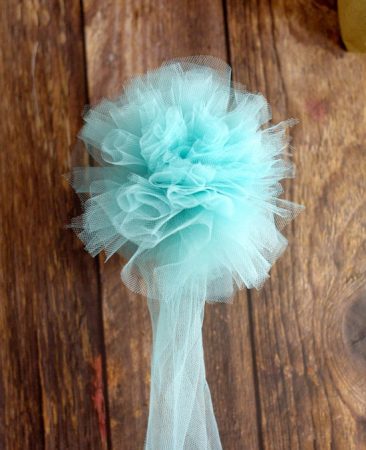
Tutorial to Make Tulle Bow for Wreath
Tulle bows are popular in wedding decors and look elegant to enhance the look. You can easily create your own bows in no time and hang them on to your wreaths.
-
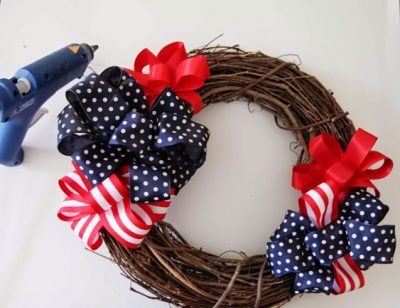
DIY Floral Patriotic Bow for Decoration
This 4th of July try making these cute bows to hang them on your front doors or your wreath. This handmade bow is simple to make and takes no time.
-
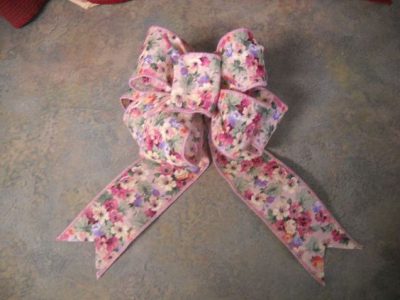
Big Bow Made from Unwired Ribbon Craft
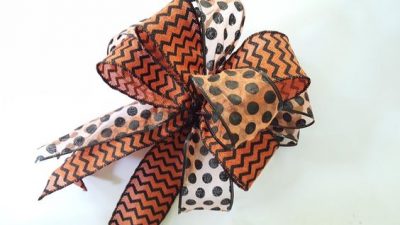
This is a super cute florist bow made from printed wide ribbons. This will look great as party decorations, gift packing and as a wreath decor. Make your own bows in different prints quickly.
-
How to Make a Triple Christmas Bow with Velvet Ribbon
To make elegant and fluffy bows for your Christmas, choosing a red velvet ribbon adorned with beads at the sides is the perfect option. Make your wreaths look prettier and brighter with the red bows on the top.
-
How to Make Holiday Bows for Wreath
This red ribbon bow will make your front door bright on the green wreath. If you want it to be bigger, just adjust the length of the ribbon that you cut in the first step.
-
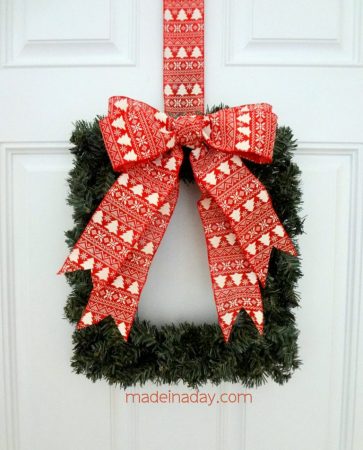
Beautiful Layered Bow to Decorate Christmas Wreath
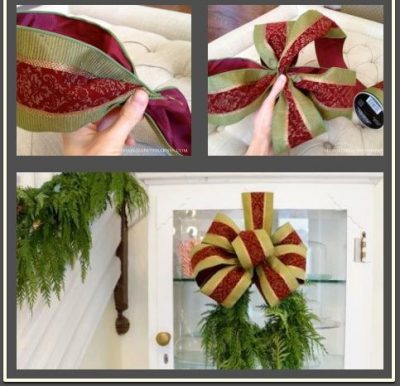
This is one of the most simple yet trendy bows which is a no stitch tutorial. Just place all the ribbons on top and tie it in the middle as shown in the linked project.
There are a lot of creative ways to make and decorate your handmade bows. You can go through any of the tutorials above and follow the instructions. Share your creations with us in the comments section below!
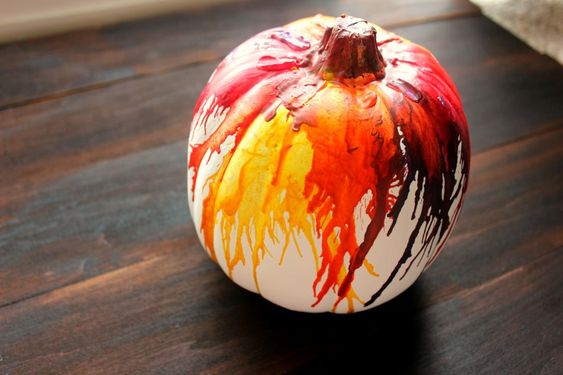
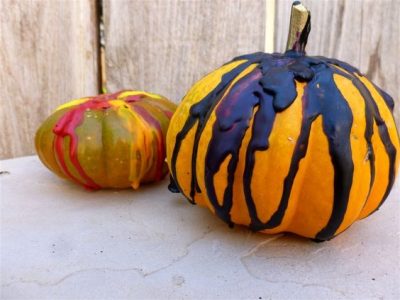
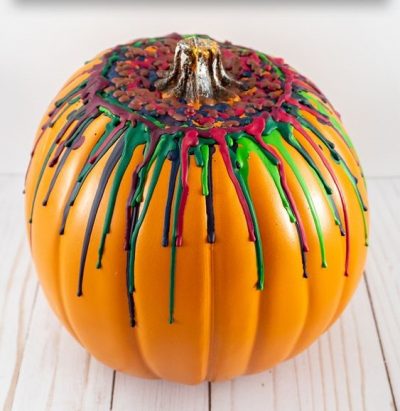
This Halloween find unique and spooky decoration ideas for your pumpkins. You can try this cool melted crayon pumpkin ideas which require no carving. This craft is easy to make and is a fun project for kids and adults.
You need some simple supplies to make this craft;
- Crayons( old and broken will also do),
- A hot glue gun
- A hair dryer or a heating tool
- Pumpkin/Faux Pumpkin
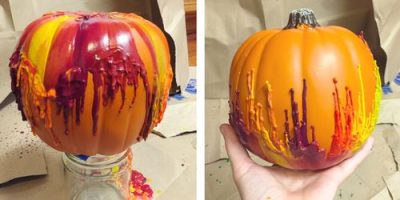
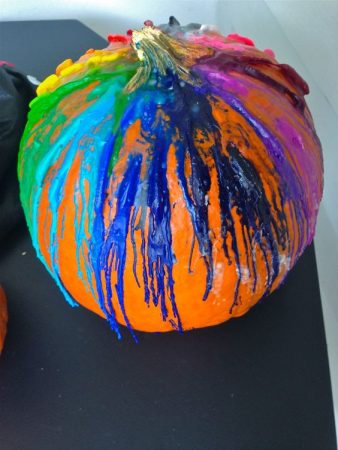
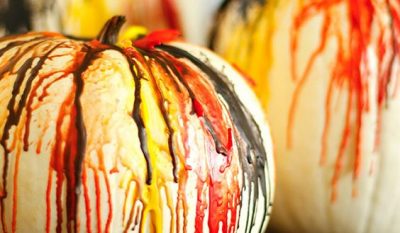
The melted crayons gradually drip down due to the heat, creating fun patterns on the sides of the pumpkin. This color splatter might turn out to be a bit messy at times, so you can use some sheets or newspaper below the pumpkins while making this. A crayon pumpkin is easy to make and you can create them in all sorts of colors from Halloween colors to rainbow colors and beyond! Learn interesting techniques about how to melt crayons on a pumpkin to decorate it.
You May Also Like: “How to Make Styrofoam Pumpkin“
How to Make Melted Crayon Pumpkins: 12 Tutorials with Instructions
1. Melted Crayon Pumpkin DIY
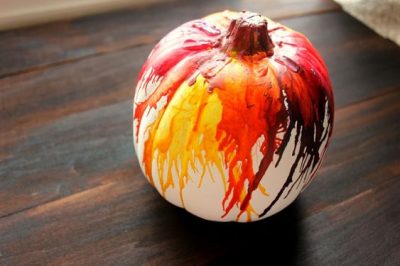
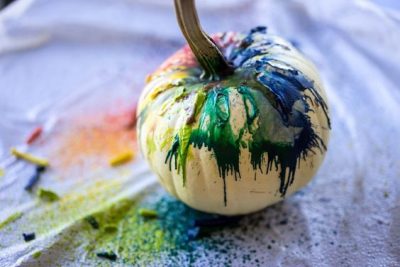
This DIY tutorial uses a faux white pumpkin to get the best effect with melted crayons. This is quite an easy yet creative idea to make your own no-carve pumpkin. All you need to do is get some old crayons and stick them on the top of the pumpkin near the stem with a hot glue gun. Use your hairdryer and have fun watching the crayons melt and make beautiful designs.
2. Melted Crayon Orange Pumpkin Tutorials
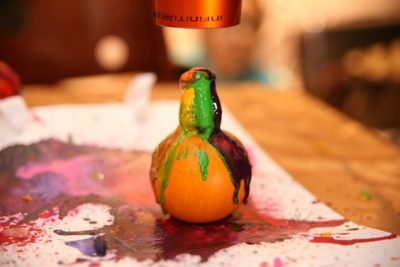
These mini pumpkins are decorated with melted crayons but with a unique twist. A fun craft activity which will make amazing and spooky decorations for the Fall and Halloween. You can use different sizes of pumpkins to make a classic arrangement.
3. How to Make Melted Crayon Dripped Pumpkin
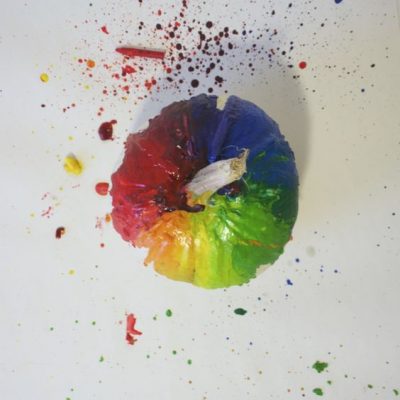
4. Rainbow Pumpkin Crayon Art Ideas
This is such a fun and easy craft ideas for kids and adults too. This Fall, try melting crayons to make beautiful pumpkin decorations.
5. Melted Crayon Pumpkin Decorating Ideas
If you are done with the conventional orange, white and black pumpkin ideas, try this rainbow colored pumpkin with melted wax or acrylic crayons. The scattered pattern looks creative and gives your Halloween decor an artistic touch.
6. White Pumpkin Decorated with Melted Crayons
7. Directions to Make Melted Crayon Pumpkin
8. Melting Crayon Pumpkin Instructions
9. Crayon Melting Art on a Carved Pumpkin
This Youtube video tutorial will guide you with step by step instructions to create this carved pumpkin by melting crayon colors.
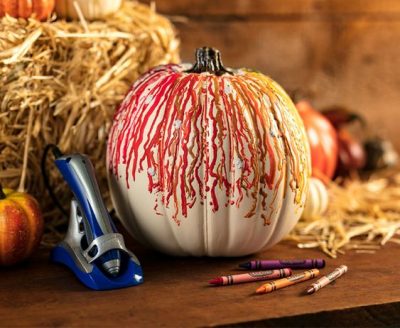
10. Make Crayon Dripped Pumpkin with Crayola Crayon Melter
Now kids can easily use their old and broken crayons and give them a new life with this Crayola melter. Make amazing patterns on a pumpkin with this for this autumn and decorate them creatively. Using black colors will add to the spooky effect.
11. Cute Melted Crayon Pumpkin Decorating Ideas
12. How to Decorate Pumpkin with Crayons
You May Also Like: “Pumpkin Painting Designs“
If you’re looking for a fun autumn craft with a twist for your Halloween centerpieces, then you will love making this crayon-drip pumpkin project.
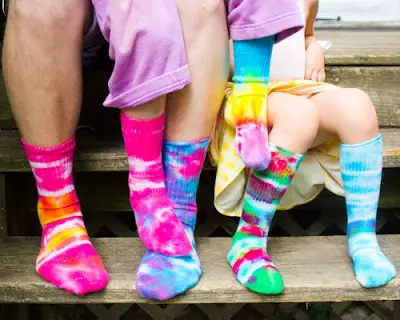
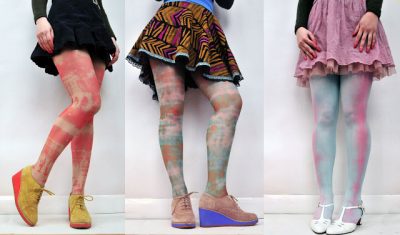
Tie-dyeing is long- practiced traditional technique for people who love exploring with colors. Nowadays it has become a great fashion trend where people love soaking their t-shirts, bags, shoes, socks or headbands in tie-dye patterns.
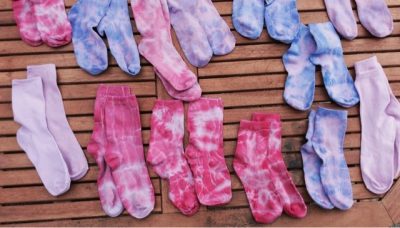
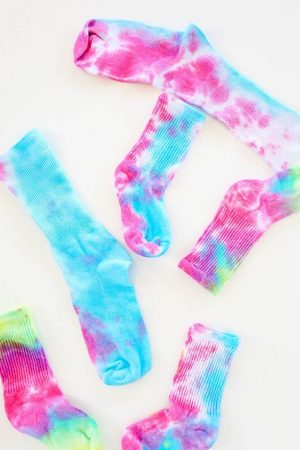
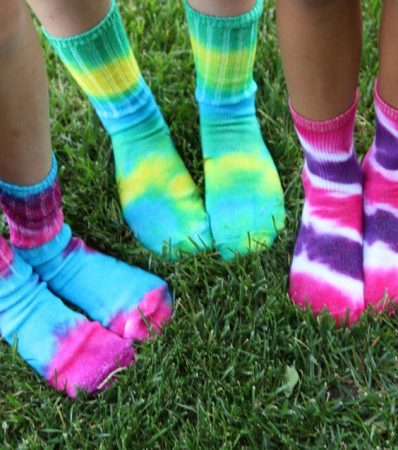
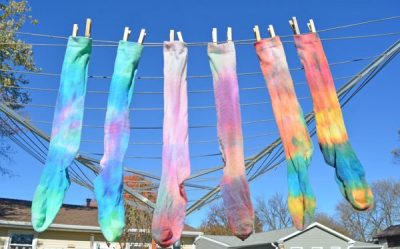
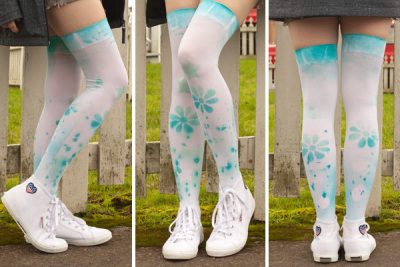
You can easily turn an old pair of socks or clothing by infusing fresh colors and tie-dye patterns this summer. It’s a fun and easy DIY activity for kids as well as adults. We have compiled some of the most unique tie-dye designs with step-by-step instructions to help you create amazing sock patterns.
Editor’s Recommendation: “How to Make Tie Dye Shoe Designs“
22 Cool Ways to Tie Dye Socks with Instructions
1. How to Tie Dye Socks
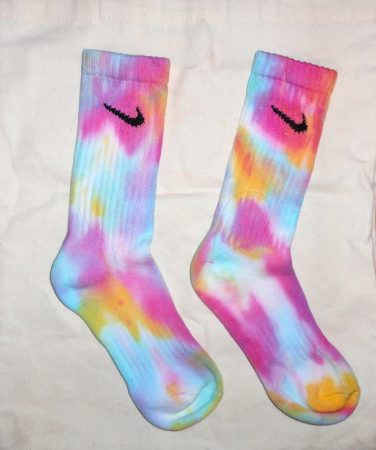
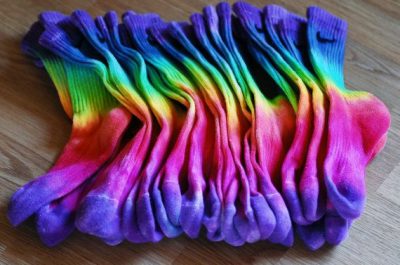
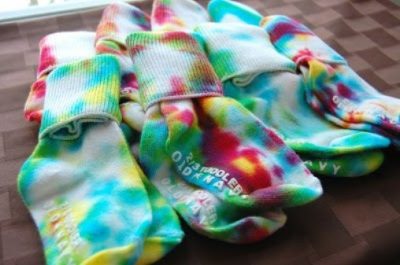
Don’t wish to part with your old Nike Socks? No worries, splatter it with bright colors and give it a new life with these tie-dye patterns.
2. Tie Dye Sock Patterns
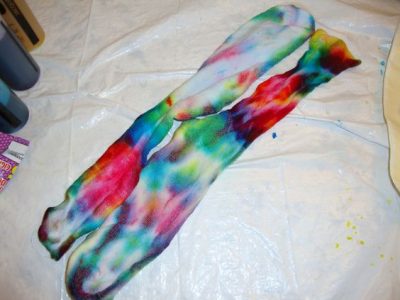
Pick your neon dye colors or your tie dye kit and turn your white socks into bright and vibrant pairs. You can use a different color combination for each sock. The instructions are simple to follow as given in the linked tutorial.
3. Tie Dye Socks DIY
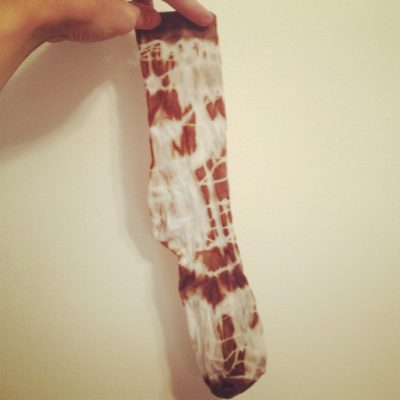
Tired of your stained socks? Let’s recycle them into funky and trendy leg warmers. Grab some attractive dye color bottles and try making these interesting patterns on them. A great kid crafting idea for the holidays.
4. How to Swirl Tie Dye Socks
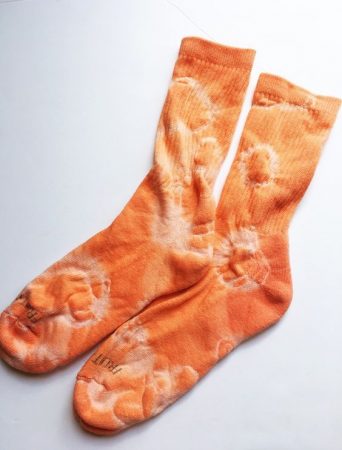
The white circle’s pattern in orange dyed socks, look cool. The bigger the rubber band tied the wider the tie-dye circle will be. This homemade tie-dye pattern is great to give your old short socks a new look.
5. Tie Dyeing Sock Method
Grab some bottles of tie-dye, and soak the worn out leg warmers, and give them good wash for the final finish. You can also use black dye colors instead of these bright ones.
6. Rainbow Tie Dye Socks Pattern
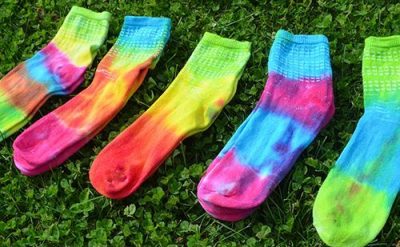
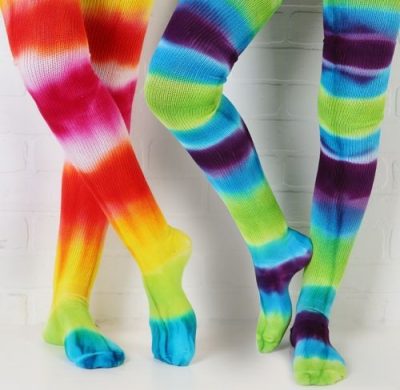
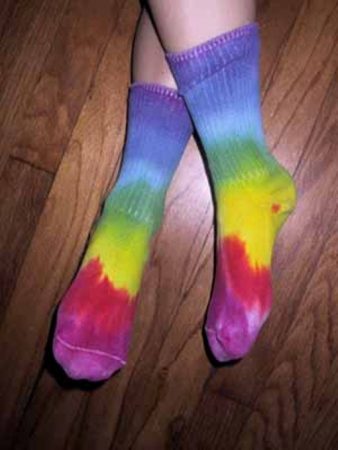
Wanna add some creativity to your old knee high socks this winter? Learn how to make these striped designs using easy dyeing techniques. You can try an interesting combination of colors to make a unique blend. The rainbow color palette is quite in trend these days.
7. Permanent Marker Tie Dye Socks
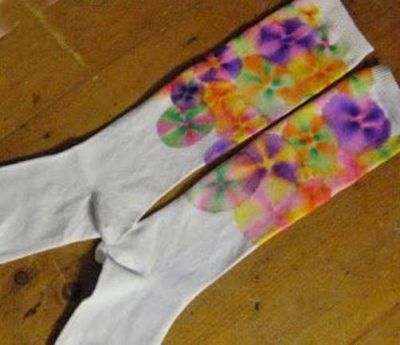
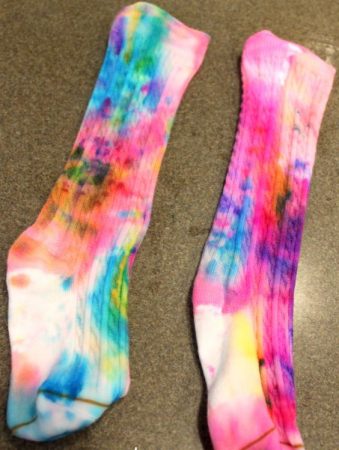
If you don’t wanna mess your hands with the dye colors try replacing it with permanent markers and rubbing alcohol. This is an easy alternative to traditional dyes which makes the process easy.
8. Tie Dye Socks Tutorial
Try this ombre design effect looks stylish on socks. This tutorial shows how to do the “low water immersion” or “scrunch” dyeing, technique.
Tie Dye Sports Socks
9. Basketball Socks
Turn your dull socks into a sporty one with eye-popping colors. The use of multiple-hues gives it a dashing look, which will want you to go shoes less and play your sport.
10. Soccer Socks
11. Volleyball Socks
12. Base Ball Socks Pattern
13. Sharpie Marker Tie Dye Designs
Accent your casual look with a little hippie touch by topping your tube socks off with these tie-dye designs made using Sharpes Marker. A good option to dye your socks when your dyes are out of stock.
14. Tie Dye Long Socks
15. Ways to Tie Dye Ankle Socks
16. Men’s Tie Dye Socks Project
17. Striped Tie Dye Socks
18. Galaxy Tie Dye Socks
19. Tie Dye Tube Socks Instructions
20. Pink Tie Dye Socks
A stunning combination of swirls and stripes in pink for pretty girls and will go well with white sneakers.
21. Tie Dye Socks with Food Coloring
Craft with eco-friendly food coloring dyeing options this summers. Replace your dyeing colors with food colors, which is quite a safe option. You can try making unique designs like a starburst, stripes, crimpled, etc.
22. DIY Tie Dyed Socks at Home
You can easily create socks with tie-dye patterns instead of buying them from stores. Don’t get stuck with the 22 tutorials and designs listed above. You can also try some new and unique patterns of your own. Do share your creations with us in the comment section below!
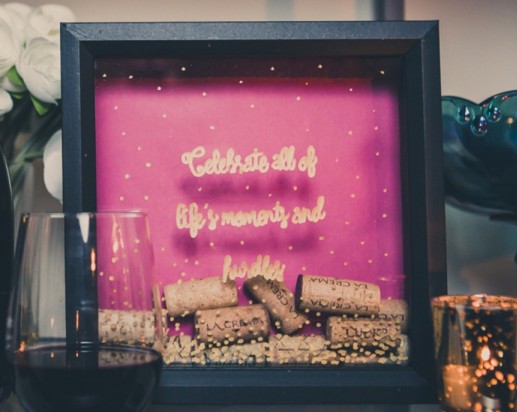
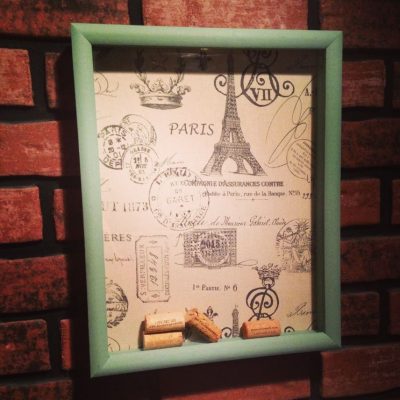
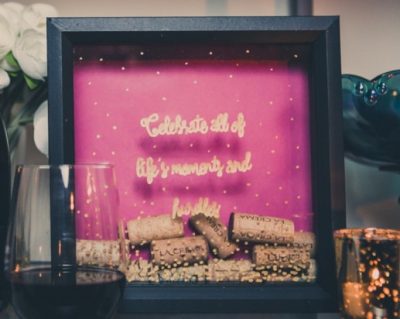
Ever since I started drinking wine, I love to store all the wine corks. You can use a shadow box and give it a makeover by upcycling the wine corks. It’s a great way to show off your favorite wines in wonderfully decorated boxes.
How to Make Beautiful Wine Cork Holder Wall Decor & Boxes
1. DIY Wine Cork Collector Shadow Box
This is for all crafty wine lovers, who can cherish their memories with wonderful shadow boxes mounted on the wall. You can choose a background of your choice, and paint the box with colorful colors.
2. How to Make a Wine Cork Shadow Box
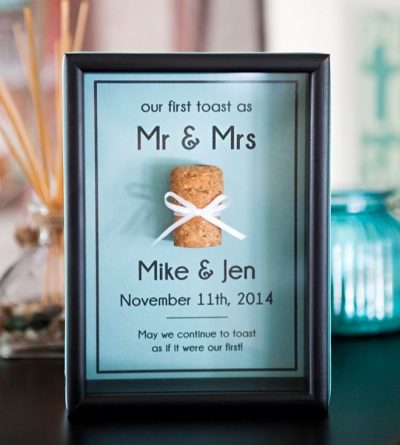
Looking to personalize a gift for your friends? Then this is the ideal gift for your wine drinking friend. You can adorn this with a beautiful message and place them at the tabletop.
3. Keepsake Shadow Box for Wine Corks for Wedding
Create a beautiful memento or keepsake as an anniversary or wedding gift to your nearest ones. You can use the wine cork of the special day and note the date and time of the day in the box. This always keeps the memory alive!
4. Personalized Wine Cork Shadow Box Tutorial
You can embellish the shadow box cover with dots, glitters and wises. Displaying your wine corks is the perfect wall decoration for any kitchen or bar area.
5. Large Wine Cork Shadow Box Ideas
If you want to make a shadow box on your own, then this little woodworking project to store wine corks is for you.
6. Directions to Make Your Own Wine Cork Shadow Box
Put those special wine corks to use with these beautiful DIY displays. An easy tutorial for crafters.
7. Shadow Box Frame for Wine Corks Tutorial
Start your wine cork collection right away so you have enough material to work with and share your creations and ideas with us in the comment section below.
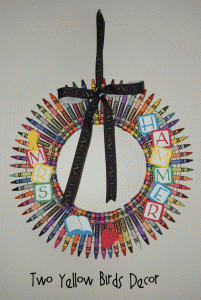
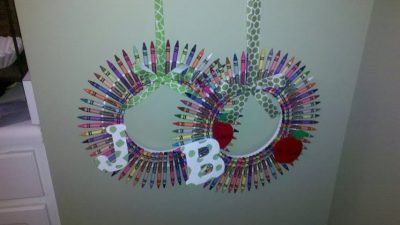
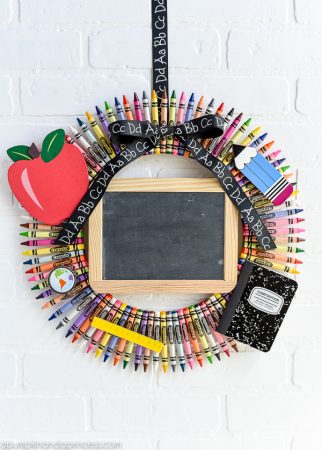
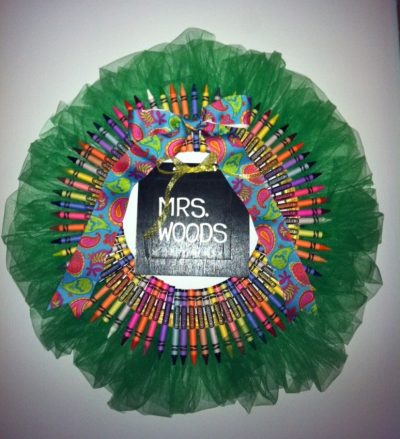
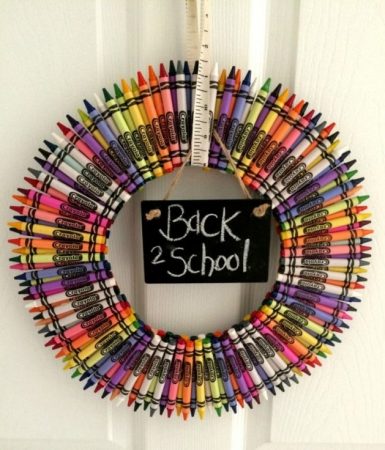
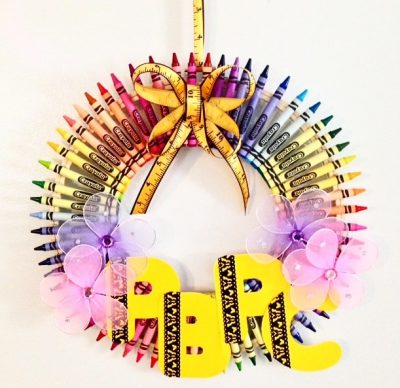
We all have our childhood days when we colored and scribbled with numerous crayons. Hundreds of colorful crayons can be used to adorn a wreath along with a chalkboard or other accessories in the center to add your personal message.
You May Also Like: “How to Make Candy Wrapper Purse“
This is a great crafty project for the kids to make during the holiday/Christmas season. The coolest way of making the walls of your rooms look vibrant would be by creating a lovely wreath out of crayon. This makes a lovely gift for teachers too. We are sharing some amazing tutorials and DIYs to make a handmade, multi-colored wreath made from crayons. The linked tutorials have step-by-step instructions to guide you well.
15 Cool Ways: How to Make DIY Crayon Wreath
1. Making a Crayon Wreath for Teachers
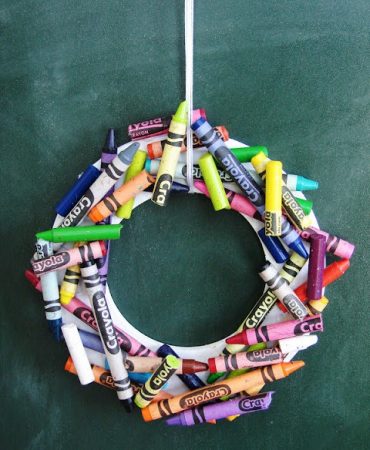
This is an easy tutorial for kids and preschoolers who love making handmade stuff and try new things. You need an embroidery hoop for this craft, some crayons, and a hot glue gun. An ideal gift for teachers day!
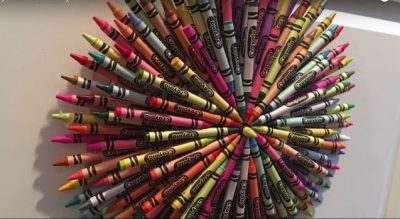
2. Cool Crayon Wreath Ideas
This is one of the easiest ways to make a wreath out of crayons. You can add the monograms or name initials to add a personalized touch to it.
3. Crayon Wreath with Chalkboard
Grab your set of crayola colors and get creative with some ribbons, colors, and chalkboard. Embellish it with cute cut-outs to give it a classroom themed design.
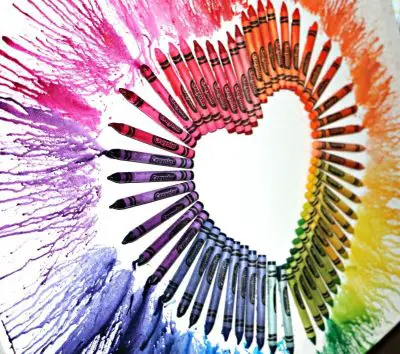
4. Melted Colors Crayon Heart
Doing some out-of-the box craft with recycling old colors fascinates me a lot. You can get this rainbow shades of melted colors, by using heat from a blow dryer to get this amazing effect. You can easily use old crayons also for this DIY project.
5. Homemade Crayon Wreath
You need the following supplies to make this wreath, 150 Crayons, a hot glue gun, (1) 10″ cake round, (1) 6″ cake round, an old CD, a pipe cleaner, and a paper punch. A unique way to make something your children will love to create.
6. How to Make a Crayon Wreath with Styrofoam
7. Decorative Ways for Making a Crayon Wreath
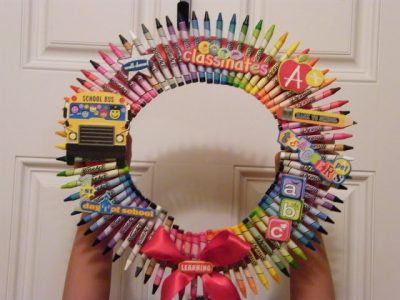
Use ribbons, satin bows and more to make this unique wreath made from crayons for Christmas. You can change the colors of the ribbons and give it an interesting look.
8. Easy Crayon Wreath for Kids
This back to school crayon wreath makes for a perfect teacher appreciation gift craft project anyone can do!
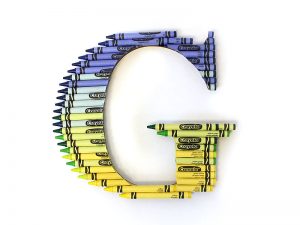
9. Crayon Ombre Letter Wreath
A hanging monogrammed wreath made with ombre shades of crayons will make your child thrilled when he sees his initials on the walls of his room.
10. Create Unique Crayon Wreath Ideas
11. Crayola Crayon Wreath Craft
12. Crayon Wreath Tutorial (Under US$25)
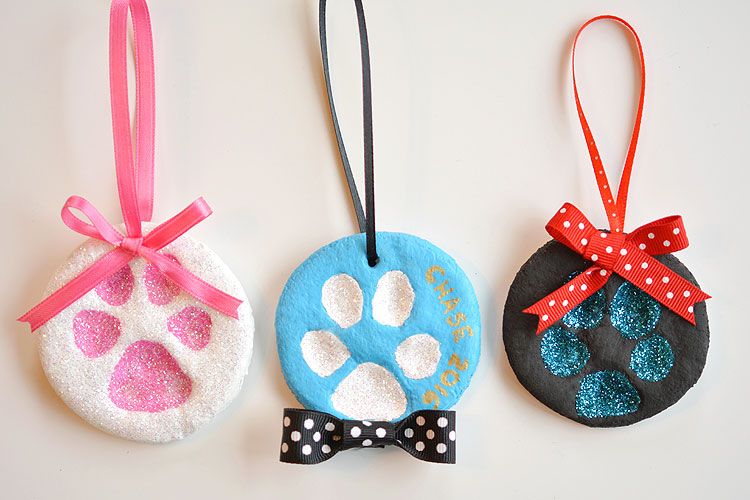
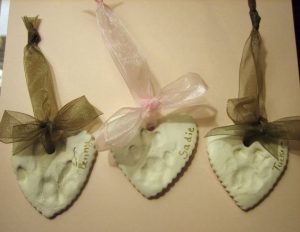
It’s the most wonderful time of the year, and if you’re looking for a fun holiday project to do with your furry friends, then we’ve got some adorable ideas for you. It’s Christmas and we all buy ornaments to decorate our trees.DIY paw print ornaments is a great idea to personalize them and get creative with your pooch.
You can use salt dough, clay, the plastic of Paris, ceramic to make these ornaments.
You can treasure these memories as they make wonderful keepsakes too. Let’s see some beautiful designs to make. If you are running short of time you may buy paw print ornament kits and make them quickly. The linked tutorials come with easy-peasy instructions to help you throughout.
[You May Also Like: DIY Wine Cork Ornaments for Christmas ]
Cute Ways on How to Make Paw Print Ornament
-
Paw Print Ornaments DIY
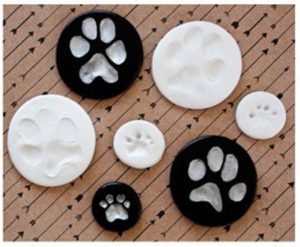
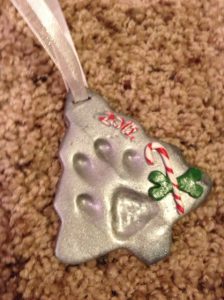
You can give interesting shapes to the ornaments from molds and hang them around with impression of paw prints of your dog/cat, their name and year of birth.
The project can be easily made at home with some simple steps. The recipe includes dough, salt, and water. Add ribbons/twine to hang them on the Christmas trees or baskets.
-
Cute Paw Print Ornament Designs with Glitter
Decorate your trees with a pawprint of your favorite pet. This unique art project can work for both dogs and cats and is a great way to keep kids occupied in holidays.
You need flour and salt to bake this one after the paw prints of your mutt is taken on it. Once cooled you can paint and add glitter, to jazz them up, and finish with a nice ribbon to hang it up with.
-
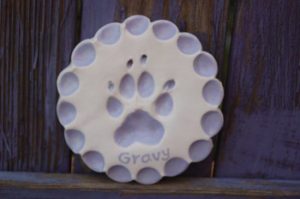
Instructions to Make Clay Paw Print Ornaments
This is a cute Keepsake that you can cherish forever and get your dog’s paw casting done and you get that sense of pride that you have made it yourself.
Wondering how to take a dog paw print on clay ~ Instruction guide here!
-
Baked Paw Print Ornament Ideas for Christmas
The linked tutorial uses polymer clay to create this ornament. These ornaments make perfect gifts for dog lovers who can cherish their pet’s memories forever.
-
Ornaments with Dog Paw Prints with Plaster of Paris
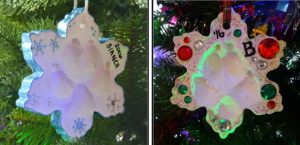
A very cute idea to make snowflake ornaments with paw prints on it. This project uses plaster of Paris, some cookie cutters, and silicone molds to make the snowflakes.
Add rhinestone stickers and other embellishments to decorate it. You can write your pet’s name, year and more to keep it as beautiful keepsakes.
These ornaments are dried and painted later. There is no baking process required.
The amazing tutorial is from Rocketdogblog.com
-
Keepsake Ornaments with Pet Paw Prints
You will love this Paw Print Ornament and it’s a super easy DIY and we have the complete tutorial to show you how. -
Homemade Paw Print Ornament Keepsakes (Using Air-Dry Clay)
-
No Bake Paw Print Ornament Tutorial
-
Recipe for Paw Printed Ornament
-
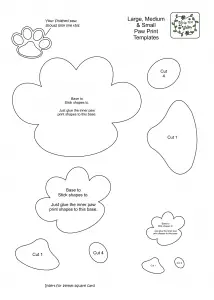
Paw Print Ornaments Template
In case your puppy is giving a tough time taking the paw impression, you can use this printable template to make the paw print. It contains small, medium and large paw prints.

