Category: CRAFTS
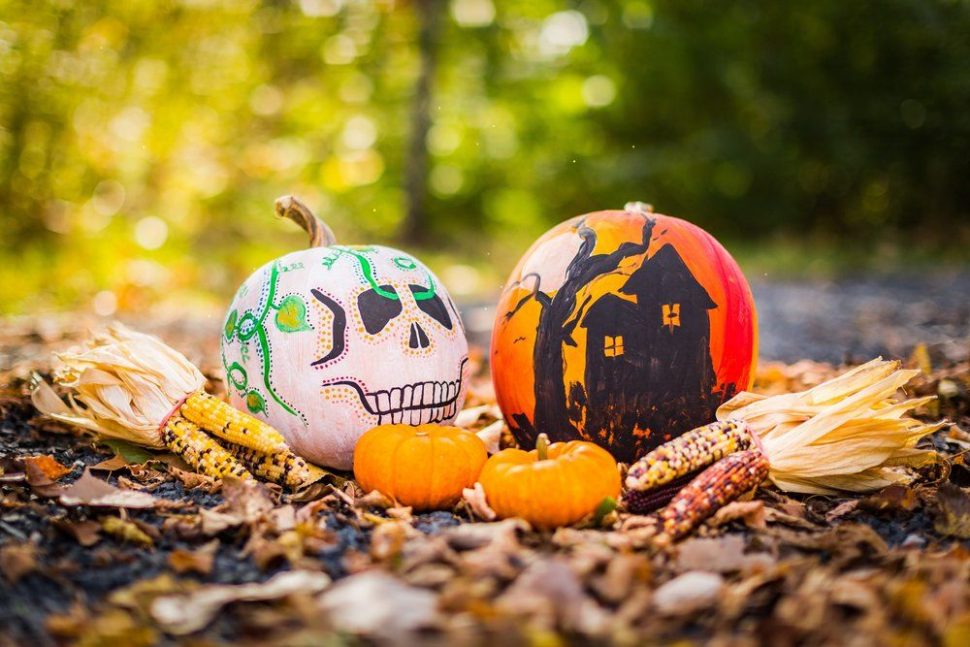
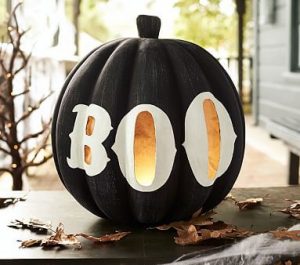
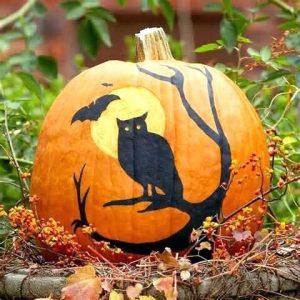
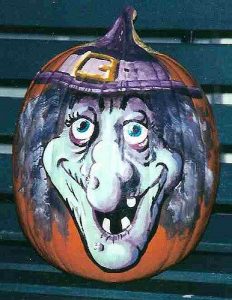
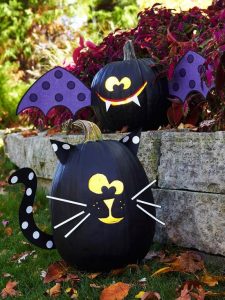
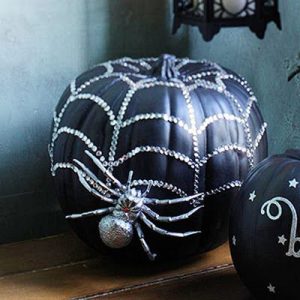
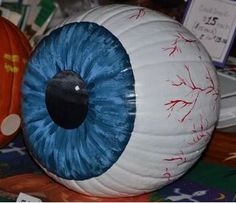
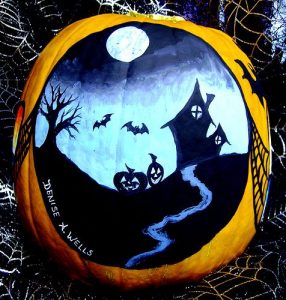
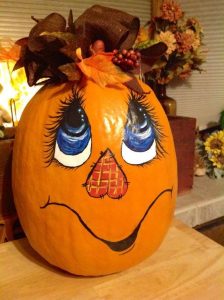
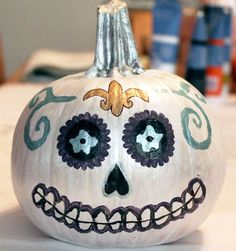
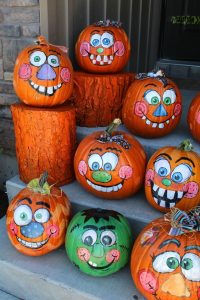
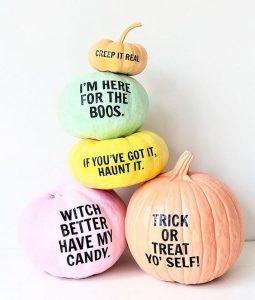
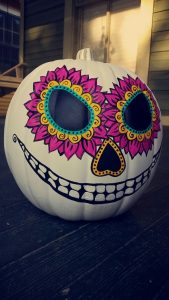
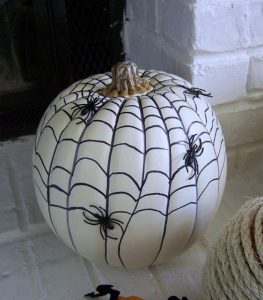
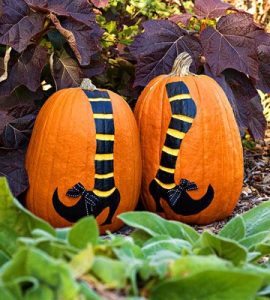
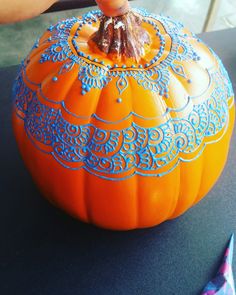
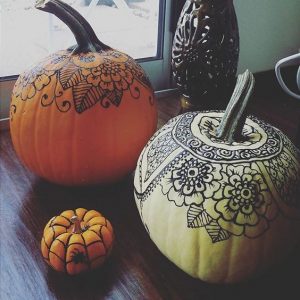
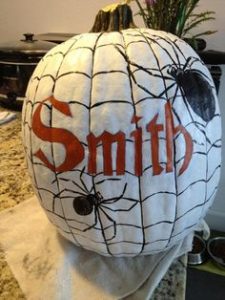
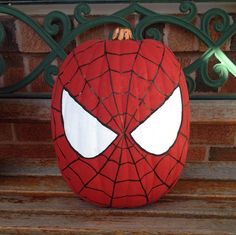
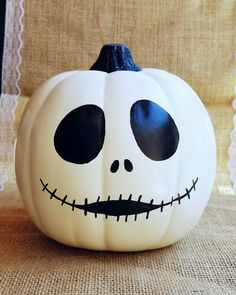
If you love a good Halloween DIY, then you’ll love these creative pumpkin painting ideas that don’t require any of the cleanups that follow traditional pumpkin carving. This October, brighten up your house, doorstep with bold no-carve painted pumpkin designs, and those trick-or-treaters won’t know what hit ’em.
Collection of Spooky Pumpkin Painting Designs for this Halloween
This year’s we have got inspiration for some of the most unique and cool designs of DIY painted pumpkins for Halloween and Fall. Set a bewitching scene inside or out with jack-o’-lanterns in whimsical, easy-to-paint designs on Pumpkins.
Cute n Easy Pumpkin Painted Designs for Autumn
If you are running out of time to carve a cool pumpkin design which may be a messy business at times. Save yourself the time and stress with one of these inspired painting ideas, which are creative and add a stunning look to your decor.
Beautiful Pumpkin Painted Designs to Decorate Your House In Halloween/Fall
Recommended for You
How to Make DIY Paper Pumpkin Crafts

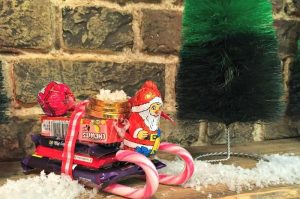
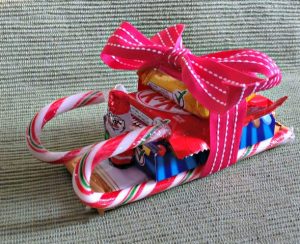
You need a hot glue gun, glue sticks, bags, kit kat, candy canes and whatever candy you’d like to put in Santa’s bag.
[Also Read: How to Make DIY Wine Cork Ornaments for Chrismtas]
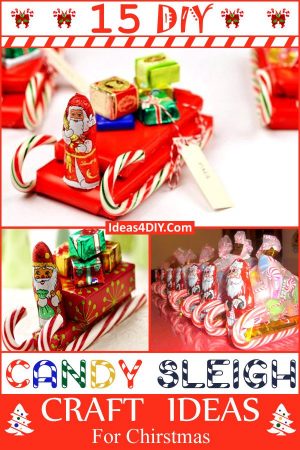
How to DIY Make Candy Sleighs Yourself for Christmas
-
DIY Candy Santa Sleigh
If you are wondering how to attractive do a table décor this Christmas, this candy treat could be your best bet. Click on the above link to know how to make it.
-
Making Cute Candy Cane Sleighs
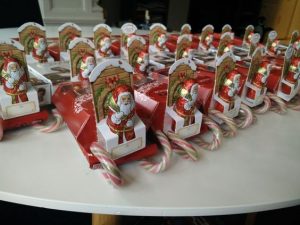
These Santa’s Candy Sleigh treats are super easy to make, perfect table décor and a take-home treat too!
For each sleigh, pipe glue along sides of 2 candy canes (in wrappers); attach to either side of candy bar to make sleigh runners. Glue the Santa, trees and candies.
-
Easy Candy Sleigh Project for Favors
Your friends and kids are going to love this adorable candy sleigh idea. You can make a handful of them and give away as little favors to your guests.
-
DIY Stunning Candy Sleigh Idea
These DIY Candy Sleighs are easy to make, and you can have them ready to go weeks before your big day.
-
Christmas Sleigh Made Out of Candy
I think these Candy Sleighs are perfect for stocking fillers and kids will love the chocolates and candies loaded on the sleigh.
-
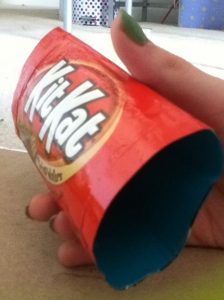
Candy Sleighs for Christmas from Kit Kat Bars
-
Instructions to Make Candy Sleigh
-
DIY Candy Sleighs Craft for Kids
-
Making Santa Candy Cane Sleighs
Enhance the looks of this beautiful candy cane sleigh by attaching it to a handmade Santa or reindeer to pull it.
-
Stunning Candy Cane Sleigh
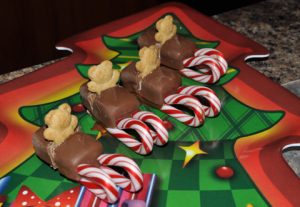
Milky Way Bar Teddy Graham Candy Cane Sleighs are pretty easy to make and a yummy treat too.
-
Handmade Candy Cane Sleigh Presents
-
Lovely Candy Cane Sleighs for Christmas
-
Frozen Candy Sleighs Tutorial (Video)
-
Free Printable Candy Sleigh Template
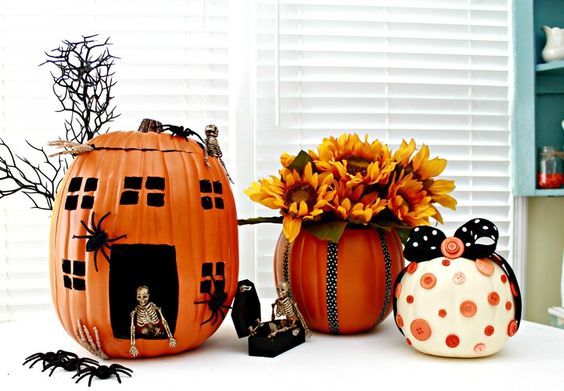
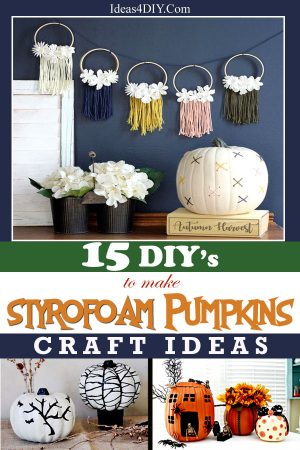
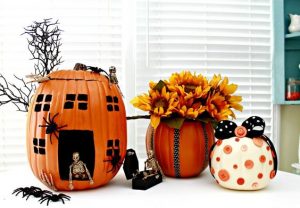
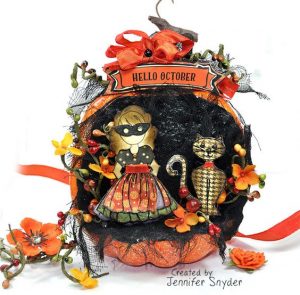
This autumn you can make your own pumpkins from styrofoam and decorate them in unique and interesting ways.
We have got you a host of amazing and informative tutorials, that would naturally inspire you to have a whole lot of ideas in your kitty to make decorative pumpkins for Halloween and Fall.
[Read: How to Make Paper Pumpkins]
Interesting Ways to Make DIY Styrofoam Pumpkins for this Halloween/Fall
-
DIY Faux Styrofoam Pumpkin
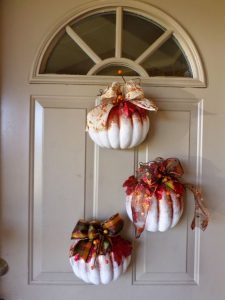
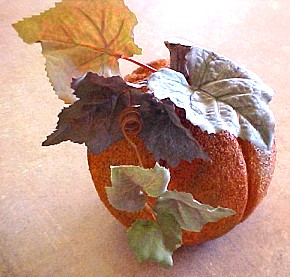
You can use faux pumpkins available at-the dollar stores and cut them in half and make pretty embellishments for your door this Fall. Decorate the pumpkins with glitter, and add a bow to it. Follow the link for the complete tutorial and instructions.
-
Paint Large Styrofoam Pumpkin Decorating
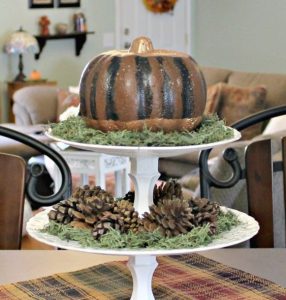
Styrofoam pumpkin makeover project is a great idea to test your creative ideas. It makes a great table decor and adds to the Halloween/Fall ambiance.
[Also Read: How to Make Tulle Wreath for Halloween]
-
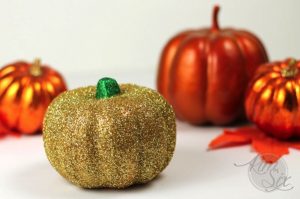
Styrofoam Pumpkin Decorating with Glitter
Add some sparkly delight to your Halloween decor this holiday season. These fake foam pumpkins are available in various sizes and shapes at-the dollar store. Follow the link-to learn how to paint and add glitters to this stunning pumpkin.
-
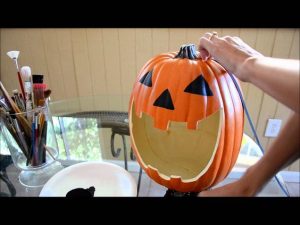
How to Carve a Styrofoam Pumpkin
This is a How-to video on carving a foam pumpkin and decorating it for Halloween.
-
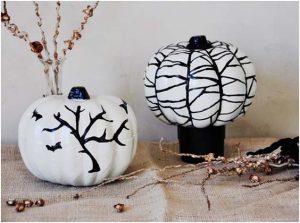
Fake White Painted Styrofoam Pumpkin
Nothing says Halloween like cool pumpkin decorations! This is a quick and cheap holiday DIY that’s great for a party, or to simply get your family into the spirit.
-
Mini Styrofoam Pumpkin Craft
I think these pumpkins would make create Halloween party favorites. If you leave off the face you could use them as Thanks giving table place holders or center pieces.
-
Fun Ways to Make Foam Pumpkin
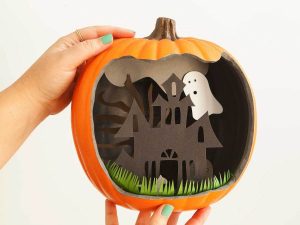
You can get bulk foam pumpkins and decorate them by painting and carving cool Peek-a-boo designs. In the linked tutorial follow the step-by-step instructions to make interesting designs.
-
Making Artificial Styrofoam Pumpkins
-
Styrofoam Pumpkin for Halloween
-
Homemade Styrofoam Pumpkin Ideas
-
Pumpkins Made from Styrofoam
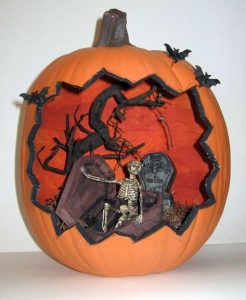
The eerie scene created in the pumpkin is for sure to send a chill down your guests’ spine.
-
How-to Decorate Styrofoam Pumpkin
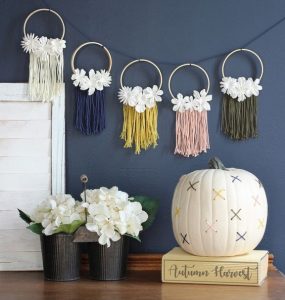
Learn how to cross-stitch a carve-able foam pumpkin! An interesting way to decorate your room this Fall/Autumn. Would you try a non-traditional color palette or do you like to stick with the norm of orange or so? The good thing is that you could easily adjust this craft to suit your personal preferences. -
Interesting Styrofoam Pumpkin Tutorials
-
Pretty Girly Pumpkin Decorating Ideas
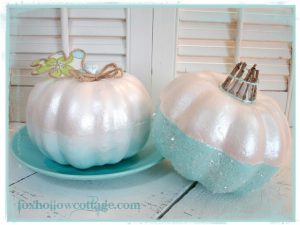
These gorgeous pink pumpkins would be an excellent decoration idea for a baby shower. You can even keep some blue pumpkins along with the pink ones for baby girl and boy. Dip it in some glitters to add sparkles to the vintage decor. The tutorial is from Fox Hollow Cottage. Visit the link for full instructions to make one of your own.
-
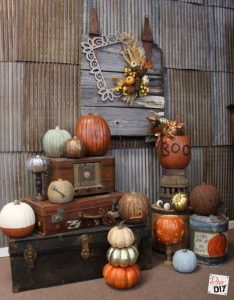
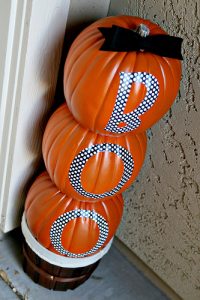
Instructions to Make Stacked Boo Pumpkins
I’d love to see what fun you create, tell me about it in the comments section below. Happy crafting!
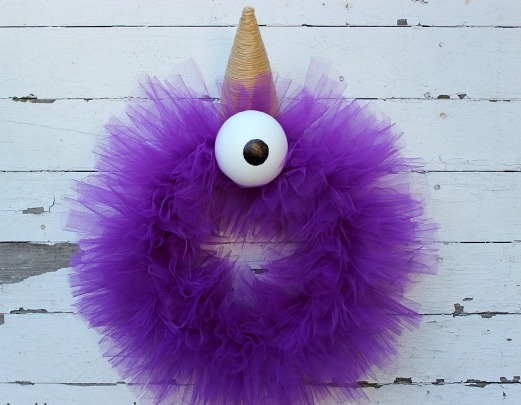
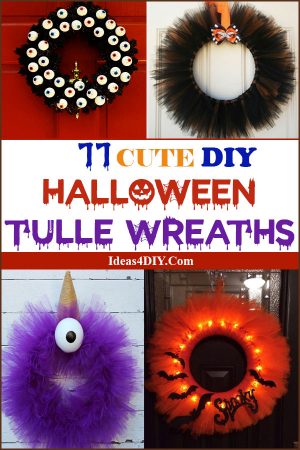
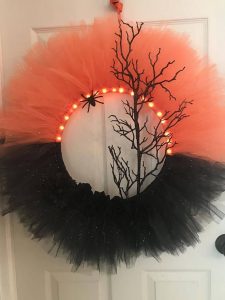
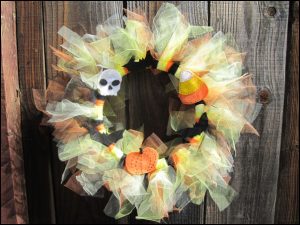
Halloween is the time for decorating, crafting, cooking and getting dressed in spooky costumes. Getting your front door ready is an important part of the celebration to welcome your friends/family with the perfect creepy decor. In this tutorial, we have shown you different ways to make our Halloween wreath from tulle and embellish it with lights, ghosts, pumpkins, glitters, flowers and more.
[Also Read: How to Make Mesh Wreath for Halloween]
How to Make DIY Halloween Tulle Wreath Designs
-
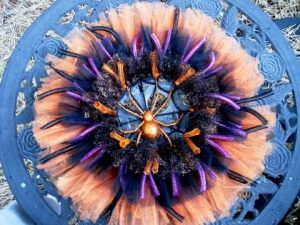
Halloween Tulle Wreath DIY
The basic supplies you need to make this amazing wreaths are a styrofoam wreath form and some tulle. Accessorize them with beautiful flowers of different colors, orange, purple, black or more.
[Read: How to Make Paper Pumpkins]
-
Halloween Tulle Wreath
Learn how to make a tulle Halloween wreath at a fraction of the cost of buying one. Create a totally different kind of wreath for the Halloween decor for your walls and doors. Learn a quick way to cut the tulle and how to apply it to a wreath base.
-
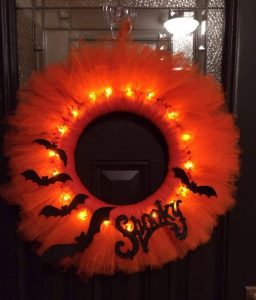
Glowing Halloween Tulle Wreath Instructions
This fall create a fantastic glowing wreath in the dark with orange tulle and some Halloween embellishments like bats, pumpkins, cool captions and more.
-
Cute Halloween Wreaths Made from Tulle
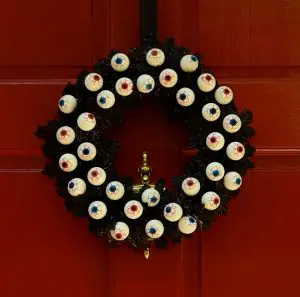
Don’t bouncy googly eyeballs look cute on a Halloween wreath? A wreath form is wrapped in tulle, a glitter leaf held behind a ball and secured in place with a stick pin. You can arrange the eyeballs in any random order.
-
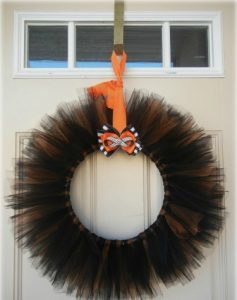
Easy Halloween Tulle Wreath Tutorial
The tulle is perfect for Halloween, and the bow makes it classy.
-
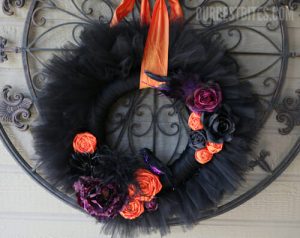
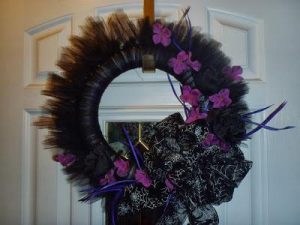
Black Tulle Halloween Wreath
Grab a spool of black tulle, some silk flowers, and spider ribbons to make this creepy black wreath to adorn your doors this Halloween.
-
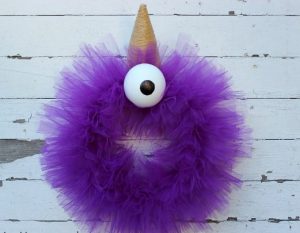
Halloween Monster Tulle Wreath
You can find wreath form and purple tulle on any dollar store. Have you seen their craft department lately? It’s really expanding and many stores have a fabric back too! One-eyed, one-horned, flying, purple people eater on your door!
-
Orange Halloween Tulle Wreath
-
Halloween Tulle and Ribbon Wreath
-
Tulle Wreath for Halloween
This fun tulle wreath is easy to make and can be modified for Fall, Halloween, and other festivals.
-
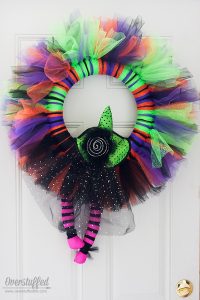
Tulle Witch Wreath for Halloween
This “witchy” tulle Halloween wreath is a fun way to decorate your front door with some colorful tulle and a spooky look. This tutorial is from Overstuffedlife.com, visit the above link for detailed step-by-step instructions.
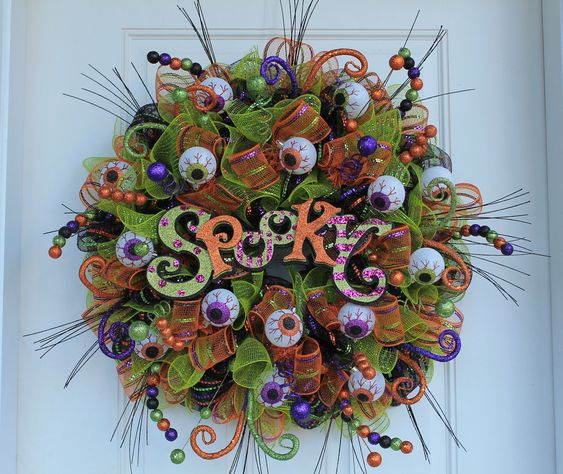
Creepy really can be beautiful and interesting when Halloween is around the corner. Spooky but beautiful was exactly what is wanted for the Halloween wreath for the front door.
All it takes to craft this wreath that will spruce up your front door for Halloween are a few simple steps and an inexpensive trip to the craft store. You can use skulls, ghosts, skeleton, spiders, witches, pumpkins and more Halloween ornaments to give your house a spooky decor.
We are sure that the images would inspire you to make one on your own during fall.
[Read: How to Make Paper Pumpkins]
How to Make a Halloween Deco Mesh Wreath | DIY
-
DIY Halloween Mesh Wreath for Door
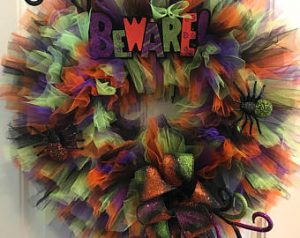
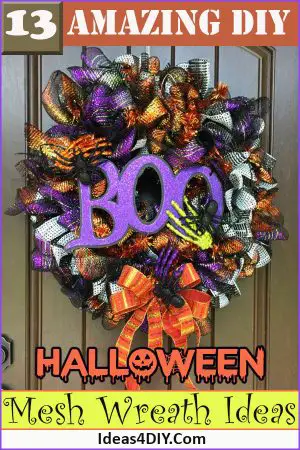
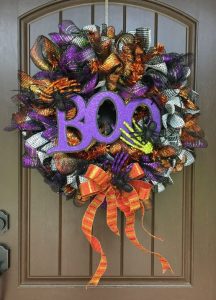
Halloween is around the corner and the preps to decorate the house and front door is on the rise. To make this handmade wreath you need simple supplies like black, orange and copper metallic mesh and some glitters and colors to play with creativity. You can add scary spiders and Halloween captions on it to give it a spooky touch.
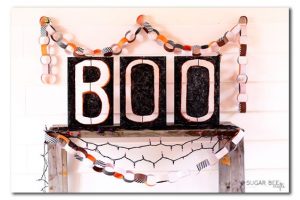
The bow with the hand was secured to the bottom of the wreath. You could place your bow elsewhere, but we were trying not to cover up the boo sign.
[Also Read: How to Make Tulle Wreath for Halloween]
-
Cute Halloween Mesh Wreath Ideas
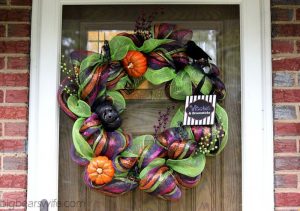
Some deco mesh ribbon roll, a wireframe some pipe cleaners are the main supplies for this tutorial. Decorate it with small colorful pumpkins, captions, and witchcraft ideas for a stunning wreath. This creative Halloween craft idea is taken from Big Bears Wife where they have explained the step-by-step instructions to make a super wreath hanger.
-
Halloween Witch Mesh Wreath
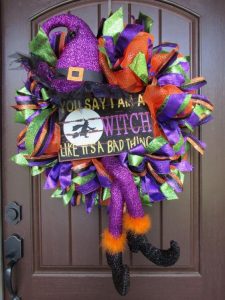
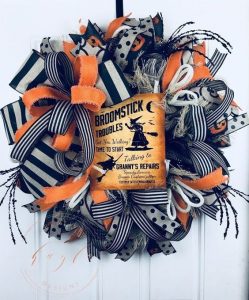
This deco mesh wreath looks beautiful decked up with A witch’s hat and shoes and pumpkins and a “Witches on Broomsticks” or “Trick or Treat” sign. Shimmery bows added to accentuate the look of this witchy wreath.
-
Ways to Make Black Mesh Wreath for Halloween
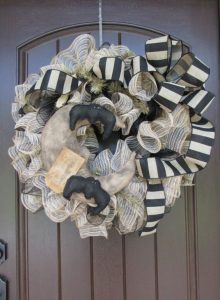
Looking to make a unique wreath for this Halloween? Try making this wonderful primitive style wreath using burlap and deco mesh. You can never deny the rustic charm of burlap. Fluff your ribbon and check your embellishments to make sure they will withstand door closings.
-
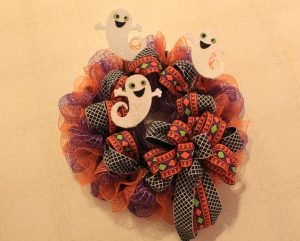
Halloween Wicked Ghost Deco Mesh Wreath Design
-
Creepy Halloween Mesh Wreath with Spiders
This quick and easy wreath uses purple and orange deco mesh, glitter floral stems and branches, bows and some spiders to give it a spooky look. It’s a simple design which can be made easily at home without much pinch on your pocket. You can use geo mesh instead of deco mesh if you wish.
-
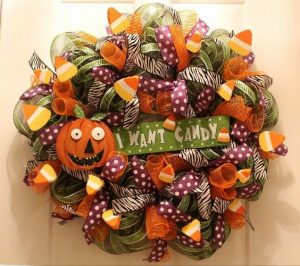
DIY Mesh Jack O’Lantern Halloween Wreath
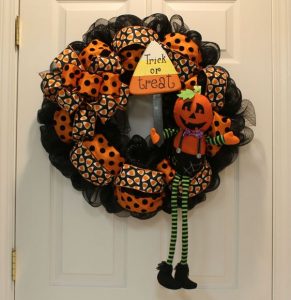
Kids are going to love this wreath hanging on your door with the funny guy on it. Follow the tutorial below and see how quick and easy it is to make the DIY Halloween. I bet it brings a chuckle to your guest when they are greeted by the friendly fellow waving at them. -
How to Make Halloween Wreath with Mesh Ribbon
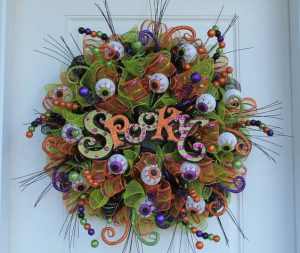
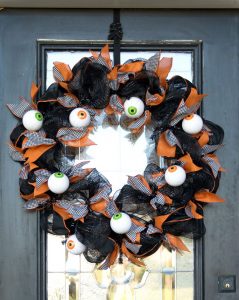
All eyes will be on your house this October with a spooky DIY Mesh Halloween wreath on your door. You will surely have fun making this easy wreath with mesh ribbons and decorate it with Halloween ornaments. The spooky eyes will surely give you jitters down your spine!
-
Halloween Wreath with Mesh Instructions
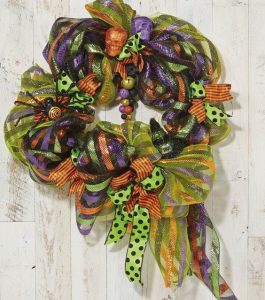
First striped green deco mesh is wrapped around the wire wreath in a floral pattern, followed by orange deco mesh. Then secure lime green tubing to the wreath with wire sprigs. For the rest, click on the above link. You can use geo mesh instead of deco mesh if you wish.
-
Halloween Wreath with Mesh Ribbon
A DIY Halloween mesh wreath that even the most inexperienced crafter would master. Give it a try and add Halloween whimsy to your door.
-
Halloween Mesh Wreath: Video Tutorial
In this video, learn how to create a whimsical, full deco mesh wreath using 3 different types of mesh for the base, for your front door or interior home décor.
-
DIY Geo Mesh Eyeball Wreath
-
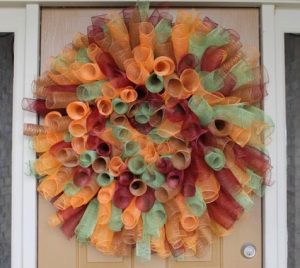
How To Make A Curly Deco Mesh Wreath
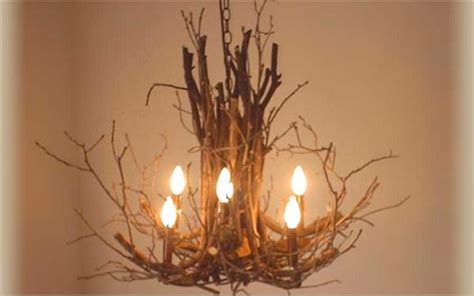
It’s autumn and Christmas is coming soon. DIY enthusiasts love to create unique crafts for the holiday season and utilize almost everything available. We had earlier shown how to make candle holders using twigs. Now let’s see how to transform a fallen tree branch and twigs into stylish chandeliers.
It’s time to create handmade chandeliers with twigs and bring some nature into our interiors.
Interesting Ways on How to Make DIY Twig Chandeliers
-
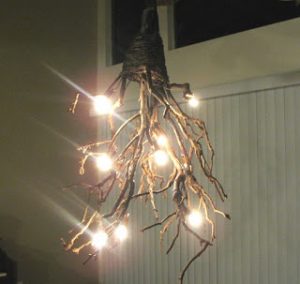
Rustic Twig Chandelier
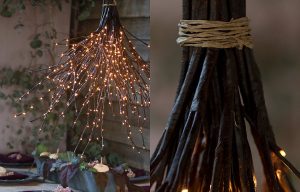
Turning some dry branches into a beautiful hanging chandelier isn’t that difficult. The linked tutorial shows you the step-by-step instructions to make this out of small-medium twigs lying around in your backyard.
-
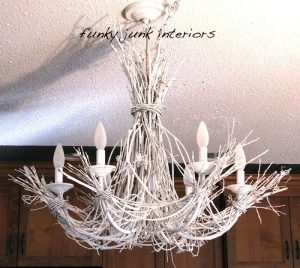
Hanging Twig Chandelier
An ideal chandelier to light up your house this Halloween and give it a natural and rustic look. In this tutorial white tree branches have been used. The use of twine and branches is eye-catching!
-
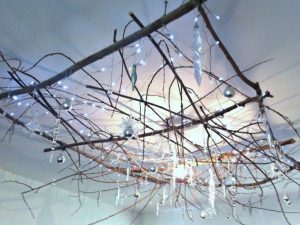
How to Make Tree Twig Hanging Chandelier
Create the most stunning lighting for this corner of your house with natural twigs, tree branches, and fairy lights. This tutorial sets-up this interesting Christmas rustic ceiling decoration which a treat to your eyes.
-
Easy Natural Brown Twig Chandelier
Tangle your twig lights together and tie the upper stems together using bind wire. You may choose to stagger the heights of the stems to create a longer, narrower chandelier. A very classic design which can be assembled easily to create some great lighting.
-
Nature Inspired Twig Branch Chandelier
This simple yet creative chandelier hanging from the ceiling is quite a creative addition to your decor. An interesting winter craft to brighten your house with some handmade light display.
This fall you have a great reason to upcycle the fallen branches, twigs and collect them and turn them into beautiful wreaths or chandeliers to light your house. Share your ideas and creations with us in the comment section below.
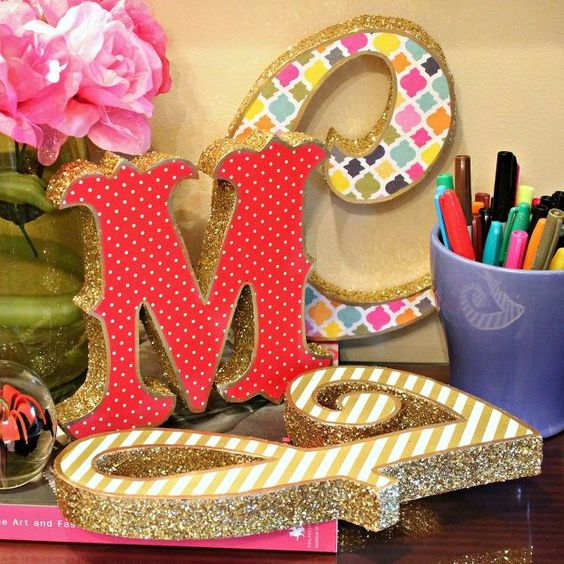
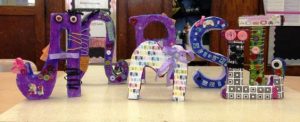
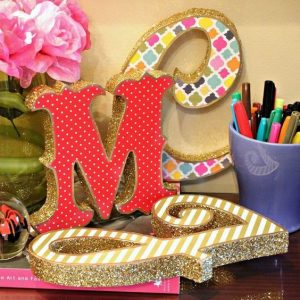
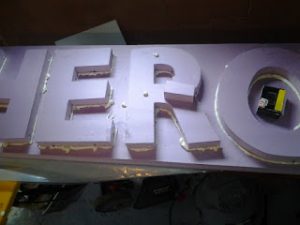
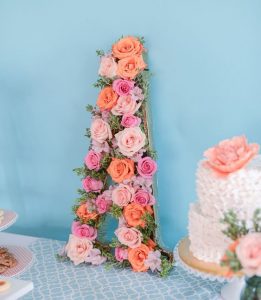
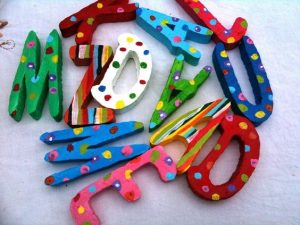
Styrofoam is a highly versatile and a creative craft material for creating letters (alphabets), numbering or designs. You can choose a font style and print size from any word processing program on your computer. Polystyrene foam letters and numbers great for decoration, arts & crafts, DIY for kids too. The cutouts can be decorated with water-based paint, glitter, flowers and customized to your creative levels. Let’s explore the amazing ways to cut of styrofoam letters.
How to Make Styrofoam Letters ~ Tutorials with Instructions
-
DIY Styrofoam Letters
Create unique and colorful wall art with large styrofoam letters. A great idea to show your love to your loved ones on Anniversaries, Weddings or Valentine’s Day. Once the alphabets are cut, add some color and get some life to it and use as decorative centerpieces.
-
Styrofoam Letter Tutorial
Jazz up your walls with funky homemade styrofoam signs, letters, and numbers. A cool makeover for your walls which can add glitz to any party.
-
Make Your Own Styrofoam Letters
-
How to Make Letters from Styrofoam
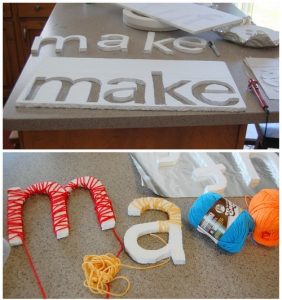
A great combination of styrofoam and colorful strings to make amazing art for decorating your room.
-
Large Styrofoam Letters: Step-by-Step
Wondering how to make giant letters out of Styrofoam? If you want a standing letter sign then take a Styrofoam with good thickness.
-
Jumbo-Sized Styrofoam Letters Instructions
-
Styrofoam Block Letters Ideas for Decoration
-
Making Styrofoam Wall Letters
-
Over-Sized Styrofoam Letters
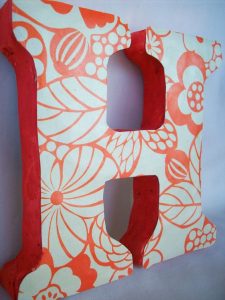
Recycle some discarded styrofoam to make these marquee letters with patterned paper printed and some glitterati.
-
Styrofoam Studded Wall Letters: DIY
-
Glitter Styrofoam Letters for Decoration
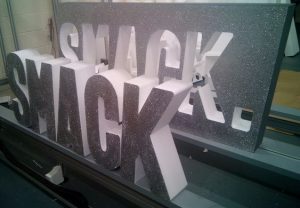
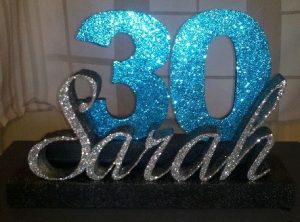
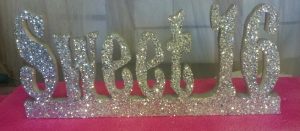
Glitter, paints, and styrofoam can make great party props. Be it your wedding anniversary, baby shower party or sweet 16 birthday, make great letters and signs with foam at affordable prices.
-
Styrofoam Script Letters Design
-
Styrofoam Letters for Homecoming
-
Cool Styrofoam Letters for Pool Party
-
Cute Styrofoam Letters for Birthday Party
Making your own jumbo letter cut-outs as a backdrop for the birthday party will be a perfect budgeted decoration. You can add red, pink or blue depending on the theme of the party. The linked tutorial guides you with step-by-step instructions on how to cut and paint styrofoam alphabets.
-
Styrofoam Letters for Baby Shower
Make cute DIY Centerpiece Ideas using Styrofoam Shapes to welcome the angel in your life. Add glitters, ribbons and more to further embellish it.
-
Styrofoam Cursive Letter Designs
-
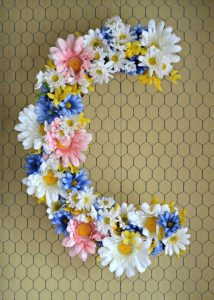
Styrofoam Letters: Flower Decoration
-
Styrofoam Letters for Wedding
These styrofoam/polystyrene letters make a striking centerpiece. You can spray paint them any color you want. You can even cover them in glitter, sweets or sprinkles should you prefer.
-
Huge Letters Cut-Out in Styrofoam
-
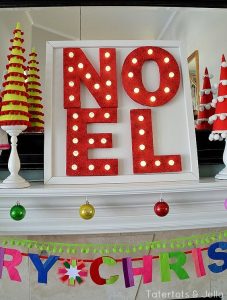
Styrofoam Lighted Marquee Letters
A great crafting prop for parties and festive season. You can also download the free PDF template for the alphabets.
-
Cool Styrofoam Letters in 3D Design
Carve out great props for your party or occasions with styrofoam and paint them with bright colors.
-
Styrofoam Monogrammed Letters Standee
-
Easy Painted Styrofoam Letters For Kids
-
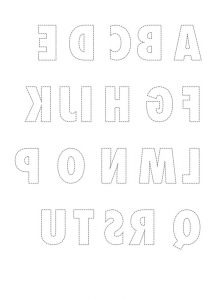
Styrofoam Letters Template
You can download the free templates of reversed numbers and alphabets and trace them on the styrofoam to make a neat cut out.
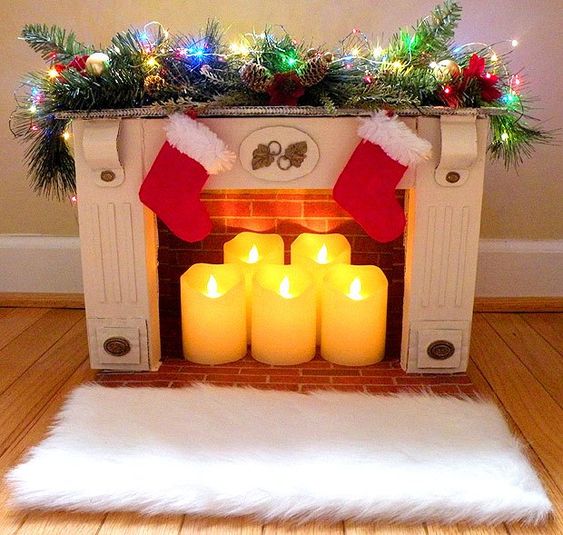
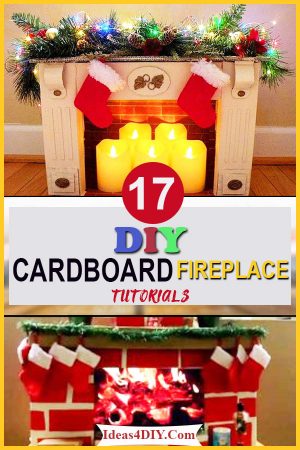
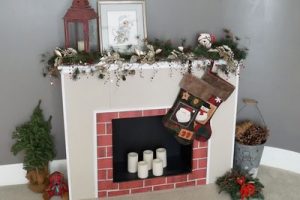
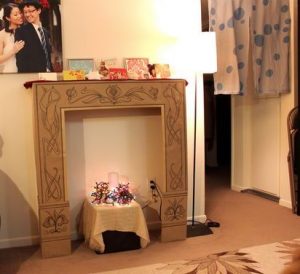
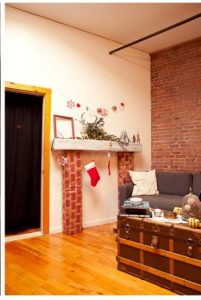
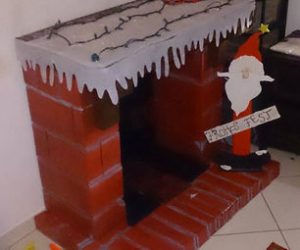
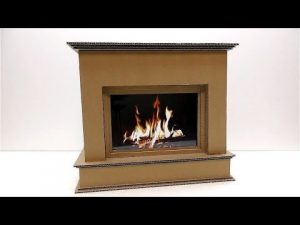
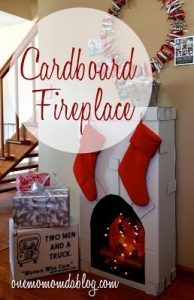
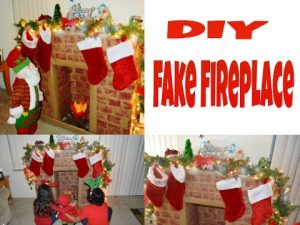
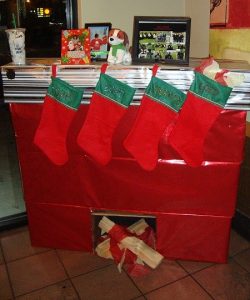
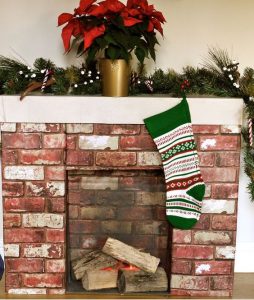
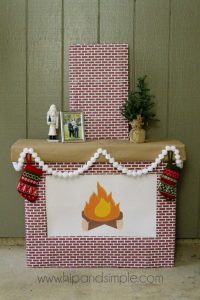
If you are deprived of the comfort of having a warm fireplace at your home, fulfill your desire by creating a fake one using recycled cardboard, to enhance the decor of your house especially when the festive season is around the corner. Sharing a collection of great DIY’s and tutorials to help you out with step-by-step instructions.
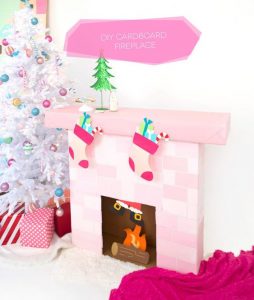
A faux fireplace can be used just at Christmas time or all year round to add a fun architectural detail to the home. Place LED candles or a basket of wood in the open center part of the fireplace to complete the effect during the chilling winters. Hang the stockings and make it look so real even Santa gets confused!
How to Make DIY Cardboard Fireplace with Instructions
-
DIY Cardboard Fireplace
If you are a creative junkie and don’t have a real fireplace this Christmas to lighten your house, make this beautiful craft and make a warm elegant corner for your room.
-
Cardboard Fireplace for Christmas
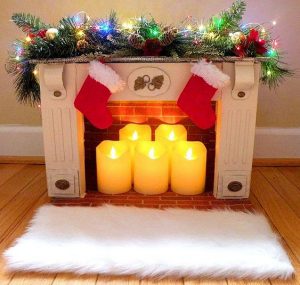
Add a warm and cozy charm your room and decorate it with garland, lights and filled with flameless candles. It is made from all recycled materials and it is very easy to create. You can add your own holiday decorations to make it your own style.
-
DIY Cardboard Fireplace for Halloween
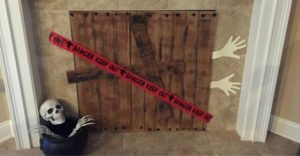
This Halloween fireplace cover will add a great charm to your decor. Paint some bats and hands and create a spooky effect.
-
Vintage Cardboard Fireplace Instructions
A lovely fireplace that looks real. Add some warmth to your home decor with this handmade fireplace. Decorate it with stockings and Christmas ornaments.
-
How to Decorate Cardboard Fireplace
Your kids will enjoy to add Santa coming down the chimney along with a warm fire, all made from paper and cardboard.
-
How to Make a Fake Fireplace from Cardboard
-
Easy Mini Faux Fireplace of Cardboard
Add some homey holiday feeling with cardboard boxes and light in one corner this winter and create a faux fireplace. Making some cute designs with your colorful sharpies will give it a unique artistic touch for the festive season.
-
Homemade Cardboard Fireplace Display
-
Making a Fireplace from Cardboard Boxes
-
Easy Cardboard Fireplace Ideas (Video Tutorial)
With the help of a tablet screen, the fake fire effect has been created. This will surely amaze your friends in wonder.
-
White Cardboard Fireplace for Christmas
Your kids would be elated on seeing this awesome fireplace as it would serve as an ideal place for them to hang their stockings and eagerly wait for the special gifts brought for them by Mr.Santa.
-
Cardboard Fireplace with Lightbulb for Fire
-
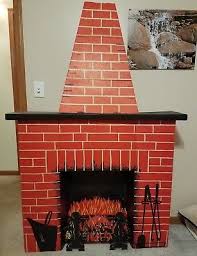
Cardboard Fireplace with Chimney Craft Ideas
Why buy a fireplace when you can build your own with a custom vintage effect. Just add a big triangle cut out to attach a chimney to your fireplace, just like the one shown in the picture below.
-
Making an Artificial Cardboard Fireplace
-
Instructions to Make a Cardboard Fireplace
-
Create an Antique Cardboard Fireplace
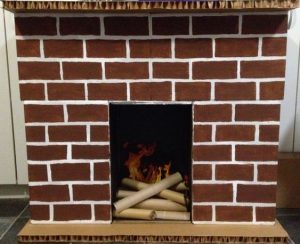
The old vintage brick style fireplace is always a treat to your eyes. Follow the simple instructions to create a decorated fireplace yourself.
-
Making a Cardboard Fireplace Mantle
Add props, trees, stockings and Christmas garlands to embellish it further for the cute festive look.
Try making this cute cardboard Thomas Tank Engine Costume from this tutorial.
Place your faux fireplace against the wall or in the corner to create a Christmas look anywhere. Stockings, lights, small bulbs, and garlands can be hung with simple thumbtacks. These design cannot hold a lot of weight, however, so use caution when filling stockings and adding decorations to the mantel.
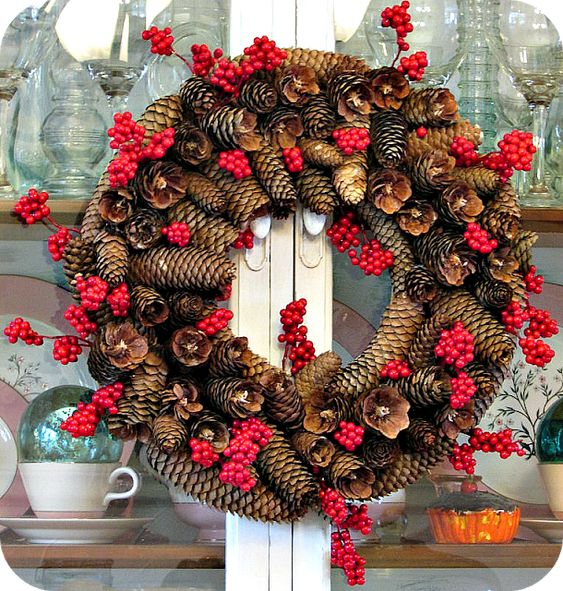
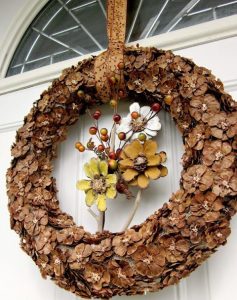
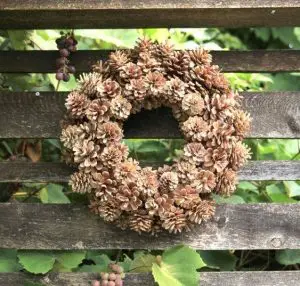
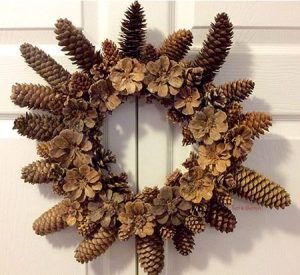
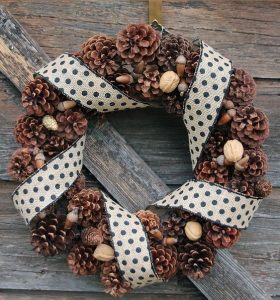
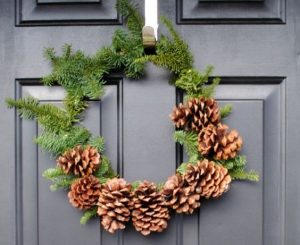
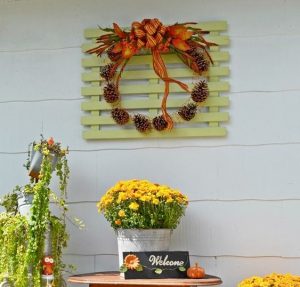
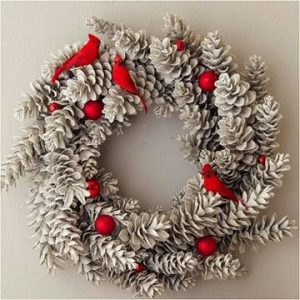
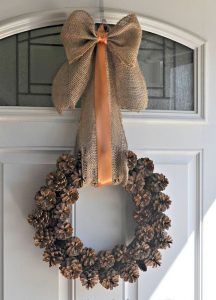
Making pinecone wreath is a fun and creative way to welcome guests and add a little curb appeal during holidays. Gathering natural objects from the outdoors like pinecones, acorns, some greens and bringing them together in a creative manner keeps you connected to nature. Create a fabulous wreath using the freshly cut pine cones, this might be one of your preferred craft idea for this holiday season. We have compiled some amazing tutorials which may make your wreath making project an easy one! It’s simpler than you think and getting the pinecones ready makes your house smell amazing!
How to Make Decorative Pinecone Wreath~ Tutorials & Instructions
-
Pinecone Wreath DIY
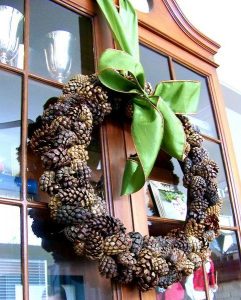
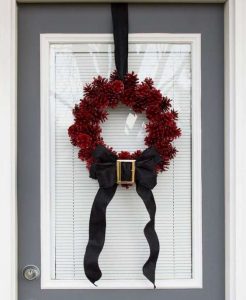
These wreaths are spray painted and glittered, with bead decorations and a bow attached. You can choose to keep the original color of pinecones to have that rustic country look on your entrance. If you are wondering how to make a pinecone wreath on a wire frame, then this is the perfect tutorial for you!
-
Homemade Pinecone Flower Wreath
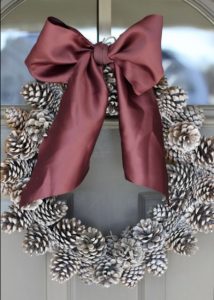
This winter white wreath is the perfect decoration to greet guests with a warm, holiday welcome.
-
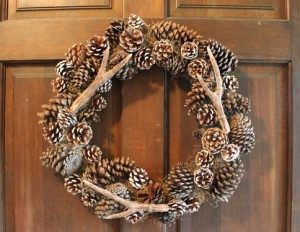
DIY Pinecone Wreath with Faux Antlers
-
Directions to Make Holiday Pinecone Wreaths
Turn these pinecones into an abundance of flowers and colors for a festive fall touch that will last you through Thanksgiving or Christmas!
For Wine Cork Wreath Tutorials ~ Read Here
-
DIY Woodland Pinecone Wreath Tutorial
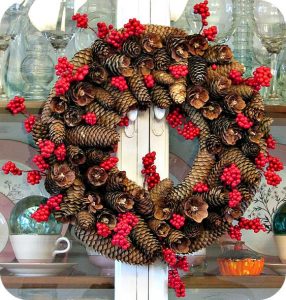
A great one for beginners, bring some holiday cheer to your front door with this woodland, pinecone wreath adorned with artificial berries. It looks lovely displayed all winter long!
-
Festive DIY Wreath Made from Pinecones and Greenery
An amazing combination of greens, mini pinecones, glitter, ribbons and more. Adorn your front doors with this holly combination sets off the mood for the festive season.
-
Pinecone Wreath from Wire Hanger Tutorial
-
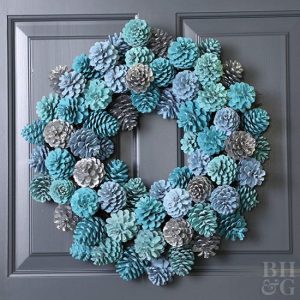
Instructions to Make Ombre Pinecone Wreath
Make a pretty wreath for the holidays (or any time of year!) with pinecones, spray paint, and a few other basic craft supplies.For DIY Coffee Filter Wreath ~ Read More
-
How to Make Paint Dipped Pinecone Wreath
You can also opt for a three-color dip (red, white and green or blue), for Memorial Day or Christmas likewise.
-
Making Monogrammed Wreath with Pinecones
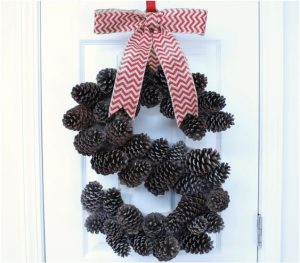
Upcycle pinecones to make a warm and welcoming door decoration. Personalize it for some one special or in remembrance of a loved one! -
Directions: Rustic Burlap Pinecone Wreath
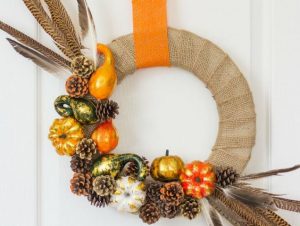
With a burlap base and pumpkins, gourds, pine cones, and pheasant feathers, this rustic DIY wreath screams fall! It would look great either outside on the front door or indoors as part of your fall and Halloween decor.
-
Making a Bleached Pinecone Wreath for Fall
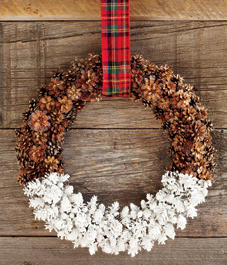
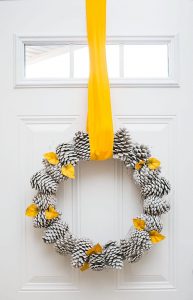
Bleached pinecones are all the rage! While pinecones have always been a staple of autumn and winter décor, bleaching them gives them a softer, brighter, more modern look than untreated pinecones.
-
Handmade Pinecone Wreath for Spring
Grab some ferns and pinecones from your backyard and turn them into a pretty wreath in for the spring. A lovely house decor with colors and hues.
-
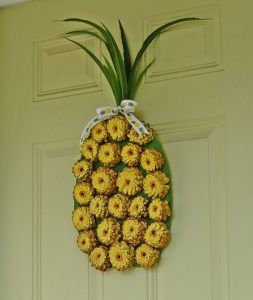
Pineapple Pinecone Wreath for Summer
Give your front door a warm and welcoming summery vibe with this cute and thrifty Pine Cone Pineapple Wreath!
-
Scented PineconeWreath for Autumn/Fall
To give it a natural look the grapevine is used instead of the styrofoam. A splash of bright colored bow makes it look more lively. You can get more creative and try adding elements for a new look.
-
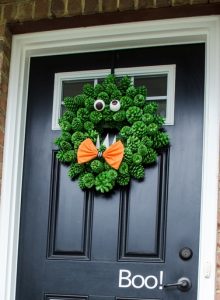
DIY PineconeWreath for Halloween
-
Traditional Pinecone Wreaths for Christmas
A great Christmas craft with natural pinecone supplies and small colorful pom-poms. You can also use tassels, ribbons, bows to embellish it further. Hang it on your front door or wall and get amazing compliments.
-
Make Your Own Winter Pine Cone Wreath
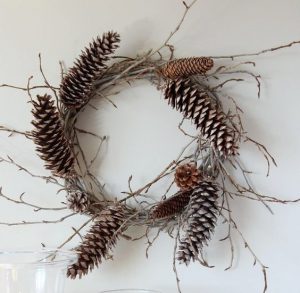
This woodland wreath can be made using twigs and pine cones gathered up on a family nature walk. A fun and thrifty home decor project for holidays!
-
Christmas Pinecone Wreath Ideas
-
Pinecone Christmas Wreath Snowflake Design
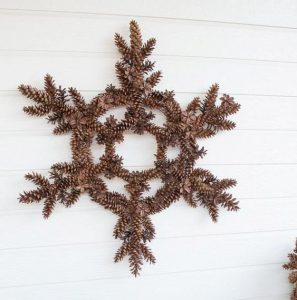
A perfect pattern for a snowy season decoration this winters. Use it to dress up your home from Christmas until Valentine’s Day.
-
Heart-Shaped Pine Cone Wreath
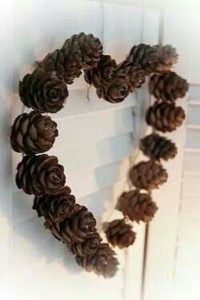
This easy-to-make Pinecone Wreath is the perfect addition to your Fall/Autumn decor. You can add a touch of red ribbons, bows or little paint to use it for Valentine’s Day too.
-
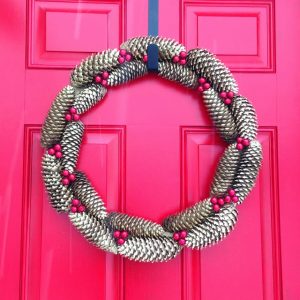
DIY Gold Pinecone Wreath
-
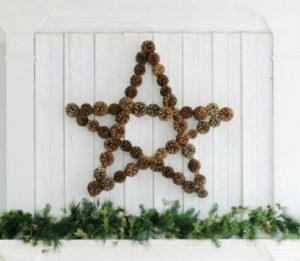
Big Pinecone Star Wreath Craft
All you need is some 5-6 yardsticks to make the star shape. Once done, stick the pinecones on them meticulously. Add a bow or ribbon to make it more colorful.
-
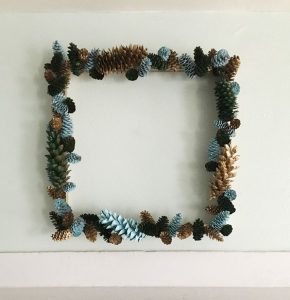
Square Pinecone Wreath Tutorial
Bored of the regular round wreaths? Then try making a square one with pinecones beautifully spray painted. You can use these to decorate your walls all year around.
-
How to Make a Vintage Pinecone Wreath
-
Pinecone Wreath with Wired Wreath Frame
You can use nuts, acorns, berries, etc to give it a natural close to nature look. I loved the way they have designed it with it.
-
Pinecone Advent Wreath Art Tutorial
-
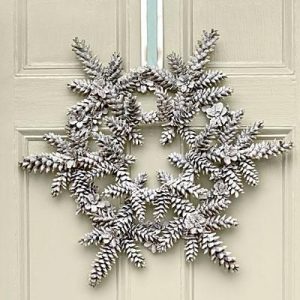
Snowflake Wreath Made with Skinny Pinecones
-
How to Make a Small Pinecone Wreath
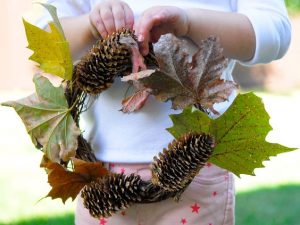
Make a little wreath with kids to showcase all the beautiful things you find on your nature walks!
-
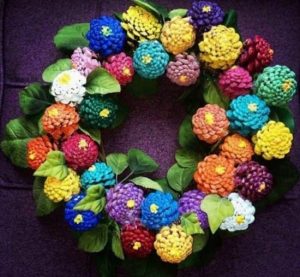
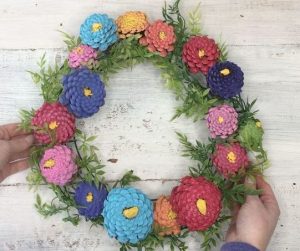
Zinnia Pinecone Wreath Ideas
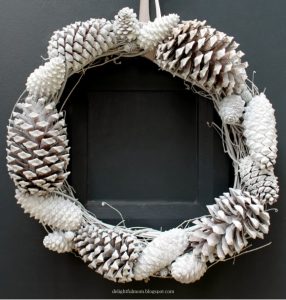
Paint it all white for a modern, monochromatic look that’ll last through the winter or make your front door pop with brightly colored pinecones. -
Unique Pine Cone Wreath with Book Pages
-
How to Make Miniature Decorative Pinecone Wreath
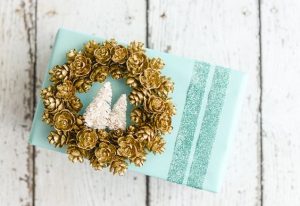
No matter whether your style is rustic or glamorous, these pine cone ornament wreaths are sure to be the perfect crowning touch for your gifts.
-
Wintery Pinecone Wreath Tutorial
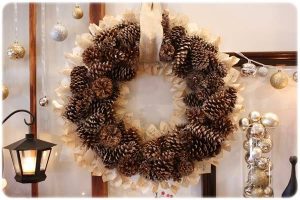
You can decorate them with ornaments, flowers, and lights to brighten up your decor!
-
DIY Pine Cone Wreath for Wedding Decoration
DIY with this inexpensive (under $10) winter white pine cone wreath! It is a great activity to make with the kids and look how pretty it compliments a front door or back patio or an elegant wedding decor.
-
Easy DIY to Make Pinecone Grapevine Wreath
This stylish wreath would look gorgeous when hanging on your window or door!
-
Creative Idea to Make Pretty Pinecone Wreath
-
How to Make Chicken Wire and Pine Cone Wreath
-
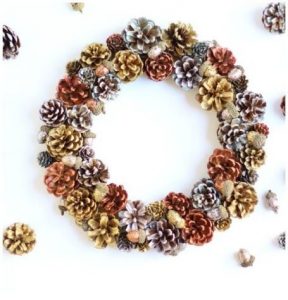
DIY Metallic Pinecone and Acorn Wreath
Just pair some natural pinecones and acorns with shiny metallic gold, silver, and copper paint and glitter. The end result is both rustic and glam at the same time.
-
Pinecone Wreath with Cardinals: Do-it-Yourself
-
How to Make: Pinecone Wreath Tutorial
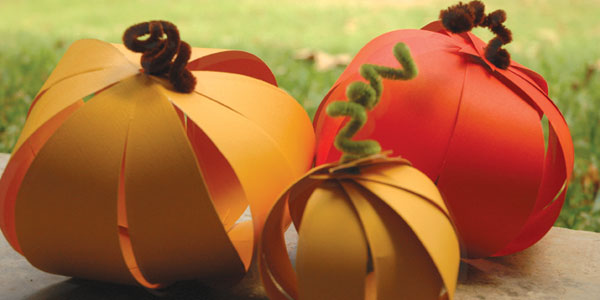
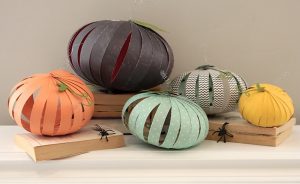
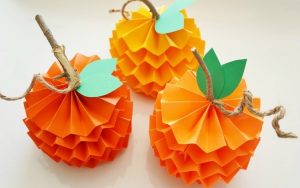
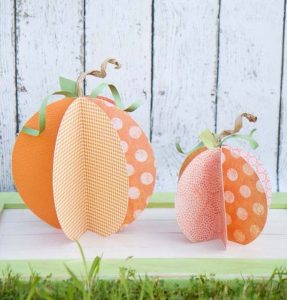
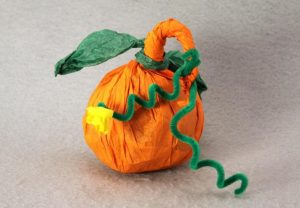
Keep your Halloween or Thanksgiving table setting a bright and fun look by adding DIY decor that’s easy, inexpensive and so cute, it might even grab the attention away from the turkey! These little handmade pumpkins are so much fun to make.
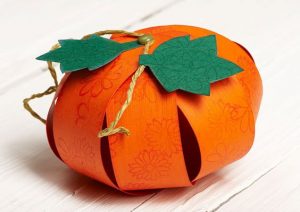
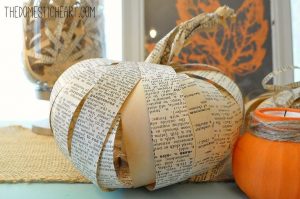
It’s a fun Fall craft you can do with your kids or a great adult craft to spruce up your mantel or table decor. You can try it with different colored papers (crepe, tissue, cardstock, old book papers, newspapers, scrapbook pages etc.) in different patterns as well. Go through the versatile DIY tutorials and make your own paper pumpkin craft this Halloween!
How to Make Easy Paper Pumpkins ~Tutorials & Instructions
-
DIY Paper Pumpkin
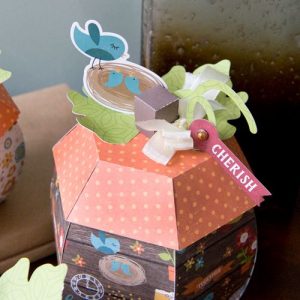
These lovely pumpkins are made from patterned paper in different colors and prints. You can decorate your house with these cute different sizes of pumpkins made from scrapbook paper.
-
Unique Paper Pumpkin Craft for Fall
Craft enthusiasts can draw some inspiration from the amazing DIY origami tutorial to give their indoors a Halloween facelift. You can play around with the sizes, colors, and patterns. Group a few together at a kid’s table, adult’s dinner table with decorated skull heads, and the gothic zombies.
-
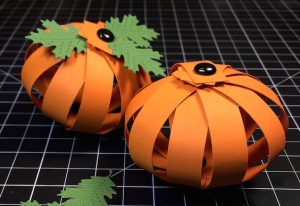
Pumpkin Paper Craft with Card Stock Strips
-
Paper Pumpkin Project Ideas
A very unique project with a vintage touch. Use printed crepe papers or paper of your choice and create decorative centerpieces for your Thanksgiving table or sideboard this Fall. A free template for the pumpkin design is given in the linked tutorial.
You May Also Like ~ “Halloween Pumpkin Designs & Ideas“
-
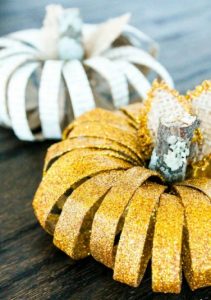
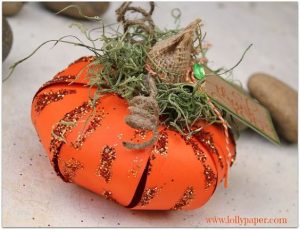
Instructions to Make Decorative Paper Roll Pumpkin
Spend more time to decorate your pumpkins you could do different colors of glitter, gold leaf flakes, or buttons or paint them too. Let it last till Thanksgiving to double up the fun quotient. Using cinnamon sticks as stems give it a beautiful rustic touch.
-
Make Pumpkin using Paper Strips
The Halloween fever will increase manifold with glow-in-the-dark pumpkins that can be placed at the doorstep or in the yard alongside those twinkling lights.
You May Also Like ~ “How to Make Halloween Table Runner“
-
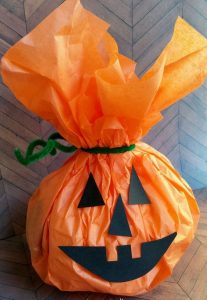
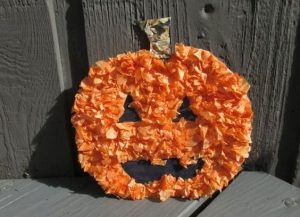
Easy Tissue Paper Pumpkin Ideas for Kids
Get the kids involved in Halloween and Fall decorating with these super easy kids’ tissue paper pumpkins. -
Paper Pumpkin Crafts for Pre-Schoolers
A super easy crafting idea to make pumpkins with scrapbook papers. Kids will love this holiday project. You can further decorate the pumpkins using glitters, ribbons etc.
-
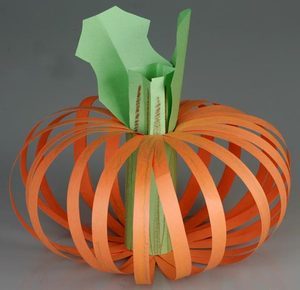
How to Make a 3D Paper Pumpkin
Handmade pumpkin will give you not only the warmth and good humor but some unforgettable moments of creativity too.
-
Scalloped Paper Pumpkin Decorating Ideas
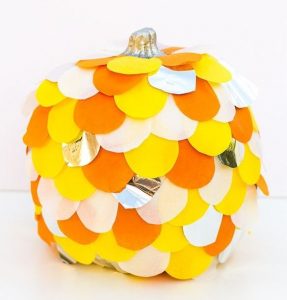
Create a beautiful ombre effect with this no-carve pumpkin decorating project. An interesting way to make pumpkins for this Halloween.
-
Paper Pumpkin for Halloween: Step by Step Instructions
-
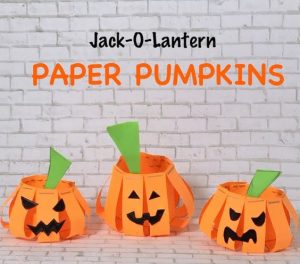
Jack-O-Lantern Paper Pumpkins
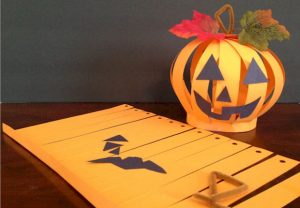
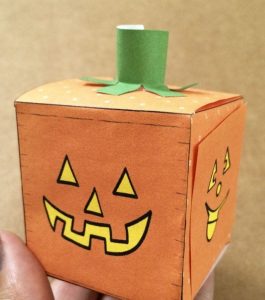
These smiling Jack-O-Lantern Paper Pumpkin puppets will surely get a smile on your munchkin’s face.
-
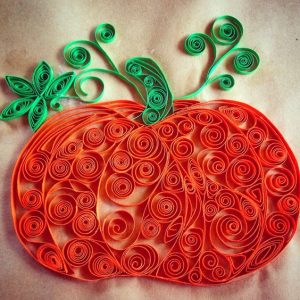
Paper Quilling Pumpkin Ideas
Learn how to make a beautiful pumpkin using quilling techniques. An easy to make a tutorial for beginners as well. You can hang them on walls or your doors for this Fall.
-
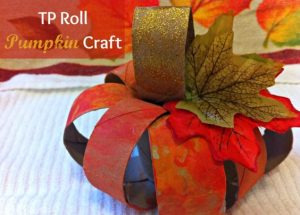
Toilet Paper Pumpkin Roll Crafts
Elementary, classy and vintage, this pumpkin look great with the maple leaf and glittered stems. Display them on your walls, tables, or hang them on the door as these are versatile enough for a lovely display.
-
Paper Pumpkin Tutorial for Kids
Directions for making a spooky, Halloween pumpkin decoration from paper. Kid crafters can indulge in this impressive pumpkin cut-out fall project to bring back the old-fashioned glamour to the Halloween party. -
Directions to Make: Paper Pumpkin
Celebrate the fall season and add colorful handmade paper pumpkins to your home décor. The linked tutorial has used orange and green construction paper for a sturdy finish.
-
Free Paper Pumpkin Favor
-
Paper Pumpkin Craft Video
-
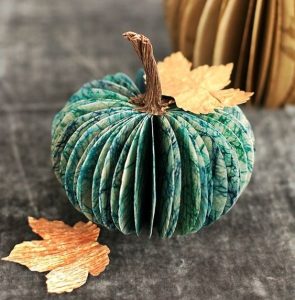
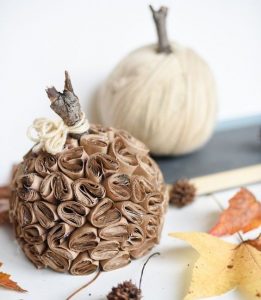
Vintage Brown Paper Pumpkin Tutorial
Folded strips of old brown paper are the perfect pumpkin crafting material to add some neutral-toned rusticity to your tablescape.
-
3 Dimensional Paper Pumpkin
-
Free Paper Pumpkin Pattern PDF Download
-
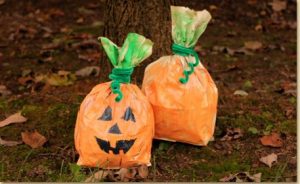
How to Make: Pumpkin Paper Bag Puppet
Funky and quirky Halloween design made by turning an ordinary paper lunch bag into a pumpkin favor bag with just a few simple craft materials and splashing some colors.
-
Glittery Pumpkin Out of Construction Paper
-
Simple Pleated Pumpkin Made Out of Paper
-
Pumpkin Made from Book Pages
These fun paper crafts projects are so splendidly simple that you can make whole pumpkin patches of decoration for your tablescape, decorating your doorstep, porch display or mantel. Enjoy and share your unique creations with us in the comment section below.
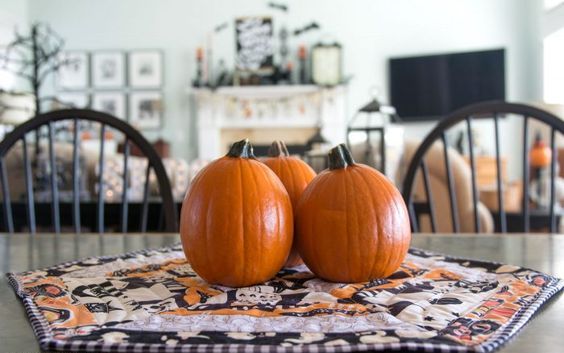
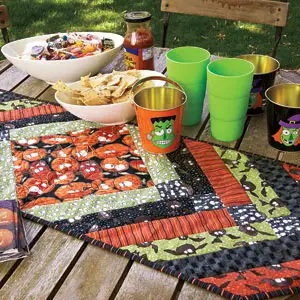
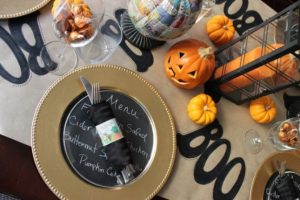
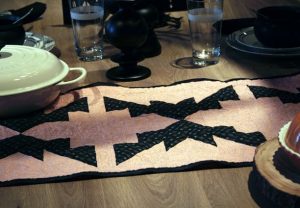
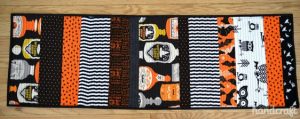
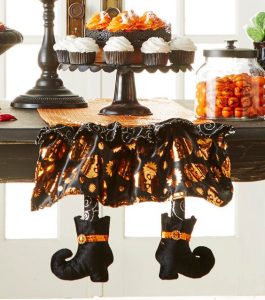
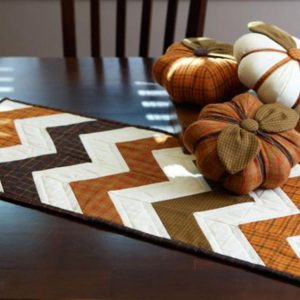
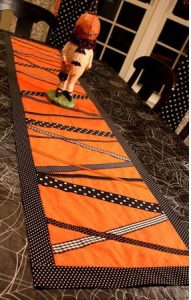
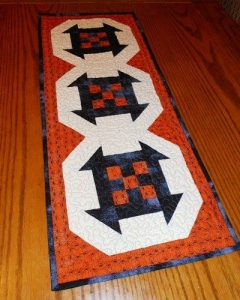
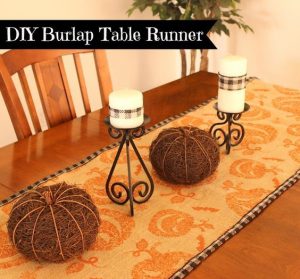
This Halloween turn your table decor to a crafter’s paradise. If you love to spruce up your whole house in Halloween, don’t let your dining tables be an exception. Table runners are an easy way to dress up your table setting for any Halloween gathering! Make your meal spook-tacular with these great homemade table runners! Obviously, the color code would be majorly orange and black to go with the theme. We have some amazing easy to make Halloween table runner patterns which are free and ready to be put to work.
Most of the tutorials listed need some simple supplies and do not need a lot of time to be made. The crochet and sewing ones need a bit of detailing. Choose your craft idea be it, cutting, painting, sewing or crocheting and get started now!
Collection of Free Halloween Table Runner Patterns for this Fall
-
Halloween Table Runner DIY
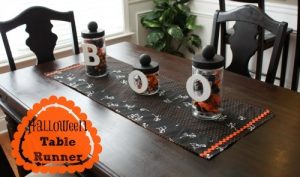
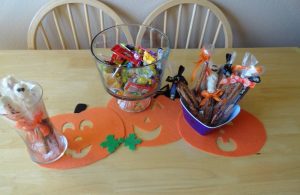
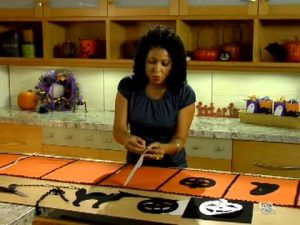
Display with some of your favorite Halloween Decor or maybe even a big bowl of Halloween candy! Add some fright to your table for Halloween in just a few minutes.
-
Halloween Crochet Table Runner Patterns with Lace
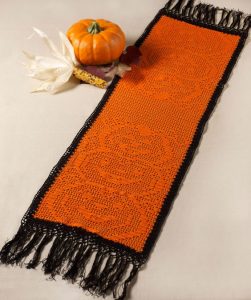
Crocheting the stacked pumpkin design on the table runner will be an amazing addition to the table decor. The fringes on the ends complete the Halloween look.
-
Table Runner for Halloween
What a spooky quilt perfect for the Halloween season! You will surely need to throw a party to show off your creations!
-
Halloween Table Runner Tutorial
This Monster Munchies quilted Halloween table runner pattern is a great way to showcase any group of holiday fabrics and it’s so quick, you can stitch it today for your party tonight!
-
How to Make: Halloween Table Runner
Add a rustic touch to your Halloween table setting with a burlap runner decorated with ghostly bare branches and ravens. -
Free Halloween Bat Table Runner Patterns
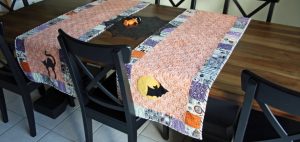
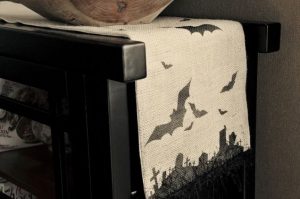
Sew this “Bat Table Runner” to decorate your tabletops in a unique way. I loved the technique used in the tutorial. You need to know basic sewing to make this one. They look cute and spooky at the same time!
-
Make Your Own: Halloween Table Runner
To give it some creative element you can add beads or tassels to the ends.
-
Black Halloween Table Runner Ideas
-
Chevron Halloween Table Runner Patterns
-
Halloween Table Runner Sewing Pattern
-
Reversible Halloween Table Runner Idea
-
Handmade Halloween Table Runners
-
Velvet Halloween Table Runner Style
Try making these cute pumpkin table mat cum runners. You can add a dash of colors to the stenciled felt and make it gothic with amazing carvings.
-
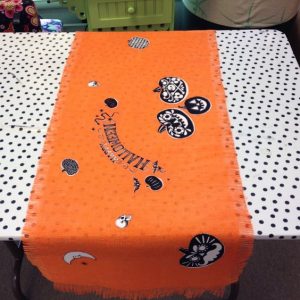
Easy Halloween Table Runner (No Sew)
Once you got you cool jack o’ lantern pictures and spooky pumpkins ready just iron them on the burlap and you’re done with a great table runner for your Halloween decor. A black or an orange burlap would be a perfect choice for the occasion. A quick tutorial which requires no sewing fuss. Time to make yours today!
-
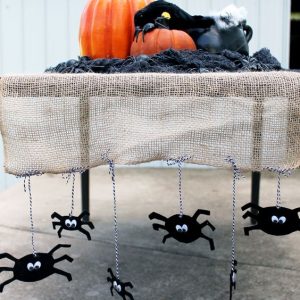
Directions to Make: Halloween Spider Table Runner
You will love the cute dangling spiders on this table decor and just how easy it is to make. You may even have everything you need to make this one at home.
-
Halloween Hexagon Table Topper
-
Black and White Table Runner for Halloween
-
Make Your Own: Handpainted Halloween Table Runner
-
Free Halloween Table Runner Video Tutorial
-
Free Halloween Table Runner Patterns PDF
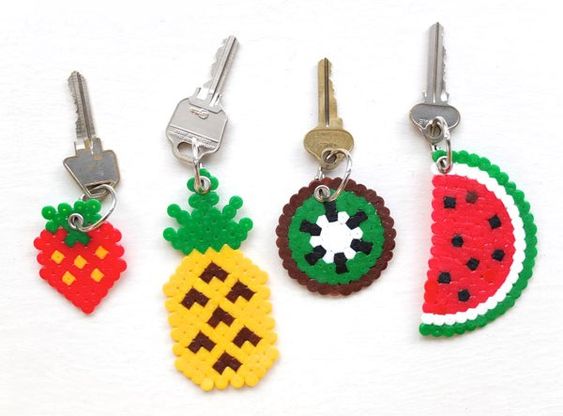
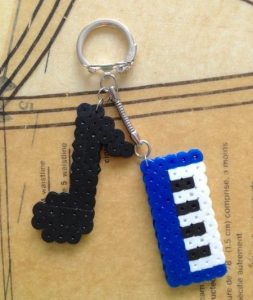
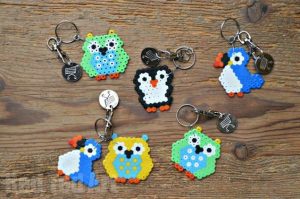
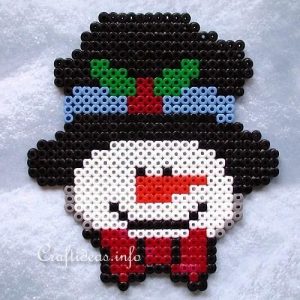
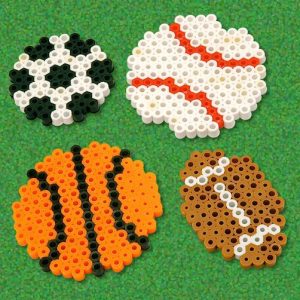
Perler beads also known as Hama beads are a surprisingly versatile craft material for kids and adults too. Perler bead keychains can be a great way to accessorize a purse, backpack, or lanyard in a unique and inexpensive way. We have compiled some cute DIYs and tutorials with free Perler bead template in most of them, which are printable and can be downloaded for free.
Supplies Needed to Make Perler Bead Keychains
- Perler Beads (also known as Hama Beads or Melty Beads, Fuse Beads)
- A Hama bead tray/Perler Bead Peg Board
- Keyring
- Iron & Baking Paper
- A little bit of wire/leather string to attach the beads to the keyring
How to Make Perler Bead Keychains with Step-by-Step Instructions in Tutorials
-
DIY Perler Bead Keychain
-
Perler Bead Fruits Keychain Patterns
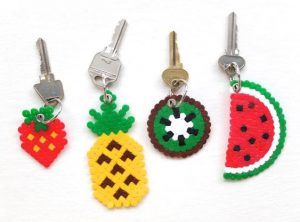
These fun fruit keyrings from Hama/Perler beads are easy to make and make great stocking fillers and secret Santa gifts. You can use them as key rings, or cute handbag charms or zipper pulls.
-
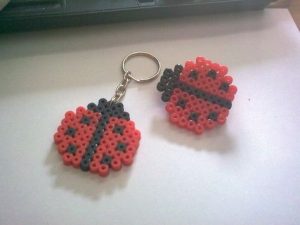
Perler Ladybug Keychain Tutorial
-
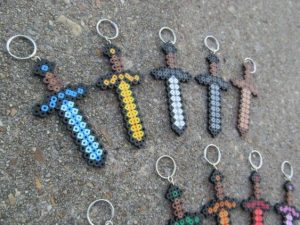
How to Make Perler Bead Minecraft Sword Keychain
Make innovative Minecraft crafts keychains with a trendy color combination.
-
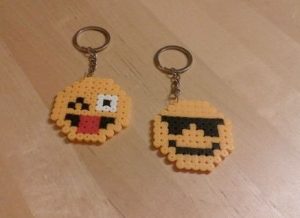
Perler Bead Emoji Keychain Directions
-
Easy Hama Bead Animal Keychain
-
Easy Perler Bead Keychain Design
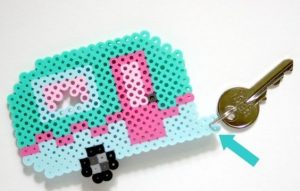
You can download the free printable pattern for this cute little retro camper Perler bead pattern in the linked tutorial.
You May Also Like ~ “Easy DIY Keychain Making Ideas” ~ Read Here
-
Perler Bead Owl Keychain Instructions
-
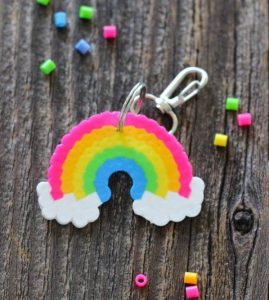
Making Mini Perler Bead Rainbow Keychains
-
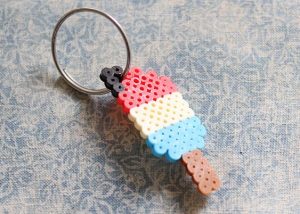
Cool Perler Bead Popsicle Keychain
-
Free Perler Bead Keychain PDF Pattern
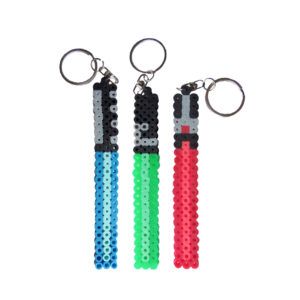
This tutorial is for all Star Wars fans. Make any combination of blade colors and handles and customize your own lightsaber key chain set. To get the video tutorial click here.
-
Free Perler Bead Keychain Template for Christmas
You May Also Like ~ How to Make Beaded Keychains ~ Read Here
-
Free Printable Patterns for Race Car Perler Keychains
You May Also Like ~ How to Make Bottle Cap Keyrings ~ Read Here
-
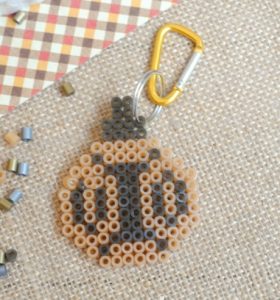
Hama Beads Ball Keychain Free Instructions
-
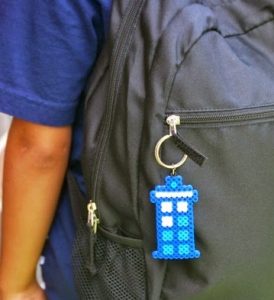
Perler Bead Doctor Who Tardis Keychain
-
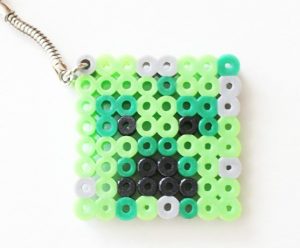
Minecraft Hama Beads Keychain Instructions
The linked tutorial has a file for all the free printable Minecraft Perler bead patterns and designs to make it easier for you! Wohooo!
-
Fuse Beads Pumpkin Keychain Ideas
-
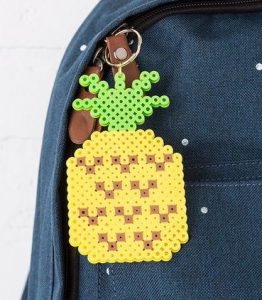
Fuse Bead Pineapple Keychain Pattern
-
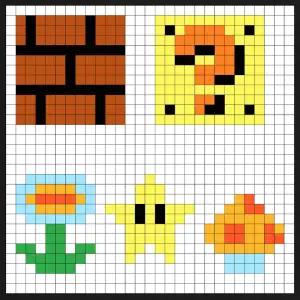
Super Mario Perler Beads Patterns for Keychain
I think these key rings would make a great gift for Father’s Day or Mother’s Day too, or for an Aunt at Christmas. Just follow the instructions to create your design from the list above!
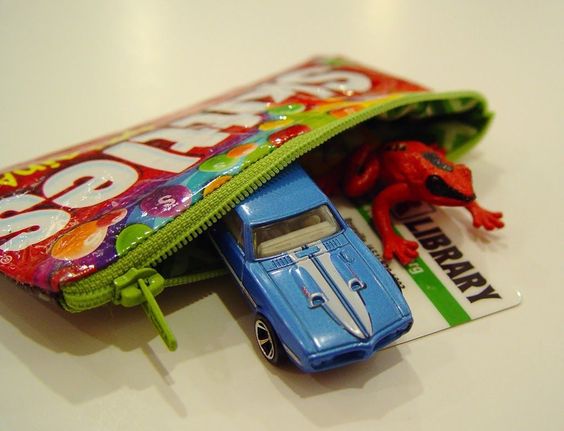
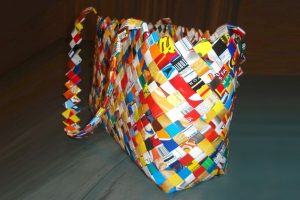
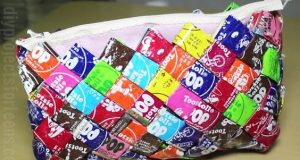
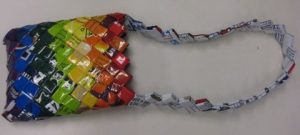
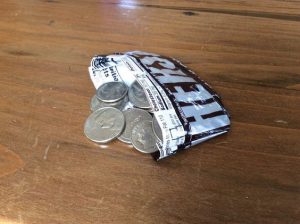
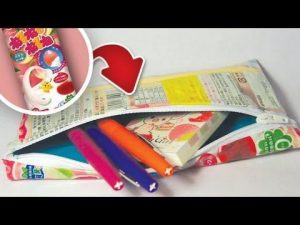
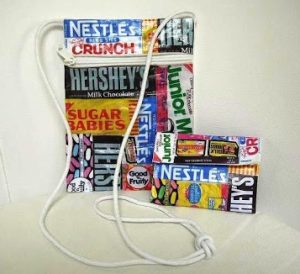
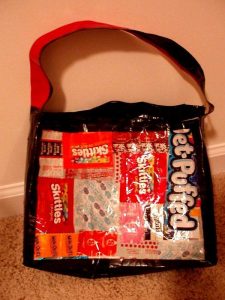
A candy wrapper purse or pouch is a handbag made from folded candy wrappers. Most purses are relatively small clutch styles, although you can make a larger shoulder bag with a strap if you desire. These are generally brightly colored and modern styled. Making a candy wrapper purse is a wonderful project for the frugal crafters since you don’t need to purchase any expensive supplies. We have explored some fun crafty ways to use candy wrappers to make interesting purses.
How to Make Candy Wrapper Purse with Instructions
-
DIY Candy Wrapper Purse
A cute DIY to make a thinly quilted purse using candy wrappers and some basic stitching techniques. Add funky colored zippers to make it fun for kids to use them.
-
Purse made out of Candy Wrappers
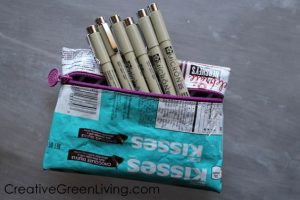
These little pouches are perfect for filling with candy, cookies, stationery or gift cards.
-
How to Make a Flat Bottom Candy Wrapper Purse
-
Candy Wrapper Purse: Interesting How-To
If you can’t gather enough candy wrappers you can replace them with other upcycled materials like chips covers, magazines, top ramen packets, old catalogs etc.
-
How to Make Upcycled Purse from Candy Wrappers
Design your own purse, bag or wallet with candy wrappers. The linked tutorial will guide you with directions to make this.
-
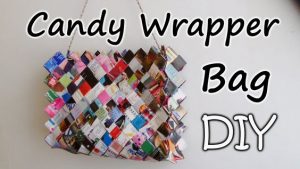
Candy Wrapper Bag DIY
-
Directions to Make: Candy Wrapper Wallet
-
Candy Wrapper Coin Purse Tutorial
You can alter the size of the purse as per your need. A smaller pouch will be easily tucked in your purse too.
-
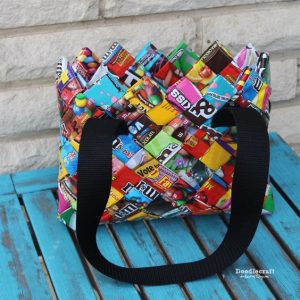
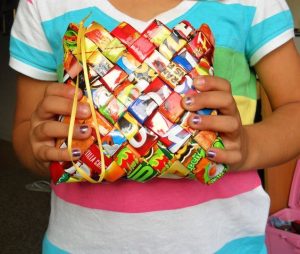
How to Make a Woven Candy Wrapper Bag
A cool way to re-purpose your candy wrapper collection. Make an adorable upcycled statement with this woven bag. Follow the step-by-step instructions and make this amazing bag at no extra cost!
-
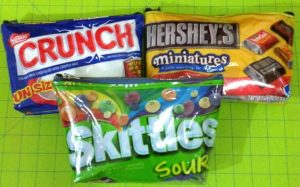
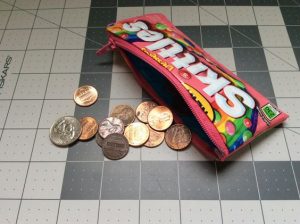
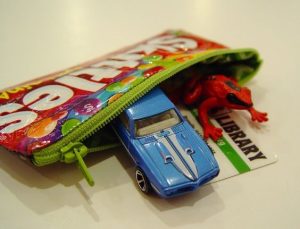
Making Zipper Pouch/Purse with Skittles Wrapper
The vibrant colors of the candy wrappers give the pouch a great look. You need to put a think fabric as lining to make it more sturdy. See your kids happy to use this candy wrapper pouch. If you want to make it of a bigger size you can use candy bar wrappers too.
-
No-Sew Candy Wrapper Pouch: Step-by-Step Instructions
An easy to make a fun craft for kids as this does not require sewing at all. All you need is your candy wrapper, some duct tape and staplers to pin the zipper to the pouch.
-
Candy Wrapper Coin Clutch DIY
-
Ways to Make Candy Wrapper Wallet with Duct Tape
-
How to Make Candy Bar Wrapper Purse
-
Candy Wrapper Purse Pattern
-
Candy Wrapper Hand Bag Purse: Instructions
All you need is lots of candy/gum wrappers and some clear duct tape to make this fun craft.
-
Zig Zag Candy Wrapper Purse Video Tutorial
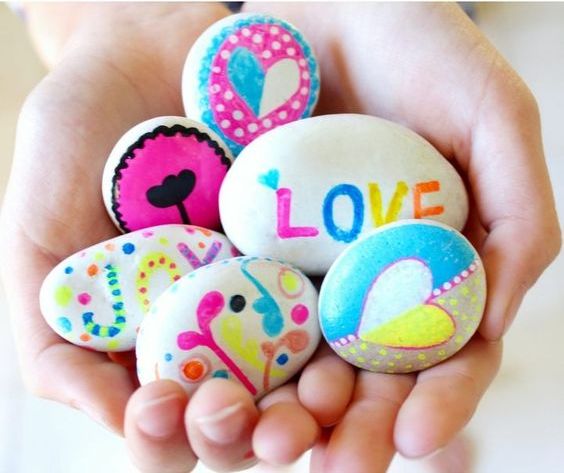
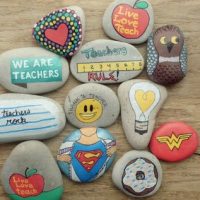
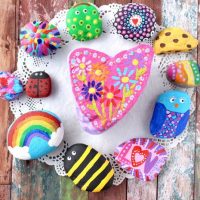
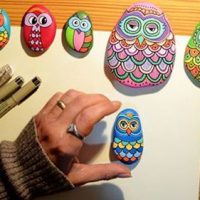
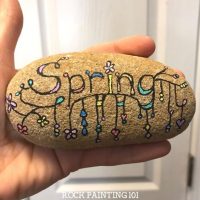
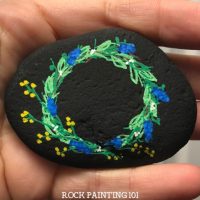
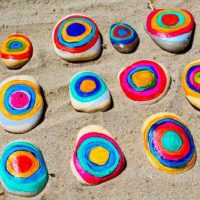
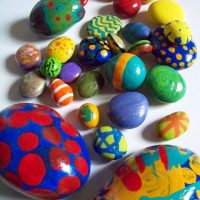
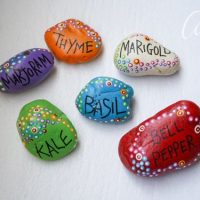
Turning plain rocks, stones, and pebbles into stunning works of art is always an exciting craft! Rock painting is super fun activity with kids and with spring right around the corner, we just had to join the excitement! Rock painting continues to be a popular trend. It’s fun and relaxing to make little works of art on this tiny, natural canvases. Wondering how to make beautifully painted rocks? Scroll down for a great collection of painted rock designs and patterns. You can use acrylic paint, spray paints or water paints.
Easy Rock Painting Craft Ideas for Kids
Scroll below the huge collection of easy-peasy rock painting ideas for kids and pre-schoolers. From funny images to inspirational ones we have it all for you in one place! Just click on the image to go to the tutorials!
Fun Rock Painting Tutorials for Beginners
Explore the free rock painting DIY Ideas to make interesting stone art! From animals to cute cartoon characters, your creativity has no limits.
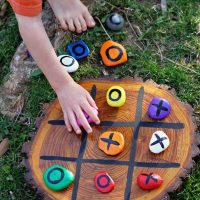
- Tic Tac Toe Painted Rocks
- Easy Rock Painting Ideas
Inspirational Rock Painting Patterns for Children
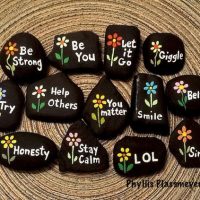
These rocks are painted with random inspirational and peace messages. Inspired by the Kindness Rocks Project! You can pick rocks of various sizes and spray paint them with bright vibrant colors.
- Rock Painting Ideas
- Inspirational Rock Painting Ideas
- Free Rock Painting Ideas
Cute Rock Painting Crafts for Kids
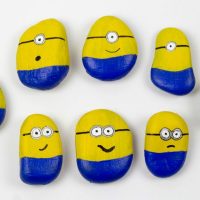
Kids will love to paint and pick out their pet cactus rock for this easy craft project! Minions and owl painted rocks are also quite popular these days. Try your creativity and make unique patterns!
- Cute Cactus Rock Painting Ideas
- Minions Painted Rocks
- Owl Rock Painting for Beginners
Cool Rock Painting Ideas For Seasons
Rock Painting Ideas & Designs for Summer
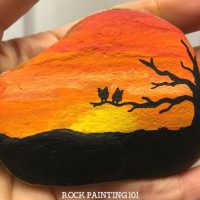
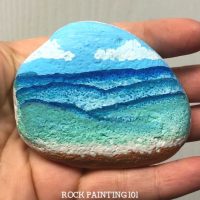
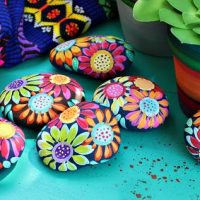
Painting rock outdoors is a great summer craft! You can draw flowers, beaches and other summer themes for the season and gift this to friends & family. Handprinted rocks make great decorations and gifts.
- Sunset Theme Painted Rock
- Beach Painted Rock Pattern
- Flowers Rock Painting
Rock Painting Tutorials for Spring
- Cool Rock Painting Ideas
- Spring Painted Rock Ideas
- Examples of Painted Rocks
Rock Painting Ideas for Occasions & Festivals
With holidays around the corner, keep your kids busy with some pebble painting crafts. You can color them based on a theme and make wonderful rock painted stories.
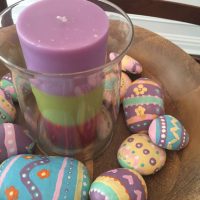
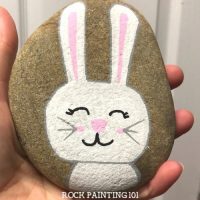
Rock Painting Patterns for Easter
- Easter Painted Rock Ideas
- Easter Rocks Painting
- Bunny Rock Painted
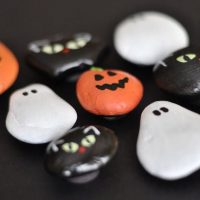
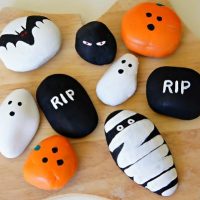
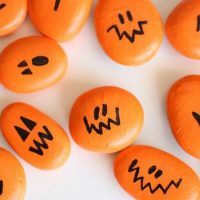
Rock Painting Ideas for Halloween
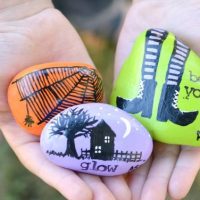
- Halloween Rock Painted
- Halloween Painted Rocks
- Pumpkin Painted Rocks
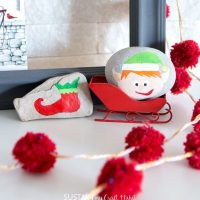
Free Rock Painting Ideas for Christmas
Its winters and Christmas is coming. Try and paint cute designs on pebbles and decorate it around your Christmas Tree. You can create snowman, snowflakes, stocking, Santa, Christmas Tree, Elf, gifts and more!!
- Christmas Rock Painting
- Rock Painting Christmas Tree
- Christmas Painted Stones
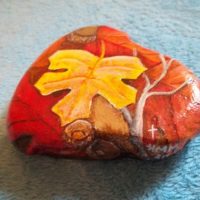
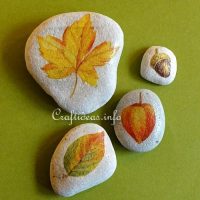
Autumn/Fall Rock Painting Ideas
- Painted Rock Leaf Autumn
- Fall Leaf Stone Painting Ideas
- Rock Painting Ideas for Fall
Animal Rock Painting Ideas
Learn how to draw and paint realistic animals on pebbles! You can turn simple rocks of all sizes into amazing artwork in some time. Try making unicorns, turtle, frogs, horse and more animals to make a collection. Kids are surely going to enjoy this!
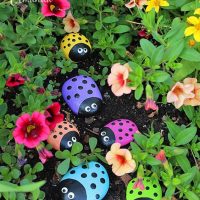
- Painted Rocks Lady Bug
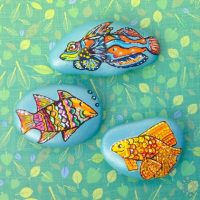
- Painted Fish Stones
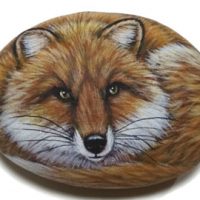
- Fox Painted Rock DIY
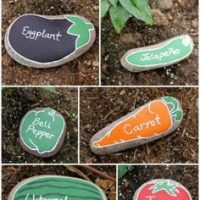
Rock Painting Ideas for Garden/Outdoors
- Vegetable Painted Rock Ideas
- Rock Painting Ideas for Garden
- Free Painted Rock Ideas
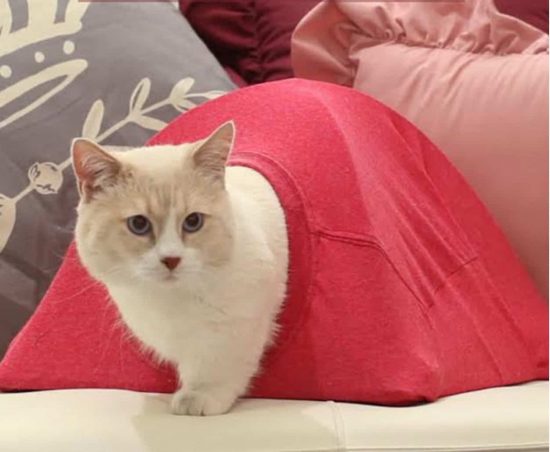
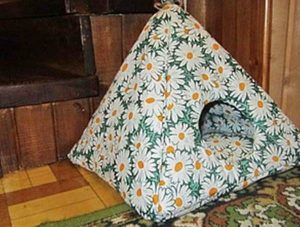
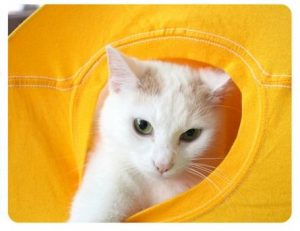
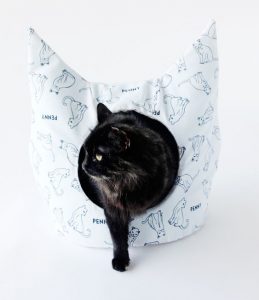
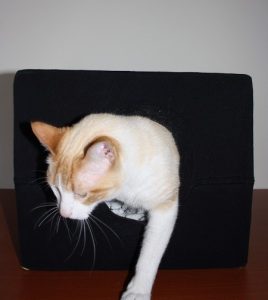
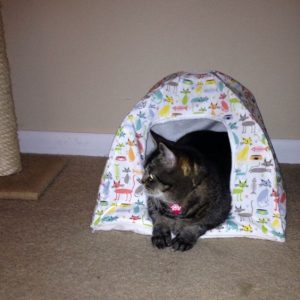
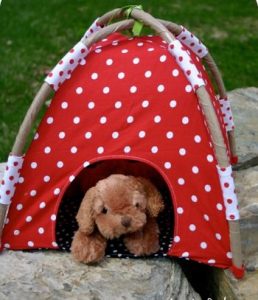
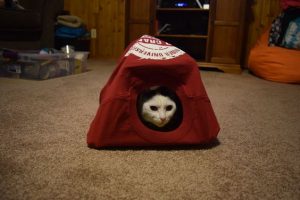
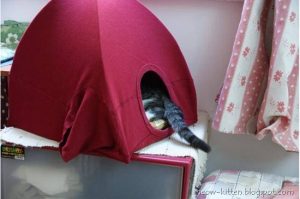
Cats love tiny, warm, dark places. But why buy a mini carpeted cat hole when you can make a cat tent with materials found around your house at most affordable prices? So if you need a DIY project for your cat, we have compiled some simple tutorials to make Cat Tents with recycled stuff like t-shirts, hangers and more.
How to Make Cool Cat Tents for Indoors & Outdoors
-
DIY Cat Tent
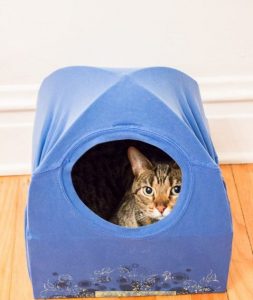
Your furry baby will love this cute cat tent as it’s new hideout. It’s easy to make and an inexpensive project using a cardboard box as a base. and an old T-shirt. They will be snug as a bug and love hiding out here. Create your own very simple kitty bed by repurposing an old coat hanger and t-shirt!
-
Cozy Cat Tent Bed Ideas
A very sweet idea for all cat lovers. All you need is some canvas, cardboard, and fabric. You can place a thin cushion at the base to provide a warm bedding for your kitty.
-
Pop-Up Cat Tent
Use your old cotton shirt to create a comfortable and fun tent for your lovely cat. This tent project needs you to apply your simple sewing skills.
Pic Credit goes to Flynnside Out Productions.
-
Easy Cat Tent for Indoors
Make your furry friends happy with this handmade cute cat tents. They will love to crawl in and enjoy their time and relax. They will love this colorful hiding place to sneak in.
-
Patterned Mini Cat Tent
-
How to Make Cat Tents without Hangers
This is a quick DIY cat house that only takes 5 minutes to make using an old t-shirt and a cardboard box. Your cat will love to spend time in her privacy tent.
-
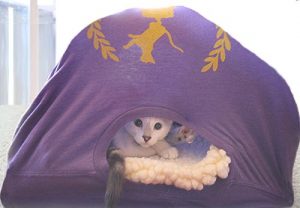
DIY T-Shirt Cat Tent (Portable)
Cats love boxes, so use your old litter box and tee and wire coat hangers to make an amazing tent for your kitty. You can involve kids in the fun craft.
-
No-Sew Cat Camping Tent
Give this no-sew simple tutorial a shot when out for camping with your pet kitty. They will surely love to snuggle in this warm private enclosure.
-
Making a Tent for Your Cat
We are sure your kitty would love playing in the tents made by you. You can add some toys to keep your cats busy in the tents.
-
Tents for Cats to Play In
You can alter the size of the tent if you have a big cat. You can make a big tent to accommodate your pet comfortably.
-
Cute Cat Tent Pattern Instructions
-
Sew a Mini-Cat Tent
Build an adorable habitat for your loved cat and make them happy with their new shelter for your feline friend. You can choose personalized prints and colors for your furry friend.
-
Cat Litter Tent for Outdoors
Small towels or blankets as a base will also work to make the tent more warm and comfy.
-
Cat Tent DIY Video
This super simple DIY cat tent is fun to make and even more, fun to watch your cat enjoy – high fives all around!
-
Recycled Old Tshirt into Cat Tent
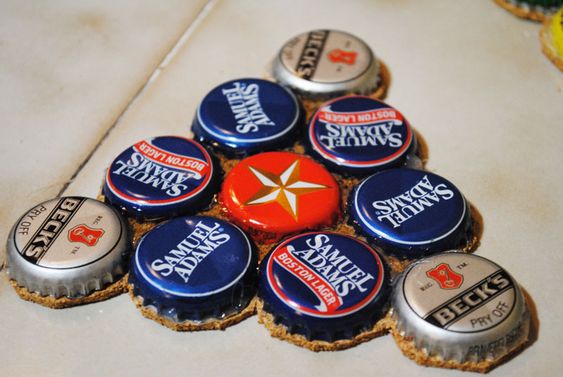
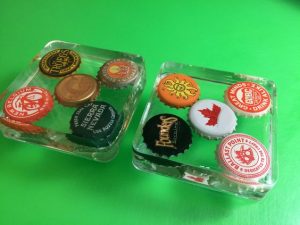
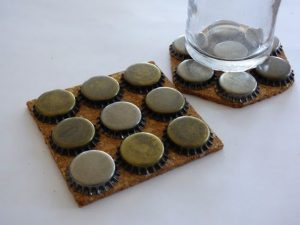
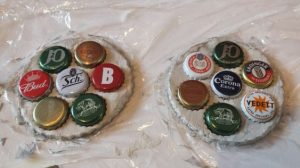
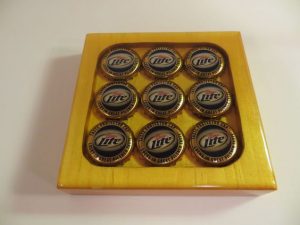
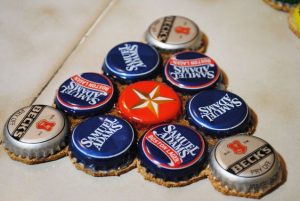
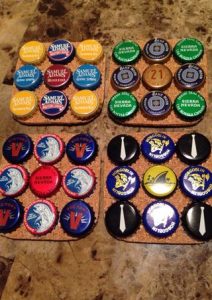
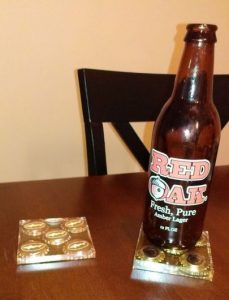
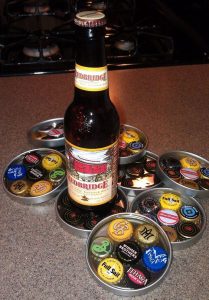
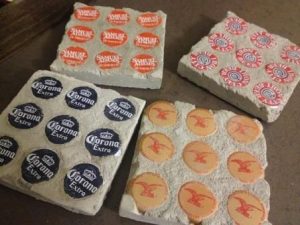
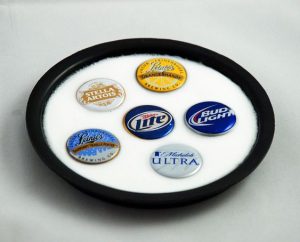
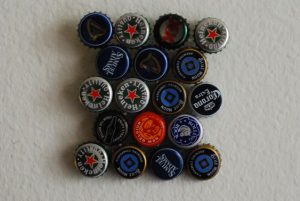
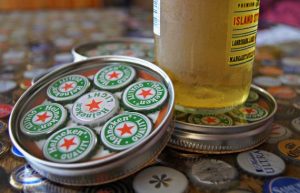
Bottle cap coasters are sturdy and are perfect for protecting your wooden furniture from heat and stains. They are inexpensive and a great recycling project to put your old discarded bottle caps in use. You can use cardboard sheets, cork board, resin, molds, concrete etc, as your base and glue on the caps using a hot glue gun. Explore the different ways of making creative coasters from bottle caps.
You May Also Like ~ “Cool Bottle Cap Keychain Ideas“
How to Make Bottle Cap Coasters with Step-by-Step Instructions
-
Bottle Cap Coasters Tutorial
Get inspired to use your old beer caps and make cool coasters for your tabletop! You can gift these to your dad on occasions around the year.
-
How to Make Coasters from Beer Bottle Caps
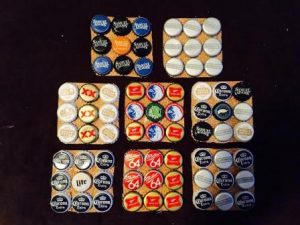
You can cut the cork board in different shapes and stick your bottle caps on them. You can customize the caps as per your preference. Paint it or put a print on it to make it quirky!
-
DIY Beer Cap Coasters with Clay Base
If you want a durable coaster, you can try making one with a clay base. Select your bottle caps and press them gently into your clay coaster. You can color the clay and give it funky look.
-
Beer Cap Coasters with Wood Project
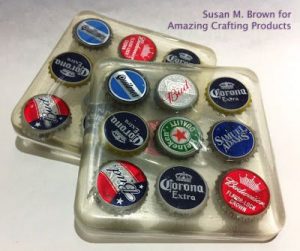
This tutorial shows you how to make decorative bottle cap coasters with pine board an epoxy resin (liquid glass) coating. These make great gifts and beautiful home decorations, especially for a bar or a lounge!
-
Instructions to Make Beer Bottle Cap Coasters
-
Making Bottle Cap Coaster with Cork Board
Use caps with interesting prints to make unique coaster designs. You can use all of the same type or different colors to add an element to the coaster.
You May Also Like ~ “Wine Cork Coaster Making Ideas“
-
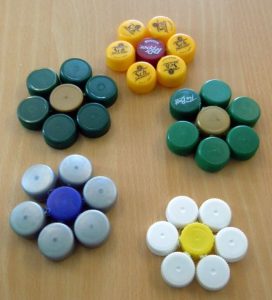
DIY Plastic Bottle Cap Coasters
An easy to make a craft with old waste cold drink bottle caps. Kids can easily collect these plastic caps and make amazing shapes like a flower, square and more takes simple coasters.
-
Bottle Cap Coaster Fabric Covered Craft
-
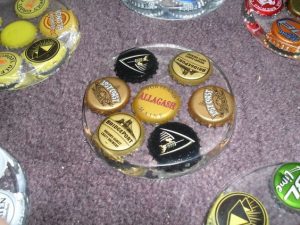
Homemade Beer Bottle Cap Coaster with Resin
Resin coasters are an amazing craft for the holidays with recycled beer bottle caps. Time to use your old bottle caps to make new coasters for the festive season. You can make colorful coasters with different caps.
-
How to Make Bottle Cap Coasters with Epoxy Resin
All you need is silicon soap mold, Epoxy cast resin and your stack of old beer bottle caps to make your memories frozen in time. An inexpensive and easy to make craft idea!
-
Easy Mason Jar Lid Bottle Cap Coaster
-
DIY Bottle Cap Coasters on Concrete
-
Make Your Own Beer Bottle Cap Coaster at Home
-
Directions to Make: Bottle Cap Coasters (SolidWorkds and 3D)
-
Ideas to Make Coasters Using Beer Bottle Caps
-
Metal Coasters using Bottle Caps
-
Bottle Cap Coasters Mason Jar
Once done, try making interesting bottle cap crafts like bottle cap earrings, bottle cap keychain, necklaces and more. A fun craft for kids and adults!

