Author Archives: Rhea
Many knitters and crocheters have heated discussions on which craft is better. Today we would like to shine some light on the differences between knitting and crocheting and let you know what we think about this difficult question. We’ll talk about the main differences, the advantages of each and then let you decide which you’d prefer.
Knitters pride
Knitting vs. Crocheting – Let’s talk about the differences
First of all, let’s have a look at the differences between these two amazing crafts.
For crocheting you only use one crochet hook at the time and you are creating a fabric by threading the yarn through one life stitch. This life stitch remains on your hook and is the only stitch that you have to take care of whilst crocheting.
Crocheting is therefore easier to learn in regards of coordination, but it can be harder to learn in regards to the differences in stitches as there are so many different types that you can make. If you make a mistake when crocheting you will easily be able to undo a stitch without losing all of your previous work.
When knitting, you will be working with two needles at the same time. This requires some hand coordination and for many beginners, this seems to be the more difficult craft initially.
When knitting you are making a fabric by threading the yarn through the loops that you have on your left needle and transferring them to the right needle. These life stitches need to stay on the needles, and that’s what makes knitting initially a bit harder to learn than crocheting.
Losing a stitch can sometimes end in a catastrophe, especially when you are just starting out with knitting. It is always great if you have an experienced knitter to help as they will be able to fix a dropped stitch in no time.
The Advantages of Crocheting
- Easy to change shaping
- Easy to learn
- Only one needle needed
- Huge range of patterns (especially for small projects)
- It is quicker
When crocheting you will be able to change the shaping very easily and therefore you are very flexible in regards to personal preference in sizing and fit. You will be able to make certain parts of your crocheted sweater bigger or smaller than described in the pattern without having to learn a lot of new techniques.
Crocheting is very great for making toys as there are an incredible amount of crochet patterns out there. But you aren’t limited to toys. You will be able to make blankets, garments and practically anything else that you can think of with crochet.
For crocheting you only need one hook at the time and you don’t have to think about different kind of hooks (unless you decide to go more advanced and you want to try out different kind of crochet styles, but we leave that for another day).
We recommend to start your crocheting career with a good beginner set to avoid any frustration.
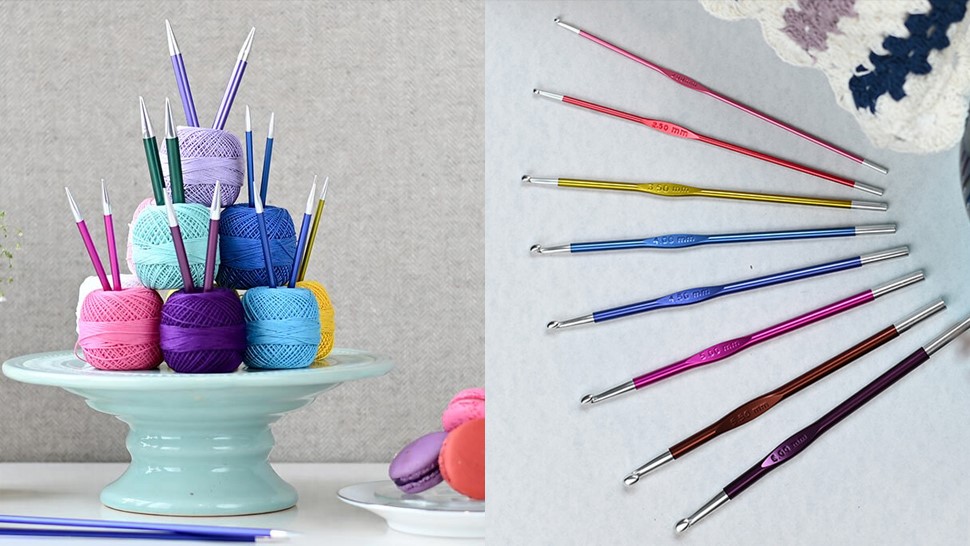
A really great set is the Waves set by knitterspride. It includes 9 different crochet hook sizes that will cover you for most yarn weights. The metal hook tips make them super easy to work with whilst the soft grips will be easy on your hands (especially if you are just starting to crochet. This is because most beginners tend to grip the needle too tight).
Knitting Vs Crochet
The Advantages of Knitting
- You use less yarn
- Make small, medium or large projects
- A good way to learn many different techniques
- Variety of styles (circular or flat knitting)
- Literally thousands of patterns
- If you can think it, you can knit it!
Knitting can sometimes be slightly slower, but that obviously varies with experience. One thing is for sure.
You will be spending less money knitting as it takes less yarn to produce the same size of fabric compared to crocheting.
Similar to crocheting you will be able to make anything you can think of with knitting. You might find that making small toys is a bit more fiddley with knitting as you will have to use a lot of different techniques to achieve the same shaping as with crocheting.
For knitting you will need a good pair of knitting needles and you might find that it is a bit harder to choose the style of needle for your first project.
You will either need a pair of straight needles or a circular needle in the required size, depending whether you will be knitting flat or in the round.
If you want to be very flexible and able to tackle any kind of project, we would recommend the Symfonie Deluxe Interchangeable Circular Needle set by knitterspride.

Wooden Knitting Needles
These wooden needles are great for beginners as the yarn slides less, meaning no dropped stitches! With the Symfonie Deluxe set you will receive 8 interchangeable pairs of needles in the most commonly used sizes.
Conclusion
Let’s be honest, we wouldn’t be able to bring this heated conversation to an end. But we are convinced that both knitting and crocheting have their place.
You might still ask yourself, which is better? Well, the only answer to it is to try it out and decide for yourself. And we promise, both are amazing hobbies to become hooked on!
Wondering how to turn your old wine bottles into adorable painted centerpieces? We have rounded up the best ideas about how to paint wine bottles, painted wine bottles DIY, tutorials, designs, patterns with complete instructions to guide you.
If you have an excess of empty wine bottles after throwing a dinner party and it just seems like just a waste to even recycle them. These interesting crafts ideas make beautiful decorations for a romantic night in, or heart-felt custom gifts for your special someone!
What paint to use on wine bottles
You can use different paints to paint wine bottles. From spray paints to chalk paint to acrylic, pretty much anything that isn’t watercolors or too thin works.
Painted Wine Bottles With How-To’s and Tutorials
-
Wine Bottle Painting Ideas
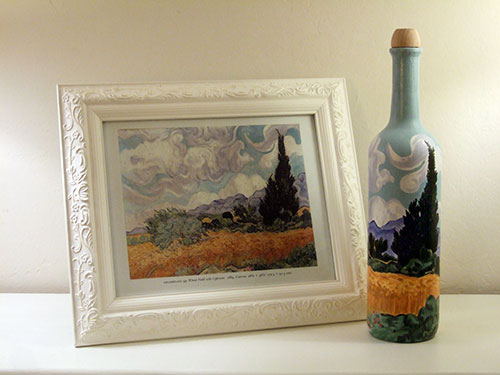
This artistic piece will be a great gift for your friends and relatives who have an eye for art. Making this mesmerizing DIY is quite easy is easy for beginners too.

Painted Wine Bottles
-
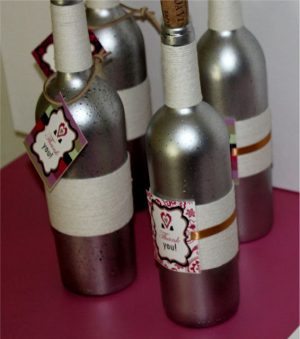
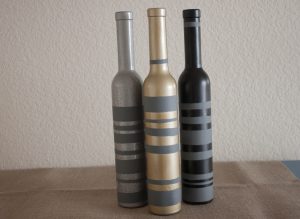
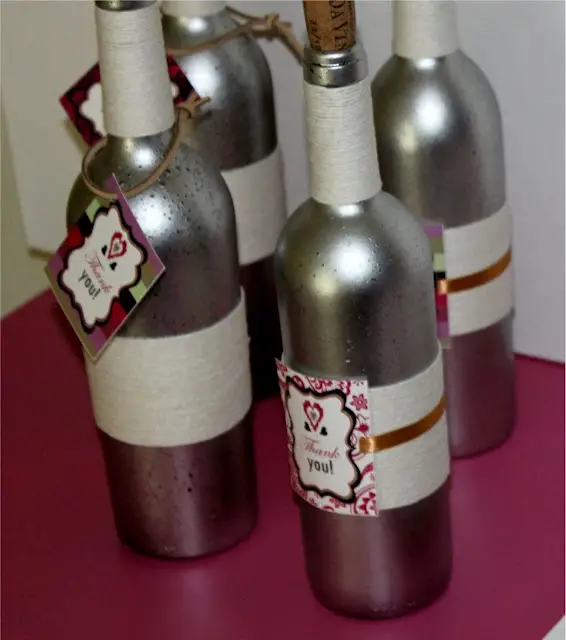
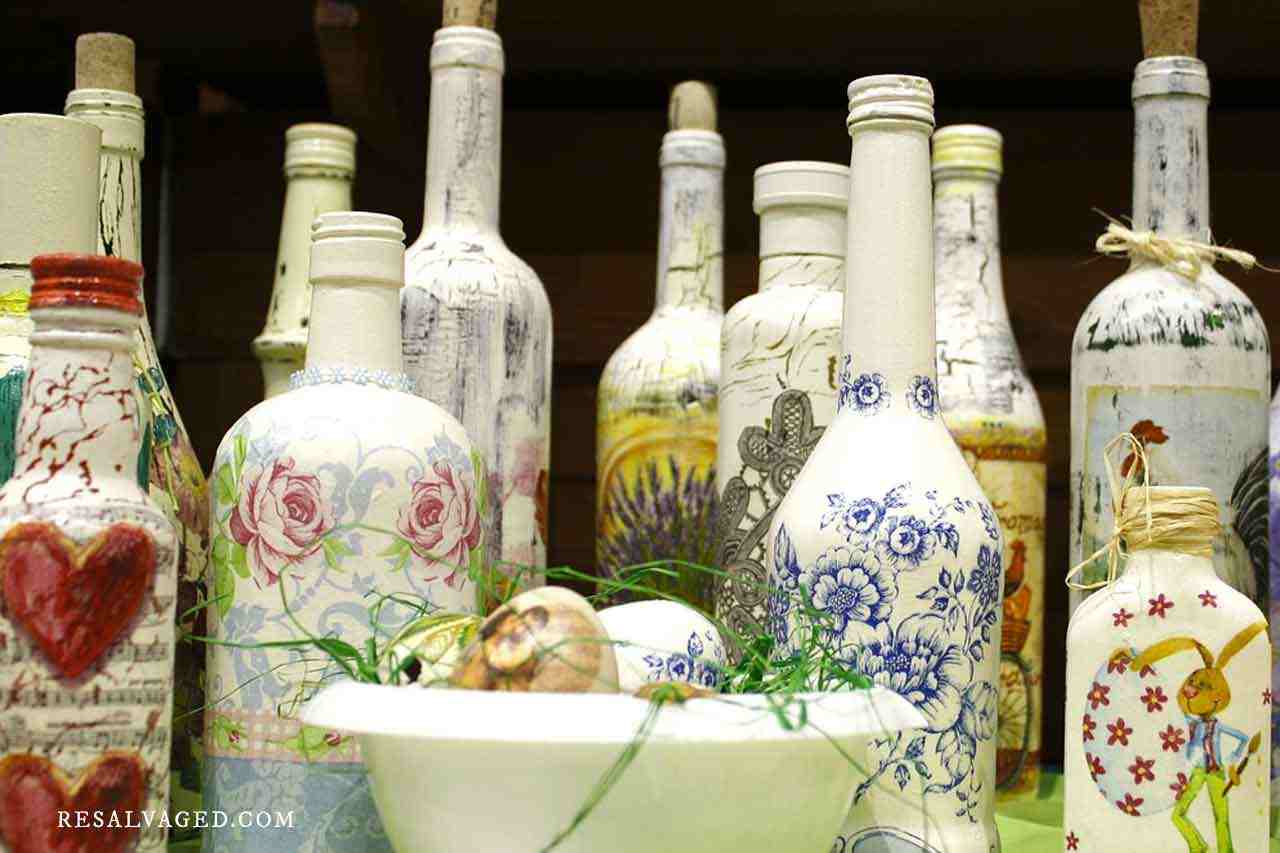
Vintage Metallic Painted Wine Bottles
You can easily transform old wine bottles into catchy conversation centerpieces! You can add a personal touch to it by writing warm and welcoming messages for your guests. All your need is some metallic spray paint and twine to make these stylish designs. Add some glitter or ribbons to beautify it.
How To Paint Wine Bottles
-
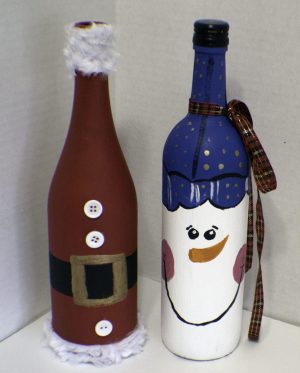
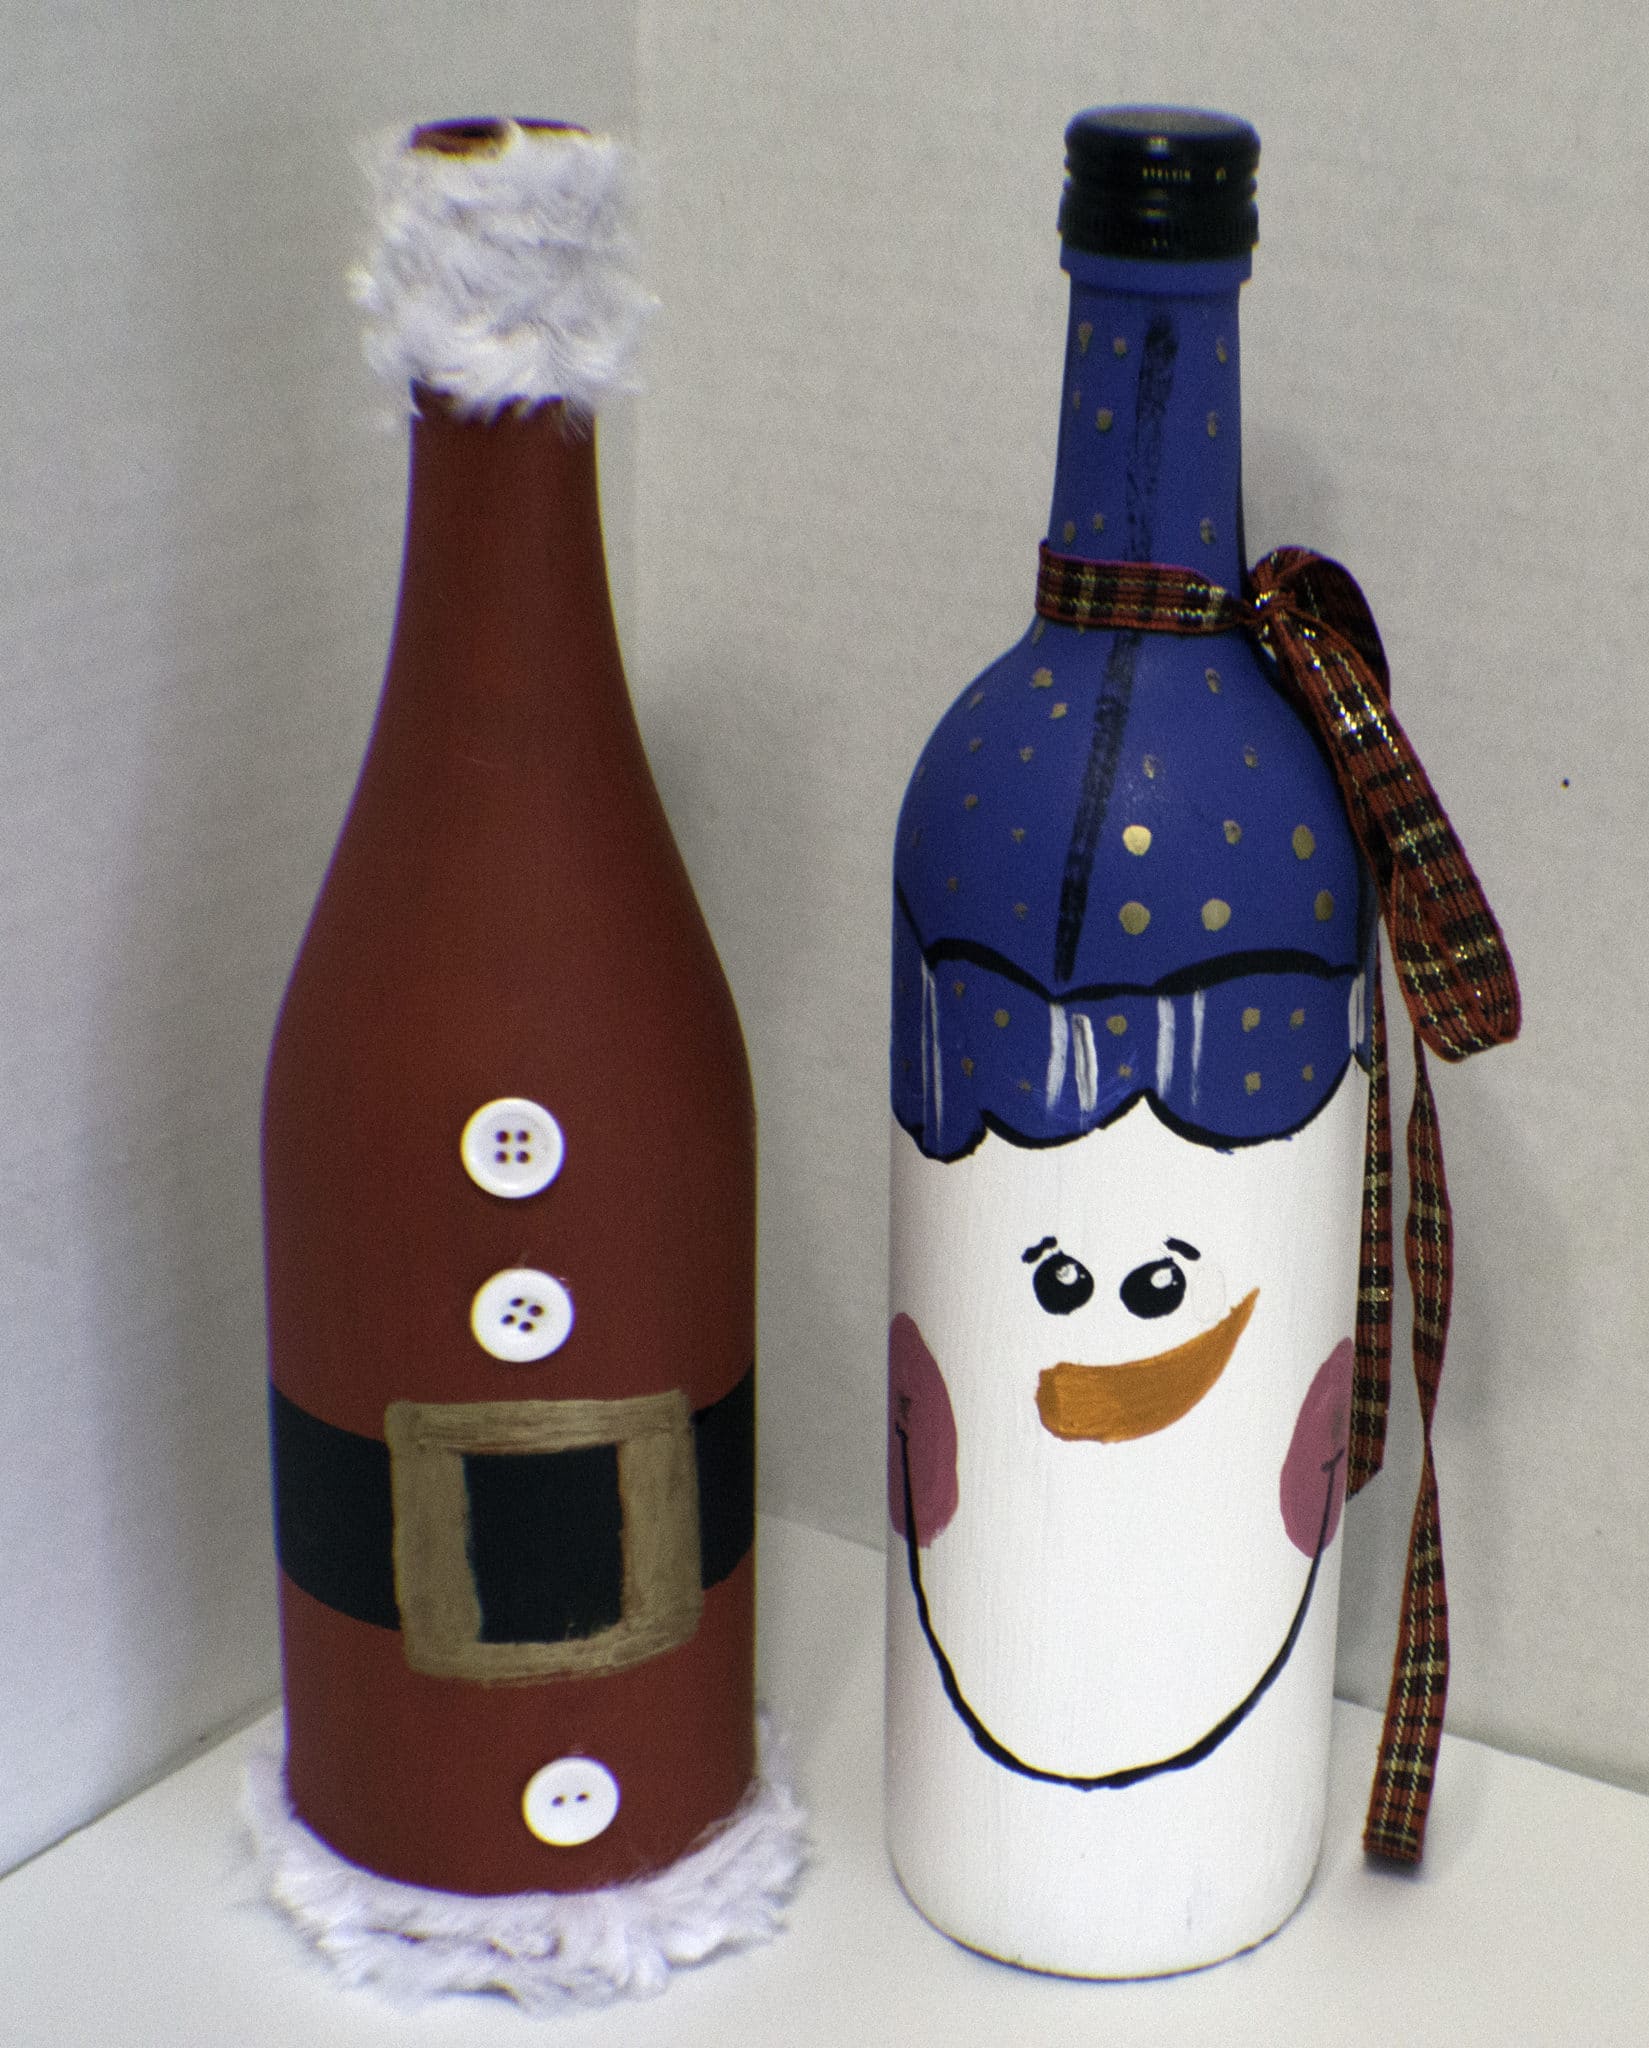
Paint Holiday Wine Bottles
Decorating empty wine bottles in the holiday season is a fun holiday craft idea which can easily involve your kids too. The linked tutorial shows you step-by-step how to paint the snowman with acrylic paint. Adding some sprinkles, glitters and ribbon will add a very creative element to the whole theme.
Wine Bottle Painting Ideas
-
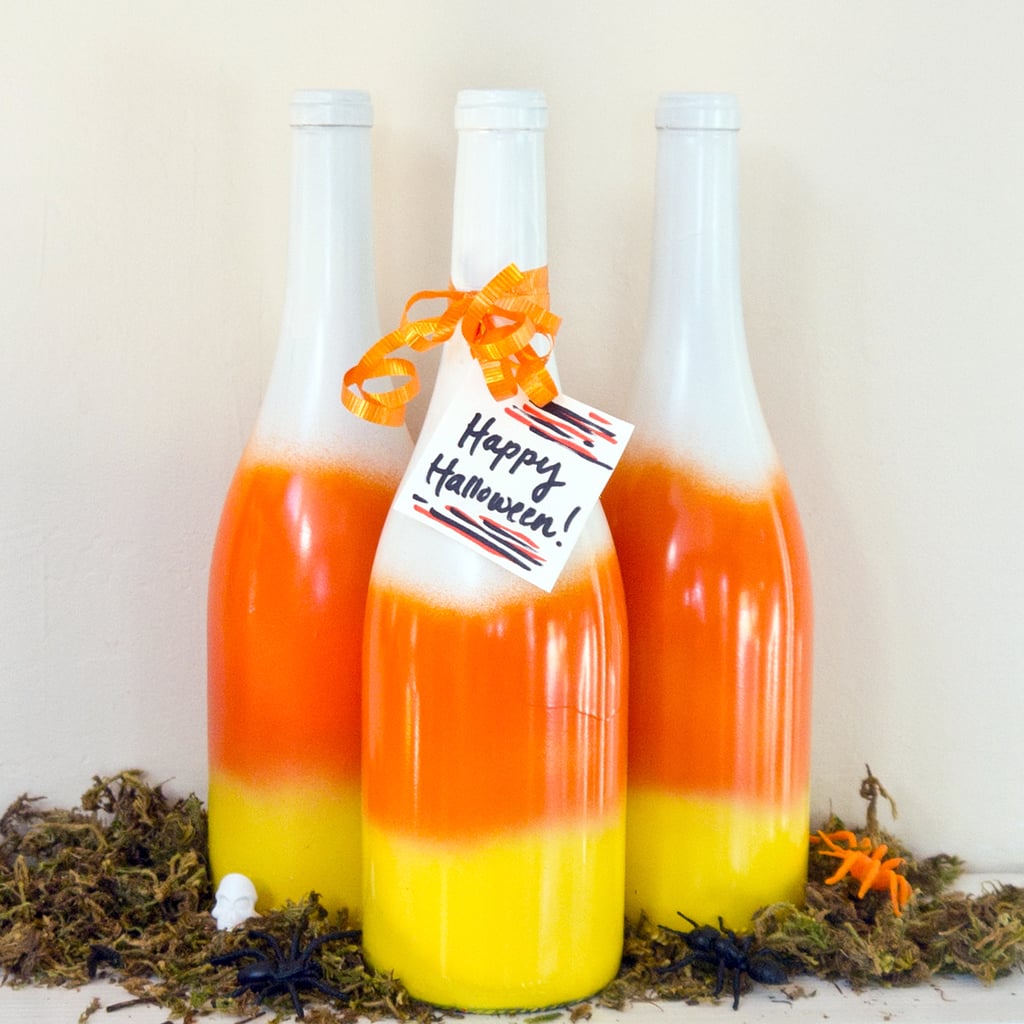
DIY Candy Corn Painted Wine Bottles (Spray paint)
Be a little creative this Halloween and make an impression with a candy corn painted wine bottle. The Ombre effect makes a cute impression. Add a cute, spooky message on the neck of the bottle with a ribbon and gift it to your friends and family.

DIY Painted Wine Bottles
-
Spray Painted Wine Bottles DIY
If you have stacked some empty wine bottles, time to paint them and turn them into beautiful vases. Once you have cleared the stickers off the glass bottle, spray paint them as done in the linked tutorial and decorate your wine bottles. These painted wine bottles are easy to make and can be used as handmade centerpieces, vases, and more.
Gold Painted Wine Bottles
-
Chalk-Board Painted Wine Bottles
Learn how to create this quirky DIY wine bottle art. This can be used as a great counter top or kitchen decoration, specially made for and by you!

DIY Wine Bottle Painting
-
Painted Wine Bottles Designs
This linked tutorial provides the complete step-by-step instructions and also a free template to guide you how to paint your wine bottle. This project involves painting the wine bottle from within and then giving the finishing effect from out.
Hand Painted Wine Bottles
-
Paint Wine Bottles Tutorials
If you have an old champagne or wine bottle which is special to you, then turn it into a beautiful keepsake and add a great element to your home décor. Adding some lace, pearls, and a charm will just add to the elegant appeal.

Glass Bottle Painting Ideas
-
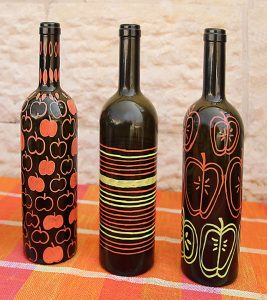
Wine Bottles Painting For The Fall
Dark wine bottles embellished with metallic markers gives it a sophisticated look. Orange and yellow paint colors really shine and make it a statement piece to welcome the Fall season. The DIY instructs you on how to paint clean wine bottles in a super easy manner for beginners too.
How To Paint Glass Bottles
-
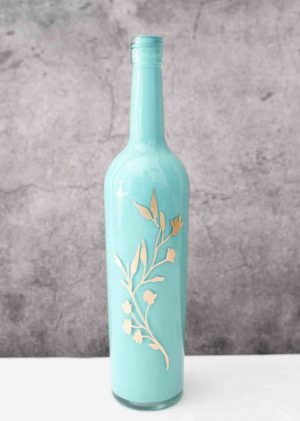
DIY Paint Wine Bottles Centerpieces
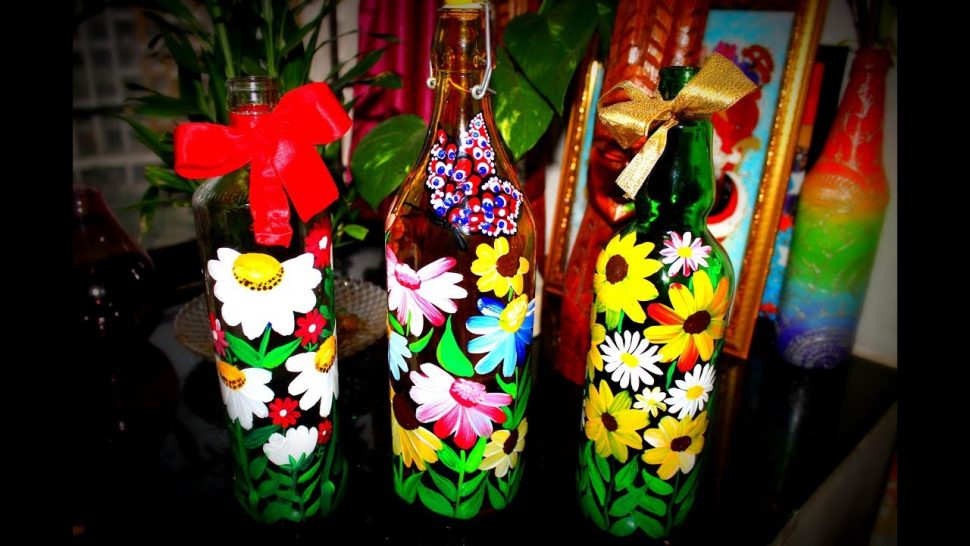
Brighten up your table-scape this season with these vibrant hand painted wine bottles. Display beautiful flowers and welcome spring with a burst of amazing colors. These upcycled bottles also make great wedding centerpieces.

Paint Wine Bottles
-
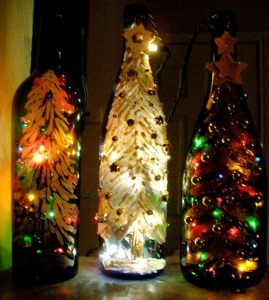
Painted Wine Bottles For Christmas
Make a visual impact this holiday season with some painted bottles and embellishing them with lights. This winter-themed wine bottles make a perfect lamp and is an adorable piece to decorate your side table and make a cozy corner.
Painted Wine Bottles Christmas
-
Paint Wine Bottles For Halloween

Painted Wine Bottles Halloween
-
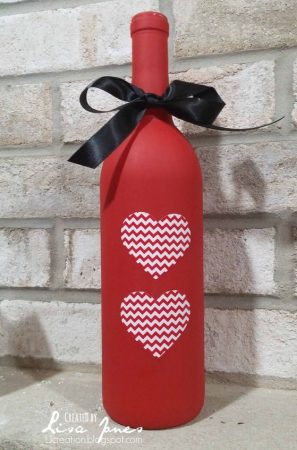
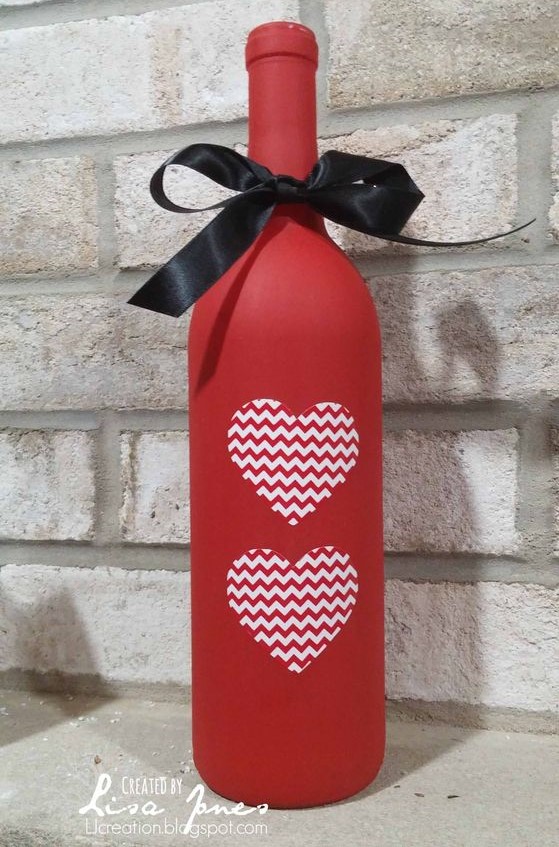
Red Painted Wine Bottle For Valentines
These wine bottles make a great gifts or a cute decoration for your home! This instructional video is perfect for giving you a basic tutorial.
Painted Wine Bottle Decoration
-
Painted Wine Bottle Ideas

Painting Wine Bottles Ideas
-
Painted Wine Bottle Decoration

Wine Bottle Painting Flowers


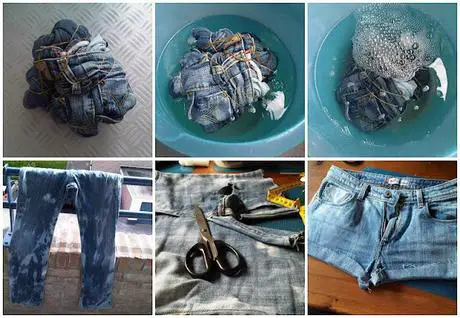
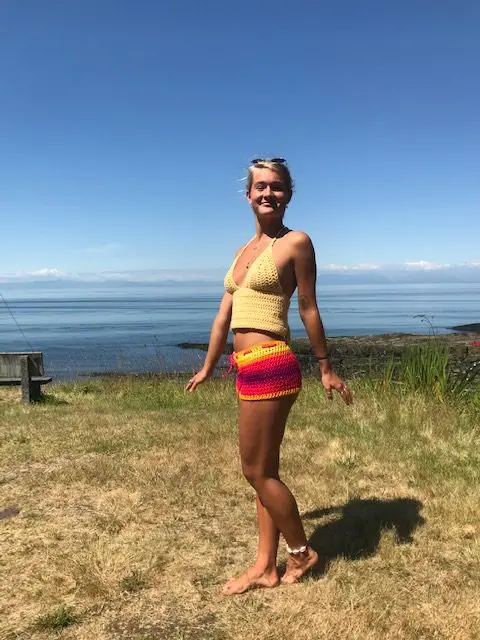
Summer is almost here and its time to sport your cool shorts look. We have rounded up some of the best collection of how to tie dye shorts, tutorials, patterns, designs, with complete step-by-step instructions to guide you.
We have a great collection of summer shorts designs with the tie dye technique that you can make yourself which will give you the perfect way to show off those tan legs this season. From rainbow effect to spirals, and watermelon designs and more there are varied designs to turn your old cotton/denim shorts into a sassy new outfit. Time to make your own tie dye shorts instead of buying one from the store.
How To Tie Dye Shorts – DIYs, Patterns, Tutorials
-
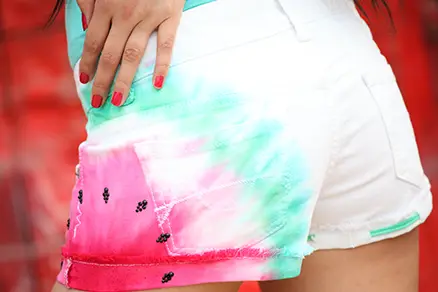
Watermelon Tie Dye Shorts Pattern
With the onset of summers if you are looking for some cool tie dye designs for your shorts, try making this watermelon motif for a fun summer look. Try this perfect look for your white denim shorts this summer!

Tie Dye Shorts DIY
-
DIY Tie Dye Shorts
If you have an old pair of shorts try attempting to DIY the tie dye technique and give it a new cooler look. A little detailing on the pockets gave it the perfect Boho look. Good way to spice up your wardrobe without spending money!
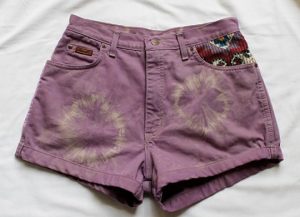
How To Tie Dye Shorts
-
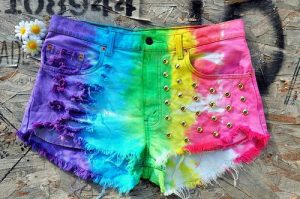
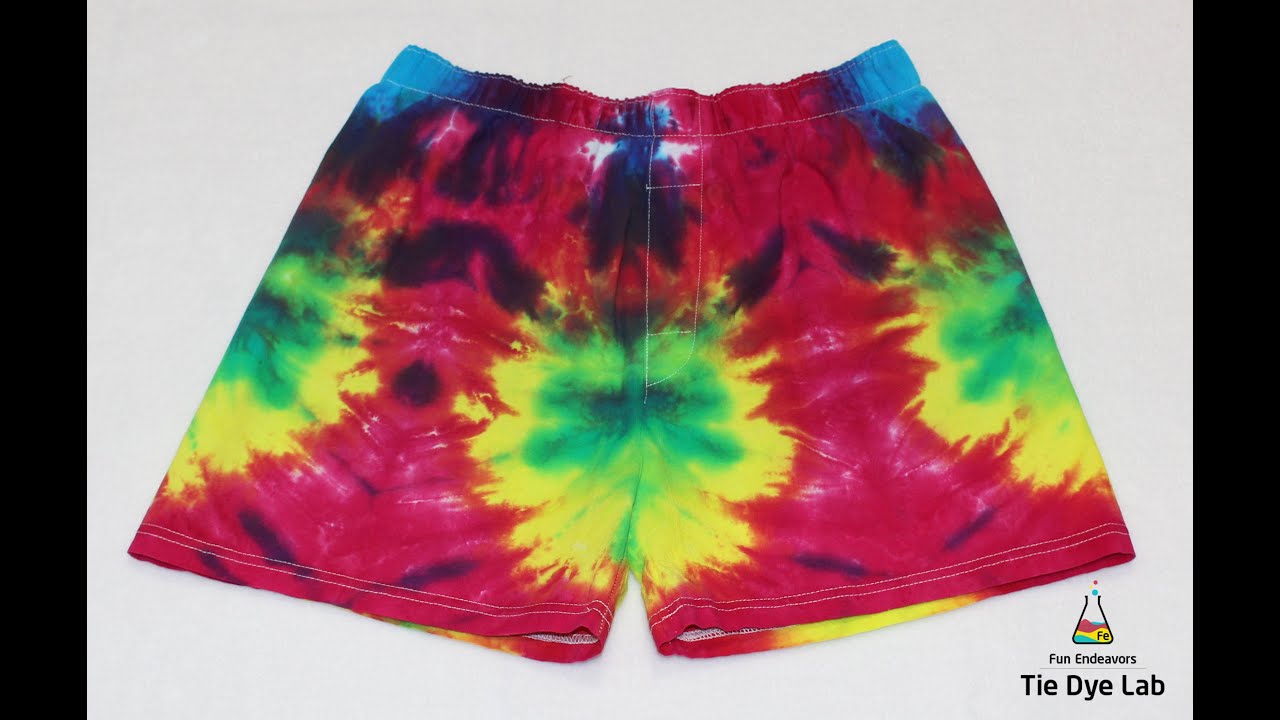
Tie Dye Rainbow Spirals Shorts Pattern
Learn how to tie and dye a rainbow spiral on the side of a pair of boxer style shorts. You can use this design for your kids short and give it up a bright look.
Tie Dye Shorts Patterns
-
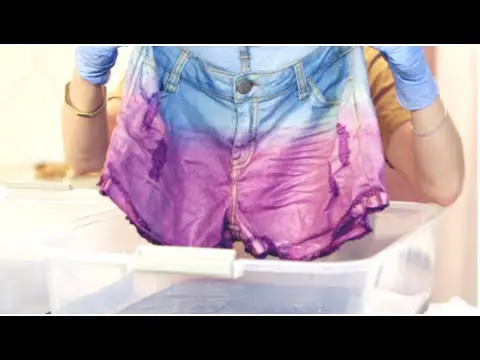
How To Ombre Tie Dye Shorts
Transform a pair of basic white cutoffs into a colorful, dip-dyed version! In just a few simple steps, you too can have a pair of bright, Summer-ready shorts with an Ombre effect— watch on to see how!

Tie Dye Shorts Designs
-
DIY Dip Dye Denim Shorts

Tie Dye Denim Shorts
-
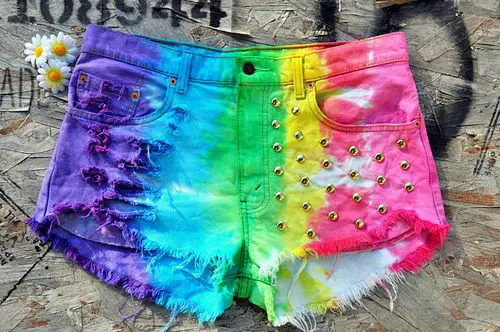
Step-by-Step Tie Dye Shorts
You use whatever colors you want and create whatever design you prefer. They are great for wearing to the beach or pool and are sure to spark attention with their bold colors. Once you have finished with your coloring, you can add embellishments to really make them stand out.
Tie Dye Shorts Tutorials
-
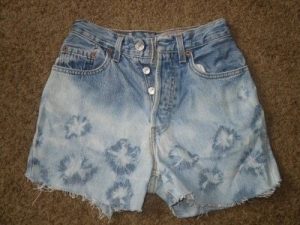
Flowery Tie Dye Shorts Pattern
This tie dyeing method is like sprinkling Hawaiian flowers all over your shorts. Its gives you a uber cool tropical look. A great DIY to turn those old jeans into beautiful shorts that you will love wearing all summer. Do remember the way you place the rubber bands will affect the design so do a few pairs and have different designs on each of them.
Tie Dye Jean Shorts
-
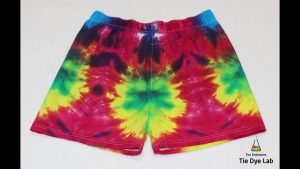
Tie Dye Shorts – Galaxy Tie Dye Technique
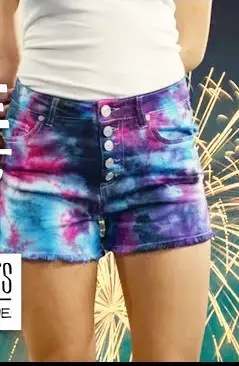
Tie Dye Shorts Techniques
-
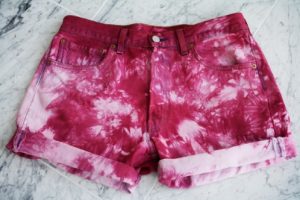
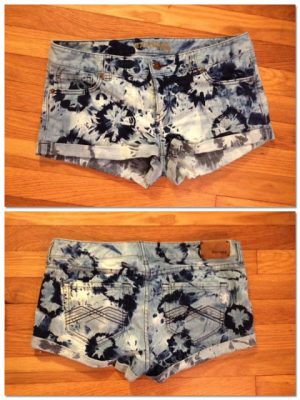
Tie Dye Shorts With Bleach
Time to grab your rubber bands and start making little nubs all over the shorts. This is where you will get what I call the “tie-dye bursts”.
Tie Dye Bleach Shorts
-
Tie Dye Bleached Shorts DIY Tutorial
Gives some old shorts a spunky makeover with the help of some colors. It’s easier than you may think, don’t be scared!
Tie Dye Shorts
-
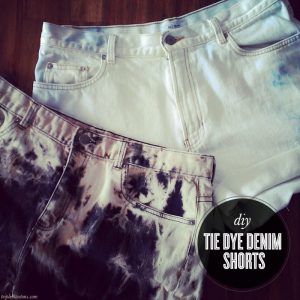
How To Tie Dye Men’s Shorts/Pants
The light blue jean color can never go out from the latest trends. Give it a new look to your old denim shorts with this technique which is quite easy for beginners too.

Tie Dye Shorts Instructions
-
DIY Tie Dye Shorts With Spiral Pattern
Tie Dye Shorts Spiral Pattern
I hope you got ample of options to give your old shorts a new look. Try using different tie-dye techniques and explore your creative side. Also don’t forget to see different ways to tie dye shirts, socks and shoes.


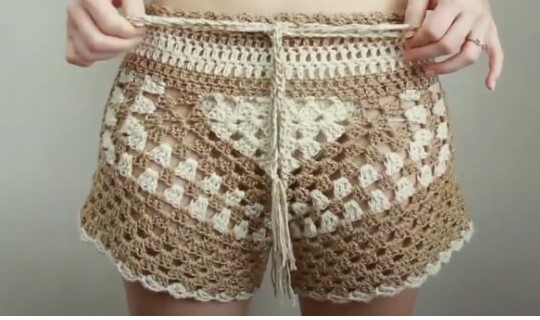
Crochet shorts are the most in thing this summer. We have rounded up the best collection of free crochet shorts pattern, tutorials, with step-by-step instructions to guide you. These tutorials are for women, girls, kids, men. Crochet short pants are the perfect outfit to pair with tops and scarf on beach on hot summer days.
How To Make Crochet Shorts: DIY Patterns and Tutorials
-
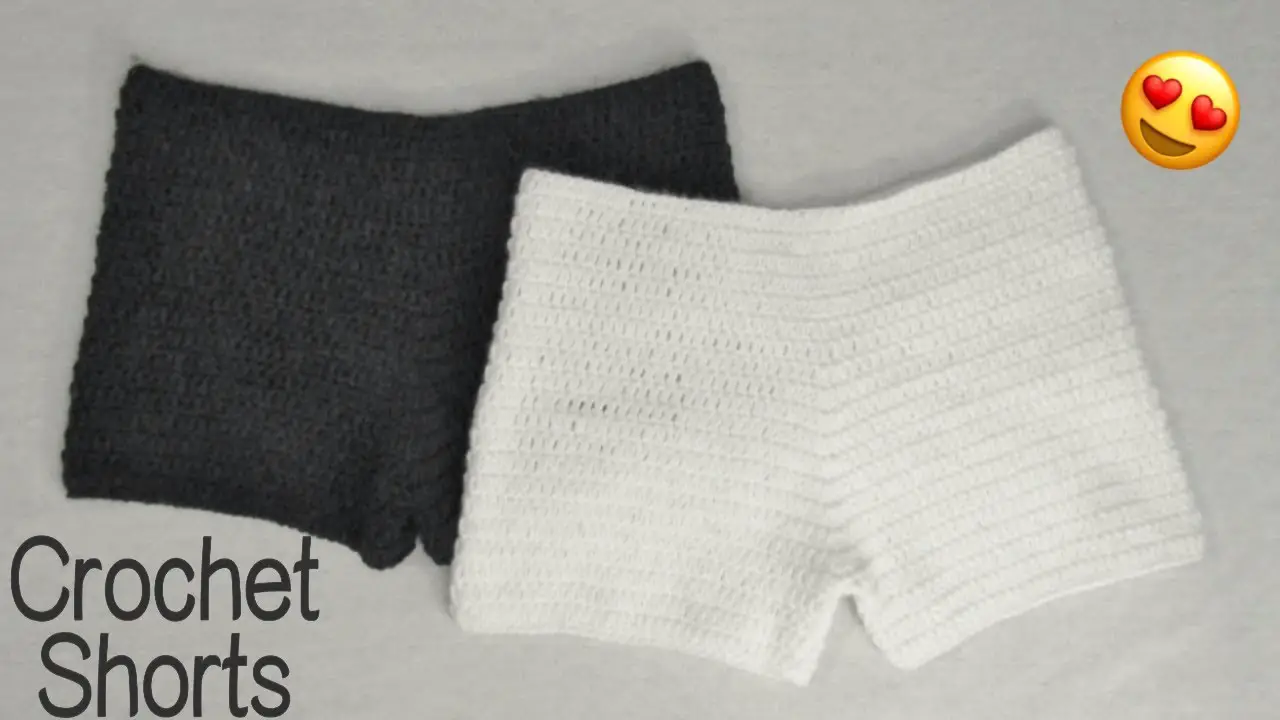
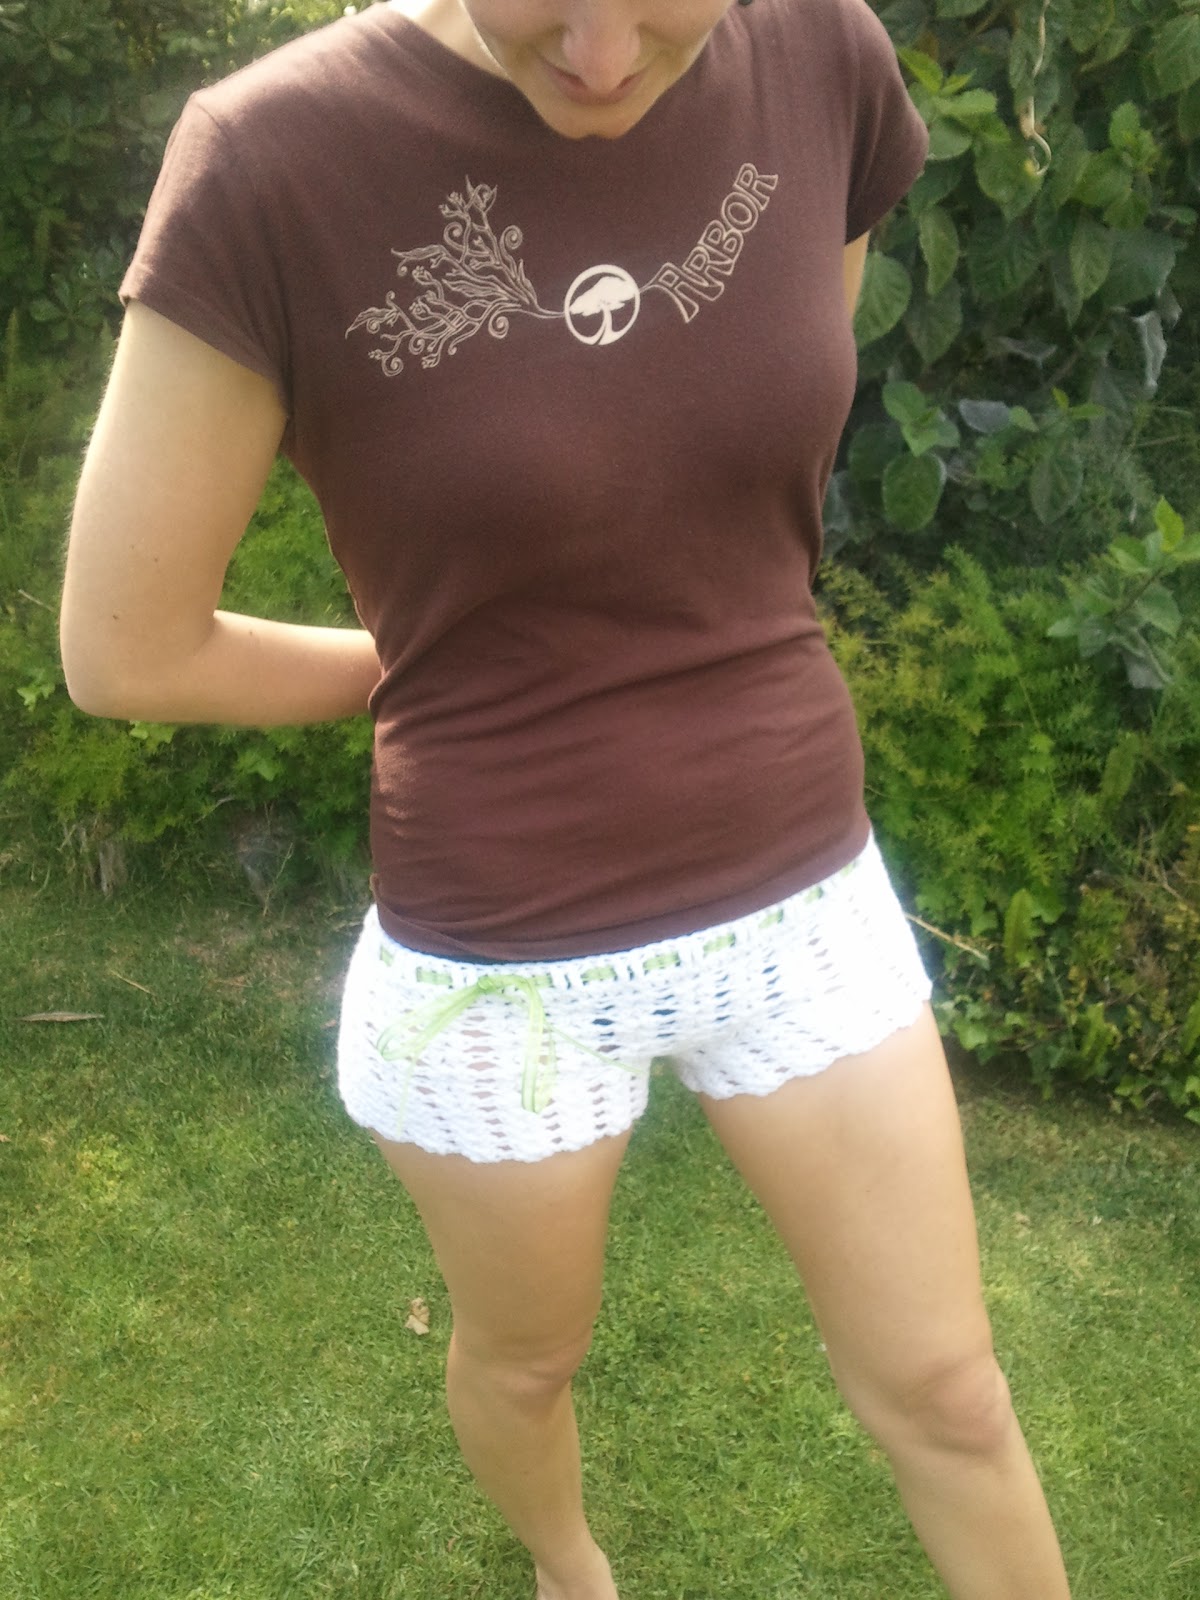
Easy Crochet Shorts Pattern
Crochet shorts are popping up all over this summer season and is a popular outfit amongst girls, kids, and women. These high-waisted crochet shorts are easy to make following some simple steps in the linked tutorial.
Consider making your own DIY crochet shorts instead of buying them from the store.
It’s usually believed that crochet shorts are only for the beach, but you can wear them at the beginning of autumn or spring also.
Free Crochet Shorts Pattern
-
How To Make Crochet Shorts (For Beginners)

How To Crochet Shorts
-
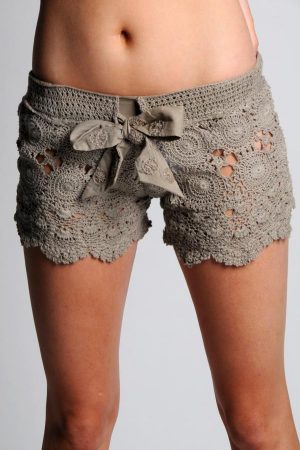
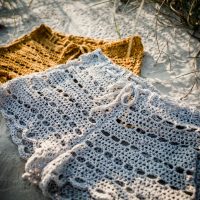
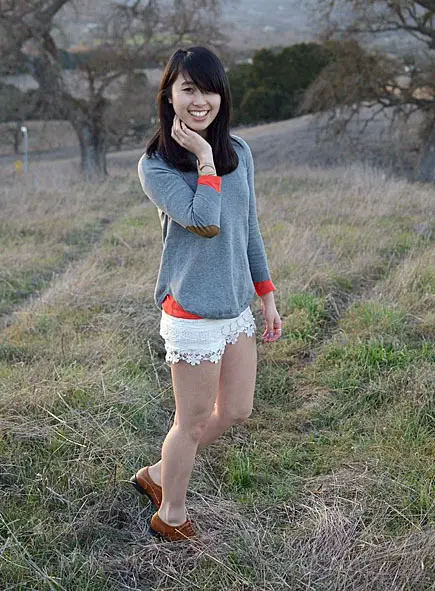
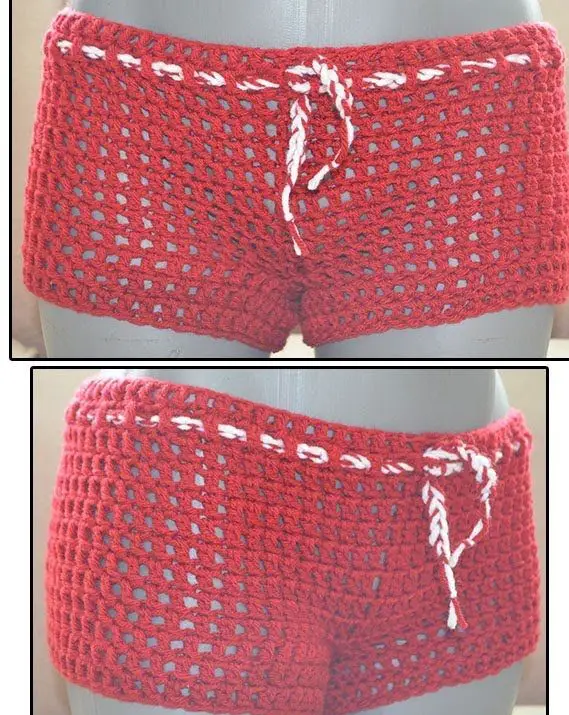
Crochet Lace Beach Shorts Pattern
This design uses pineapple crochet lace stitch (not for beginners but intermediate level). This amazing handmade shorts can be paired with a poncho or tank top on a beach on a summer day.
Crochet Shorts
-
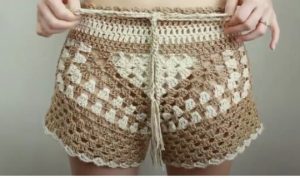
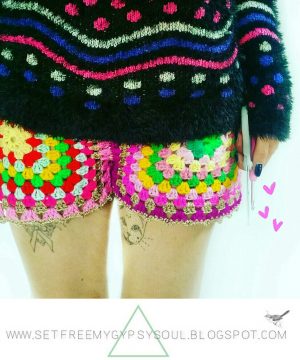
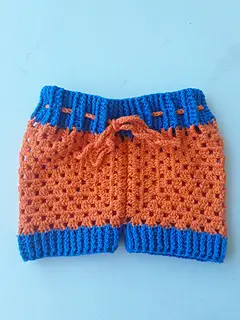
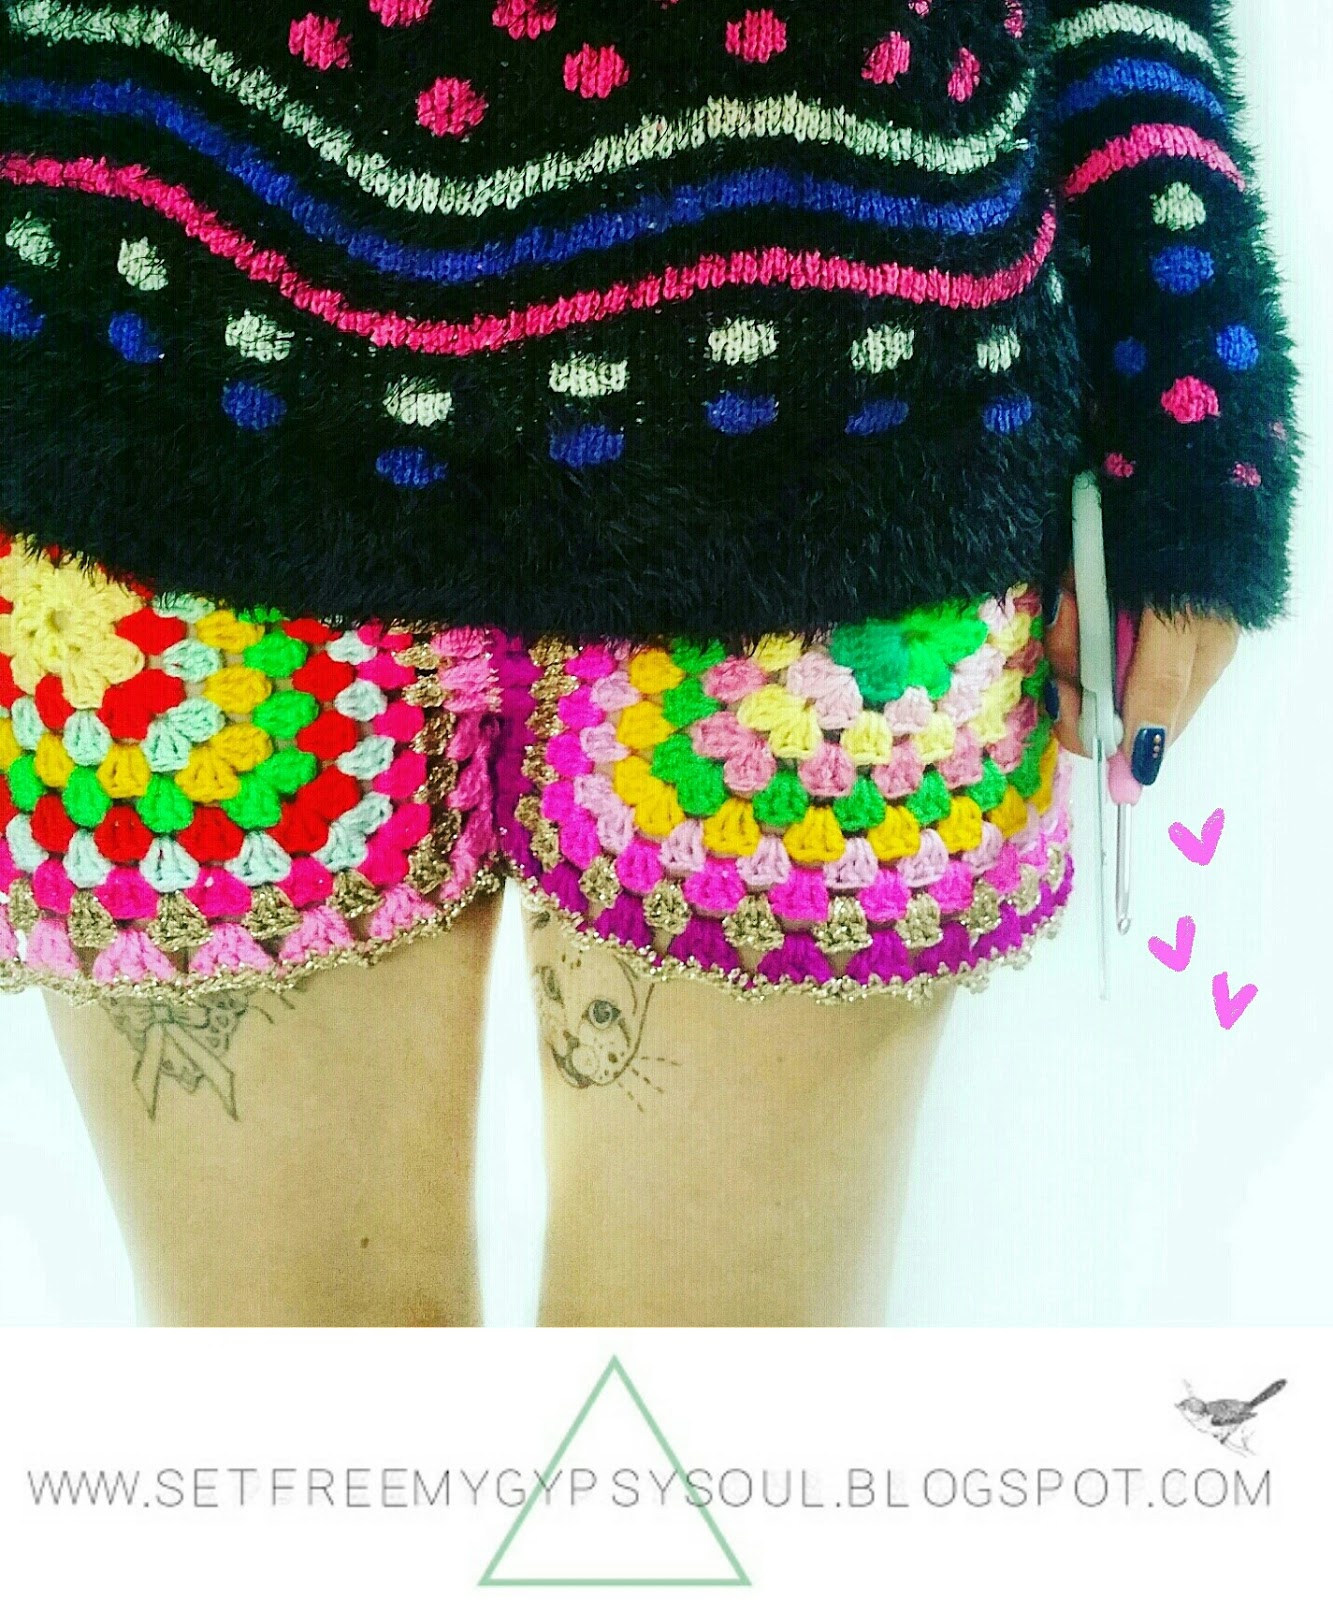
Granny Square Crochet Shorts Pattern
These granny square crochet shorts are super comfortable and cute for the summers. They are easy to make even for beginners. Feel free to choose your color of yarn for the combination of your choice. Granny square stitches never go out of style! The linked tutorial is from sfmgs.co.uk which gives you step-by-step instructions on how to crochet this pattern.
Crochet Shorts Pattern Free
-
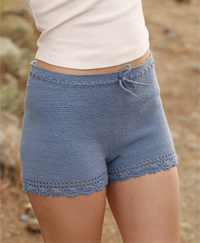
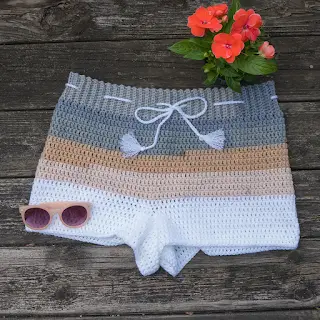
Crochet Short Pants Pattern Free
This design is a simple crochet stitch with lace trimming along the hem.
Womens Crochet Shorts Patterns
-
DIY Crochet Shorts Pattern
These days we see so many celebs are donning crochet items. So why buy them, if you can make your own crochet shorts!
Crochet Shorts Pattern
-
Fancy Crochet Shorts Tutorial

DIY Crochet Shorts
-
Make Crochet Chevron Shorts Pattern
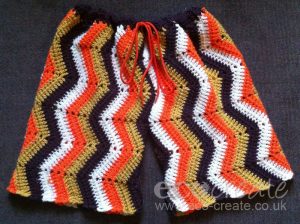
Crochet Chevron Shorts
-
Crochet Summer Beach Cover-Up Shorts
These beautiful Summer Breeze Shorts were designed by Lorene Haythorn Eppolite. This is the perfect beach cover-ups for a breezy day!
Summer Crochet Shorts
-
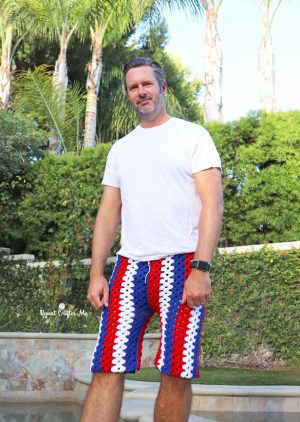
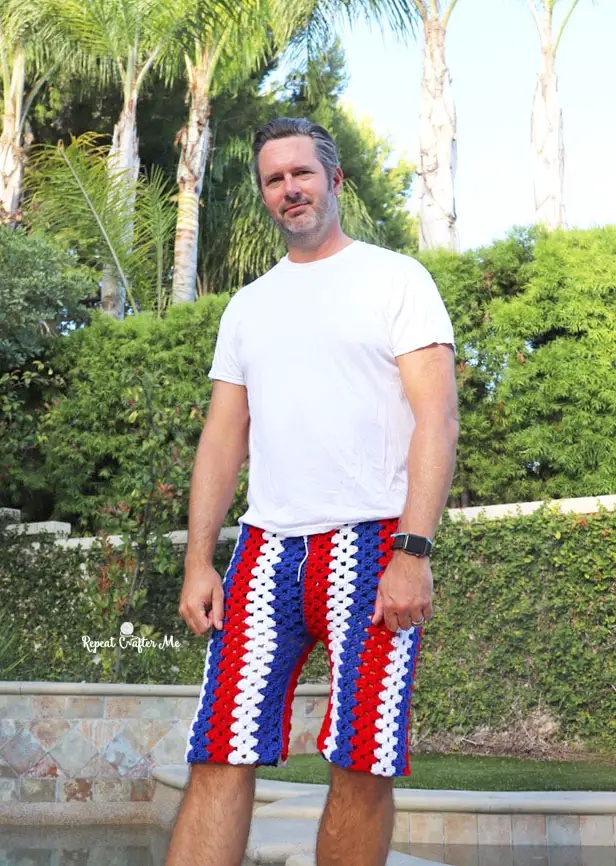
Crochet Shorts Pattern For Men
Crochet Mens Shorts Pattern
-
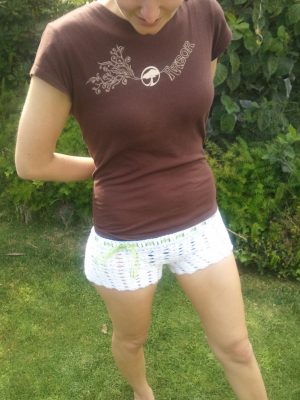
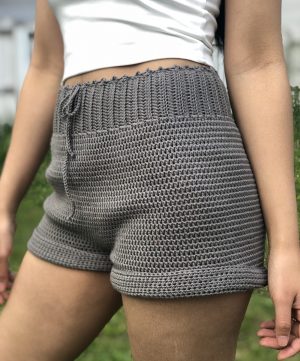
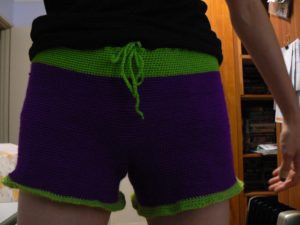
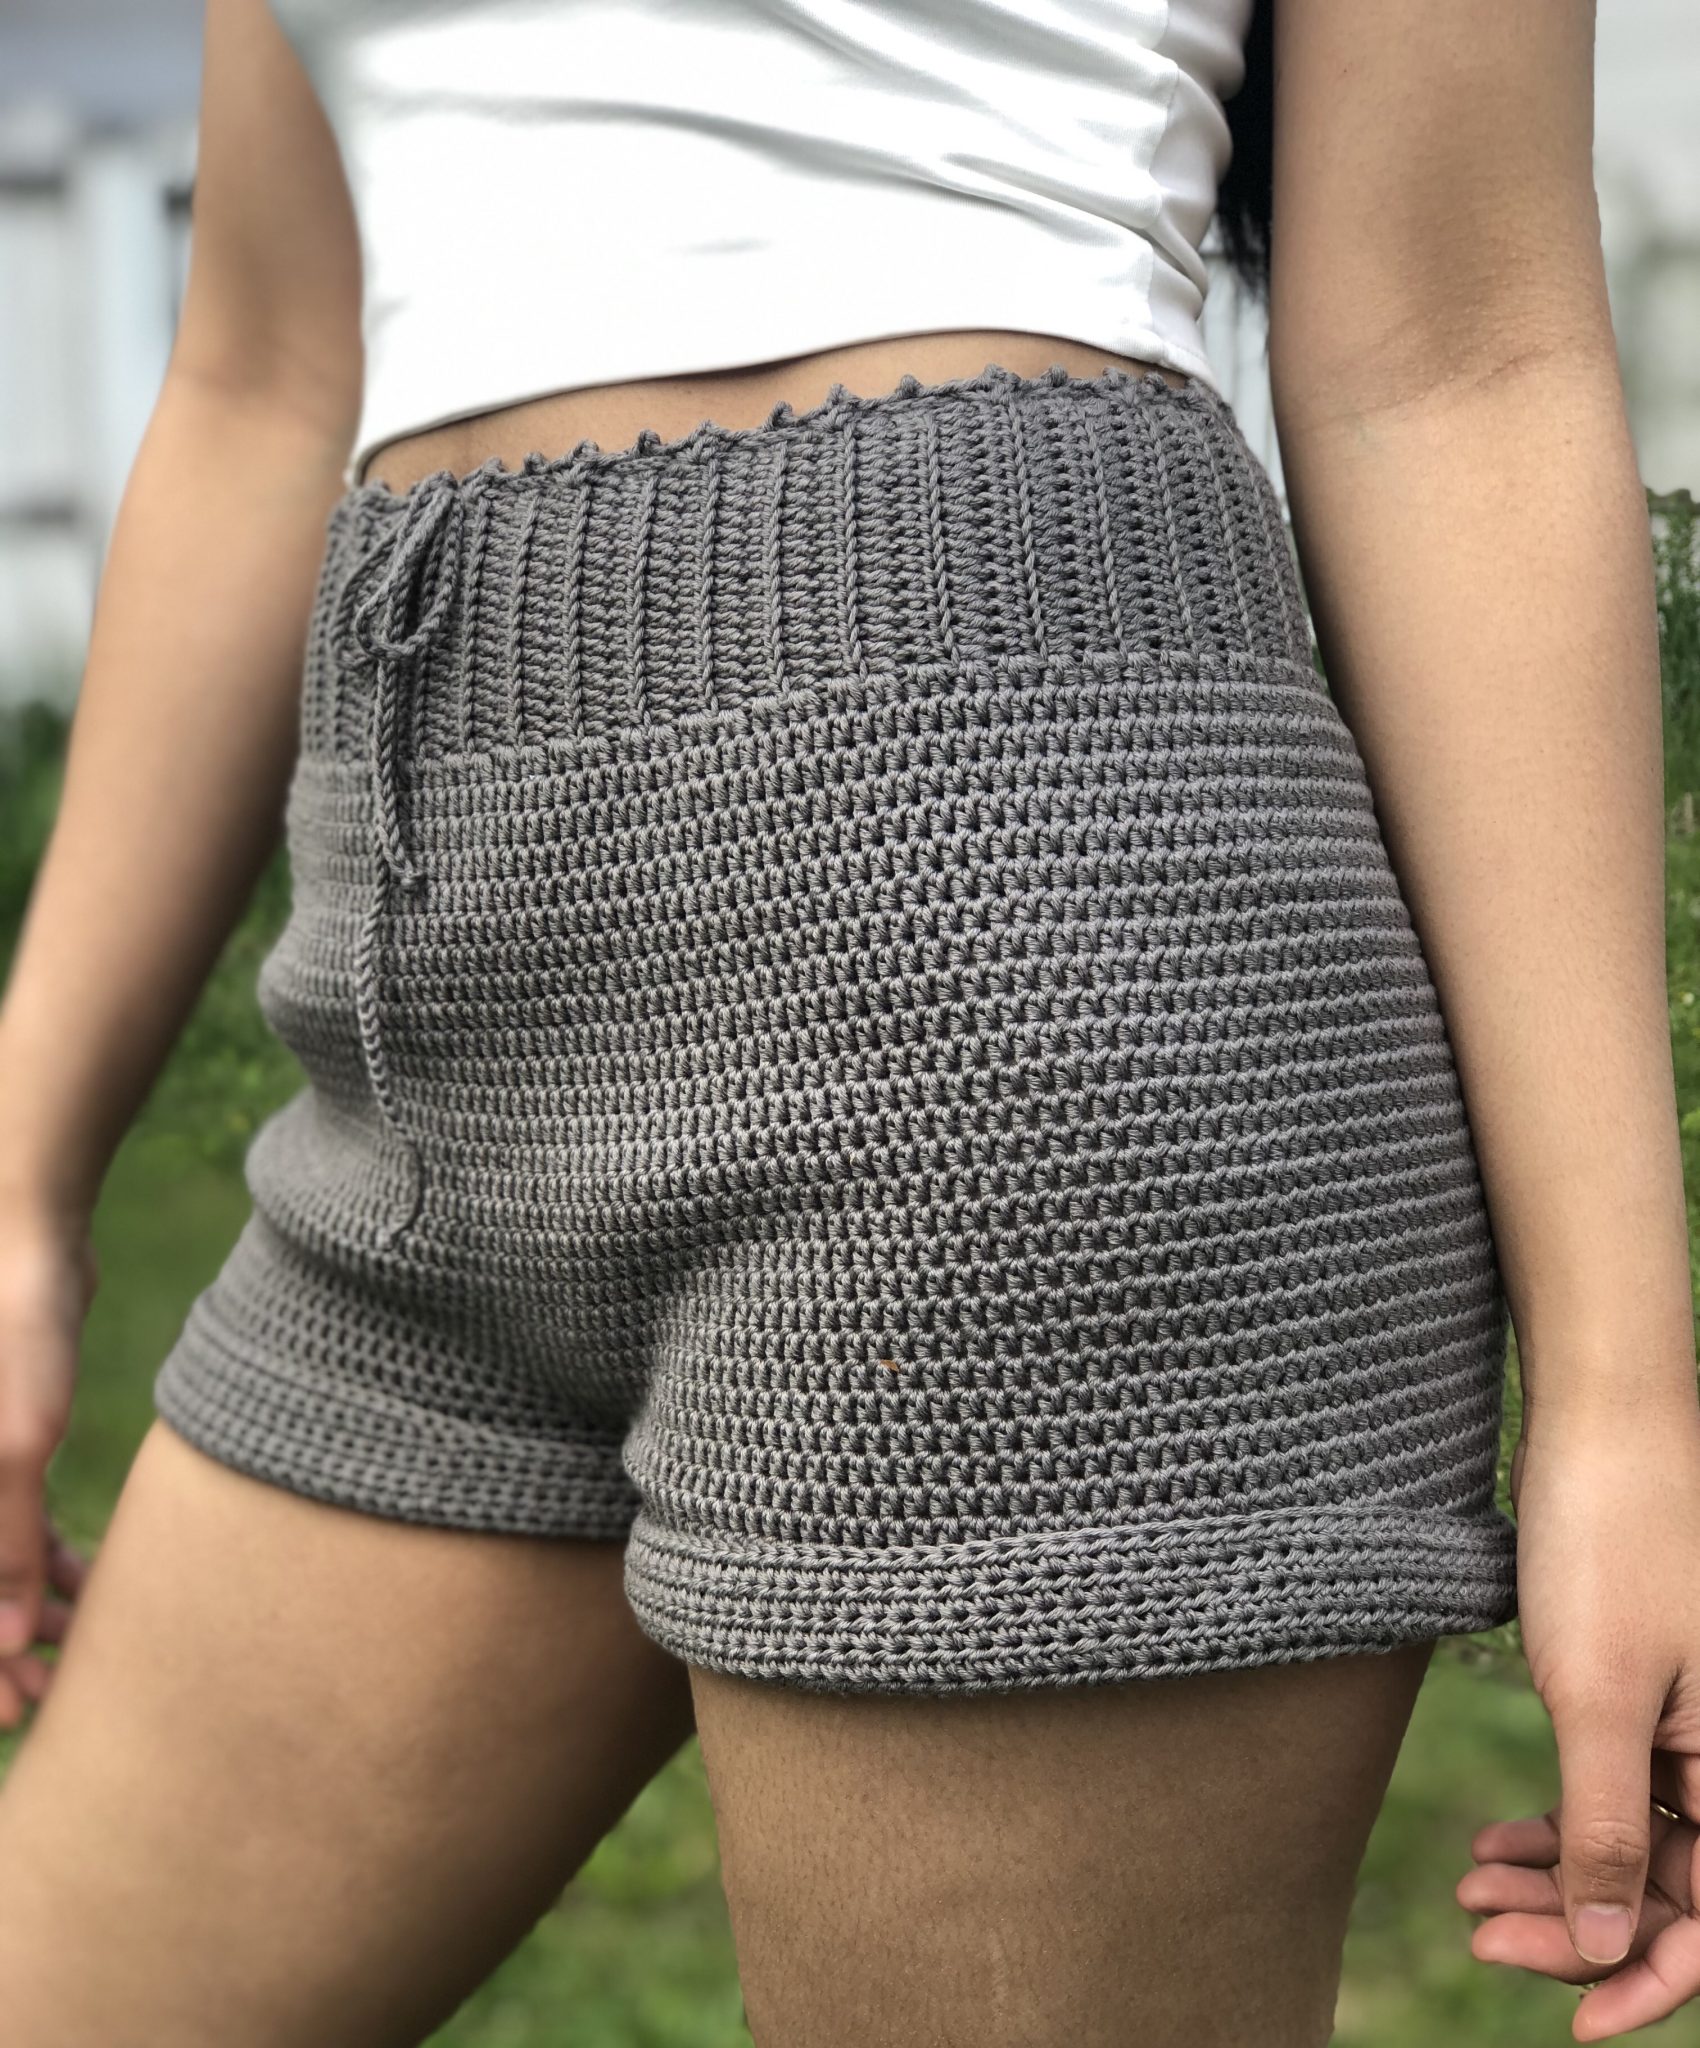
High Waisted Crochet Shorts Pattern
You can wear them as is, or you could make a pair just for over your bikini at the beach. The waist band added is adjustable and the linked tutorial has measurements for various sizes from S-XL.
Crochet Shorts Tutorial
-
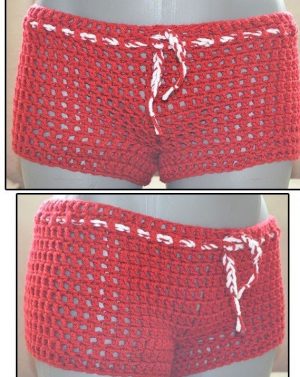
Simple Crochet Shorts Instructions
This is a super simple and quick crochet patter for Beach Shorts that you can wear over your swimsuit.
Crochet Shorts Women Pattern
-
Crochet Shorts DIY Pattern

How To Make Crochet Shorts
-
Crochet Swim Shorts Pattern
-
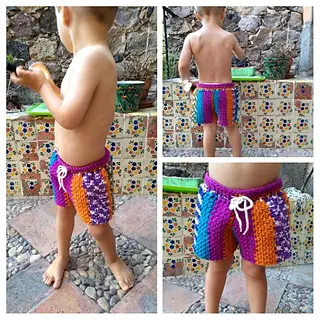
Toddlers Crochet Shorts Pattern
This linked tutorial is from Ravelry by Jess. H. Learn how to make these bright colored shorts with only simple stitches and is mostly done in grit stitch (alternating single crochet and chain stitches.)

Toddlers Crochet Shorts
-
Crochet Shorts Normas Bloomers
A pair of cool bloomers for your baby, which combines the classical granny square and a more modern rib. This pattern is the ultimate stash buster, since it is only consumes 2 skeins of cotton yarn, and you easily can make it different colors.
Crochet Shorts Patterns for Toddlers
-
Crochet Men’s Shorts (PDF Pattern Free)
Check out the pattern for a very casual and unique crocheted shorts for men. It’s an easy to follow pattern with pdf instructions and diagram.
-
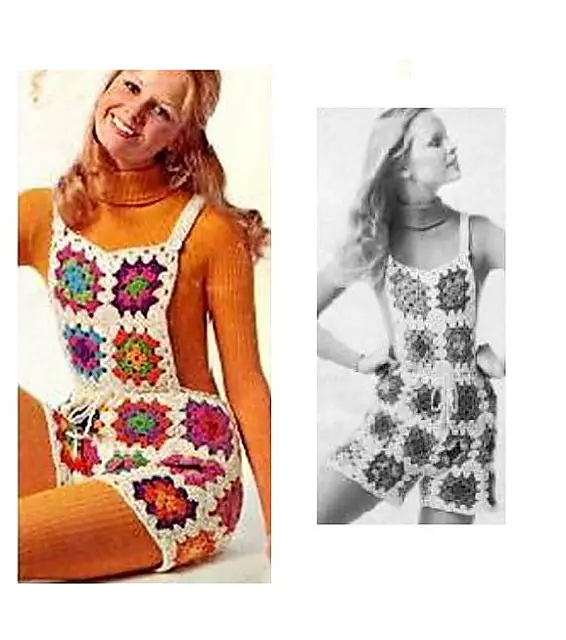
Vintage Crochet Shortalls
Granny afghan squares crocheted of knitting worsted in a variety of colors and bordered with white are sewn together for a pair of shortalls. The Waistline adjusts with a drawstring chain.

Vintage Crochet Shorts
-
The Bella B Shorts Crochet Pattern

Crochet Shorts Free Pattern
-
Crochet Shapely Shorts Free Pattern
Crochet Shapely Shorts

Wondering how to make interesting jewelry accessory using your crocheting skills? We have rounded up some of the best crochet earring patterns, tutorials, DIYs, with complete step-by-step instructions and diagrams to guide you well. Following these simple tutorials, you will have a bunch of new designs handy.
Earrings are one of the most handy accessories which girls love to wear for everyday use and special occasions. You can explore a lot of beautiful designs ranging from round, square, oval, beaded, floral patterns and more, while crocheting your pair of earrings.
All you need is some colorful yarn, crochet needles, creativity and some free time. They are a quick accessory to craft for yourself, and also serves as a thoughtful and charming gift!
How To Crochet Earring: DIY Patterns & Tutorials
-
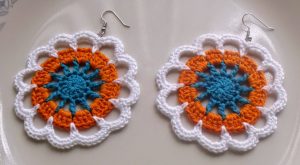
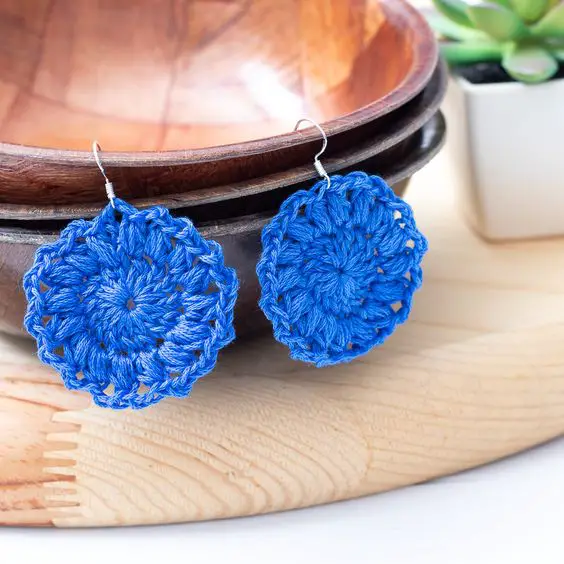
DIY Blue Crochet Sunburst Earrings Pattern
These sweet sunburst earrings have a have a Boho touch and are made using granny square stitches. The easy steps mentioned in the tutorial will help you make this pretty dangling earring in blue.

Crochet Earring Patterns
-
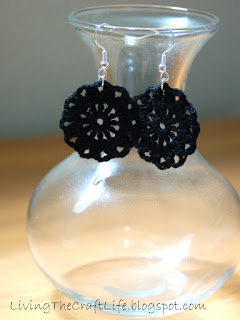
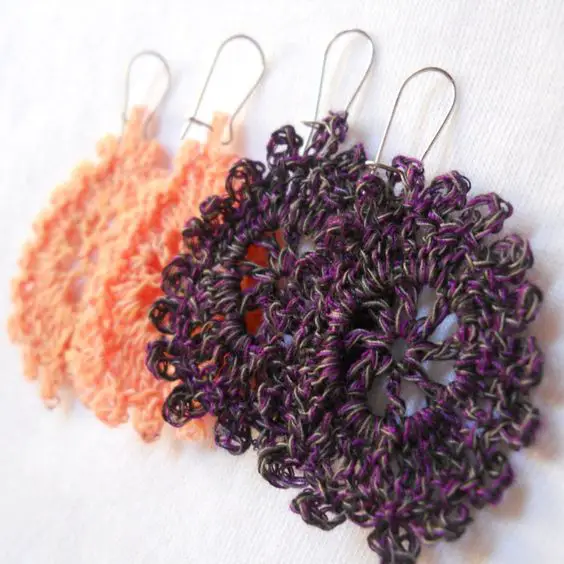
Round Crochet Earrings Pattern
These simple black round earrings are super stylish which can be well paired with any outfit be it casual or formal.
Being quite suitable for beginner crocheters, you can make a pair in each color to match them with your favorite outfits.
Crochet Earring Patterns FREE
-
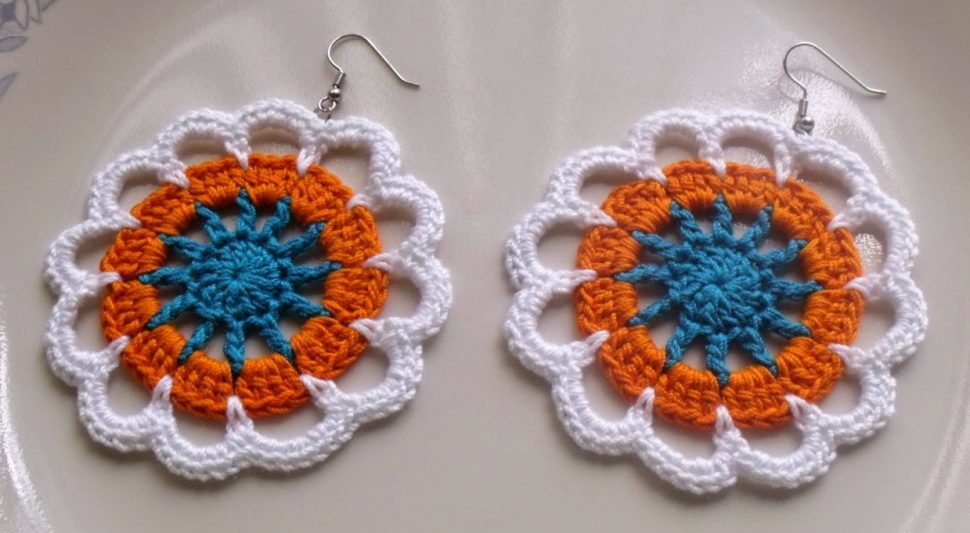
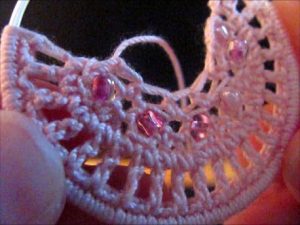
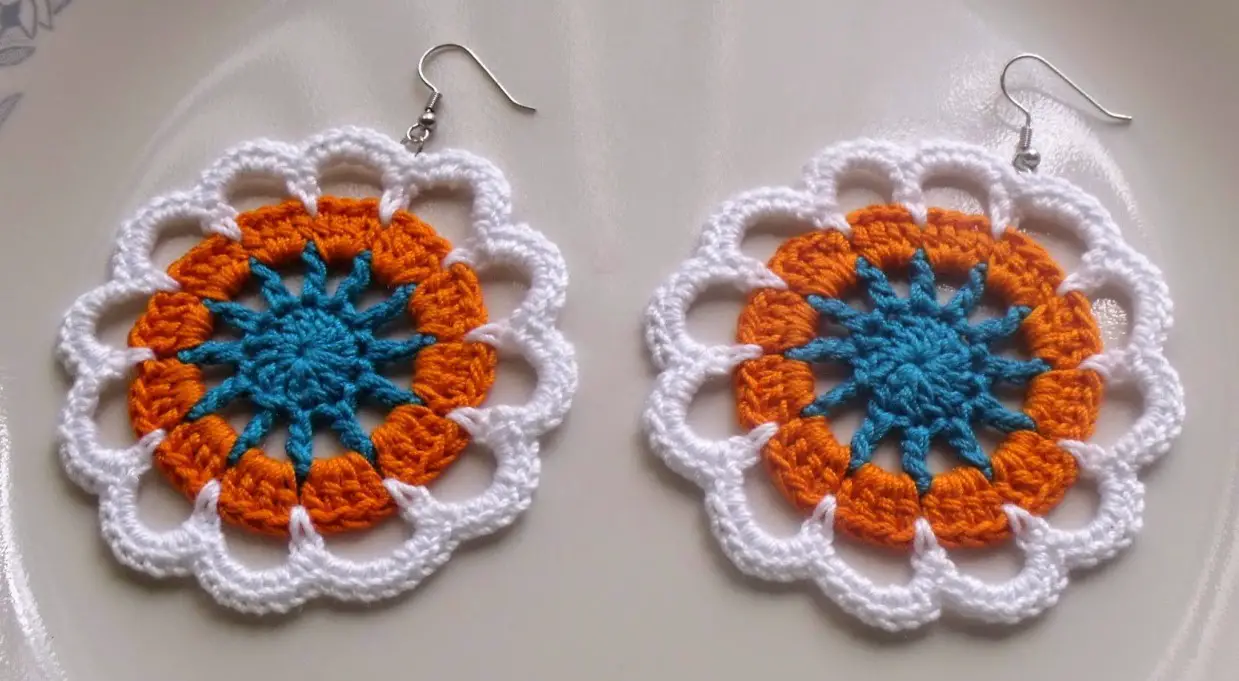
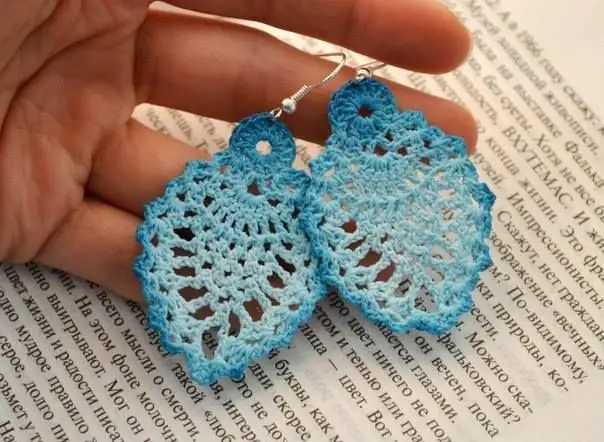
Free Crochet Flower Earrings Pattern
These beautiful floral earrings need a certain level of crocheting skills. The use of vibrant crochet threads makes it stunning giving the middle of the design a mandala effect.
Crochet Flower Earrings Patterns
-
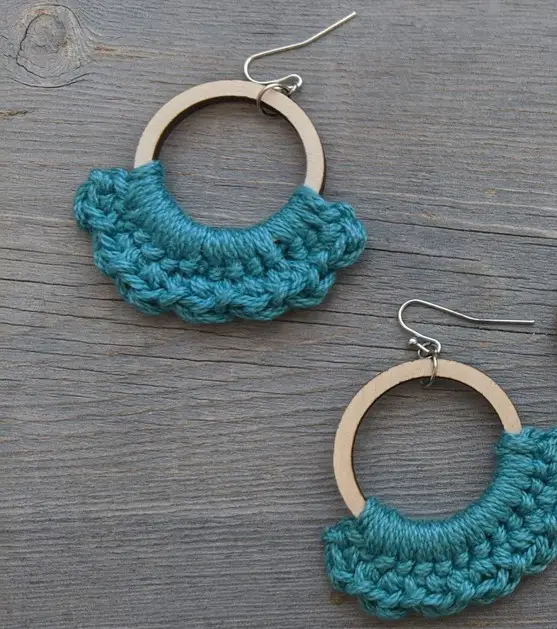
Crochet Hoop Earrings Pattern
You need some wooden rings and earring hooks to make this Boho hoop earrings. Go for a bigger ring if you want to make it a statement piece of handmade jewelry which will surely attract all eyes. Just match cotton yard color to your dress and make one in no time.

Crochet Hoop Earrings
-
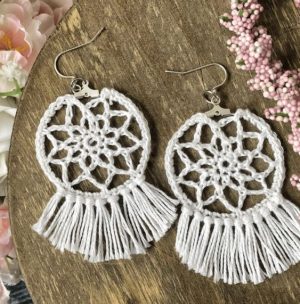
Crochet Dreamcatcher Earrings Tutorial
Who doesn’t like a dreamcatcher design? I feel this dangling earrings with a dreamcatcher pattern is perfect to accessorize your summer outfit. It’s an easy tutorial with step by step instructions in the linked DIY.
Crochet Dreamcatcher Earrings Patterns
-
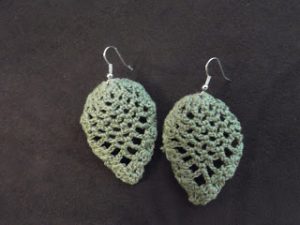
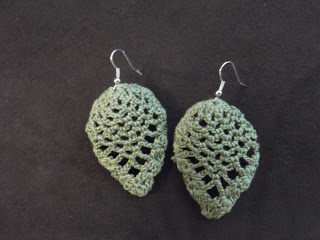
How To Crochet Autumn Leaf Earrings Pattern
Each earring features a beautiful cascade of autumn leaves in different shapes and color. These earrings are loose and breezy, perfect for the Fall season. Choose any colors you please and have fun!

Crochet Earring Leaf Pattern
-
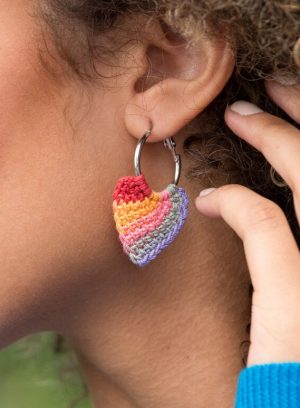
Tunisian Crochet Earrings Pattern
These beautiful earrings are made with just one multi-colored shade of crochet thread giving them a rainbow effect. You can find the free pdf pattern to this tutorial here.
Tunisian Crochet Earrings
-
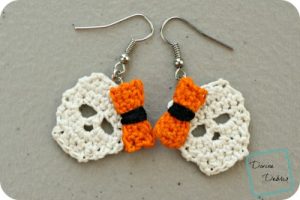
Crochet Skull Earring Pattern For Halloween
Learn to make these small and cute Skulls Earrings. It’s a free crochet pattern by DivineDebris.com, the perfect Halloween accessory!
Crochet Skull Earrings Tutorial
-
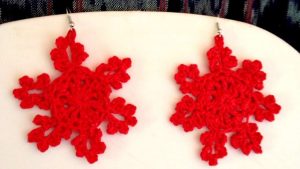
Free Crochet Snowflake Earring Pattern
Christmas wouldn’t be Christmas without a string of snowflakes! So why not crochet snowflakes earring. They’re very quick to make and fun to wear. You can use different colored yarns especially white to go with the design.
Crochet Snowflake Earring Pattern
-
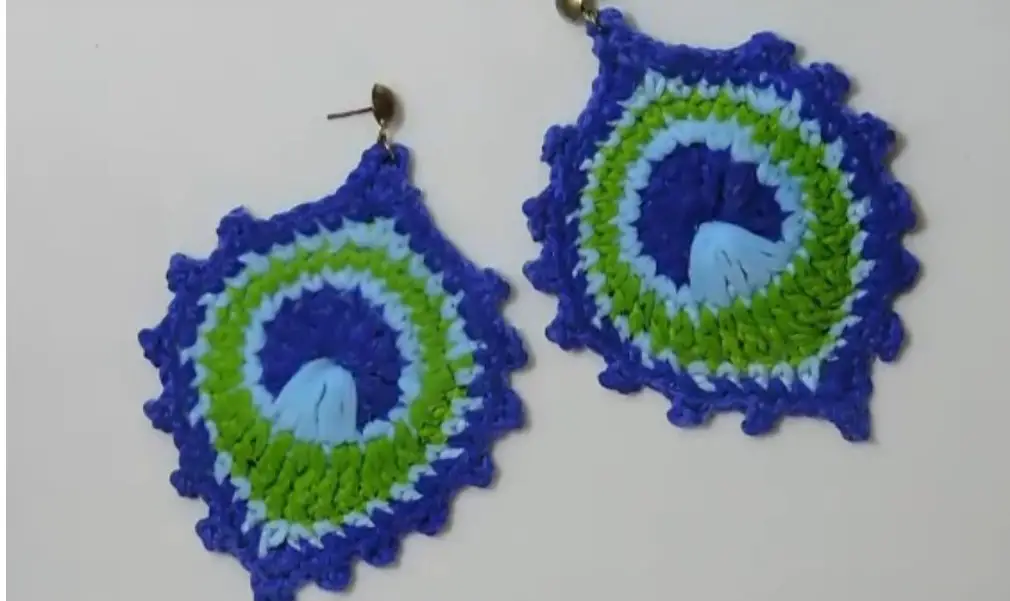
How To Crochet Peacock Earrings
This is an amazing video tutorial about peacock motif earrings. The easy steps mentioned in the tutorial will help you make this pretty earring in green and blue. You can use contrasting colors to make your earring look bright and attractive.

Crochet Peacock Earrings Pattern
-
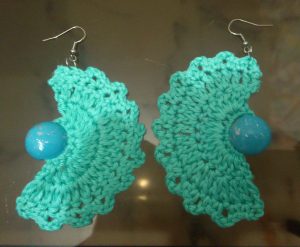
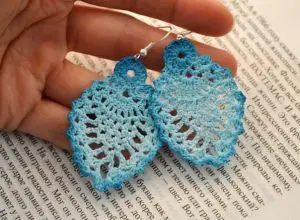
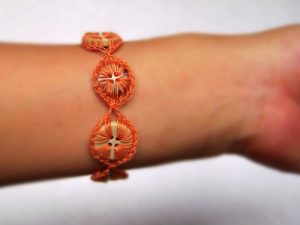
How To Crochet Earrings
In this linked tutorial you will learn you how to create a pair of crescent shaped turquoise crochet earrings. The bead in the middle gives it a unique look and makes it quite classy.
Crochet Earrings Free Pattern
-
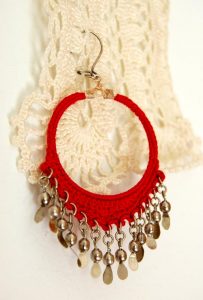
Syrian Loops Crochet Earrings Pattern
This is the perfect Boho-chic hoop earrings for your summer look. The big loops attached an danglers look very aesthetic to the red earring make it a perfect accessory to team up with your dress.
Crochet Earrings Patterns
-
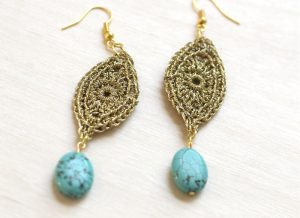
DIY Gold Crochet Earrings
This design uses gold lame thread, giving this earring a metallic look. A great option to make and gift your friends and family.
Crochet Earrings DIY
-
Crochet Earrings Hoop Pattern
Crochet Hoop Earrings Pattern
-
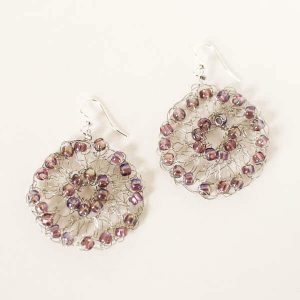
Wire Crochet Earrings Tutorial
Making wire crochet jewelry is a tad tricky. But this linked tutorial is by Elena Sheva makes it easier! This instructor does something different, she forms “petals” from loops of chains and uses beads intricately giving it a very elegant look.
Crochet Wire Earrings Pattern Free
-
Crochet Pineapple Stitch Earrings Pattern
Crochet Pineapple Earrings
-
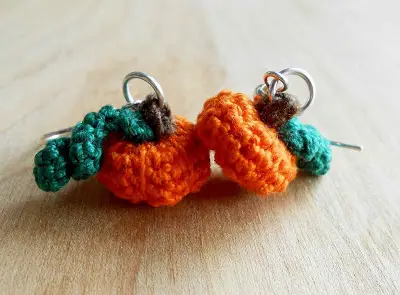
Tiny Crochet Pumpkin Earrings Instructions

Crochet Pumpkin Earrings DIY
-
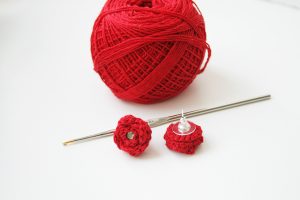
Crochet Stud Earrings Free Pattern
This easy crochet studs take no time to make them. Most suitable for little girls. You can add a pearl or a stone in the middle to embellish the earring.
How To Crochet Earrings
-
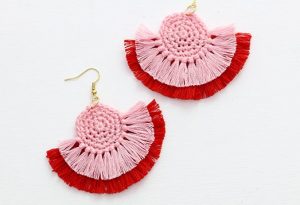
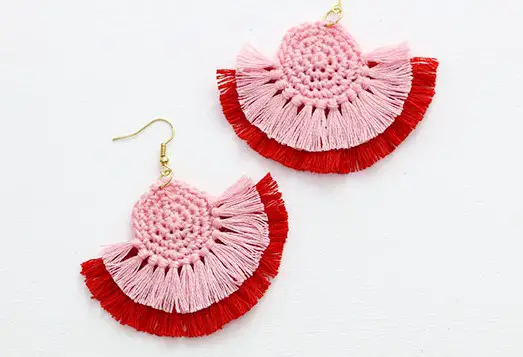
Fringe Crochet DIY Pattern
These colorful fringe DIY crochet earrings are a statement earring trend, and they are just in time for summer. The tassel fringe edge just makes them extra summery and cute.
DIY Crochet Earrings
-
Free Crochet Teardrop Earrings Pattern

Crochet Teardrop Earrings Pattern
-
Directions To Make Crocheted Lace Earrings
Crocheted Earrings Patterns
-
White Dainty Crochet Earrings DIY
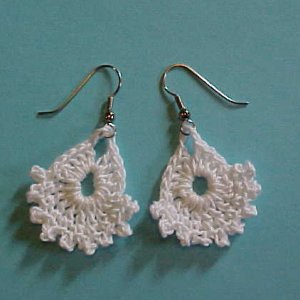
White Dainty Crochet Earrings
Well, so here you have a complete collection of colorful earrings with some amazing designs from fruits, to owls for all occasion. We hope you learn this creative crochet handiwork and create wonderful patterns on your own. Don’t forget to see other crochet projects like bracelets, rings, crochet tops and more.


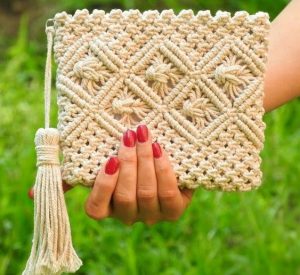
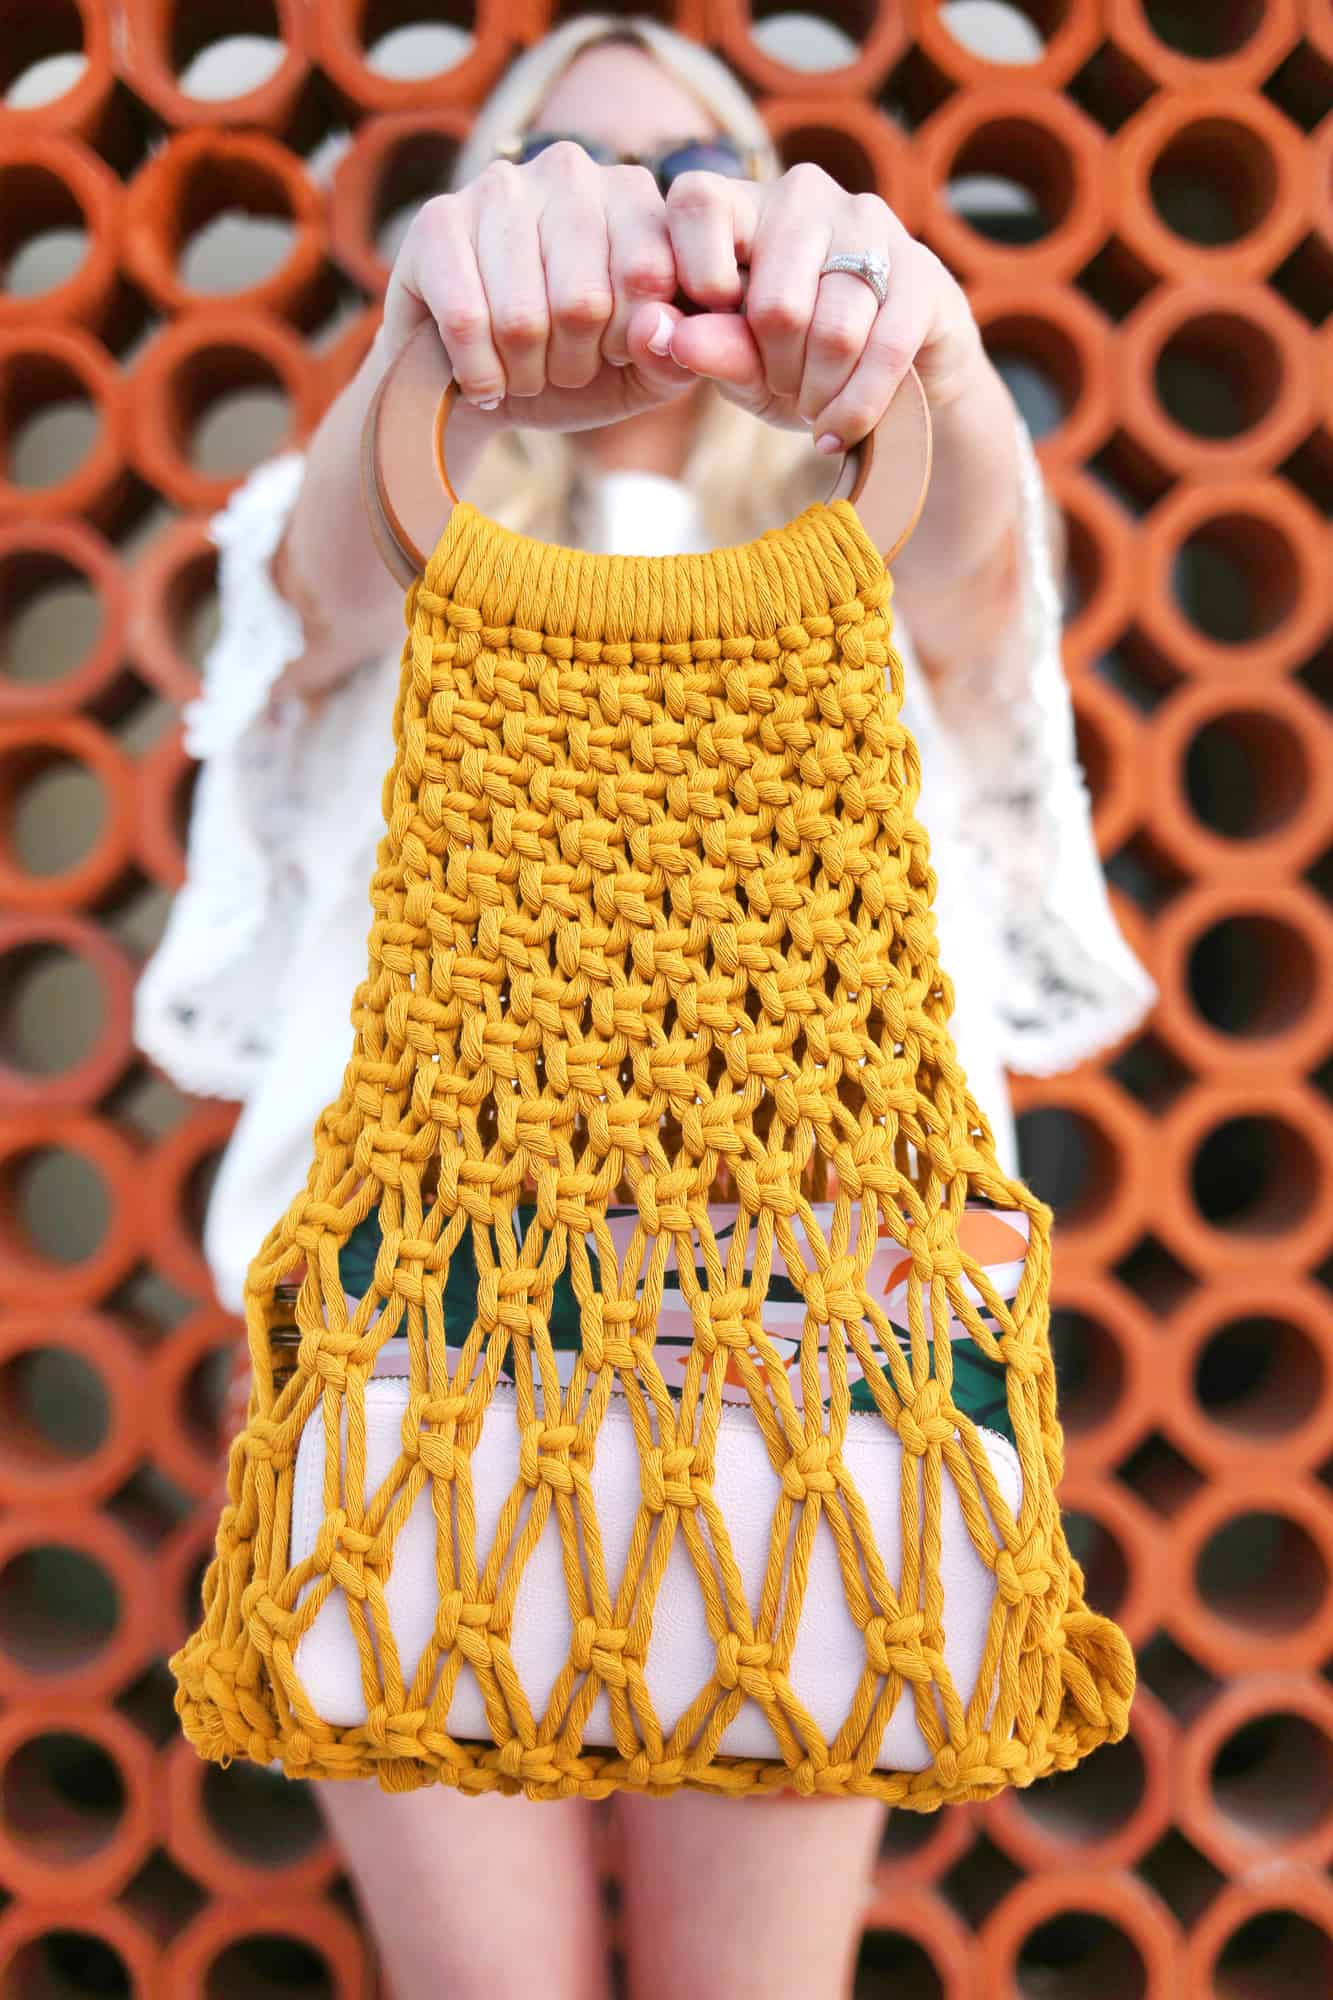
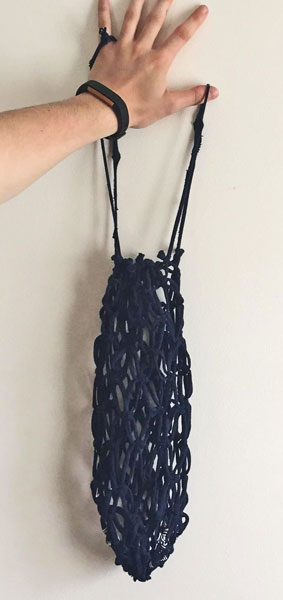
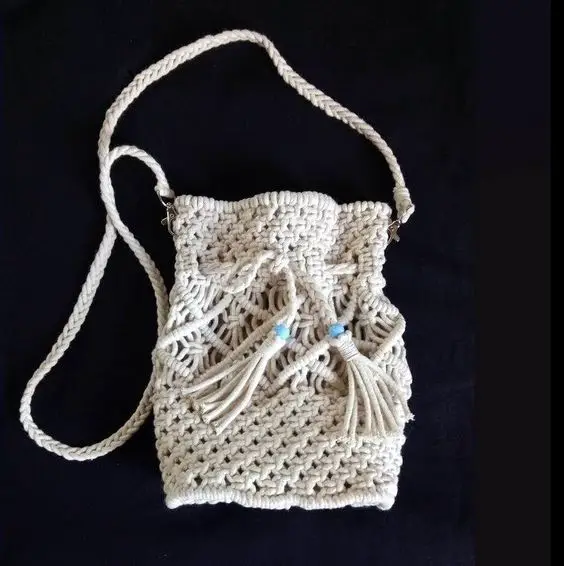
Did you know it’s super easy to design your own Macramé bag? We have rounded up some of the best easy to follow Macramé Bag DIY tutorials to inspire your next Macramé project with step-by-step instructions.
The stylish knotted macramé pattern will look fabulous when implemented on bags. You can pick any design be it a purse, cross-bodied, clutch, a tote bag, sling bag, or anything else as per your choice.
The tutorials only takes a few basic knots to get started to make amazing macramé bags.
How To Make Macramé Bag – Patterns & Tutorials
-
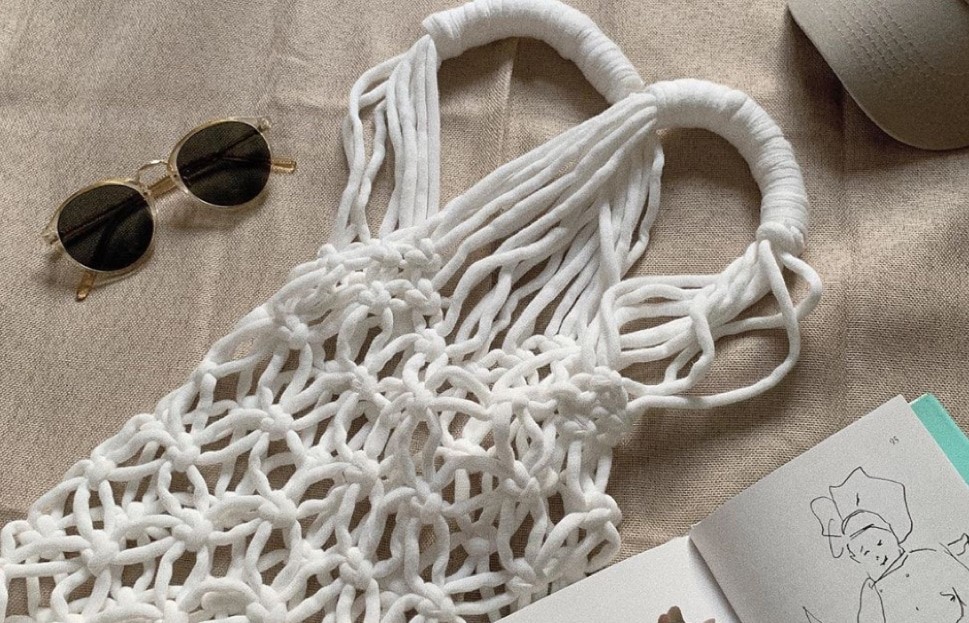
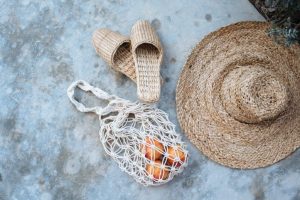
Easy Macramé Market Bag
This easy to make Macramé Market bag is perfect for beginners and only requires the macramé rope and two gold rings. You can use this beautiful knotted bag to carry your groceries in style. For a smaller bag, the strings should be knotted more closely to each other.
DIY Macramé Bag
-
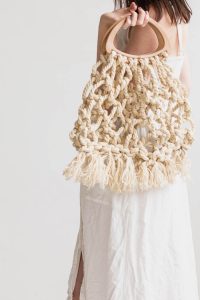
DIY Macramé Bag
You can make this pattern in circular and square designs. The long fringes makes the bag look immensely unique giving it a cool Boho-chic look. This Macramé bag is a no-sew bag tutorial, easy to toss over your shoulder that goes around attracting eyeballs.

Macrame Bag DIY
-
DIY Macramé Tote Bag (With Jute)
This trendy backpack is perfect to carry with you on travels to exciting new places. You could dip dye the jute rope in the shade and color of your choice!
Macramé Bag Pattern
-
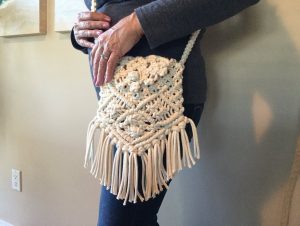
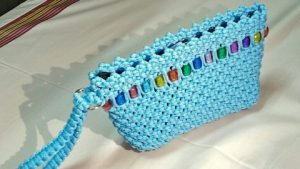
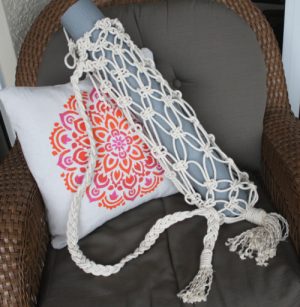
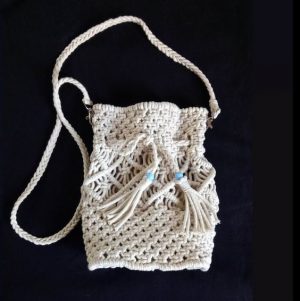
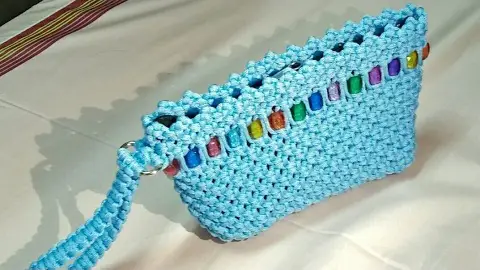
DIY Macramé Bag With Shoulder Strap
In this linked tutorial you learn to do Square Knots, alternating square knots, diagonal double half hitches and a fun closure using the berry knot. You can always add pearls, buttons, or beads to add an element to the bags to make it enticing.
Follow along and you will be able to make your very own handmade Macramé bag all ready for summer!
Macramé Crossbody Bag DIY
-
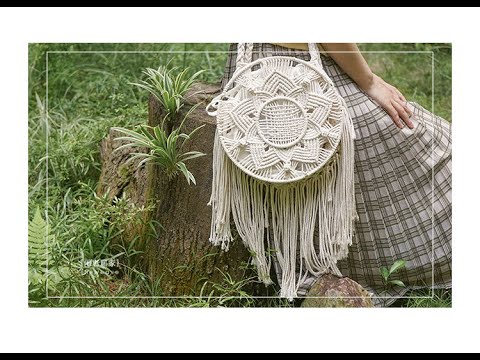
How To Make Macramé Circle Bag

Macramé Circle Bag DIY
-
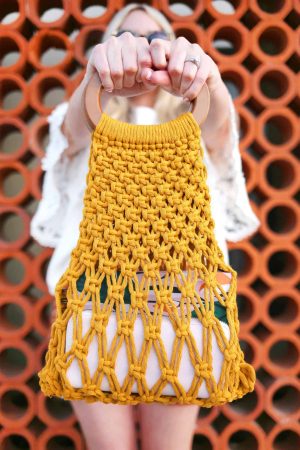
DIY Macramé Summer Hand Bag
The perfect bag to style with your floral summer dresses! This easy beginner-friendly pattern by Macramade By Cass is too cute not to make.
Macramé Summer Bag Tutorial
-
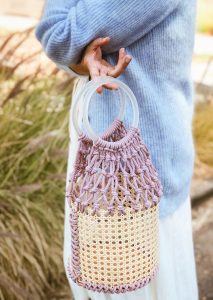
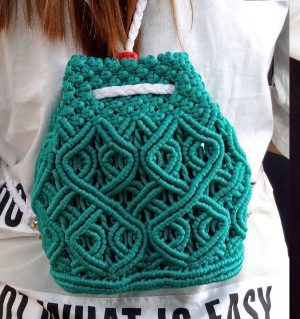
DIY Macramé Bucket Bag
The bag combination of macramé cording and cane webbing. You could use wooden handles for a rustic appeal and add to the elegant quotient.
Macramé Bucket Bag
-
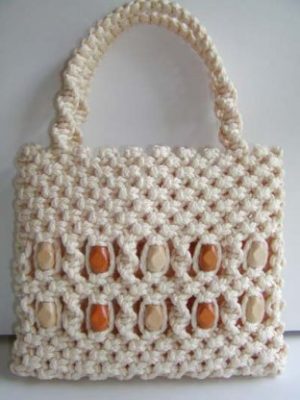
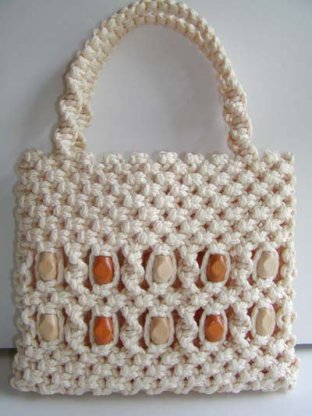
How To Make A Macramé Bag/Purse
This intricate design of woven macramé cords with beads and the stiff handles gives it a traditional touch. You can vary the size from a purse to a bag as per your purpose.
Macrame Purse Pattern
-
DIY T-Shirt into Macramé Market Bag
Recycle your old t-shirt and turn it into a cool macramé beach or market bag. The fringes at the bottom of the bag gives it look funky.

Macrame Bag Tutorial
-
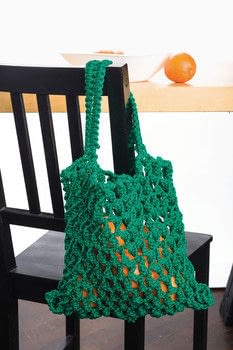
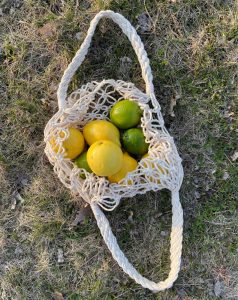
DIY Macramé Fruit Bag
This green sturdy little tote is perfect for picking up produce and other yummy goodies at your local market. You can easily make this bag with red, green combination cords and use it as Christmas gifts.
Macrame Produce Bag
-
How to Make a Macramé Produce Bag
This dip dyed produce bag looks amazing with this Ombre effect.

Macrame Bag Patterns PDF
-
DIY Macramé Clutch Bag
Macramé Clutch Purse
-
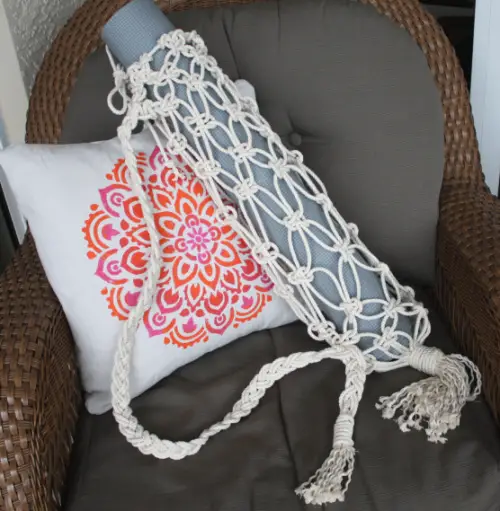
DIY Macramé Yoga Bag With Rope Net
To form the bottom of the bag, make a Wrapped Knot. this will make a solid base to hold your yoga mats. (You will trim the pieces to the desired length later.)
Macramé Net Yoga Bag
-
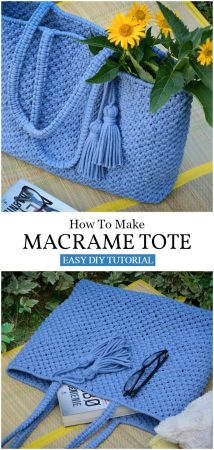
Make Macramé Tote Beach Bag
This project is very easy and simple but it requires patience. There will be a lot of knots to tie. Attach faux sunflowers to it, to brighten it and intensify its beauty.
Macrame Beach Bag Tutorial
-
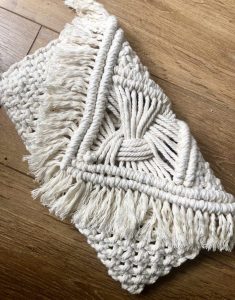
DIY Make Macramé Bag Instructions
Macramé is one of those trends that’s in rage every summer. It seems to convey that effortless boho chic look that we all strive for as soon as the sun comes out! The body comprises square knots while half hitch knots make up the flap of the purse.
Macrame Bag Pattern Free
-
How To Make Macramé Produce Bag
You could add some beads or tassels to give it a cooler look.

Macrame Produce Bag Picture
-
Step by Step Directions to Make a Macramé Shopping Bag
Macramé Shopping Bag DIY
-
DIY Small Macramé Bag /Wallet With Magic Knots
DIY Macramé Purse
-
DIY Macramé Bag pack Tutorial
This video tutorial would definitely fulfill your urge of making stylish macramé bagpack for any occasion.
How To Make Macrame Bag
-
DIY Sling Macramé Bags For Girls
Macrame Bag Making Video Tutorials
We hope you got your perfect tutorial to make the bag of your choice. Keep this craft of macramé on and try a lot more interesting crafts like earrings, keychains, bracelets, plant hangers, table runners, and so on.


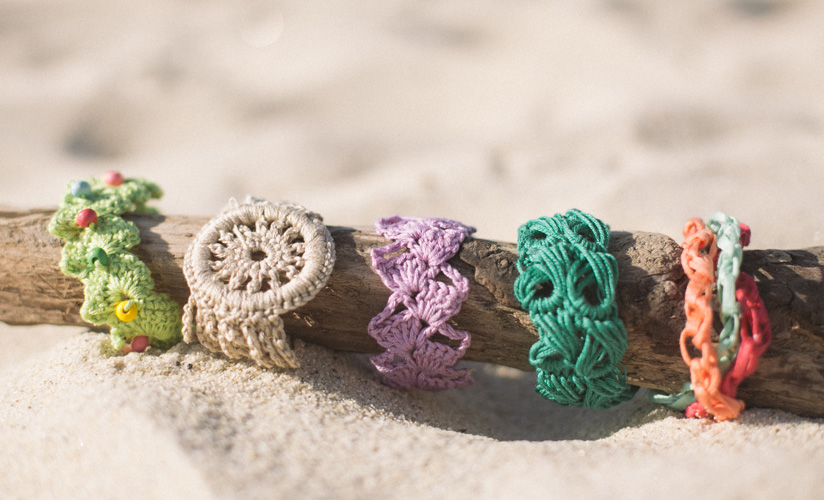
Looking for interesting patterns and tutorials to make your crochet bracelets? We have rounded up some of the most interesting and unique crochet bracelet patterns, designs, tutorials, ideas with complete step by step instructions to guide you.
If you are a passionate crocheter who likes to crochet just about anything, then there is limitless designs to explore from this art of crocheting. You just need to inspired from new ideas to take your crochet skill on a further level.
Also See: Macramé Bracelet Patterns
A crochet bracelet can be made in varied ways, including multicolored, lace pattern, beaded crochet bracelet and a lot more which you can explore with your crochet hook and colorful yarn. Your wrists will look great when adorned with some handmade colorful crochet bracelets.
How to Crochet Bracelet Patterns: Complete Guide
-
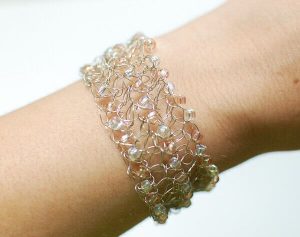
Beaded Wire Crochet Bracelet Pattern
Try making you very own crochet bracelet with wire and beads. Its a very pretty addition to your handmade jewelry. You can wear this bracelet with jeans and a nice shirt or a very formal cocktail dress.
Wireworks serve best for making crochet bracelets and for working with the wires, you must include various tools and materials.
Crochet Bead Bracelet
-
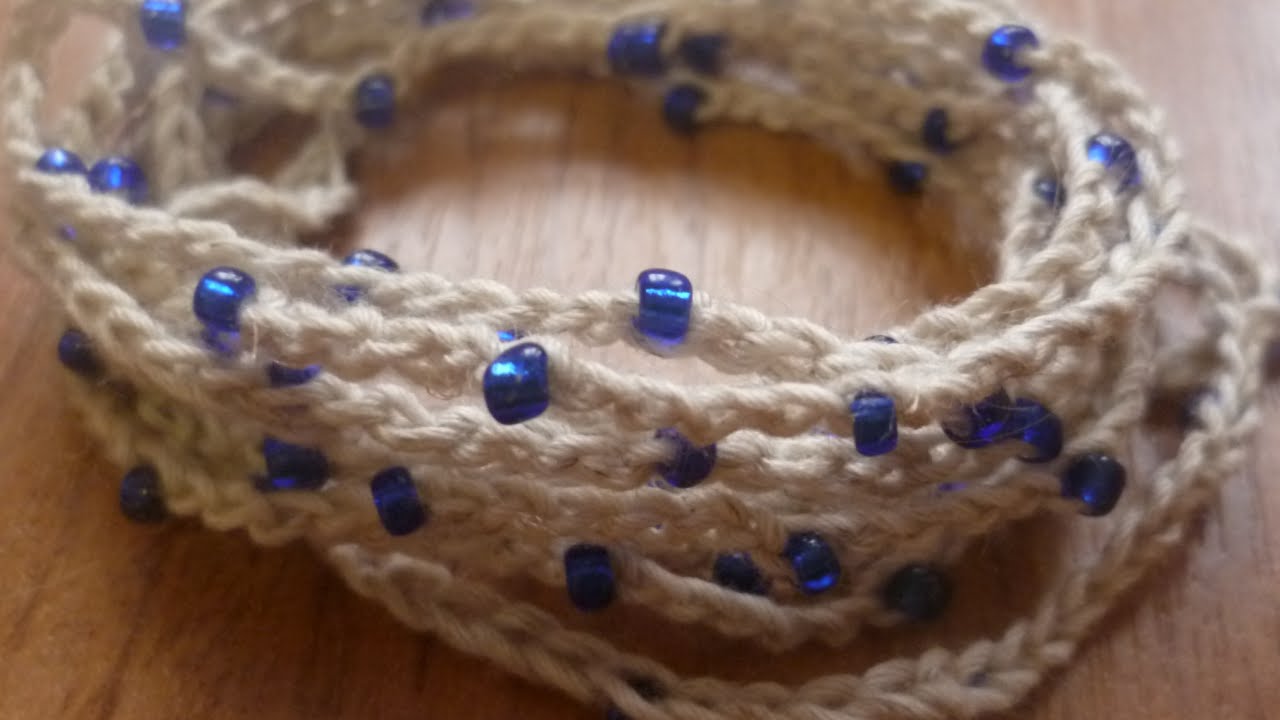
How To Crochet A Beaded Bracelet
What could be better DIY for summers than crocheting a beaded bracelet at home? Cool and cottony, prickled with bright bits of colored beads, the Sea Anemone Bracelet is quick and easy tutorial with 3-4 simple steps.
Mixing the yarn with some beads, pearls, chains and buttons the crochet bracelets looks just fabulously pretty to intensify the glam and grace of your wrists.
How To Crochet A Bracelet
-
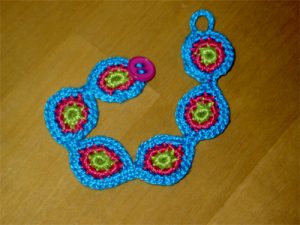
Flower Bracelet Crochet Pattern
Yes with the some colorful crochet yarns crochet sticks you can now get some cool and fun looking DIY bracelets to surprise your female friends. Enhance the beauty and style of your wrist and wrap this flower- shaped bracelet around!
Crochet Bracelet Pattern Easy
-
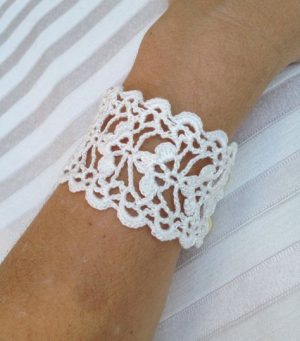
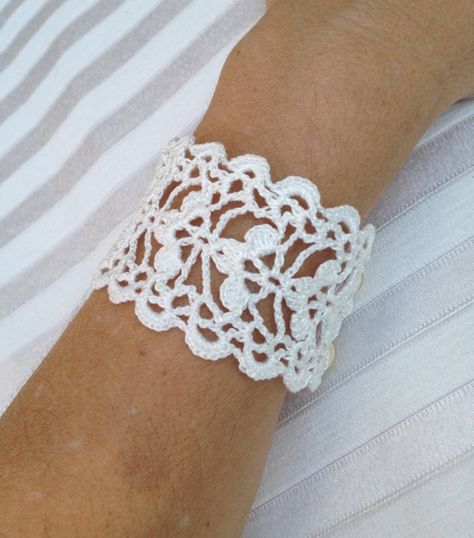
Crochet Lace Bracelet (Youtube Tutorial)
Make this elegant white lace cuff bracelet for yourself that will go nicely with your gown. Just follow the link and then the simple steps given in the video instruction.
Crochet Bracelets
-
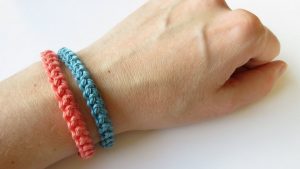
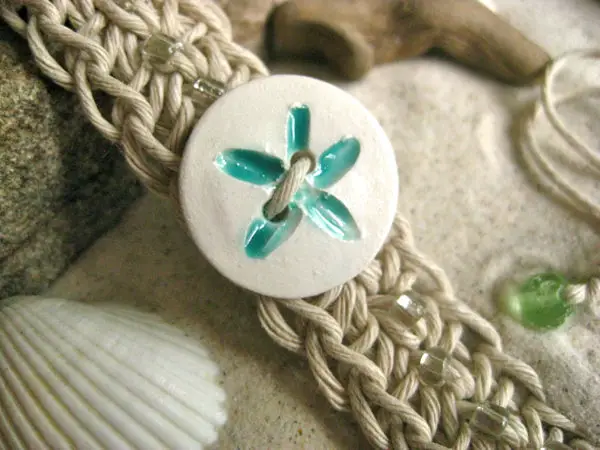
How To Crochet A Hemp Bracelet/Ankle Bracelet
Using super basic stitches like the chain stitch and the single crochet stitch, we can whip up a hemp bracelet or anklet easily in no time.
This nicely woven, sober-looking hemp bracelet is also a good choice for men who like to accessorize themselves. You can customize the design and add or remove the beads and buttons as desired.

Free Crochet Bracelet Pattern
-
Crochet Cord Friendship Bracelet
Crochet Friendship Bracelet
-
Red Crochet Friendship Lace Bracelet
Friendship day is around so you may give handmade bracelets to your besties this time for a more personalized touch. This lacy bracelet tutorial by Very Berry Handmade looks delicate because it used embroidery thread.
Crochet Bracelet DIY
-
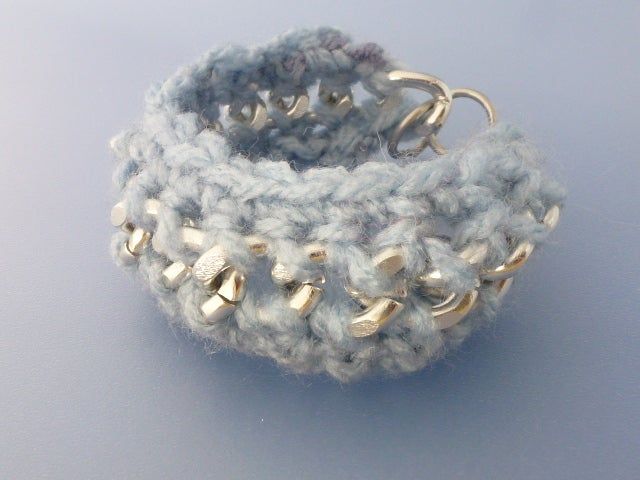
Crochet Yarn and Chain Bracelet Tutorial
Make this easy mixed media crochet bracelet in next to no time using metal chain as the foundation row. It only requires basic single crochet. Even if you don’t know how to crochet, the following steps will show you how to get started.
You are not limited to yarn, experiment with crochet thread, thin leather cord or even thin wire. The possibilities are endless for this bangle style bracelet.

Crochet Bracelet Pattern
-
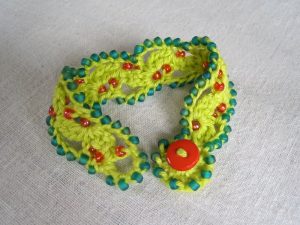
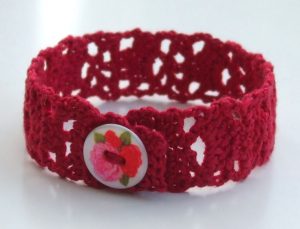
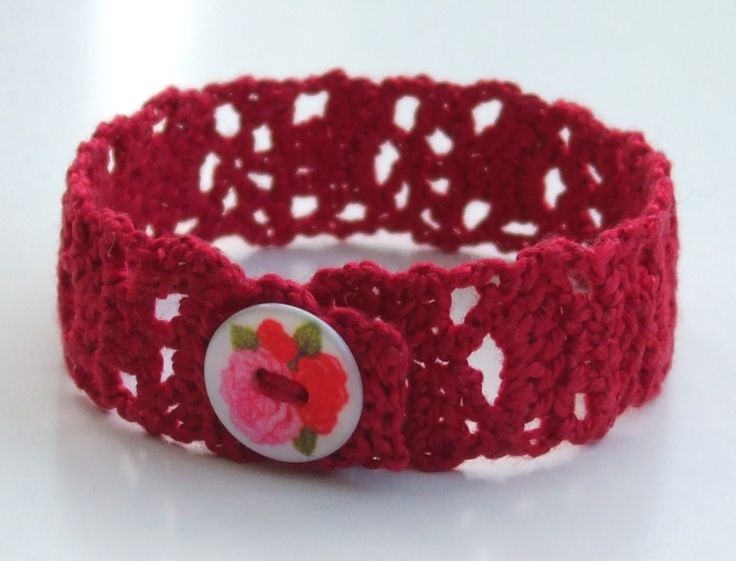
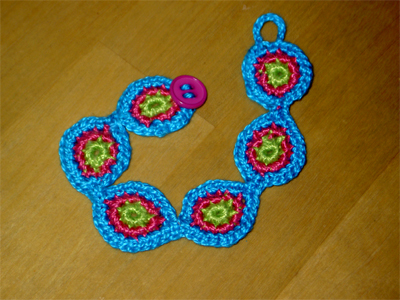
Crochet Bracelet Pattern For Beginners
This intricately woven colorful bracelet celebrates circles. It can be a good hand accessory when worn with a long, flowing skirt. You may change the color combination to match with your attire and replace pink button with a small clasp or hook.
How To Crochet Bracelet
-
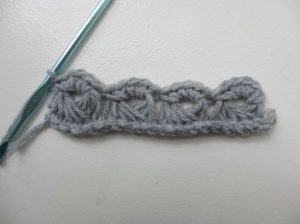
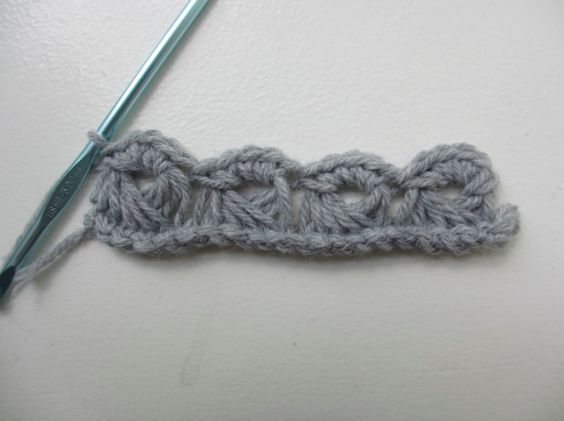
Crochet Broomstick Bracelet Pattern
Broomstick crochet gets its name from 19th century crocheters who used a broom handle to crochet the lace. You can also do this pattern by using a knitting needle, crochet hook or dowel. Make an elegant wristband using a thread of any color of your preference.
Crochet Bracelet
-
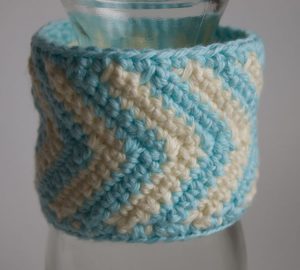
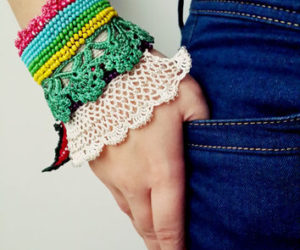
Chevron Cuff Bracelet Pattern
A cuff-patterned bracelet gives your a trendy look and charm. You can easily chose colors in bold colors like black, red, brown or blue and gift your partner this wonderful bracelet on Valentine’s day. Instructions in the linked tutorials have two versions – a loose bangle style bracelet, and a tighter cuff with fasteners.
Crochet Cuff Bracelet
-
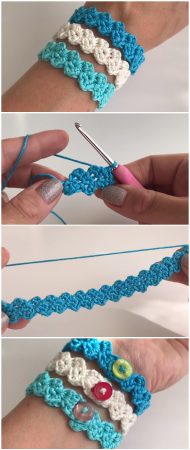
Crochet Button Bracelet Tutorials
I loved this creative bracelet design made using simple thread and few buttons.
Crochet Bracelet Pattern Picture
-
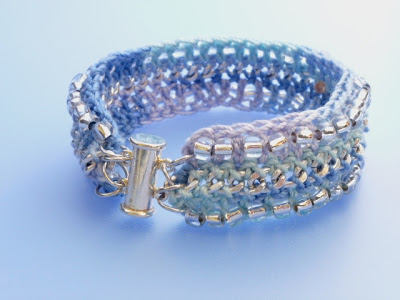
Crochet And Chain Bracelet Pattern
Slide lock clasps work really well if you have one the right length to fit the bracelet’s width. I attached mine using several jump rings.
Here are some step-by-step instructions if you are game to try. Here linked are 4 different styles to illustrate the versatility of this design approach.

Crochet Bracelet Tutorial
-
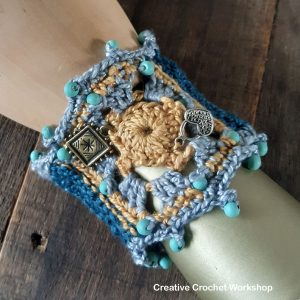
Boho Chic Crochet Bracelet Pattern
This Boho Chic Bracelet is part of the 2019 Bohemian Chic Blog Hop. Perfect for leftover yarn. Add beads and charms for a little chic style.
Crochet Boho Bracelet
-
Pattern for Beaded Crochet Bracelet
Crocheting with beads allows you to be creative with your own crochet designs. There are obviously different methods to crochet with beads, so you should decide which method will be easy for you.

Beaded Crochet Bracelet
-
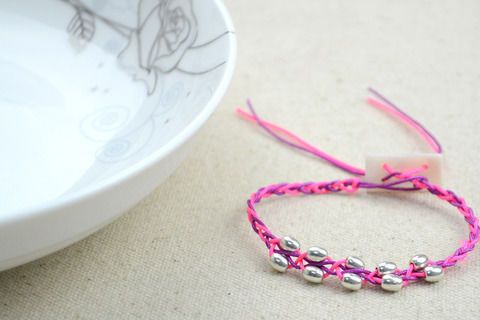
Thin Crochet Bracelet Pattern With Beads
This tutorial provides you with a free crochet bracelet pattern with beads, and informs you on how to create this handcrafted beaded jewelry. The pink and purple thread against the silvery beads set off each other nicely!

Crochet Bracelet Patterns Free
-
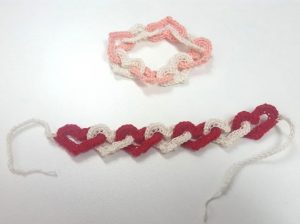
Linked Heart Crochet Bracelet
Choose the size of the hearts y choosing the right yarn. Thin yarn will give smaller and cute hearts. Treat someone dear ones on this Valentines Day to a cute and pretty decorative crochet hearts bracelet.
Interlinked Heart Crochet Bracelet
-
Lacy Crochet Bracelet Pattern
These crochet flower bracelet patterns would be a great gift for your little girl. Craft flower motifs and interconnect them using crochet needle as per the desired size.
Crochet Lace Bracelet
-
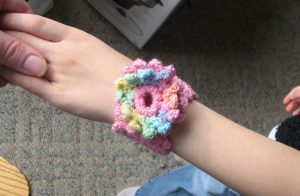
Easy Crocheted Wrap Bracelet

Crochet Bracelet Video Tutorials
-
Crochet Easy Bracelet Zig Zag Stitch
Crochet Bracelet Step By Step
So, have you picked the one you want to work to go on your writst? Whether you are a proficient crocheter or just a beginner in this field, you are sure to find a project you would want to work on.


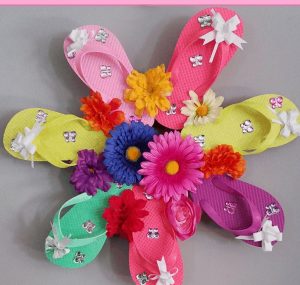
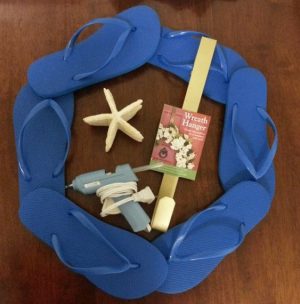
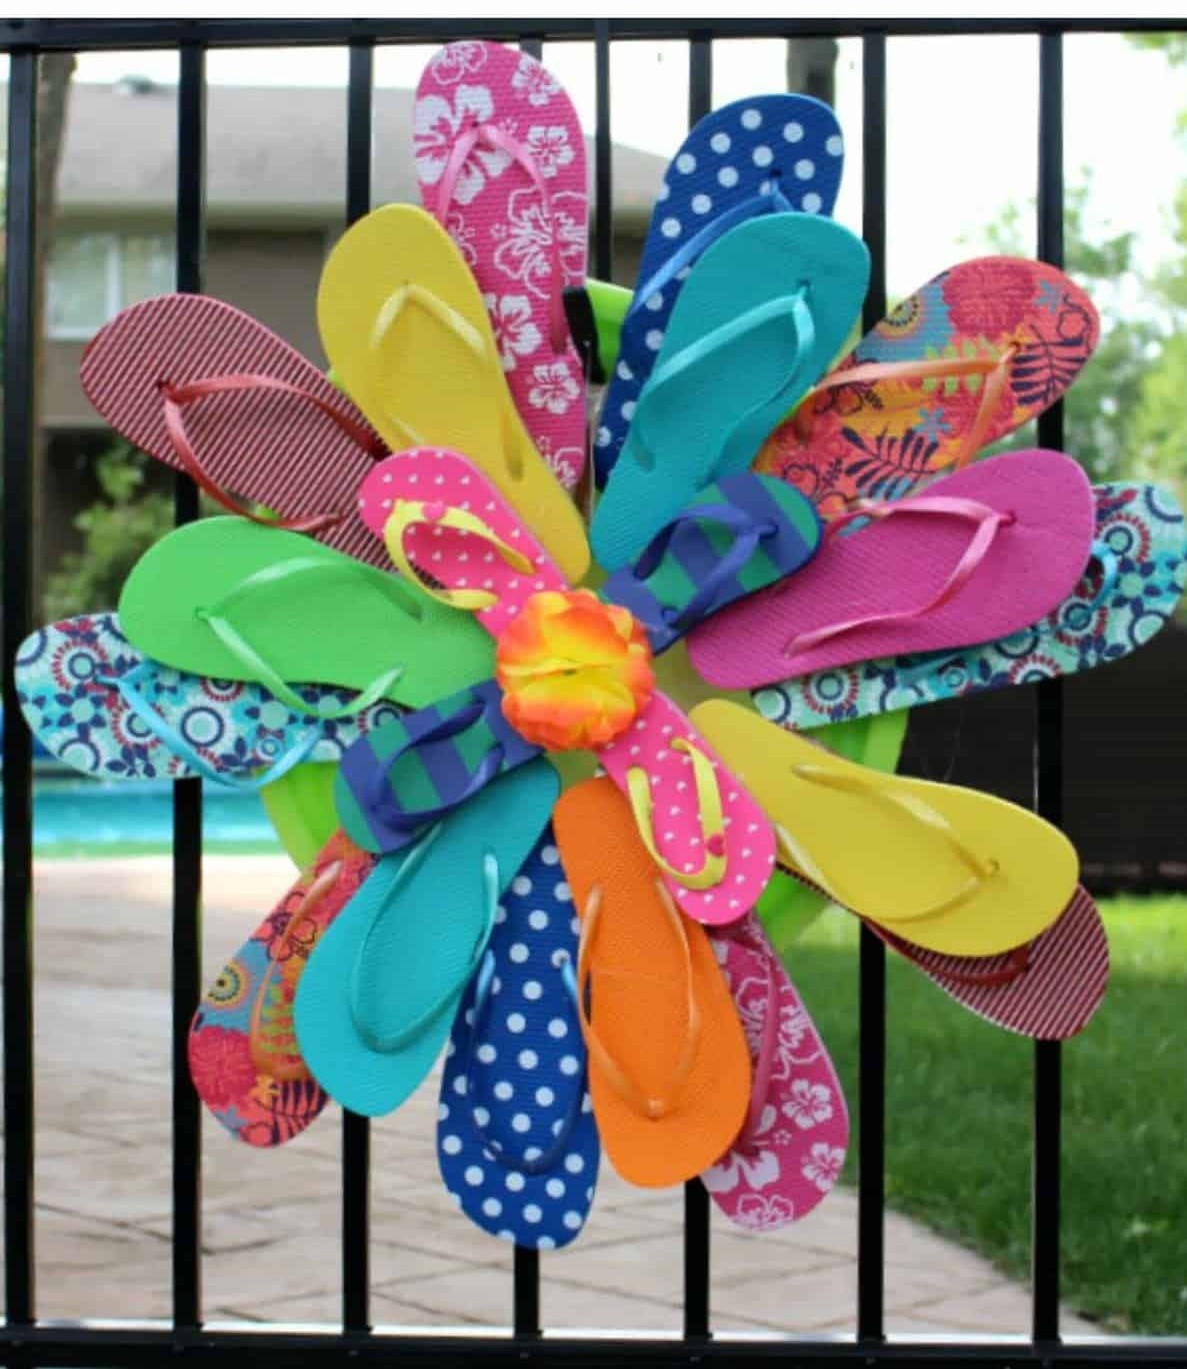
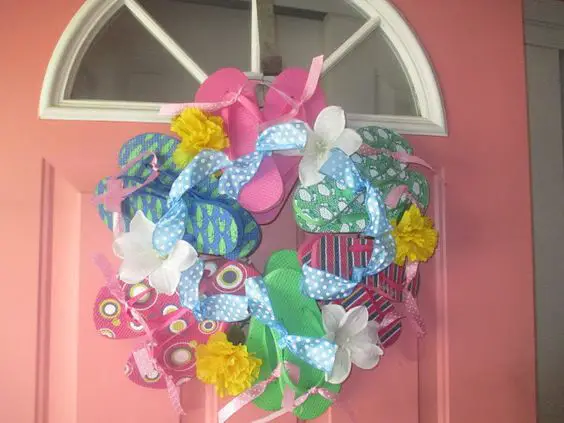
For me flip flops have always been a sign that summer has begun. Summer craft ideas like this don’t get much easier. There are a few ways you can make a flip flop wreath. The most popular ways are to make them with either a wreath form or a swim noodle. Then add some flip flops and cute flowers like Daisys and you will have the best looking ready for summer front door wreath on the block.
lace this colorful wreath on the wall or door to add charm to your home décor. Decorate it with different types of stones or artificial flowers to enhance its grace; so try this easy project and enjoy summers.
Supplies:
You can get the supplies you need to make these wreaths just about everywhere. Flip flops that are inexpensive are sold at Walmart, any dollar store, or Old Navy.
Craft stores always have a big selection of flowers and embellishments so that you can add your own personal touches on your wreath.
22 Tutorials to Make a Flip Flop Wreath
-
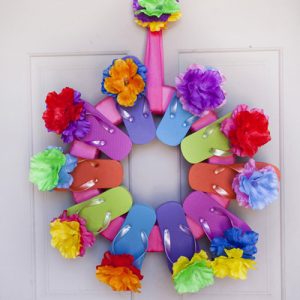
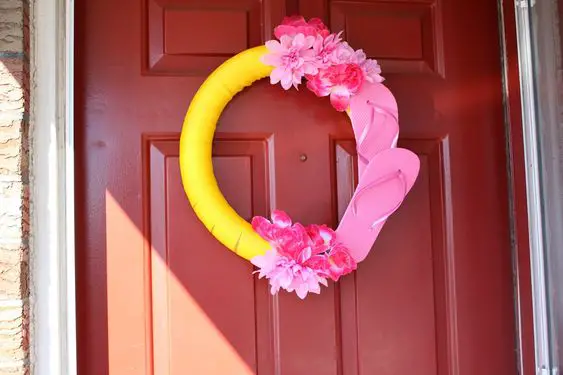
Flip Flop Wreath DIY
Line up that colorful slip-on that you loved wearing to the beach but can’t anymore and stick them around a craft ring. Add cute faux flowers and ribbons and stick them on the cross-section of the slipper band. Lastly add a cute welcome sign for a final touch. Tip – Buy new ones for different patterns, colors, and fun!
Flip Flop Wreath DIY
-
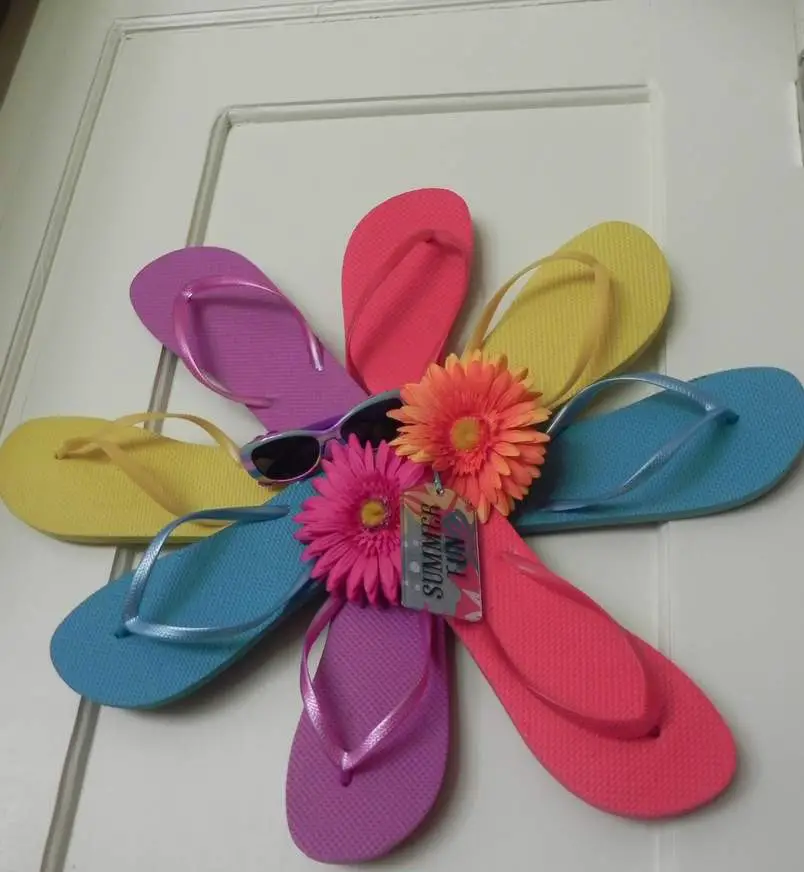
Summer Flip Flop Wreath
Buy some lovely artificial flowers and leaves along with a pair of the flip-flop to make this easy and sophisticated DIY.
Summer Flip Flop Wreath Ideas
-
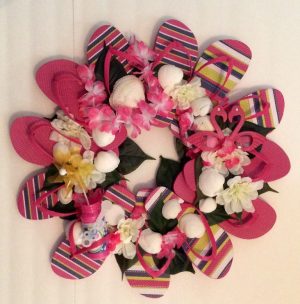
Pool Noodle Flip Flop Wreath
Create this half and half colored pool noodle wreath through simple techniques and decorative items. Use contrasting colors for the pool noodle, saddles, and the decoration. Put it up on your wall with nothing else on it for a stand out a point or on your door.

Colorful Flip Flop Wreath
-
Easy Flip Flop Wreath Tutorial
The chic flip flop wreath is a cute summer décor item that can be used for your pool parties and summer showers. You can play with your creativity and give your wreath a horizontal pattern. That would be appreciated by the visitors for its beauty and unique creativity.
Flip Flop Wreath
-
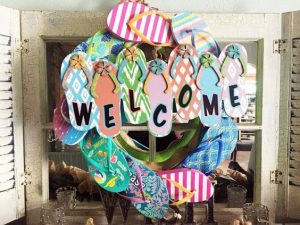
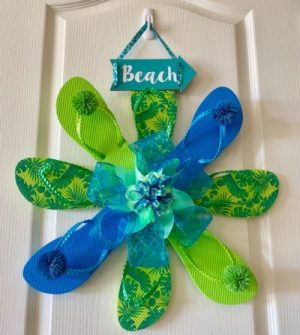
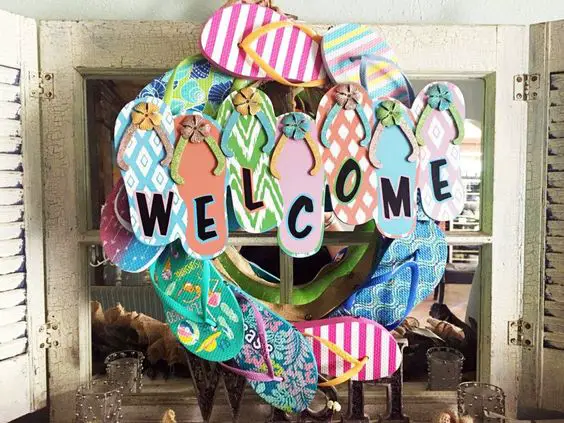
Beach Flip Flop Wreath
Give a monochromatic touch to the welcome door of your beach house, use a similar pattern or color slippers for the same. Follow the instructions to make one for yourself this summer. Add items like shells and flowers authentic to a beach to add a sophisticated vibe inside the house.
DIY Beach FLip Flop Wreath
-
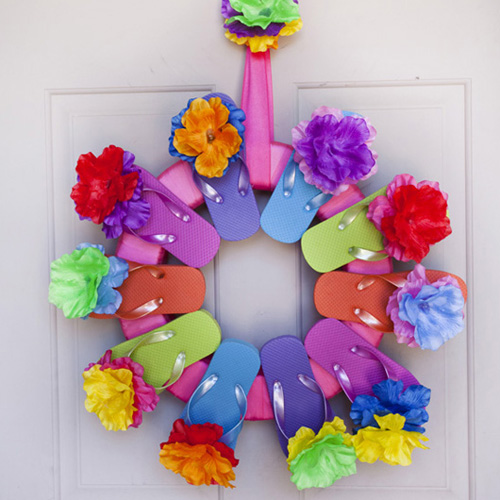
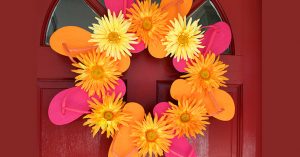
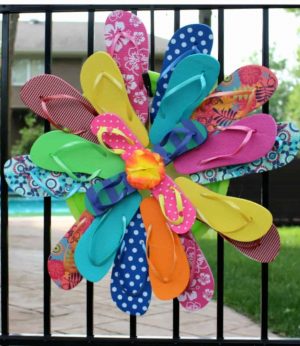
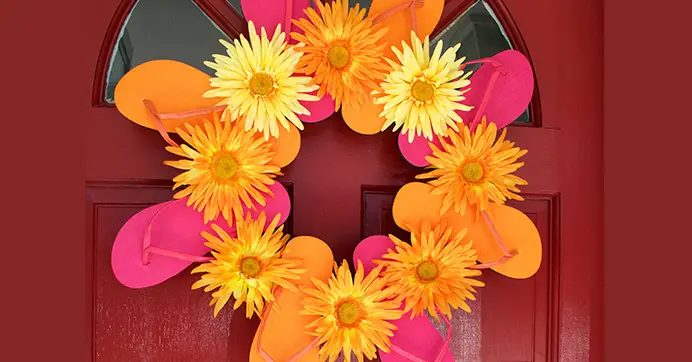
Flourishing Floral Flip Flop Wreath
Spring means warmth, flowers, and happiness. Welcome spring with this bright, popping, and vibrant flip flop wreath. Hand it in your room to brighten up that boring wall or hang it outside your door for everyone to appreciate it.
Flip Flop Flower Wreath
-
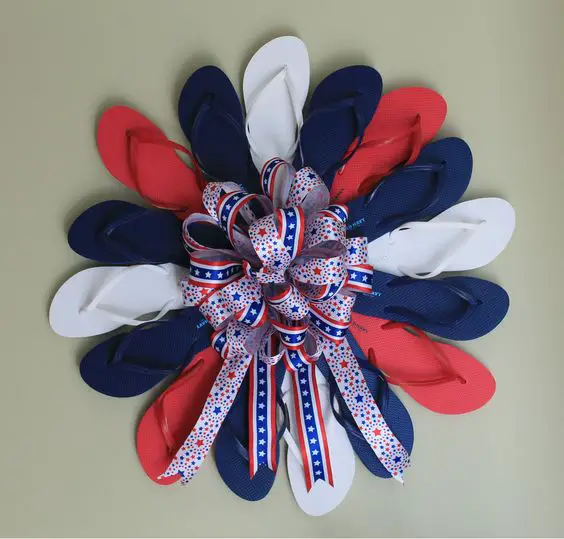
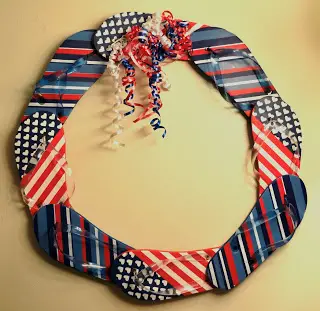
4th of July Flip Flop Wreath
Red, white and blue – glue these flip flops together and make yourself tricolor wreath for your 4th of July celebration. Add a ribbon of the same color for an easy, simple, and yet different item for your guests to appreciate on this Independence Day-themed wreath.
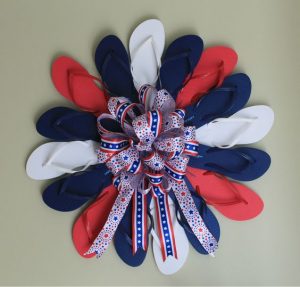
Red White Blue Flip Flop Wreath
-
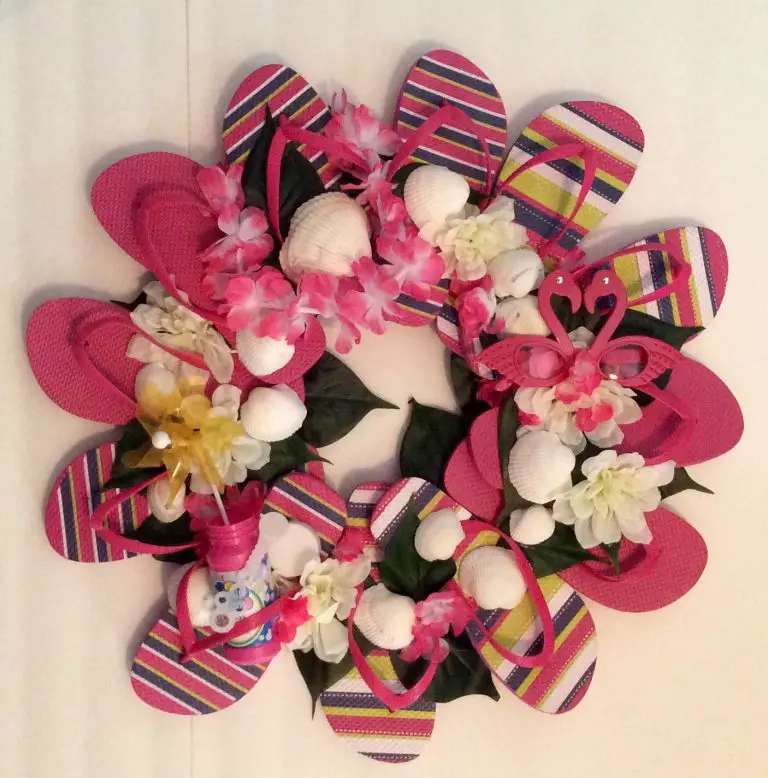
Patriotic Flip Flop Wreath Ideas
Add charm to your garden decoration with lovely flip flop wreath; the artificial butterfly and bright, colorful flowers are mesmerizing.

Flip Flop Patriotic Wreath
-
How to Make a Flip Flop Wreath
-
Flip Flop Wreath Craft
Flaunt your entryway with lovely flip flop wreath; it gives the cool and fresh feel of the beach.
Flip Flop Wreath Project
-
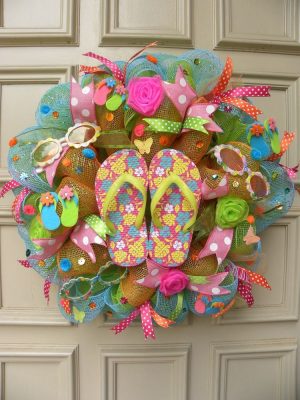
Deco Mesh Flip Flop Wreath
Perfect craft activity for your children this summer vacation and the end result is something you can use for a really long time. Different color ribbons, flowers, deco mesh, plastic beach glasses, faux flowers when put together will help you make this multi-color flip flop wreath that you can show off to everyone. Paste the flip-flops side by side to make this lovely pattern; the bright, colorful flowers and meshes enhance its grace.
Flip Flop Wreath Deco Mesh
-
Homemade Starburst Wreath with Flip Flops

Flip Flop Wreath Tutorials
-
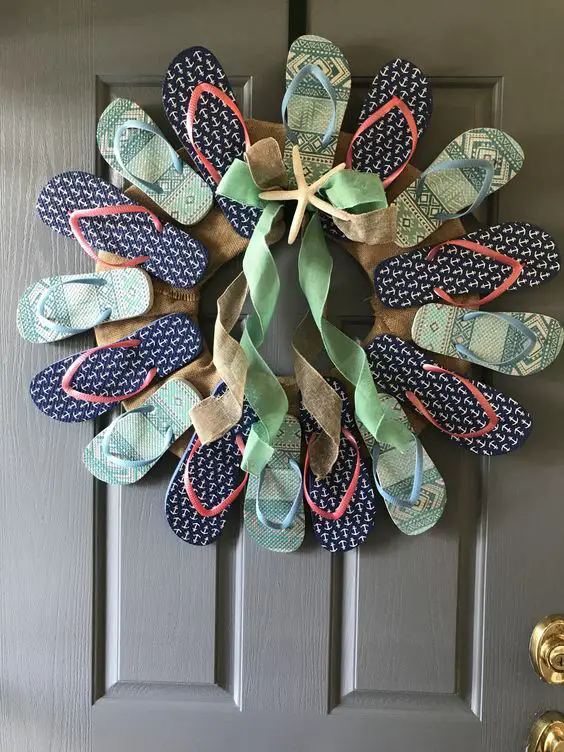
Burlap Flip Flop Wreath How-to
Spend time with your little ones to make yourself a burlap flip flop wreath for any occasion be it Christmas, Halloween, or a simple pool party. Add streamers or ribbon and other decorative items according per the theme. Your designer or worn-out rubber sandals with vibrant prints will be perfect for the craft. The burlap draped background lifts the entire design and brings all the items together giving it a rustic touch.
Cute Flip Flop Wreath
-
Holiday Flip Flop Wreath
-
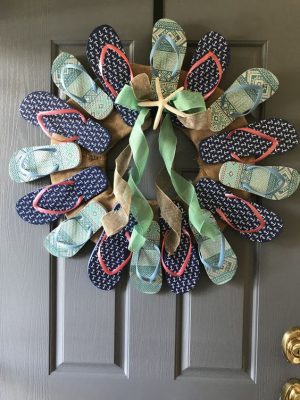
Nautical Flip Flop Wreath
Hang this blue flip flops and plastic starfish wreath on the inside of your window for an underground water feel. To us personally, it gives us the feel of SpongeBob. You can adorn the wreath with faux seashells, sea plants, or a starfish.
Flip Flop Wreath Instructions
-
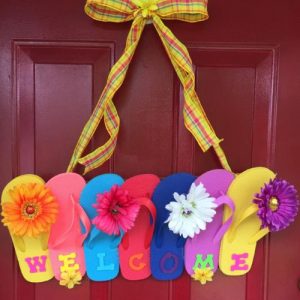
Flip Flop Daisy Wreath
Handmade Flip Flop Wreath
-
Multisize Flip Flop Wreath Instructions
Flip Flop Wreath Directions
-
Outdoor Flip Flop Wreath for Christmas
-
Directions for Making a Flip Flop Wreath
-
Flip Flop Wreath on Wire Frame
There are several wreath frames in the market, but if you want to hide the frame you can use wire. Use hot-glue to stick all the items together and be sure of keeping it from children. Run ribbon through the bands or keep them hanging and you have a perfect ‘do it yourself’ wreath.

Flip Flop Wreath Ideas
-
Flip Flop Front Door Wreath
-
Step-By-Step Procedure to Make Flip Flop Wreath


You can get the supplies you need to make these wreaths just about everywhere. Flip flops that are inexpensive are sold at any dollar store or Old Navy. Craft stores and frugal shops always have a big selection of flowers, accessories, and embellishments so that you can add your own personal touches on your wreath. Explore your imagination and refer to these ideas for some sunny season DIY fun to create vibrant wreaths for your summer

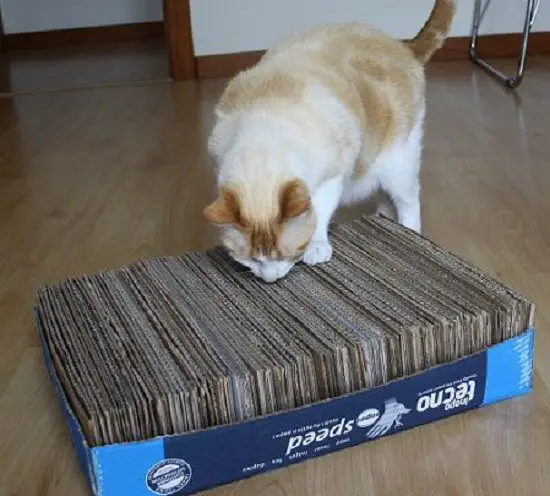
Most pet parents learn it later that scratching is an essential part of your cat’s life owing to their genetic itch. And if they find nothing to scratch, they’ll turn your carpet, couch, curtains, etc. into shreds to do so. Here are some DIY Cardboard Cat Scratcher tutorials and ideas using simple, inexpensive items lying around at home.
By making your own cat scratcher, not only will you be saving some cash, but you might also stop your cat scratching away at unfavorable places. You can design your own cat scratcher in different shapes such as circle, square, cube, etc. While you can buy one from the stores near you, which can be quite a pocket pinch, so go cheaper version by making one at home.
I thought I should bring you another fun and easy project for cat lovers. So today I’m going to show different ways to make a cat cardboard scratcher at home.
15 Ways to Make a Cat Scratcher Out of Cardboard
-
Big Cardboard Cat Scratcher
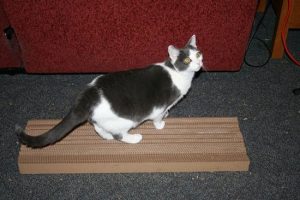
Keep your cat happy and busy by making these large cat scratchers which are rectangular in shape. They would be saving your couch and carpet from unnecessary abuse. You need to cut long strips from the cardboard to make this design.

How to Make Cat Scratcher Out Of Cardboard
-
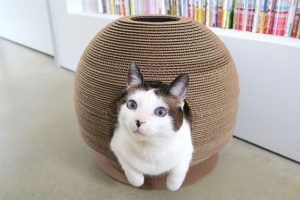
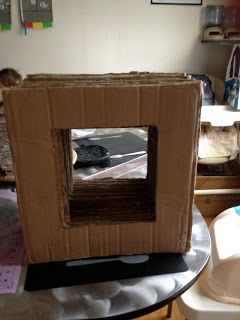
Modern Cardboard Cat Scratcher House
Your cat will love this unique cat scratcher cum dome house. Your kitty can stay holed up in this scratch friendly surface and come out whenever it wishes to. You can place them in your lounge or
Cardboard Cat Scratcher House
-
Cat Scratcher From Cardboard
This is one of the easiest tutorials to make your own cat scratcher in no time. You don’t have to cut the cardboard strips of the same dimensions.

Cat Scratching Cardboard Image
-
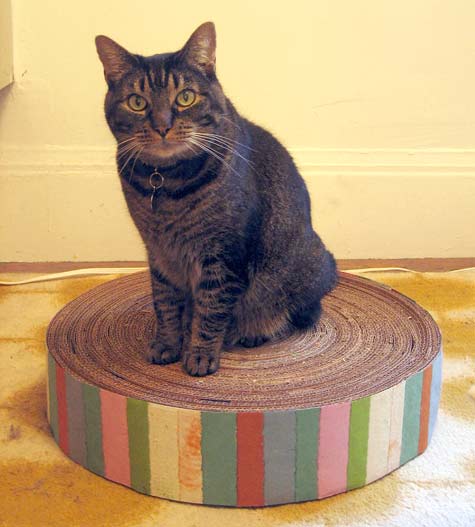
Cozy Cardboard Cat Scratcher Bed
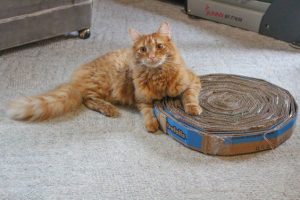
This circular flat vat bed is a simple DIY project perfect for cats who love to scratch on flat surfaces They will love to rest on a cardboard box.
DIY Cardboard Cat Scratcher
-
DIY Cardboard Cat Scratcher for Christmas
This catnip sprinkled cardboard scratcher is just what you need to save your velvet furniture from your kitty’s claws. You can also make the base oval in shape instead of round.

Cardboard Cat Scratcher for Christmas
-
Square Cardboard Cat Scratcher – Youtube Tutorial
Make your own up-cycled cardboard cat scratcher using cardboard from pizza boxes or old shipped boxes. It’s easy to make and does not take much time.

How to Make a Cat Scratcher
-
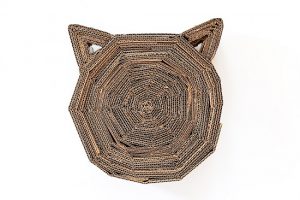
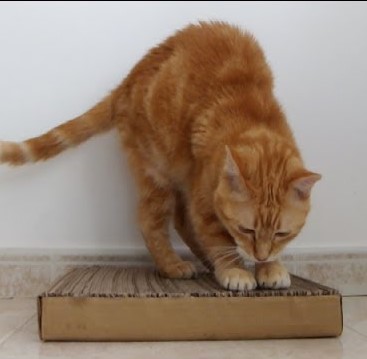
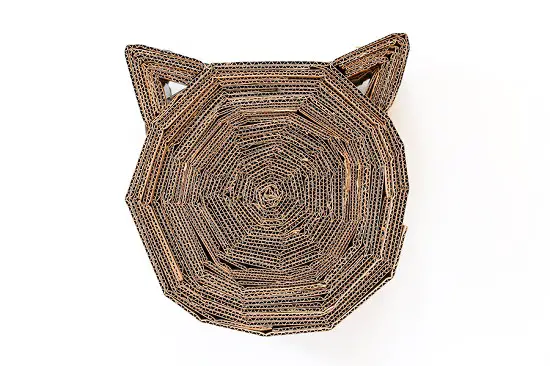
DIY Cat Head Shape Scratcher
This sturdy, cardboard scratcher in shape of a cat head will let you use your creativity. It will help your cat cope up with all that constant scratching without having to deal with damaged couches all the time.
Cardboard Cat Scratcher Pictures
-
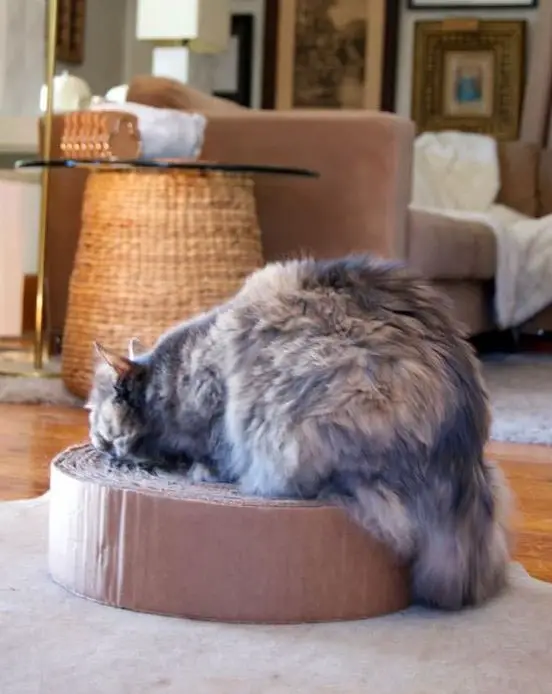
Homemade Corrugated Cardboard Cat Scratcher
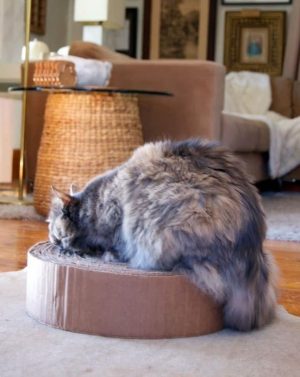
This coiled cardboard seat is of adequate height for your kitty to scratch all she wants without bending too low. A simple DIY for kitty moms who have their hands full.
Corrugated Cardboard Cat Scratcher
-
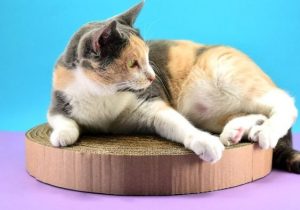
Extra Large Cardboard Cat Scratcher
If you have a big kitty who likes to sprawl over the scratching surface, this large cardboard scratcher offers the best combination of comfort and texture. This is a double-sided cat scratcher, you can turn it around when the top is worn out.
Extra Large Cardboard Cat Scratcher
-
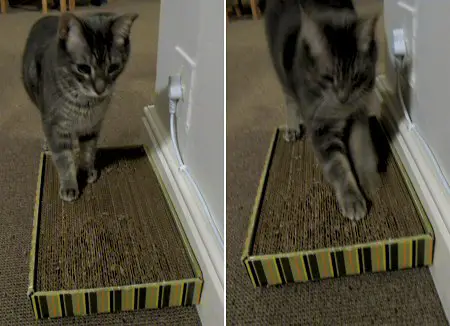
Cardboard Cat Scratching Post/Pad
All you need is a stack of corrugated cardboard boxes, like the kind online deliveries come in. Any size, any shape will suffice to make the scratching pad for your cat.
Cats can use this as a scratching post, a bed, and a perch. Flip it over when the cardboard on top wears out, for a whole new scratching pad. To keep your cat busy you can sprinkle the top with dried catnip.
Cardboard Cat Scratcher DIY
-
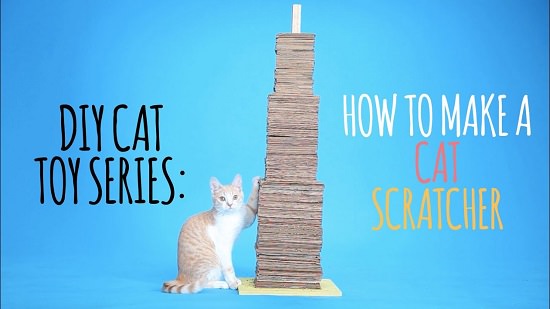
Vertical Tower Cardboard Cat Scratcher
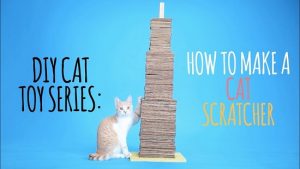
This is a great tutorial to curate the utilities of a cat tree, a toy, and a scratching board in one design. This DIY cardboard tower offers enough playtime to bored kitties whose masters are away for long hours. Follow the video tutorial for step-by-step instructions.
Cardboard Cat Scratcher Tower
-
Recycled Cardboard BOX Cat Scratcher

Cardboard Box Cat Scratcher
-
DIY Cardboard Cat Scratcher Cube
Scratch and Play cardboard cat furniture
-
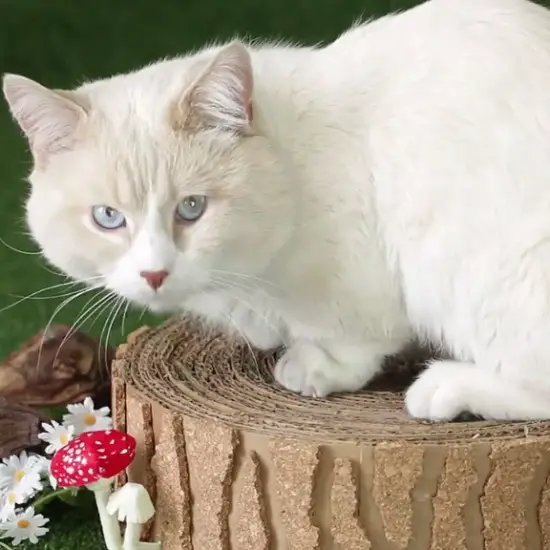
Circle Tree Stump Cardboard Scratcher

Round Cardboard Face Scratcher
-
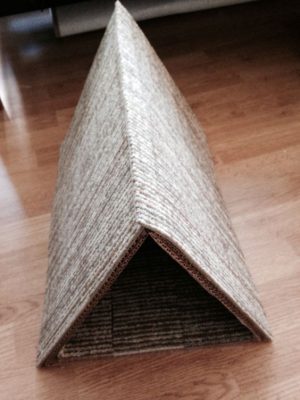
DIY Triangle Cardboard Cat Scratcher
This DIY cat scratch post is made within $2.00! This is super easy to make. The triangle shape is different to look and all it needs it a piece of cardboard, 2 mats from the dollar store, and a glue gun.
Triangle Cardboard Cat Scratcher


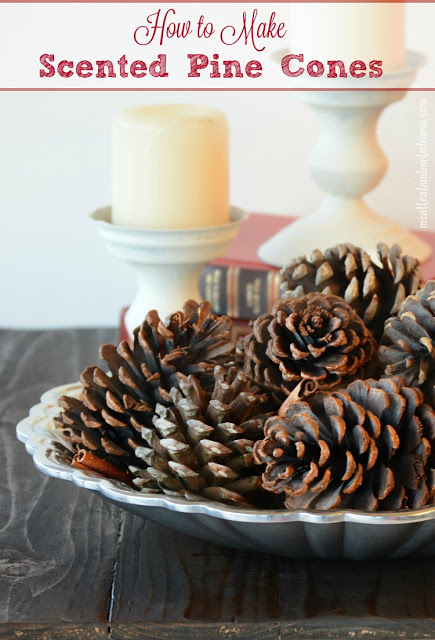
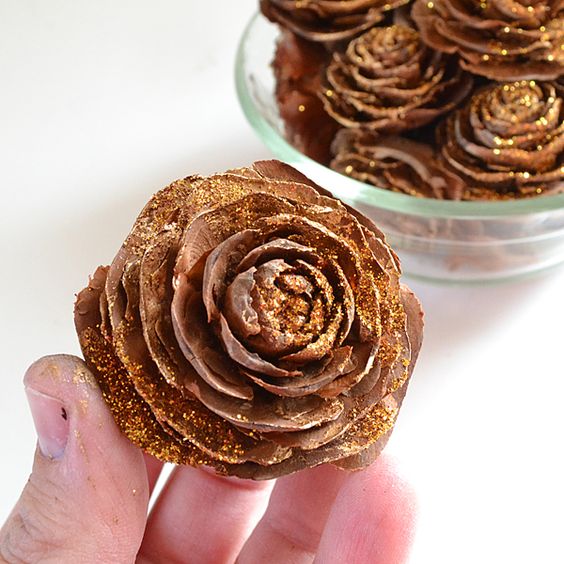
Scented pinecones are a natural way to freshen up the air during the winter months and holiday season! Unlike strong artificially scented pine cones sold in the local stores that can trigger asthma attacks or migraine headaches, for many people, homemade pine cones are safer and natural.
They also make a great personalized gift to your loved ones and for personal use as well. They make your home smell spicy and cozy!
They can be easily modified through DIY and suited for individual needs. Here we have for you a list of recipes to make decorative and amazingly scented pine cones. This is one of those easy Holiday craft projects that fit into any budget.
Things Needed for the DIY Project
- Pine Cones (foraged or bought)
- Essential oils of your choice
- Plastic spray bottle
- Ziplock bag
If you are collecting pinecones from nature they are probably full of dirt and critters. Be sure to clean and dry them properly before use, to keep uninvited dirt away.
10 DIYs – How to Make Your Own Scented Pine Cones at Home
-
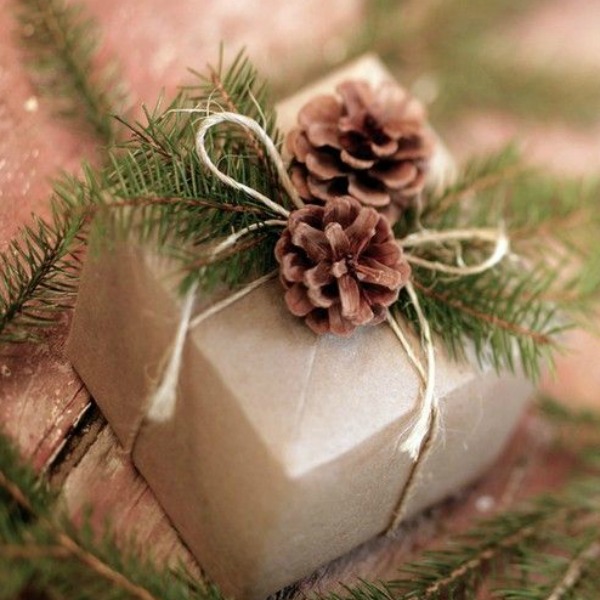
DIY Scented Cinnamon Pine Cones
Worried about what to give your loved ones for Christmas? A good home décor item as a gift can never be out of place. Making one will be more personal and will cost less. Add a few drops of cinnamon-scented oil to your pine cones and zip them in a zip lock bag for a few days.
The scent will immediately hit the nose with a pleasant smell. You can also use your DIY scented pine cones to decorate your Christmas gifts or place them in a pretty container and give them away as gifts.

Scented Pine Cones
-
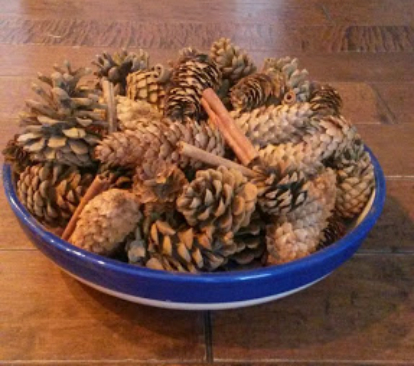
Make Your Own Cinnamon Scented Pine Cones
Make your own décor for festive occasions are fun and pocket friendly. This DIY pine cone can also act as a Christmas tree décor ornament or can act as a simple but beautiful and highly aromatic piece for any part of the house. Apply some glue on the cones and sprinkle the cinnamon, an easy way to give your home a more traditional feel.

Cinnamon Scented Pine Cones
-
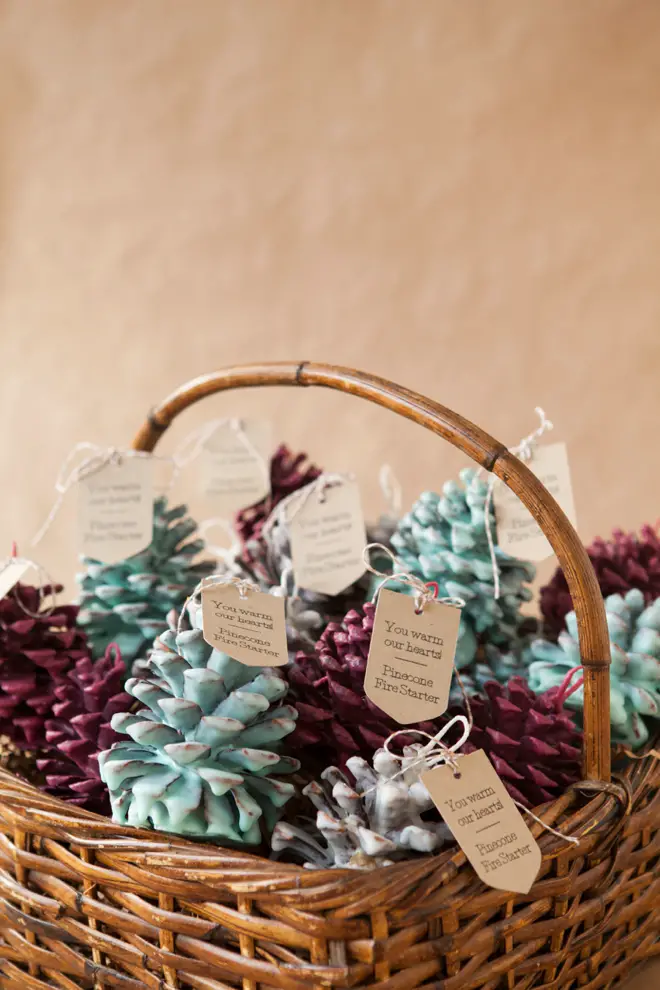
Homemade Wax Scented Pine Cones
Wax coated pine cones can simply be a decorative ornament for your home or can be used as a fire starter for your fireplace. Melt the wax and add fragrance of your choice. You can use different fragrances for each cone, add a tag, and make a basket full of these.
DIY Scented Wax Pine Cones
-
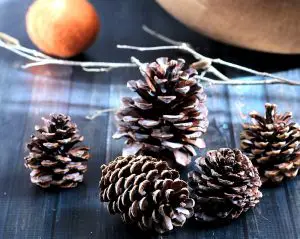
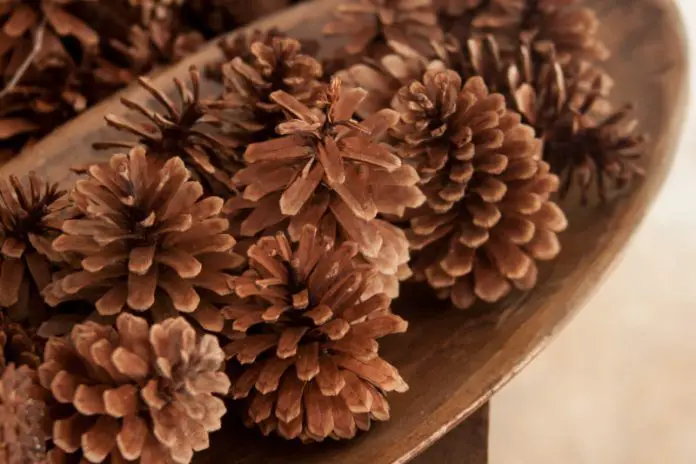
Pine Cones with Cinnamon Scent
You can use mini or large pine cones for this craft. A little variety of different shaped pine cones looks so so pretty and feel the aroma all over your house.

Scent Pine Cones Images
-
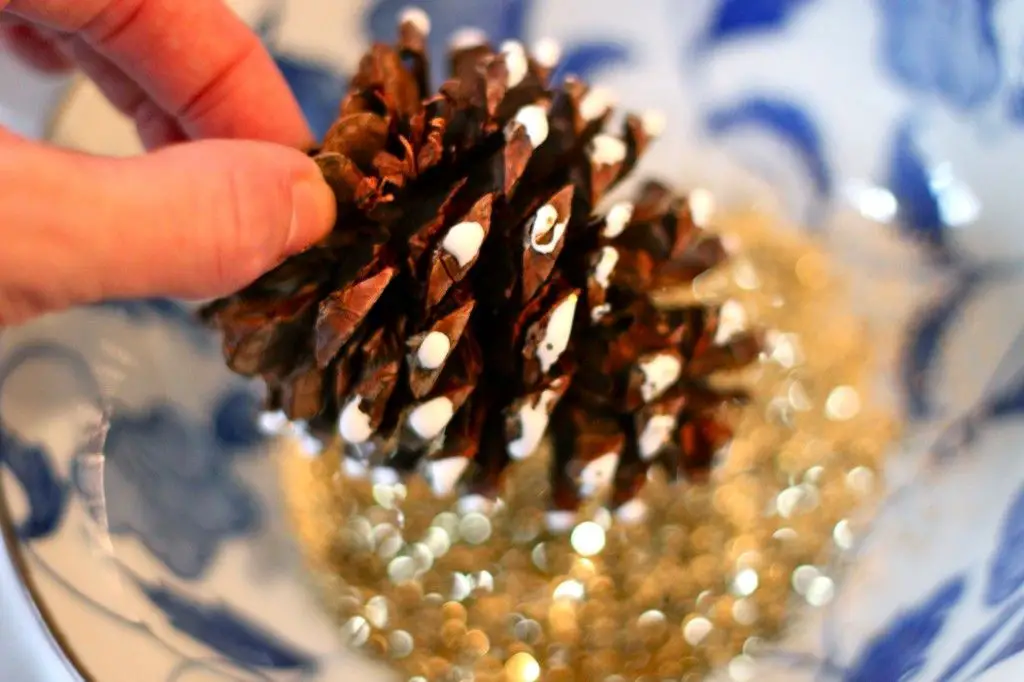
How to Add Scent to Pine Cones
With a few simple items like glitter, spray bottle, and essential oil of your choice you can make a beautiful glittery and aromatic pine cone. Be sure to pick up dried cones as the better absorb and retain the fragrance longer. You can revive the scent by adding the essential oils again.

How to Scent Pine Cones
-
DIY Scented Pine Cone Candles as Fire Starters
Waxed pine cones can be used as fire starters and can be made more fun. Add color of your choice and create a basket-like in the tutorial for a beautiful set. Further, add fragrance of your choice like vanilla, blueberry, Christmas heath, rose chestnut, etc. Use these as gifts for a Christmas party invitation or as ornaments for your tree.

Scented pine cone firelighters
-
Making Pine Cones Scented with Essential Oils

Essential Oil Scented Pine Cones
-
Pumpkin Scented Pine Cone Ideas for Fall
An easy and artistic way of having a pretty and good-smelling piece of pumpkin scented pine cone. Mix orange paint and pumpkin spice and coat the cone in it. For extra detail add orange glitter or sprinkle the spice while the cones are wet. The color really pops out and looks amazing as a centerpiece.
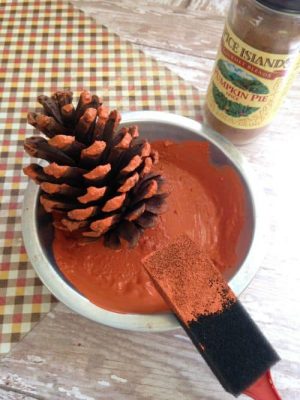
Pumpkin Scented Pine Cone
-
Christmas Tree Scented Pine Cones Tutorial
You can use various flavors like vanilla, apple, clove, orange, pine essential oils, or peppermint oil on your pinecones for scenting them. When the fragrance begin to fade after use, you can refresh them by repeating the scenting procedure as instructed in the linked tutorial.

How to Make Scented Pine Cones
-
Make Your Own Scented Pine Cones for Christmas
Essential oil pine cones are easy to make and can be reused for years by adding the oils again after they wear off. Be sure to set them aside in a bag for quite a few days as to let them absorb the aroma. The more you let them set the stronger the fragrance will be.

Scented Pine Cones For You to Make
These scented pine cone instructions are insanely easy to follow. They can be painted and can be added with any fragrant desired. Not only they bring autumn feel into the house but also are great for displays like on the side table, on the window, or as a centerpiece.
The mini ones look cute and can be gifted to anyone regardless of their age. I hope you like the ones we gathered for you and get inspired to make more like these.


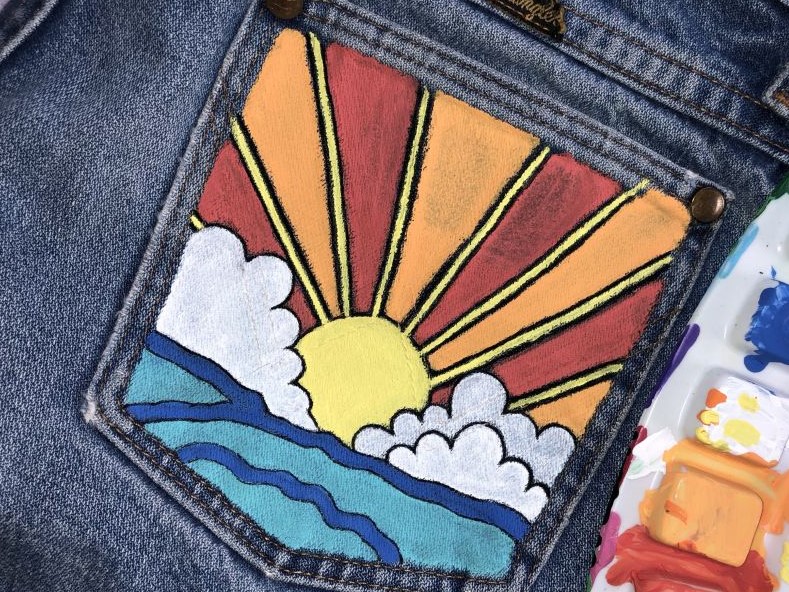
Those comfortable, old pair of denim are always a heartache to throw. So why not have some fun with it? Just use some art supplies like fabric or acrylic paint and brushes to paint anything and everything on the pockets of your jeans to give them that modern and edgy look. We have lined a series of some incredibly interesting paint patterns and known pieces for you to follow. You can definitely go all out with your imagination and skills.
DIY Painted Jean Pocket Ideas
-
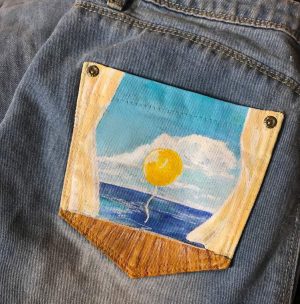
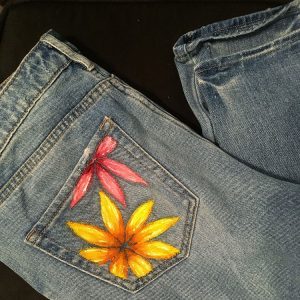
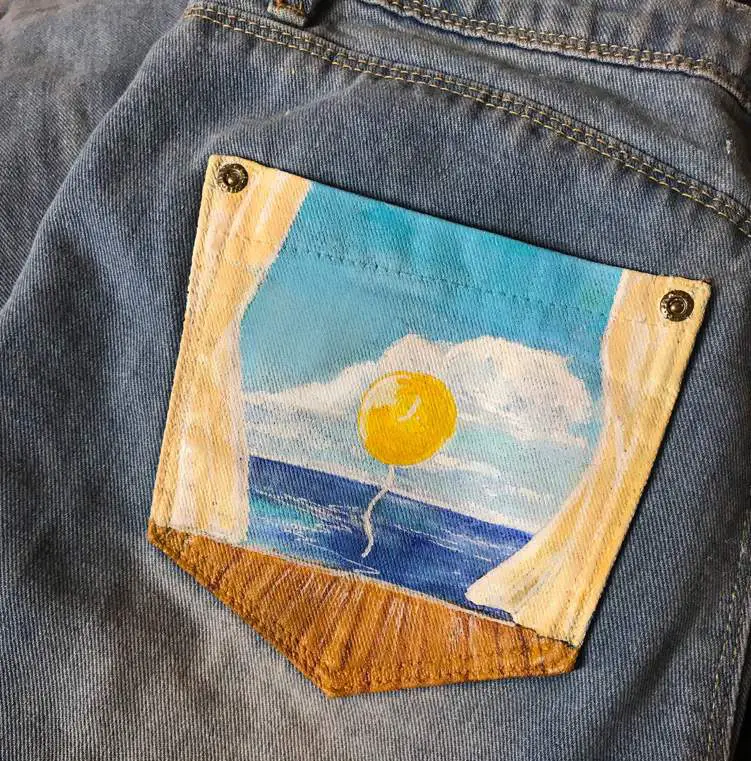
Acrylic Painted Jean Pockets
Make your old blue jeans more colorful. The yellow sunset with red or orange rays, white clouds, and the wavy waters of the sea makes your jeans not only aesthetically bright bot also upgrades your wardrobe.

Painted Jean Pockets Sunset
-
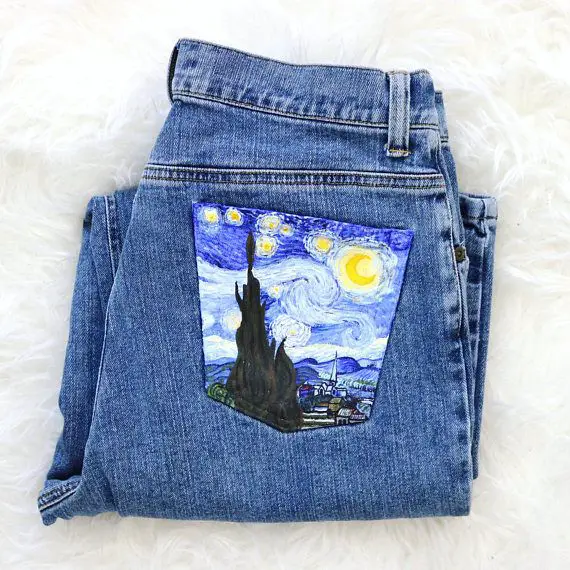
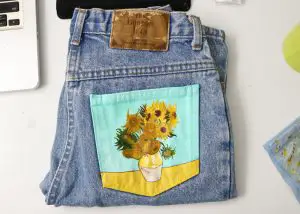
Aesthetic Painting on Jean Back Pocket
Vincent Van Gogh’s painting, Starry night is too eye-catching and mesmerizing. So why no recreate that and make your pants one of a kind. The yellow color of the galaxy of stars and the moon added with black and blue hues will definitely take your jeans game up a notch. You can select other scenes like this as well for a highly artistic painted jean pocket.
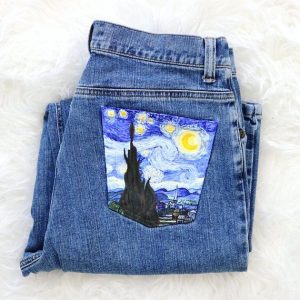
Jeans with Painted Pockets
-
Simple Painted Jean Pocket DIY
Play with your imagination and color palate. Use your skills to give your pants this multi-color wavy pattern look. Just remember to tape the borders for a messy free and clean finishing. Paint the other side using your creative side to make vivid patterns to enhance that ‘different’ look.
Painted Jean
-
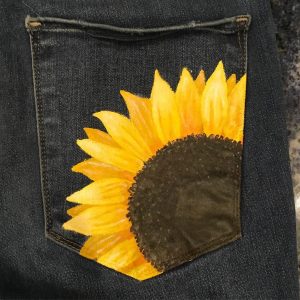
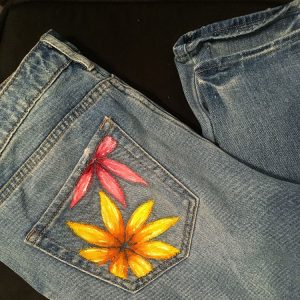
Flower Painted Jean Pocket Tutorial
Sunflowers are always beautiful no matter where we see one. Paint this aesthetic bright yellow colored sunflower. Stroke out those lines with a fine brush for a new and refreshed pair of jeans giving a summer vibe. You can also paint your jean pocket with other seasons or festivals common symbols like snowflakes for winter to represent Christmas.

Sunflower Painted Jean Pocket
-
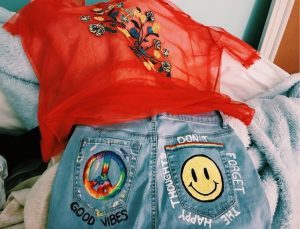
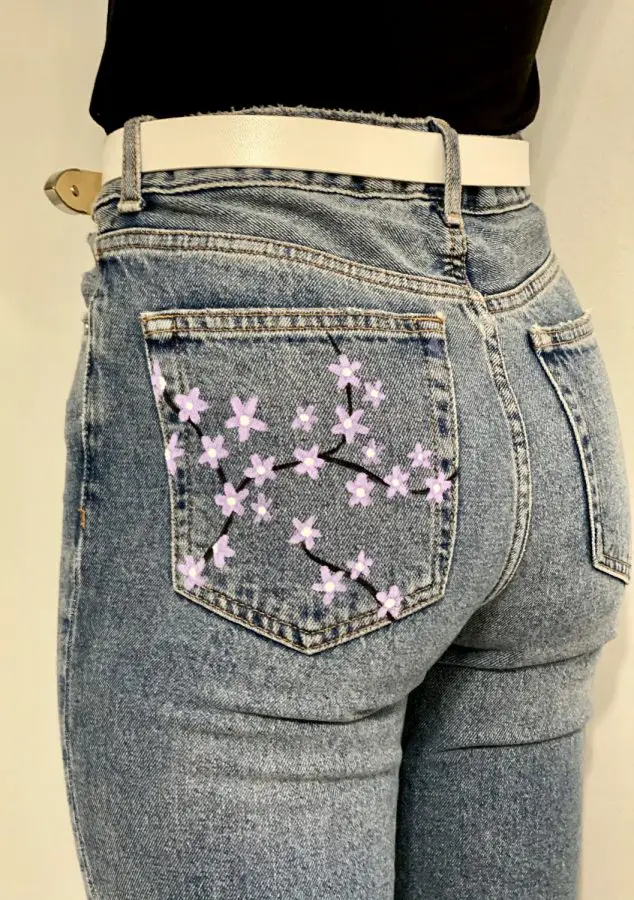
Unique Paint on Jean Pocket
If going all out is not your taste try painting these flowers. All you need are some acrylic paints, tape, paintbrush and a pair of jeans. With minimal supervision, this painted pink flower pattern looks like an intricate print of machine.
Cute Painted Jean Pocket
-
Painted Denim Pocket Instructions
You can never get out of ideas with art and craft. Paint the sea, a favorite object, or some abstract shapes and vivid patterns. Take some help from your friends for a perfect finished product like this.
How to Paint Jean Pockets
-
Cute Painting on Jean Pockets

Painting on Jeans Pocket
-
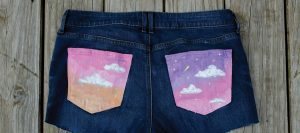
Easy Painted Pockets of Short Jeans
Mix and match hues and create beautiful jeans that set a high benchmark of fashion. Paint this beautiful pink purple and orange sky scene using oil, fabric or acrylic paints. The attention drawn will definitely get you some DIY art projects.
DIY Painted Jean Pockets
-
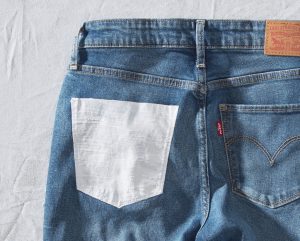
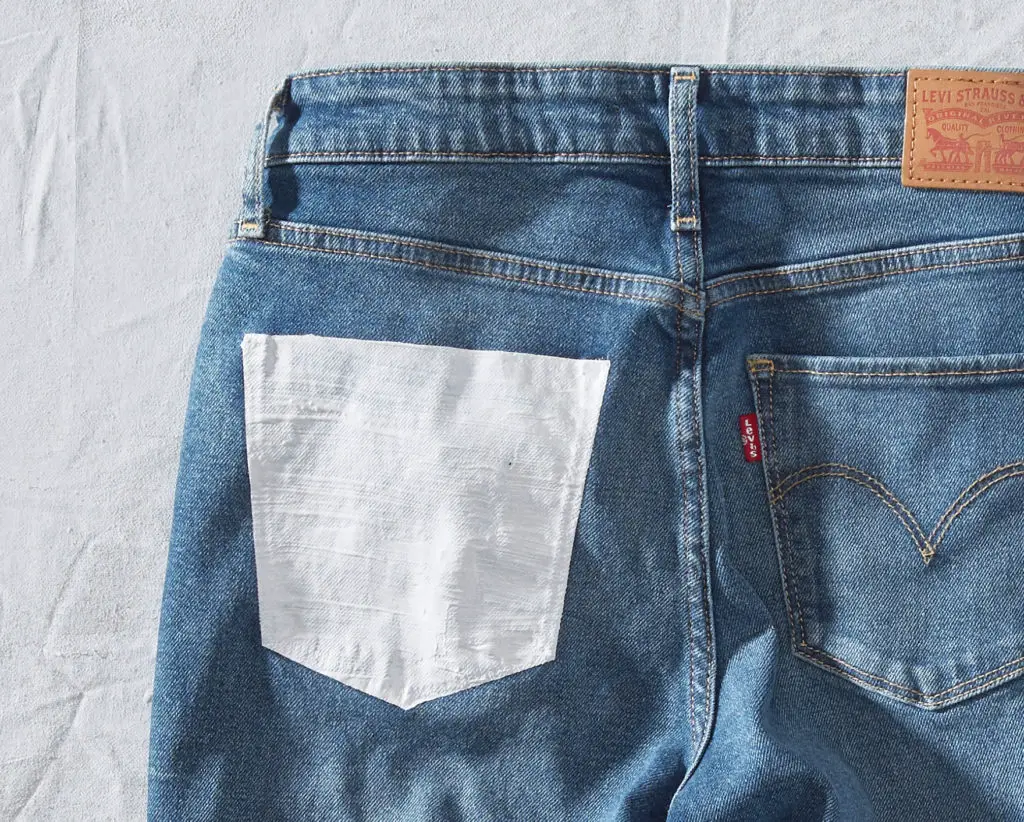
DIY White Accent Pocket Jean
This one is the easiest tutorial to follow. You need not have any artistic skills but only some art supplies and a stitch opener. Paint one pocket of the jeans white to get that out of the box look.
Painted Back Jean Pocket
-
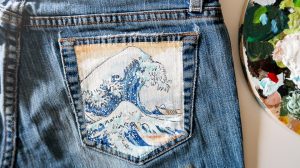
Hand Painted Jean Pocket Design
Another masterpiece to recreate and for some trendy fashionable look is The Great Wave off Kanagawa. The majestic waves and the hues of the sky complement each along with the blue color of your denim jeans.
Painted Pocket Jeans
-
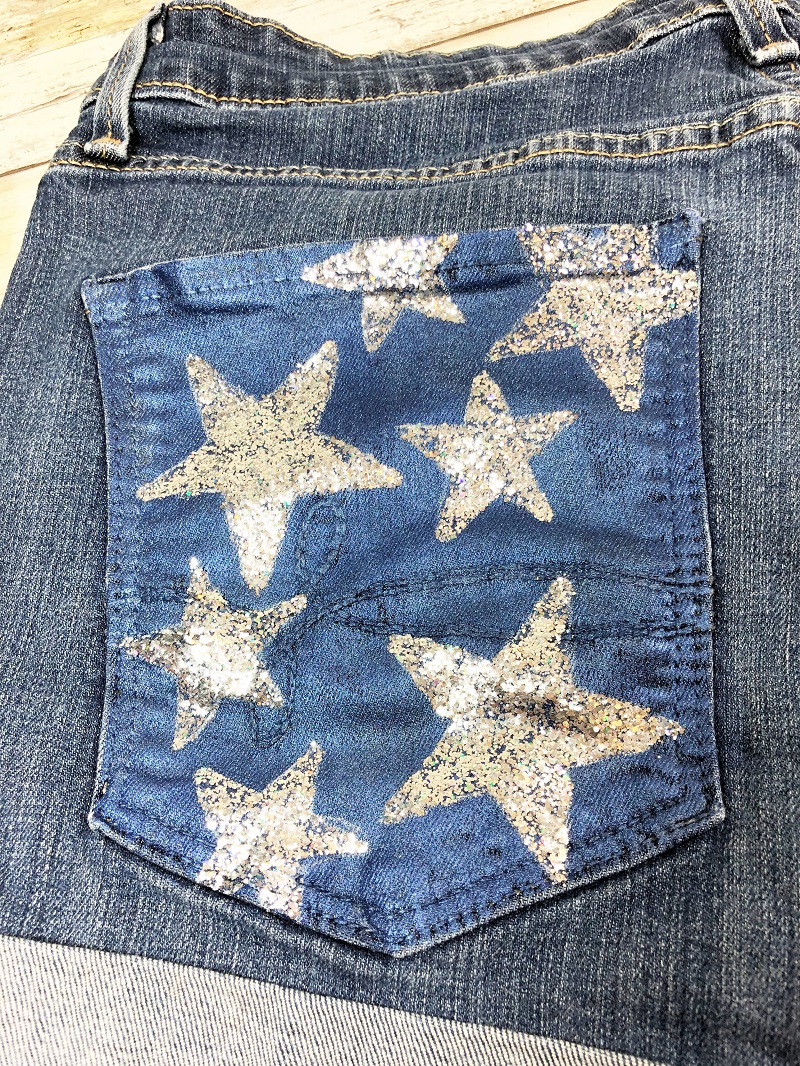
American Flag Painting Ideas on Jean Pockets
American flags are a part of almost all trendy stuff, your jeans can be a part of that trend too. With colors that include white, red, and blue, create perfect line strokes and stars with your paintbrush.

jean pocket painting ideas
-
Scooby-Doo Painted Jean Back Pocket
We always want to crawl back to our childhood days, don’t we? And who wasn’t the biggest fan of scooby-do? Put cardboard in the inside of your denim jeans for some base and don’t forget to add textile medium to your colors for it to be permanent. Draw and paint the classic van of the gang on one side and the set of the scene on the second pocket to seem like a follow-up story.

Cute Jean Pocket Painting
-
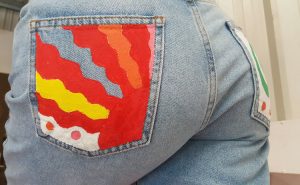
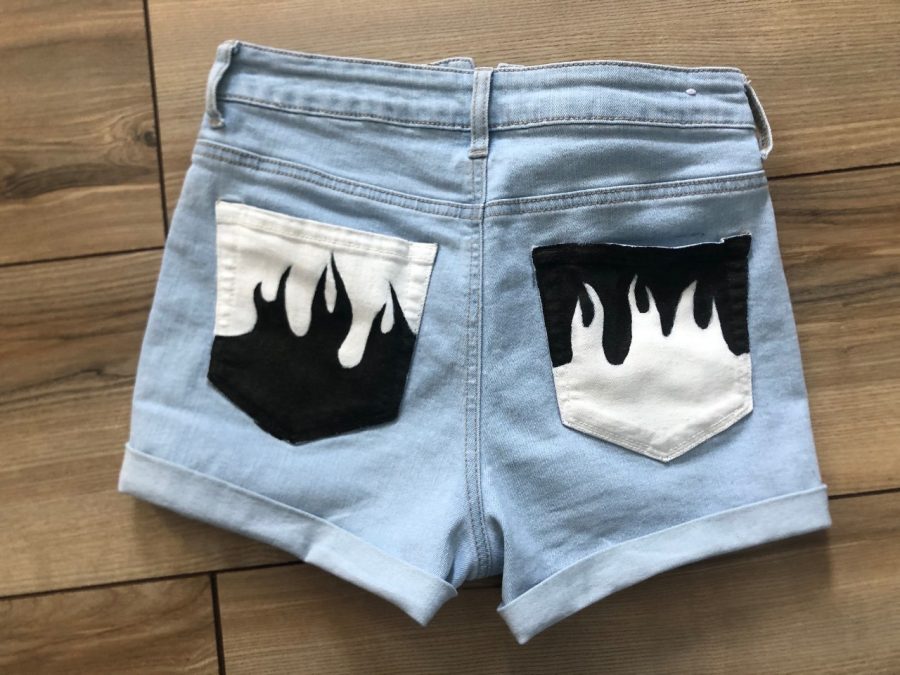
Vivid Jean Pocket Painted Design
Fashion and art are all about out of the box thinking. Paint fire but with some modern and vivid touch to it. Instead of painting those yellow paint them black and white to uplift your fashion game.

Jean Painting Ideas
-
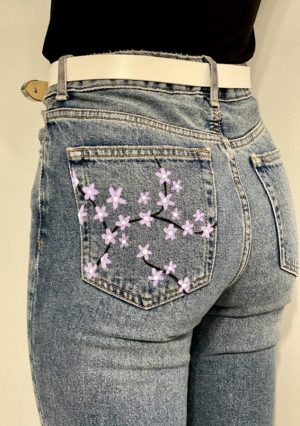
Painted Back Pockets on Jeans
For a throwback 90s chick look, draw and paint these simple flowers finished with detailed petals. Use can also paint them on the front side of the jeans for a consistent look.
Acrylic Painted Jeans Pocket
Some More Jean Pocket Painted Ideas
-
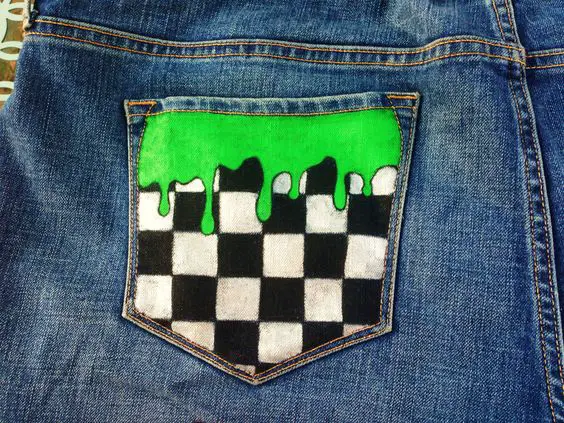
Checkered Design Jean Pocket Painting

DIY painted jean pockets
-
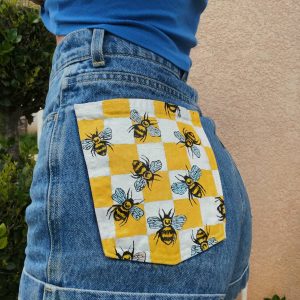
Bees

How to Paint Jean Pocket
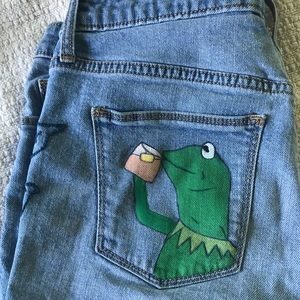
Kermit Painted Jean Pocket
Cute Painting on Jeans


Get crafty and show off your skills with these tutorials. Start with simple once and proceed to more advanced ones like that of famous paintings or your favorite Disney character.
The tutorials are easy to follow and fun to execute. You can always put your ideas to create even better DIY jeans, all you need is patience and practice.
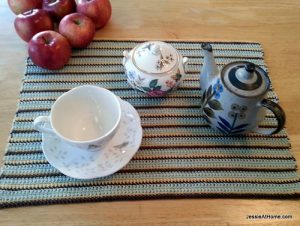
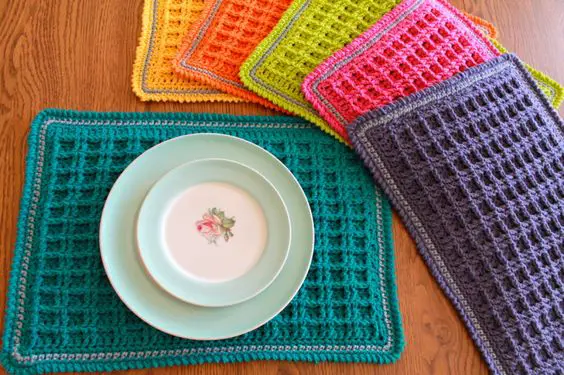
Crochet placemats add an eye-catching aesthetic to the dining table. These a personal touch to the house allowing you to free flow with your imagination of what your house must look like. We have rounded up some amazing tutorials and DIYs of crochet placemats patterns that will make your dining table visually appealing while hosting a lunch/ dinner party or even otherwise.
-
Beginner Table Lace Placemat
This is a simple lacy design that is great for novice first-timer crocheters. This will enhance the look of your table setting. Visit Red Heart for the free pattern and follow the step-by-step instructions to create your own project.

Beginners Crochet Placemats
-
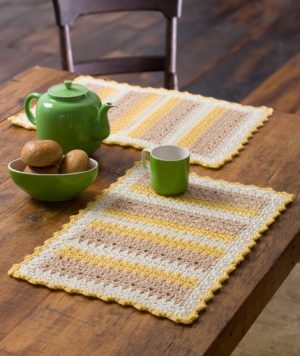
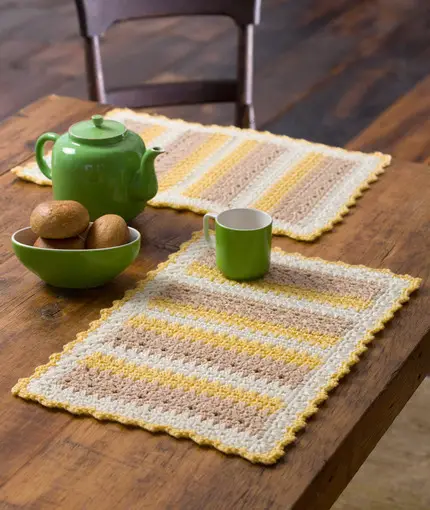
Striped Single Crochet Striped Pattern
This tutorial uses a Tahki cotton classic yarn to create different stripes of color using single crochet technique to create an aesthetic placemat. The pattern is easy to follow with detailed precession.
Free Crochet Pattern for Placemat
-
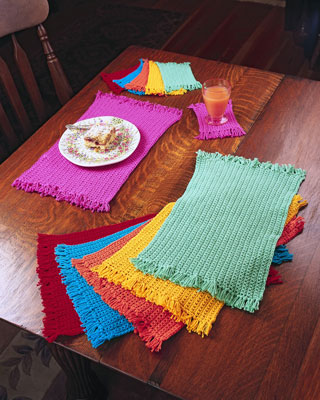
How to Crochet Rectangle Placemats
Colors always lighten up any place, even a boring dining table. Crochet different colors of large rectangular placemats for the plates and smaller ones for cups or glasses to add that extra touch of elegance and modernity. Employing chain and single crochet technique, this is perfect for beginners to the path of perfection.

Easy Crochet Placemats
-
Easy Half-Double Crochet Placemat Pattern
The Spruce / Kathryn Vercillo
-
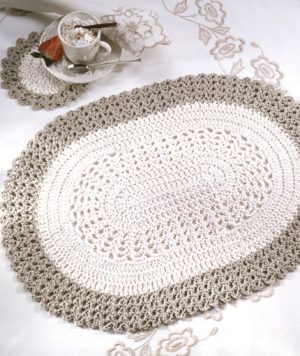
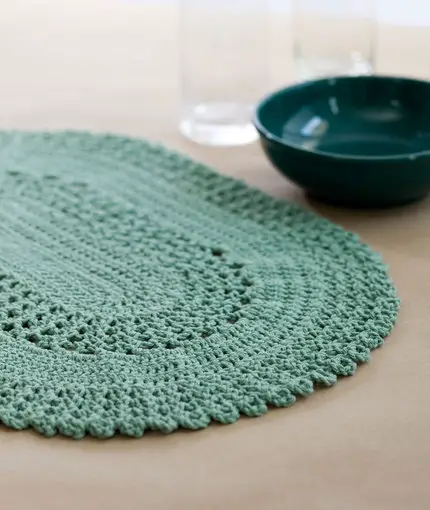
Free Oval Crocheted Placemat and Coaster Pattern
You can crochet your placemat in any shape like for example in this tutorial the light colored oval mat with wavy outer ridges and detailed patterns give it a classy feel. The worsted yarn used is just a cherry on the cake.
Crochet Oval Placemat
-
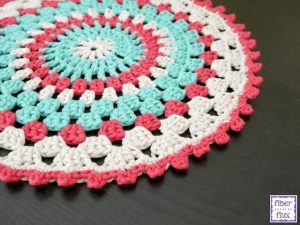
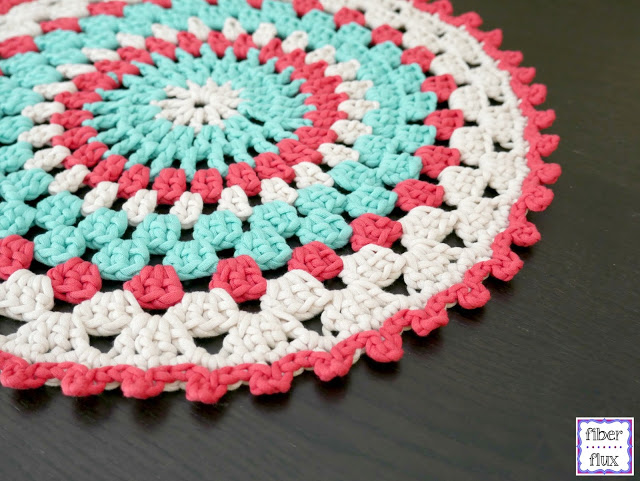
Round Coastal Crochet Placemat Pattern
Crochet allows different shapes of placemats for different purposes employing various techniques. Incorporating different hues which compliment each other to create an intriguing circular pattern is a spot on combination for any dining table. Circular patters will give a perfect outline to your plates and other utensils on the table.
Crochet Pattern for Placemat/ Fiber Flux
-
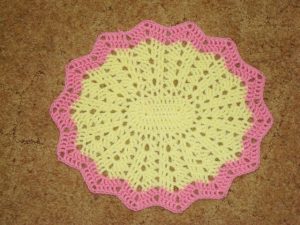
Stylish Oval Ripple Placemat
Using the yarn of your choice you can create this simple looking yet stylish placemat. Play with your color pallet to give it a more attractive look.
Crochet an Oval Placemat
-
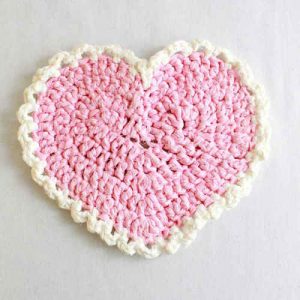
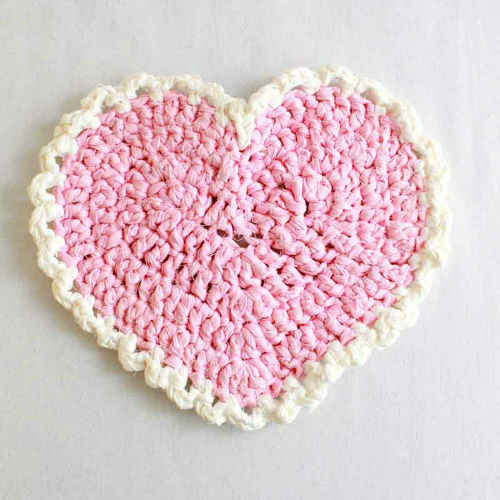
Crochet Pink Heart Shaped Placemat Pattern
Nothing says love more than a hot meal with a romantic atmosphere. So why not throw all the love you have for your special one and place this handmade heart-shaped placemat on the table of affection and love.
Crochet Heart Placemat
-
Waffle Stitch Placemat Free Pattern
Waffle loves can never get enough of that sugary goodness. This themed waffle stitch placemat is a soul mate for the dining table. The different colors are just added colors to the placemat.

Free Pattern Crochet Placemat
-
Directions to Make Crochet Chevron Stitch Placemat
Texture always stands out and so will this Chevron doubled colored placemat piece creating an impressive table. Use contrasting colors to make the Chevron pattern really pop.

Crochet Table Placemat
-
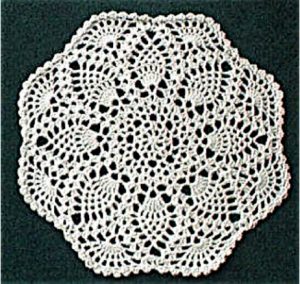
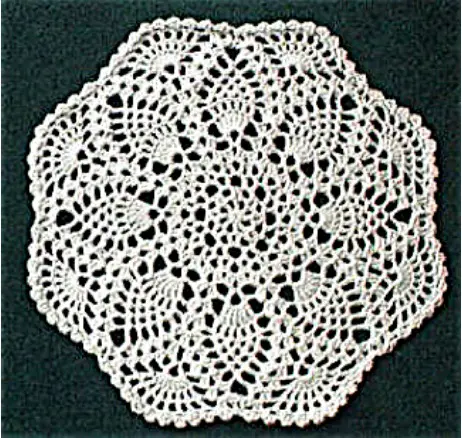
Pineapple Pattern of Crochet Placemat
This lacy looking doily definitely has something out of the box about it. Notice the integrate flower work, starting from the middle of the placemat and ending at the circumference of the mat joined by wavy edges.
Crochet Placemat Patterns
-
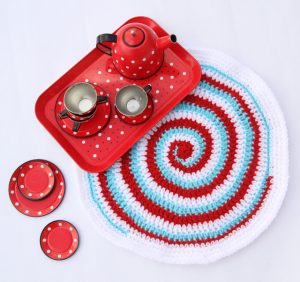
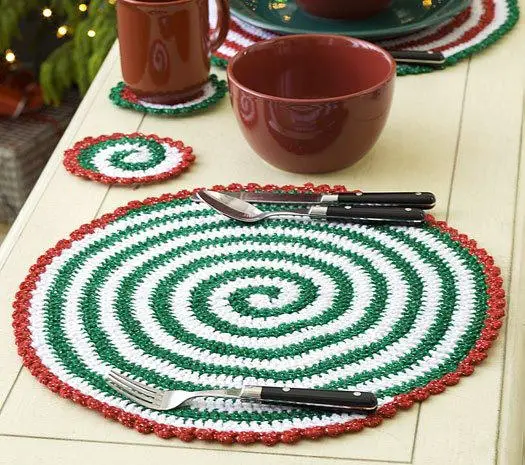
Crochet Spiral Placemat Guide
Swirl your way to upgraded furniture décor with this twisted, colorful placemat pattern. Match or contrast them with your serving utensils for a more extravagant look.
Spiral Crochet Placemat
-
Interlocking Crochet Reversible Placemat
Get the best of both worlds with this reversible mats by knitting a double or multicolor piece. You can change your mats without effort and get the most use of it.
Crochet Table Mat Pattern
-
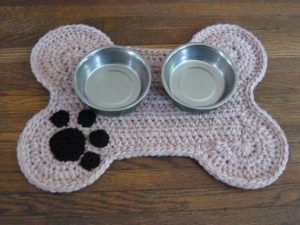
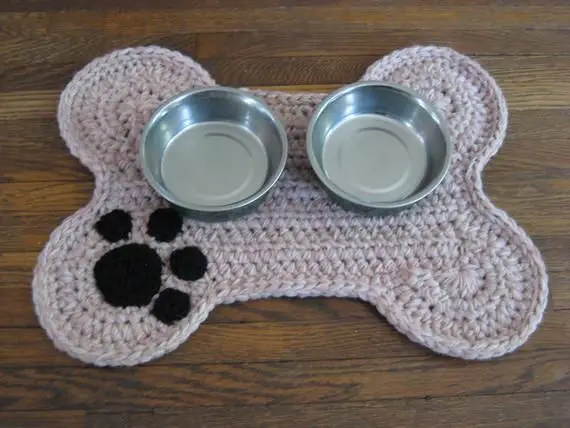
Crocheted Dog Bone Mat Pattern
Dog lovers know that there is no such thing called ‘too much love’ for their dogs and will never shy away from showing it. So here is a simple tutorial of a dog bone shaped mat with a paw knit at the corner for extra detailing.
Crochet Dog Bone Placemat
-
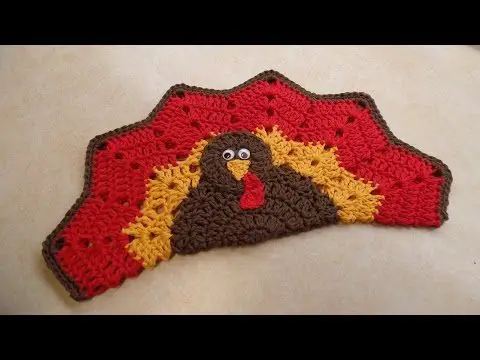
Crochet Turkey Placemat Tutorial
Getting your feast ready for thanksgiving? Place the turkey dish over this turkey-shaped placemat for a definite conversation starter.
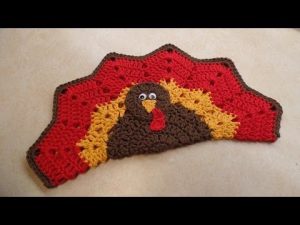
Crochet Kitchen Placemat Pattern
-
Water-Melon Shaped Placemats

Crochet Placemat in Watermelon Shape
-
Handmade Crochet Table Placemats
-
Sunrise Placemat and Coaster Set for Summer
Personalize your home décor with changing season and its colours. Using cotton yarn of two typical colors of the sun that we know of – orange and yellow, warm up the dining area. These pieces are not only ridiculously easy to knit but also literally lighten up the area due to the bright colors.
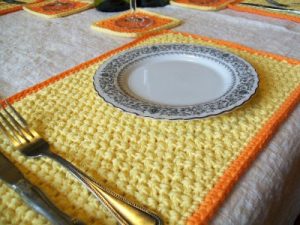
Crochet Placemat
-
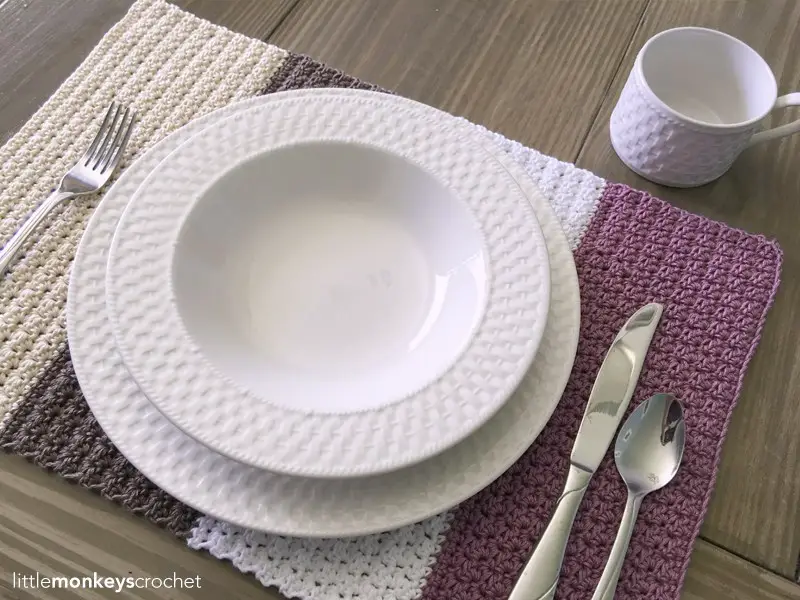
How to Crochet a Color Block Placemat
As the name suggests, this placemat is a combination of classy solid color pieces connected together. The combination of lilac, white, café Au Lait (coffee color) and ecru (light beige) perfectly uplift each other.
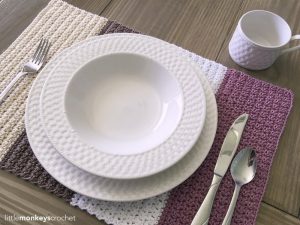
Crochet Placemat Pattern
-
DIY Jute Crochet Placemat
Jute can also be a great crochet material to add a rustic touch to your house décor. Just look at the fine finishing of this mat with beautiful integrate work.
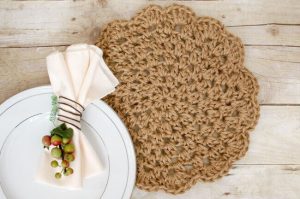
Jute Crochet Placemats
-
Crochet Lace Placemat
-
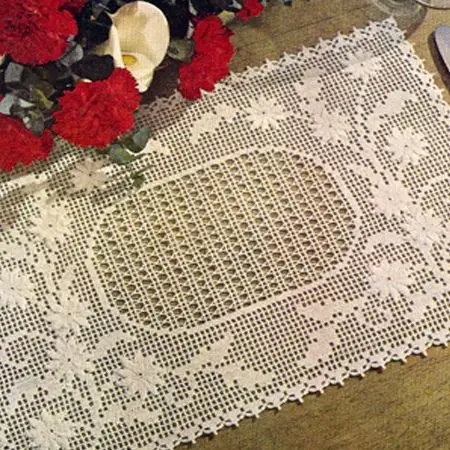
Daisy Embossed Filet Crochet Placemat
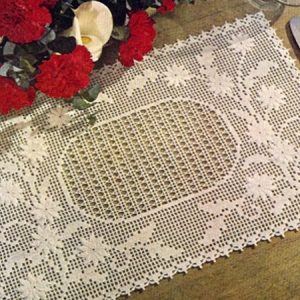
Crochet Daisy Place Mat
-
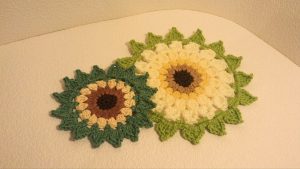
Frilly Sunflower Crochet Placemat
Why go for typical shapes when the end result can be a beautiful flower? Sunflowers always remind us about warmth and happiness and these sunflower shaped mats bring the same to the table. These placemats will surely brighten up the table setting and can be used for spring and summer lunch, or outdoor barbecue parties.
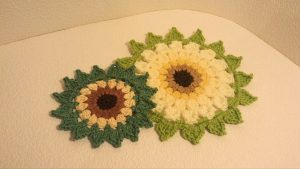
Crochet a Sunflower Placemat
-
Mandala Style Placemats Instructions
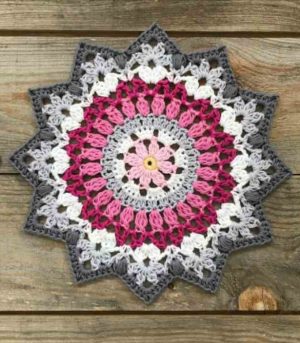
Crochet Mandala Placemat pattern
-
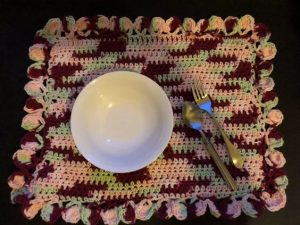
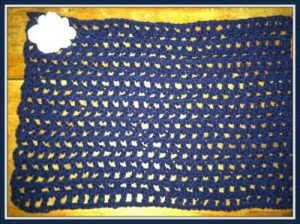
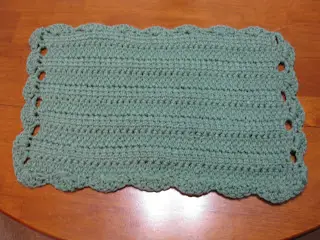
Scalloped Edge Crochet Placemats
This frosty green placemat is simple and a warm gift for your loved once. The scalloped edges add an extra detail to the mat.
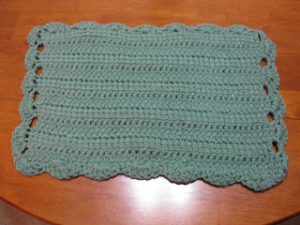
Crochet Placemats
-
Crochet Flower Placemat Design
-
Round Motif Placemat
-
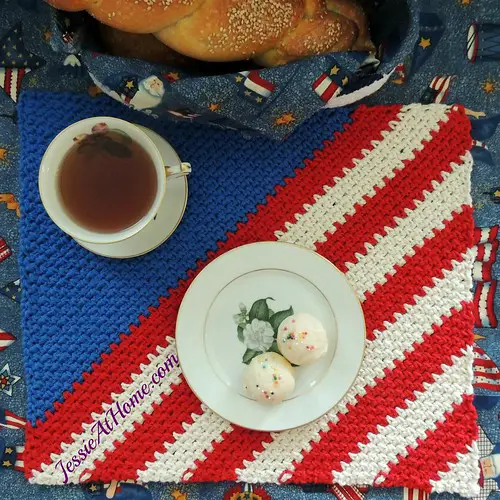
Crochet an Elegant Patriotic Placemat
Celebrate the 4th of July with this flag placemat. Knit a half-and-half blue and red and white color beautiful flag placemat for your guest to talk about.

Patriotic Placemat Crochet
-
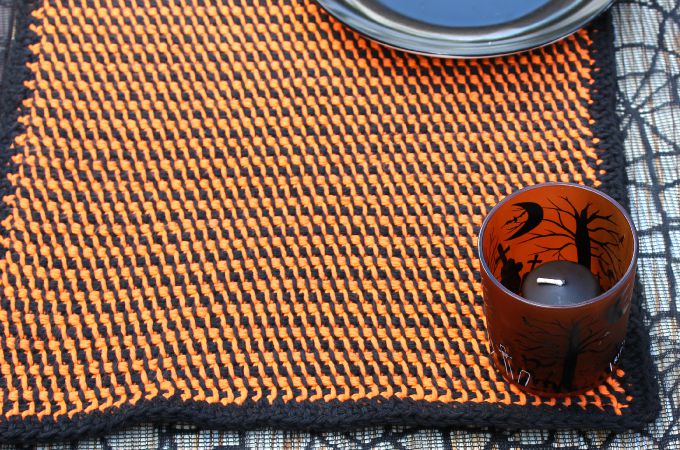
Tunisian Crochet Halloween Placemats
The classic colors, orange and black of Halloween definitely helps this mat to stand out. The Tunisian simple stitch is easy to follow and gives the final product the kind of finish like no other.

Tunisian Crochet Placemat Pattern
-
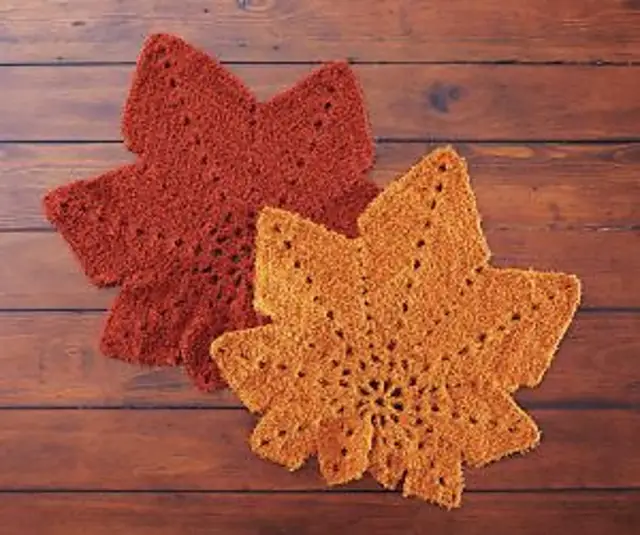
Maple Leaf Crochet Placemat (for Autumn)
Seasons change, so why not the décor? Upgrade every season and for autumns what defines it more than beautiful brown and reddish fallen leaves!

Crocheted Placemat
-
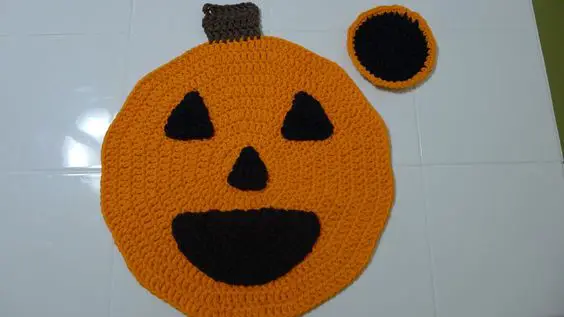
Crochet Pumpkin Placemat for Halloween (Youtube Tutorial)
Another addition to your Halloween placemat collection can be this pumpkin-shaped placemat. The face features an extra edge of details bringing out the festive feel.
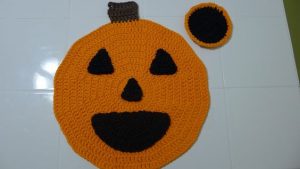
Crochet Pumpkin Placemat
-
Crochet Christmas Pinwheel Placemat Pattern

Crochet Christmas Placemat
-
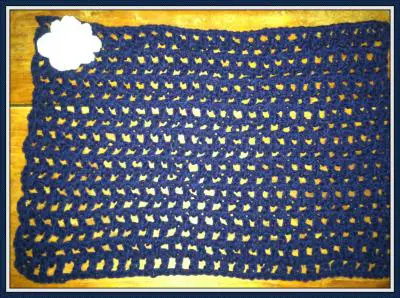
Lacy Flower Placemat [Free Printable Pattern]
This simple lacy mat with an added detail of a white flower is east to knit and to clean afterwards.
Crochet Flower Placemat
-
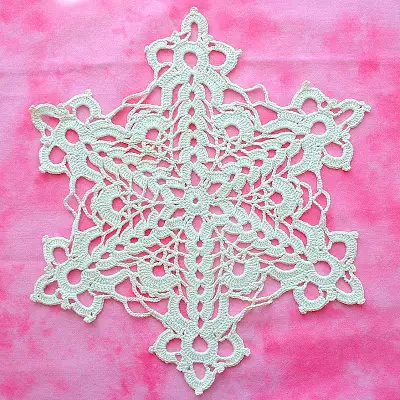
Crochet Pattern for Snowflake Placemat
Each flake is unique and so can be your dining area than that compared to others with this lacy looking snowflake-shaped placemat. Nothing says “winter’s coming” more than snow.

Crochet Placemat Tutorial
-
Snowman Winter Placemat Tutorial
Excite your kids with this cute and highly detailed snowman mat. The flower on the scarf and the gloves just steels the show. You can also gift this to a close friend or relative.
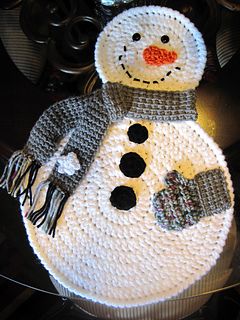
Crochet Snowman Placemats
-
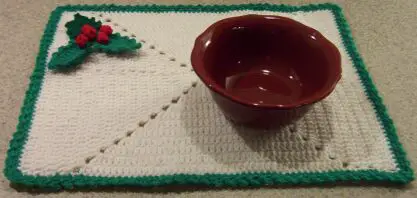
Crochet Holly Placemat for Holidays

Crochet Holiday Placemat Pattern
-
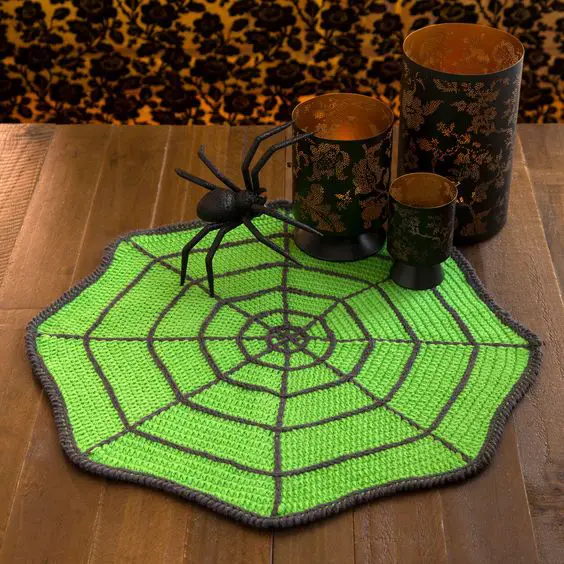
Crochet Spider Web Table Mat [Free PDF Download]
Have a lit party this Halloween with this spooky spider wen mat of neon green and grey combination. Knitted to perfection this mat portrays fine work of a craftsman.
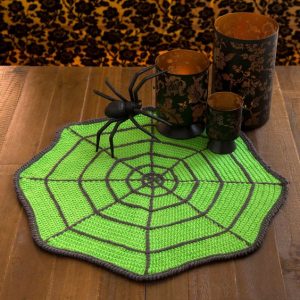
How to Crochet Placemats
With all the techniques and neverending shapes and styles that you can try, there is an ocean of designed placemats out of which we tried to narrow down a few to try your hands on. We hope you try some of these and get crafty!


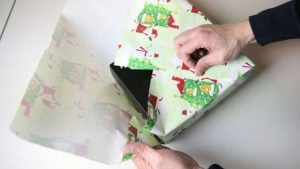
DIYs are always fun, inexpensive and savior at the time of emergency. The following links will help you to find ways to wrap anything without tape and creatively. You can easily break the typical boring style of wrapping a gift. Go hassle-free by not taping the wrapping papers but either by tucking them or tying them and giving them a different look.
With these tips and techniques, you don’t have to search for a tape or worse its opening side. Scroll down with these easy collection of gift-wrapping ideas and find interesting ideas.
Ways to Wrap a Present Without Tape and Sticky Glue
-
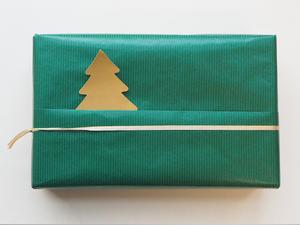
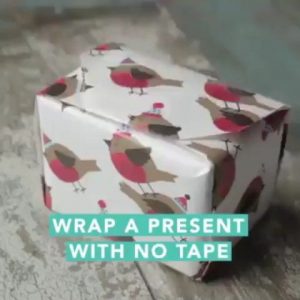
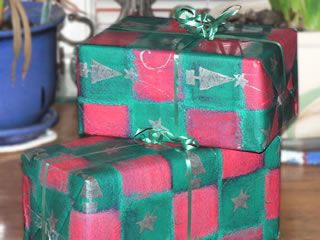
DIY: Wrapping Christmas Present without Tape
This link provides a step by step instruction of how to wrap a present for your loved ones neatly without duct tape or any kind of sticky glue. Presenting gifts to your children in these folded and tied gifts is effortless and cost-effective as the wrapper can be reused.
How to Wrap a Christmas Present Without Tape
-
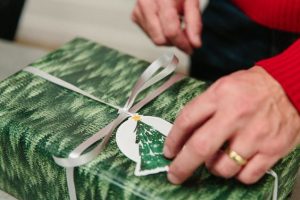
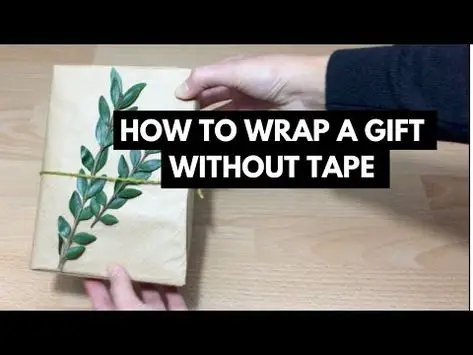
How to Wrap a Gift Without Tape Tutorial
By keeping it in the traditional Chinese way, you can create interesting patterns from paper to wrap your present. It will be fun putting your receiver in a dilemma on whether to keep that beautiful pattern intact or to see what’s inside it. You can easily add a personal touch to the gift like a note or a drawing for a warmer present. The ends are collected and tied with a cute thread or ribbon to get it together.

How to Gift Wrap Without a Tape
-
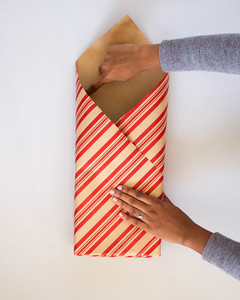
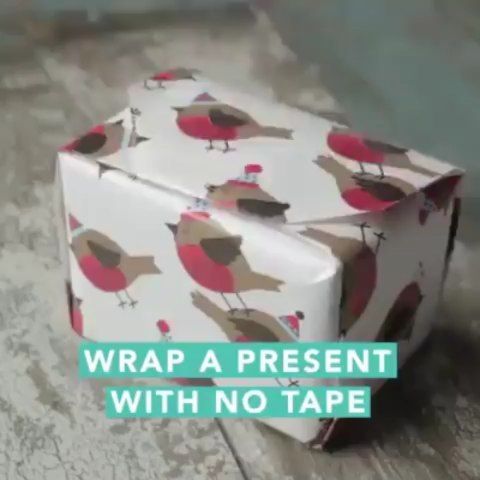
No Tape Gift Wrapping Technique
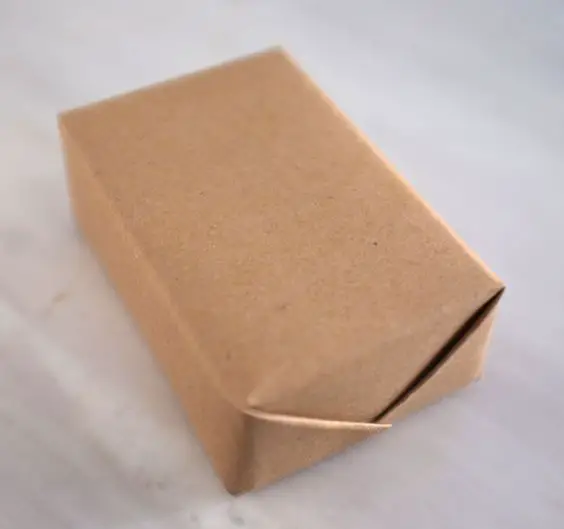
You can easily wrap a hard to wrap present by folding and tucking the paper-like done in origami craft. Go anomalous with styles and create intriguing patterns without the use of any adhesive or tape. You can wrap your presents in anything be it a paper or a beautiful fabric, which in turn can also act as g gift (like a scarf). The linked tutorial uses plain brown paper to wrap the present. You can also add messages, or stickers to adorn the gift.

Tapeless Wrapping Ideas
-
Japanese Style Wrapping without Tape/Glue
The Japanese method of origami helps in wrapping all types of gifts be it small, long or cylindrical with minimal to no waste of the paper and with no doubt, the tape or any sort of glue. It is definitely helpful when you have to wrap a gift in a hurry but don’t want to be messy.
Easy Gift Wrap Ideas
-
How to Neatly Wrap A Present Without Using Tape
How to Wrap a Gift without Tape
-
Easy Sewn Gift Wrapping (No Tape)
Want to go highly creative with your gifts but don’t have much time? Well, this tutorial is all you need. Sew your wrapping paper. Use a simple brown craft paper to make simple patterns and sew them together. To add some detailing to the simple look you can maybe write that gives it an envelope look or add some washi tape (as decoration and not for sticking).
Tape Free Gift Wrapping Tutorial
-
Interesting Ways to Wrap Gifts without Scotch Tape
You can use some accessories like a flower (fake or real) to tie it with your gift, giving your otherwise plain background of wrapping paper a simple yet classy look.

How to Pack Gifts without Any Tape
-
Wrapping Presents without Glue/Tape

Wrapping Presents without Tape
-
Creative Gift Wrapping Without Tape
Gift Wrap without Tape
-
Easy Gift Wrapping Without Tape Instructions
This tutorial will guide you through a simple and quick gift wrapping hack which again requires no duct tape and will also create a cute pocket at the front of the gift for a notecard. You can tuck a small Christmas tree, or a Santa in the pocket with a customized note to add a personal element.

How to Wrap Presents without Using Tape
-
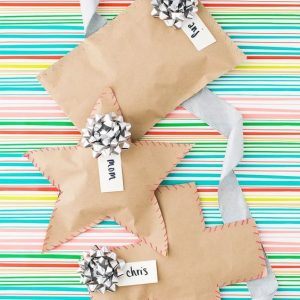
Furoshiki Wrapping style
Saving the best one for the end, Furoshiki is a traditional Japanese wrapping style used for thousands of years. For this, just like the previous ones you don’t need tape or glue. Also, interestingly enough you don’t even require a paper. Use a piece of fabric to wrap the gift creating a bundle. This technique is one of the easiest in the entire list and is really quick. The end result is a cute parcel with beautiful cloth.


The above links provide a complete guide for minimal effort to present wrapping. You can expand on the above ideas as after all, the craft is all about creating. I hope you enjoyed reading the above links and will follow the tutorials to wrap the present for your next occasion.

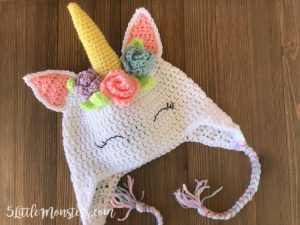
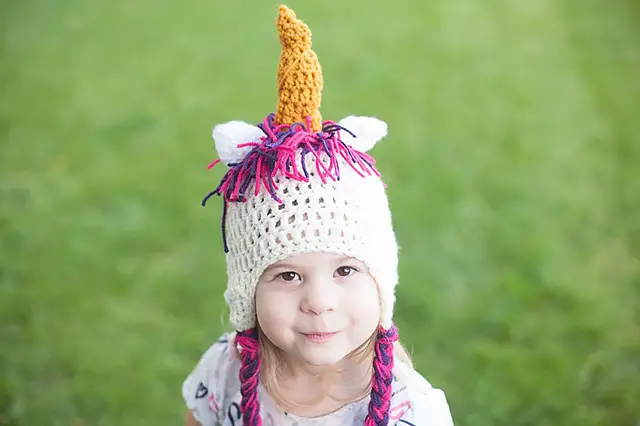
We have put together a set of 7 links to make some pretty unicorn hats which are made by crocheting. Yes, we understand that it might seem a little difficult but not when you have all the steps laid down in detail. The following free links take you on a colorful tour of DIY Crochet Unicorn hats. It will guide you to the different patterns of crocheting easy, rainbow-like hats and unicorn hoodies.
-
Crochet a Majestical Unicorn Hat Pattern
This cute hat features the classic unicorn bow over a white hat knitted with white years. For the colorful look of the hat, the hat is crochet with colorful hair. The extra cloth is added to let hang for elders or to tie it up to keep the hat in place for little kids.

Majestical Unicorn ~ Crochet Version
-
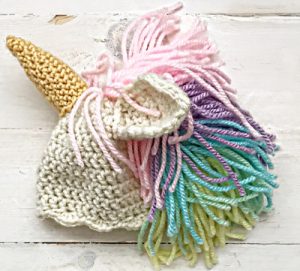
Crocheted Unicorn Hat Design with Flowers
Unicorn hats being already colorful added with flowers enhances the beauty of infinity. Add leaves for a final touch to the hat. The simple look of the hat is perfect for a stroll at the park on a slightly breezy day.
Free Crochet Pattern Unicorn Hat
-
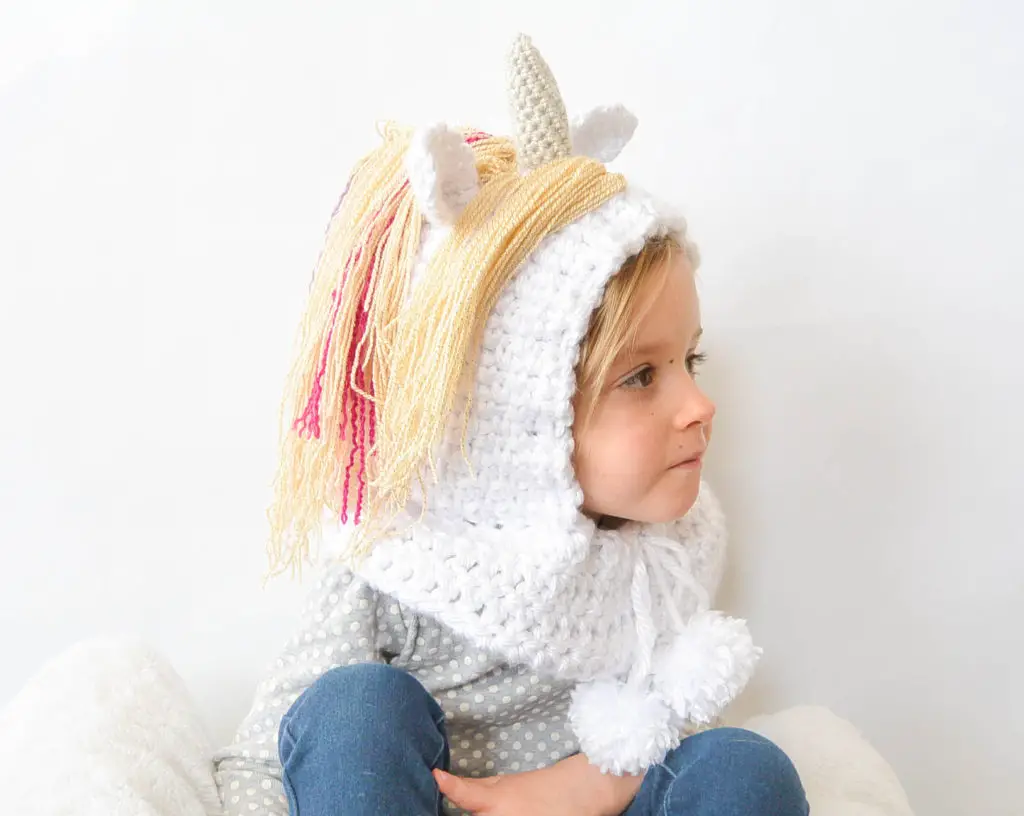
Crochet Project: Unicorn Hat Hoodie
Getting chilly? Make a hat cum hoodie perfect for casual wear, Halloween costume or to sell at a small exhibition in your backyard.
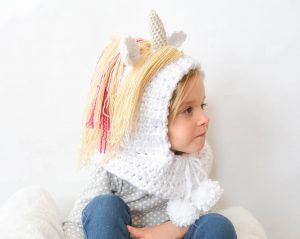
Crochet Unicorn Hoodie
-
Cute Crochet Hat and Diaper Cover Tutorial
This multi-color hat of contrasting hues creates a seemingly eye-catching look and “I too want that feel”.
Easy Crochet Unicorn Hat Instructions
-
Step-by-Step Instructions: Crochet Unicorn Hat

Crochet Unicorn Hat
-
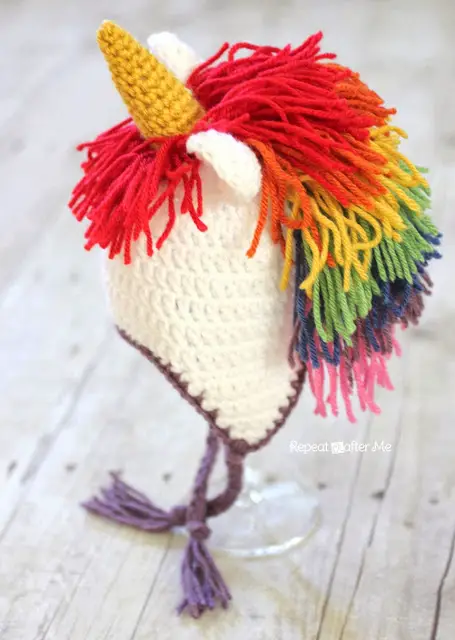
How to Make Crochet Unicorn Beanie Hat for Kids
This variant of the unicorn hat will definitely be liked by adults and kids alike. The free tutorial of this beanie hat with its rainbow pattern and vibrant flowers servers as a perfect go to accessory for a simple outfit.
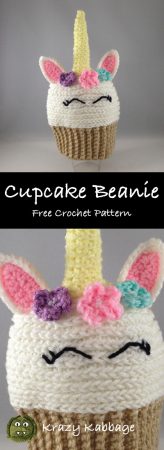
Crochet Unicorn Beanie
Unicorns and hats, individually and together are cute enough to be resisted by kids and adults alike. If you are into crocheting the above links are perfect for you. Follow them and maybe start selling them online as “unicorns are in the air” (quite literally).


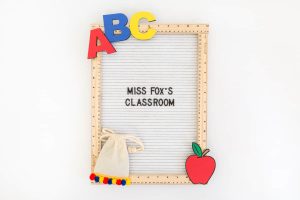
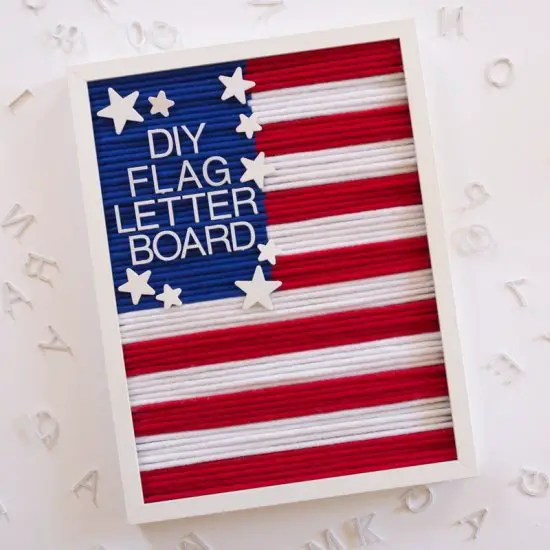
The most versatile and minimalist decoration for your home – felt letter board. Letterboards are new message stations that are quite versatile and can be used to display messages, quotes, affirmations, or hand in the kitchen to write the day’s menu. You could make it as big or as small as you want to suit any space or occasion. These unique felt letter board ideas and tutorials will surely inspire you to create one on your own and hang in your kid’s room or kitchen to enjoy all the clever musings and quotes you display.
These Letter boards can be quite a pinch in your pocket if you buy them from the store. On the contrary, you can make your own letter board with some simple supplies, affordable prices and little time.
Supplies Needed for the Project;
- Felt
- Glue Gun
- Felt Board Accessories (Optional)
- Wooden Frame – buy one that is thick enough for the wooden dowels to fit under
- Plastic Letters – You can get them on Amazon.
- Wooden Dowels – These can be bought at a craft store (.125 inch)
How to Make Felt Letter Board Yourself
-
Easy DIY Letter Felt Board
Some cute messages for the 1st day of your kid’s school will be a great idea to get the kids excited. You can use changeable colorful letters to make it brighter and add some emojis to give them a creative element.
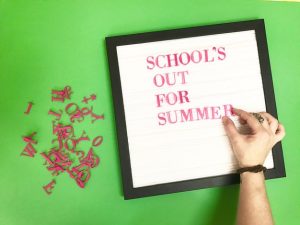
Felt Letter Board
Helpful Tip: How to Cut Letter Board Letters
-
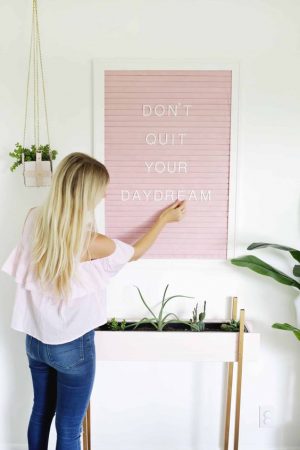
How to Make an Ombre Felt Letter Board
I’ve seen quite a few DIYs for making your own letterboards using a variety of techniques. This tutorial shows how an ombre colored letter board will uplift your decor. The linked tutorial uses square dowels as a base for the letterboard was the most effective.
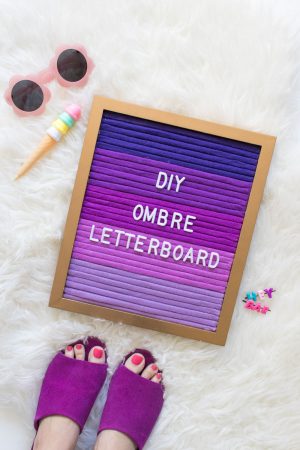
DIY Felt Letter Board
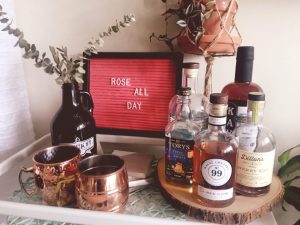
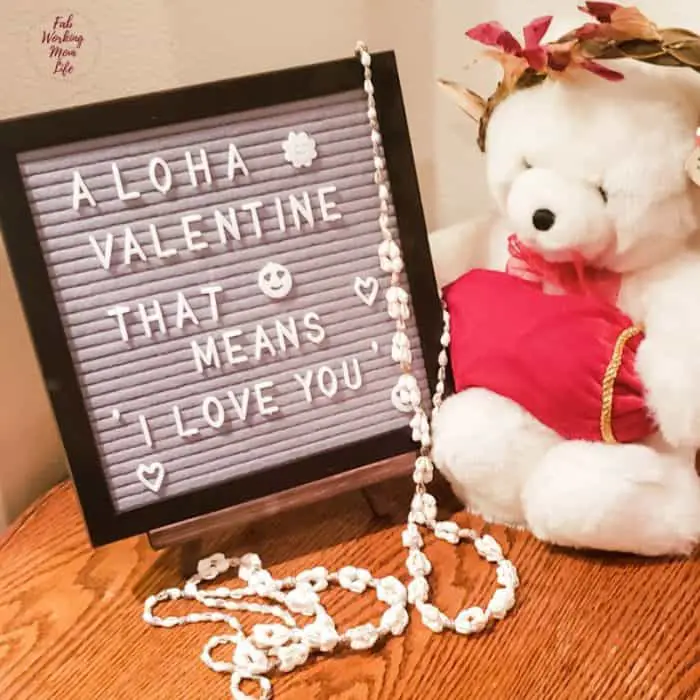
This is a similar tutorial made with a small frame. Instead of square dowels, this tutorial uses bamboo sticks. You can make this with red felt and use it on Valentine’s Day and write your message/quotes in it for your partner. To customize it you add a picture of your loved one too.
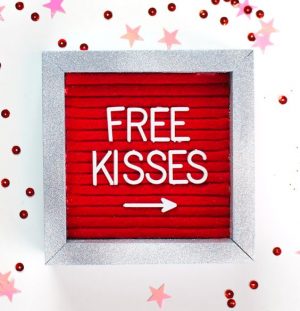
Letter Board Ideas for Valentines
-
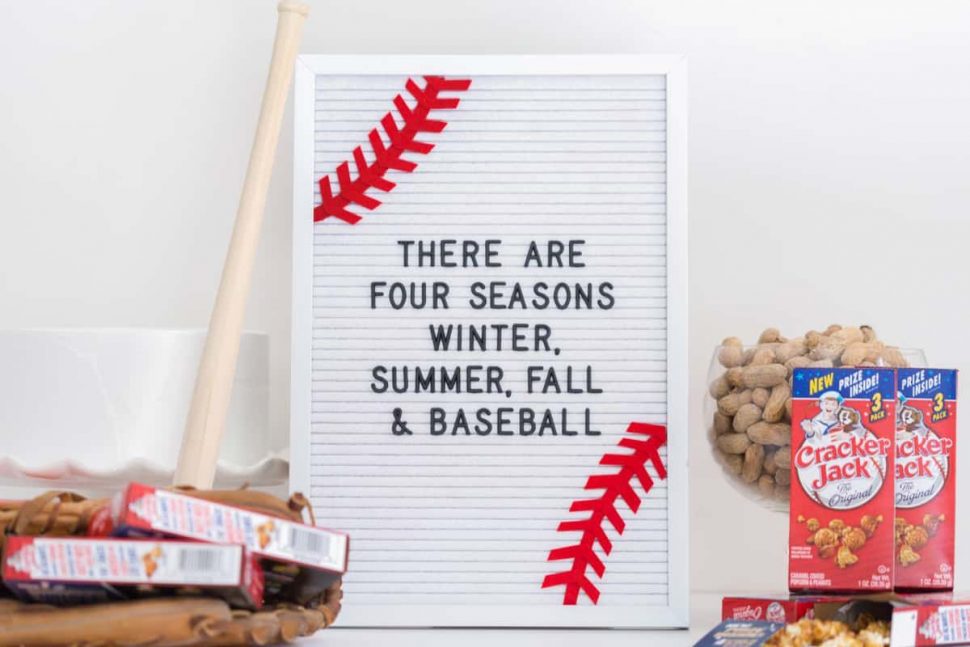
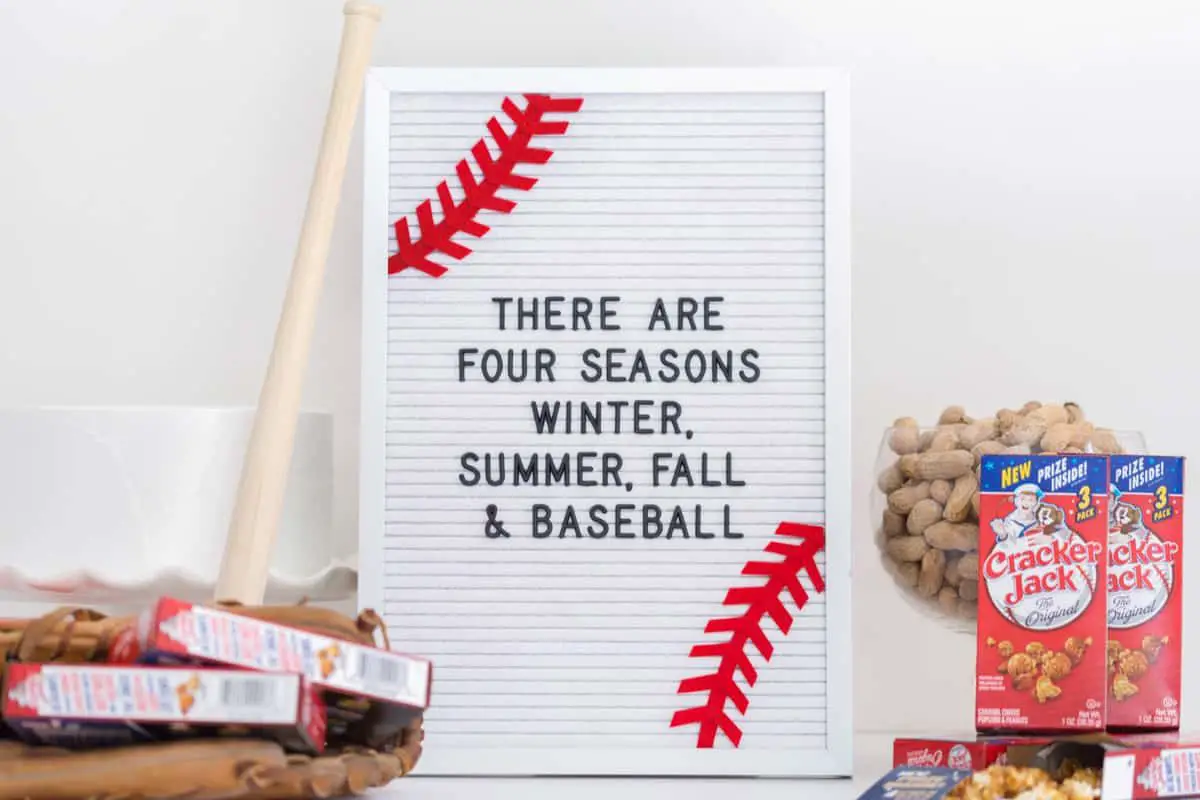
Big Baseball Felt Letter Board Tutorial for Kids
This is for all the baseball lovers. If your kid/husband is fond of the game, trying making one with the baseball theme and place it in their room.
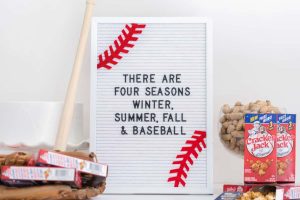
White Felt Letter Board
-
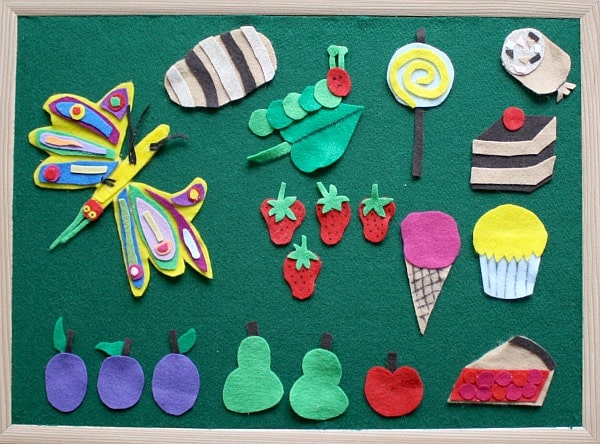
Make Your Own Felt Board for Kids (Tutorial)
This is an easy project to make your own homemade letter board with felt or flannel. These boards are a great way to write quotes, create stories, or write to-do lists for kids. Try and make it bright and colorful, to make it exciting for kids.

How to Make a Felt Letter Board
-
Felt Letter Boards for Children (Back to School Theme)
One of the best elements of this design is using rulers as frames and adorning the frame with your kid’s school elements. It makes it look super cute and something your child will cherish forever.
You can add details on the board displaying your kid’s first day in school or celebrating the arrival of your newborn, write your kiddo’s name, date of birth and weight or even something cute like “You are precious to me” or “You are my world”.
Felt Letter Boards for Baby
-
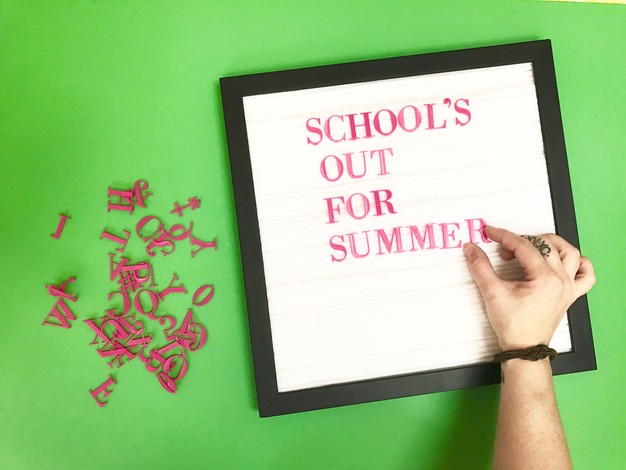
How to Make a Giant Felt Letter Board
Add a retro element to your room with a large letter board. You can put new messages/quotes every day and change it whenever you feel like. It’s also a great way to teach children about numbers and alphabets.
Felt Letter Board DIY
-
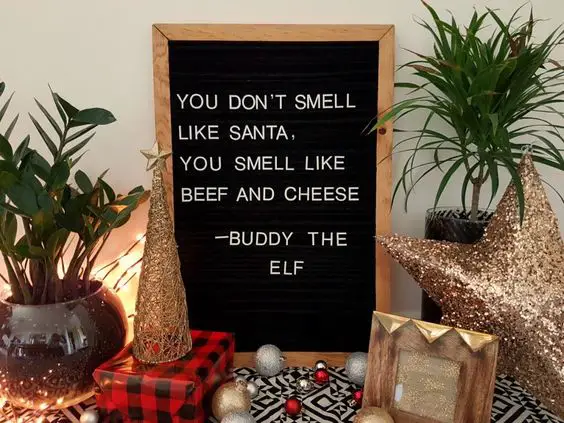
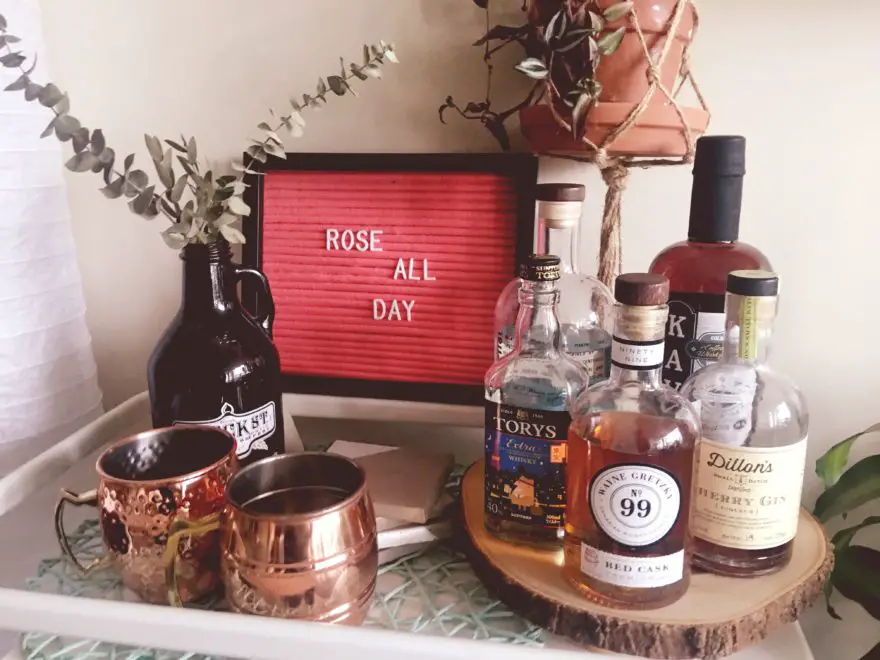
Black Felt Letter Board for Christmas (Vintage Style)
The black letter board with white letters (font) and the perfect sign to your front door.

Felt Letter Board Christmas
-
Cute Pink Felt Marquee Letter Board
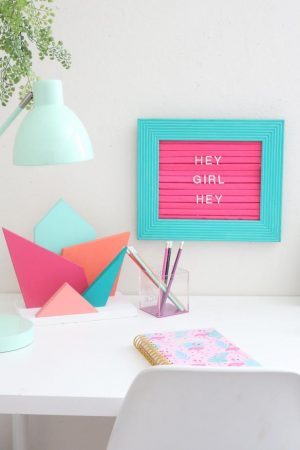
Felt Letter Board Tutorial
-
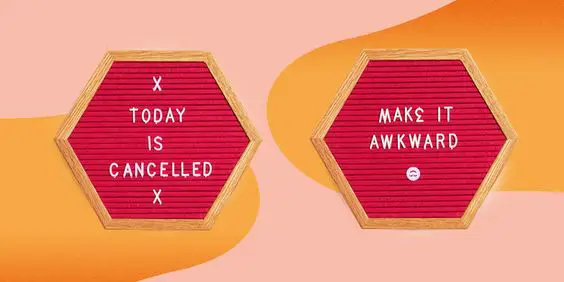
Funny Felt Letter Board Instructions
Try something new, a square or a rectangle letter board is quite common. Try making a hexagon-shaped letter board and add some quirky and funny one-liners on it. Some humor is always great to start your day.

Funny Felt Letter Board
-
DIY Rainbow Felt Letter Board
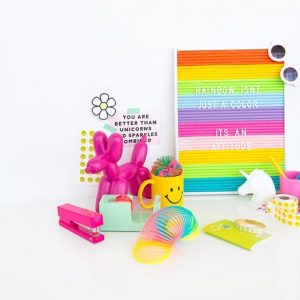
Rainbow Felt Letter Board Ideas
-
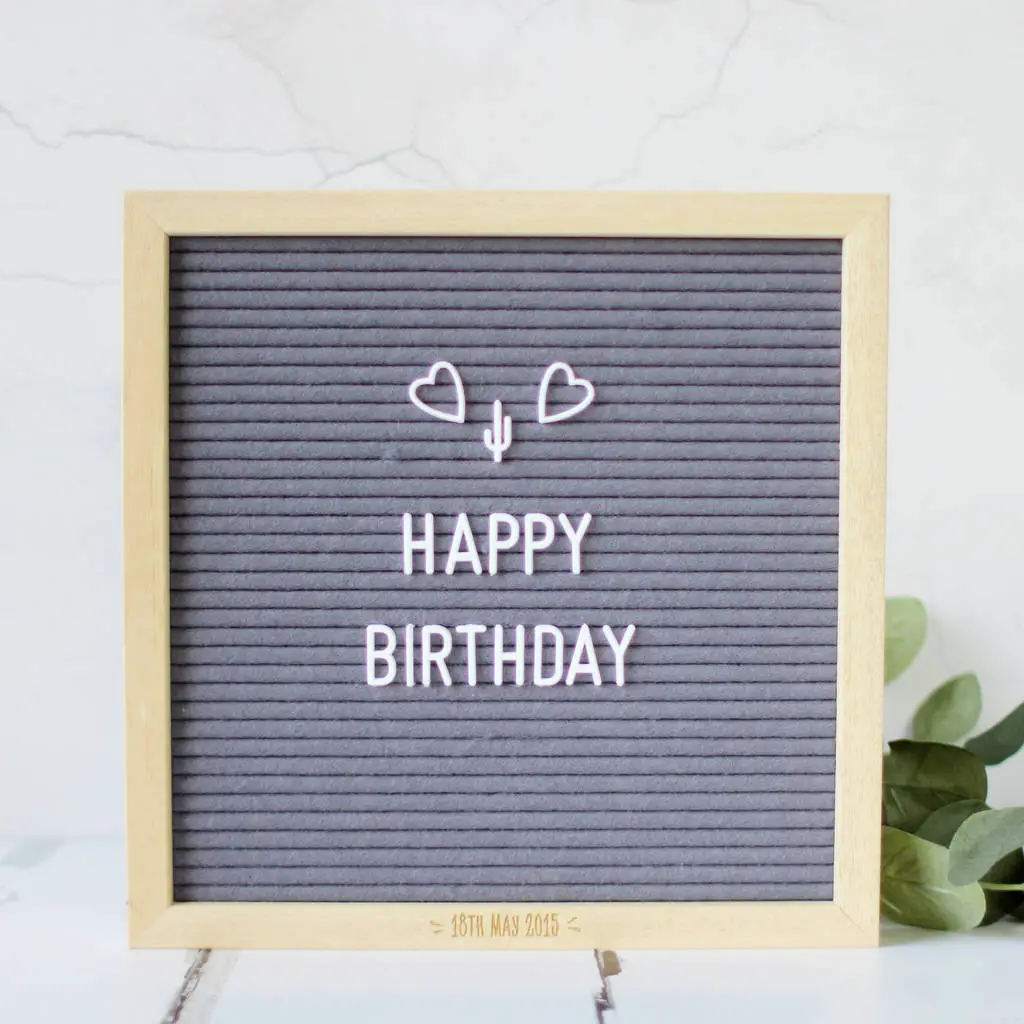
Simple and Elegant Grey Letter Board Ideas

Felt Letter Board Grey
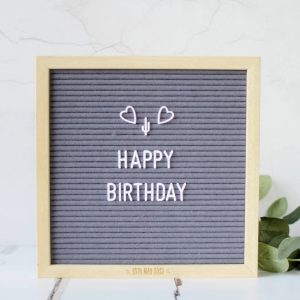
Happy Birthday Felt Letter Board
-
DIY: Glitter Double Sided Letter Board (Youtube Tutorial)
You also use cursive letter board letters to give an informal and smart look to the board. This DIY has adorned the frame with silver glitter to give it a personalized touch to your letter board.

DIY Double Sided Felt Letter Board
-
DIY Vintage Felt Letter Board Instructions
Vintage Letter Board ideas
-
Some More Ideas and Pictures to Make a Felt Letter Board

DIY Patriotic Flag Letter Board
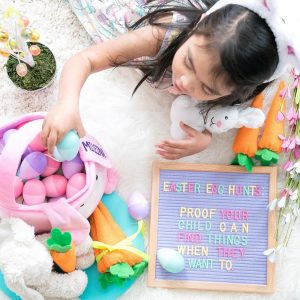
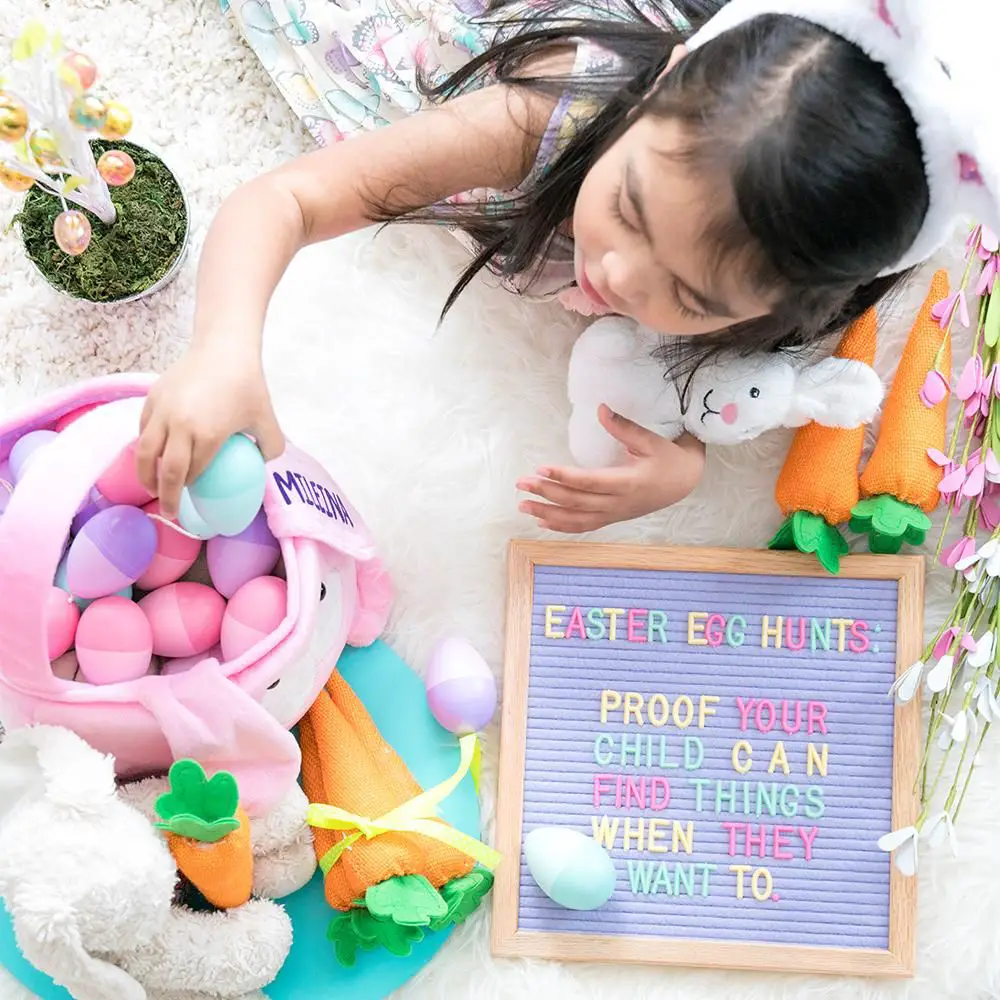
Easter Felt Letter Board Ideas

Felt Letter Board Images

And the party’s just getting started! (via @jmariekearney)


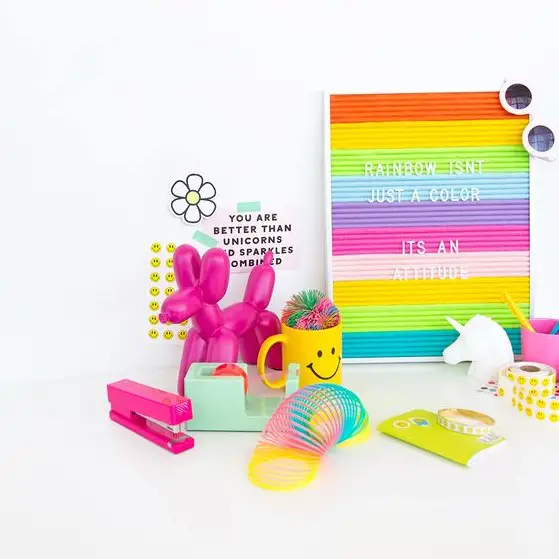


They’re perfect for social media announcements, inspirational quotes, flat-lay photography, weddings, parties, and pretty much anything else involving a message, moment, or special memory. So make one today and share your creations with us in the comments section below.
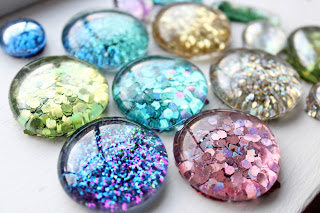
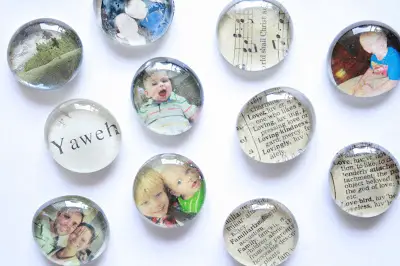
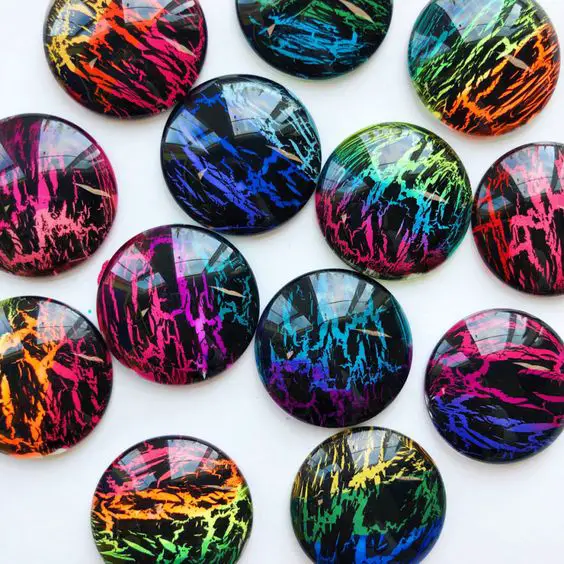
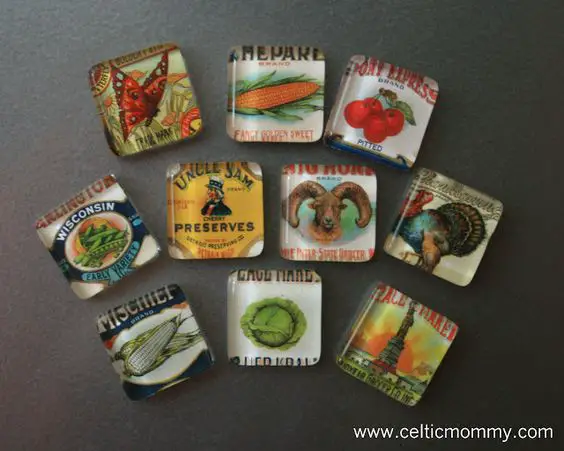
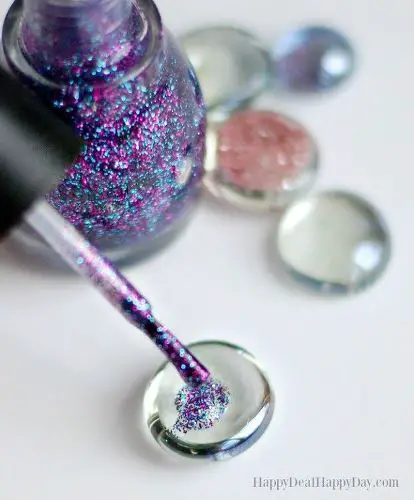
DIY glass magnets are easy to craft ideas for kids and adults. You can make creative and unique DIY glass magnets at home. with these easy instructions from the linked tutorials. You can personalize them by using photos, glitter, fabric, maps, and countless other materials.
Effortless, inexpensive and says “I care” – all these are really difficult to find in one single gift. Or is it? These cute little transparent pebbles called glass magnets can be personalized and are a perfect gift for any occasion. These are also a way to earn something extra with minimal input of time and money.
Gathering a few of many ideas here are ways to make your very own glass magnets.
How to Make Cute Glass Magnets at Home
-
Glass Magnets DIY
Who knew imperfect gifts can be cute and personalized. Use the most famous mod podge to stick your choice of picture, printed or a cut off at the back of a transparent glass pebble that can be found in any craft store. Next, stick the magnet at the back of the picture. And there you have your personalized gem to hold various memories or reminders.
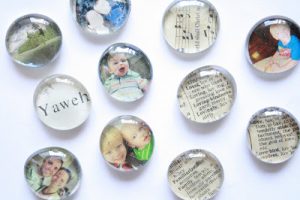
DIY Glass Magnets
-
DIY Glass Pebbles Glitter Magnet
Everything that shines is not gold but definitely pretty. This tutorial will bring out the child in you since it involves dipping glued glass pebbles into colorful glitter. Go for solid colors or unicorn ones, they are all beautiful.

DIY Glass Pebble Magnets
-
DIY Glass Crackled Gems
Black background and vibrant popping colors from circular clear glass, a magnet and you get an eye-catching piece to support your ‘vacay’ pictures against your magnetic whiteboard.

How to Make Glass Magnets
-
How to Make Glass Tile Magnets
Let’s go out of the circle and create square magnets. These will require perfect tiles unlike the circular ones which could work even if a little crooked. Paint the back of transparent square tiles with strong adhesive and paste whatever you like. Print memes for a quirky piece for your reminder list on the fridge.
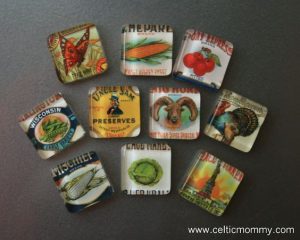
Glass Tile Magnets Tutorial
-
How to Make Glass Magnets with Pictures
What if things that hold memories are memories themselves? Yes, create small memory magnets that you can use to hold bigger images on your fridge or magnetic board in your room.
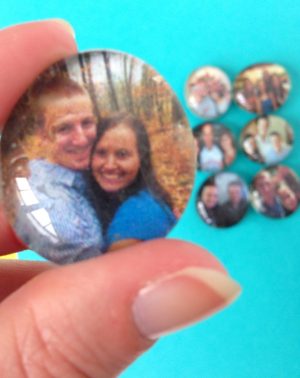
DIY Photo Magnets
-
DIY Glass Glitter Magnet
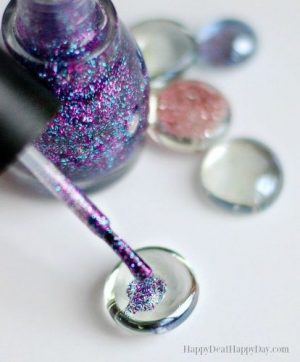
Glitter Magnets DIY
-
Glass Fabric Magnet Craft
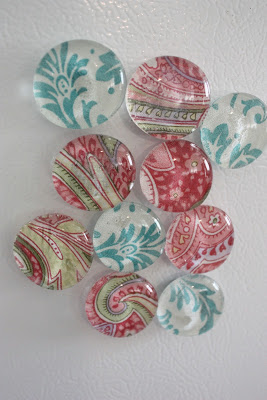
Glass Magnet DIY
Print or glitter; a square, circle or imperfect shape, mix and match all you like. You can get as creative as you want to add to the above tutorial links. Use them on the fridge or ditch the magnets and use your sparkly gems for you next craft project. The options are yours to explore and expand. I hope these easy tutorials help you fall into the world of craft more.